
In the first part of the series, we looked at the basics that need to be understood before migrating your workloads from physical to virtual – the difference between Physical and Virtual infrastructure, Pros and Cons of Virtual environment, and considerations that need to be checked before migration.
In this second part, we will take a look at the overview of the VMware free migration tool – VMware vCenter Converter Standalone, and how to perform P2V migration using it.
VMware vCenter Converter Standalone
VMware’s vCenter Converter Standalone is a free tool that lets you easily automate the process of creating VMware virtual machines from physical machines (running Windows and Linux) and other virtual machine formats.
vCenter Server Converter has a centralized management console where you can perform multiple simultaneous conversions quickly, consistently without any interruptions or downtime and monitor the progress from the same console.
vCenter Server Converter Standalone Components
vCenter Server Converter Standalone consists of four components:

- Converter Standalone server
- Converter Standalone worker
- Converter Standalone client
- Converter Standalone agent
Converter Standalone server
The standalone server enables and performs the import and export of virtual machines.
The Converter Standalone worker service is always installed with the Converter
Standalone server service.
Converter Standalone agent
The Converter Standalone server installs the agent on Windows source machines to import
them as virtual machines. There are two options available, you may choose to remove
the Converter Standalone agent from the source machine automatically or manually after the
import is complete.
Converter Standalone client
The Converter Standalone server works with the Converter Standalone client. The client
component consists of the Converter Standalone user interface, which provides access to
the Conversion and the Configuration wizards and lets you manage the conversion and the
configuration tasks.
VMware vCenter Converter is designed for converting physical machines and virtual machines for use in VMware hosted and managed products. You can use vCenter Converter Standalone to perform various types of conversion tasks.
- Converting a physical machine as a virtual machine to standalone ESXi hosts or to ESXi hosts managed by vCenter Server
- Converting a virtual machine as a virtual machine to standalone ESXi hosts or to ESXi hosts managed by vCenter Server
- Convert a virtual machine from VMware Workstation or Microsoft Hyper-V Server to ESXi hosts managed by vCenter Server
- Export virtual machines managed by vCenter Server hosts to other VMware virtual machine formats
- Configure virtual machines managed by vCenter Server so that they are bootable and install VMware Tools or customize their guest operating systems
- Customize guest operating systems of virtual machines in the vCenter Server inventory
Migrate legacy servers to new hardware without reinstalling operating systems or application software - Perform migrations across heterogeneous hardware
- Modify the volume sizes and place volumes on separate virtual disks
VMware vCenter Converter Installation
vCenter Converter Standalone can be installed on a physical or a virtual machine. There are a few methods available to install the VMware vCenter Converter.
Local Installation on Windows
The local setup installs the Converter Standalone server, Converter Standalone agent, and
Converter Standalone client for local use.
Client-Server Installation in Windows
Perform a client-server installation so that you can create and manage conversion tasks
remotely. With this option, you can select the Converter Standalone components that you
want to install on your system.
Command-Line Installation in Windows
Use this option to install Converter Standalone from the Command Prompt or by writing a
Windows batch file (.bat) to automate the installation process.
Refer the VMware Documentation for CLI based installation details
Prerequisites of vCenter Server Installation
- Verify whether your system meets the Converter Standalone system requirements. Refer the VMware Documentation for System Requirements
- Verify that you have Administrator privileges
- If you have an earlier version of Converter Standalone agent on the system, uninstall Converter Standalone agent
- Required Ports are opened in the network for HTTPS, HTTP, Agent services
vCenter Server Installation procedure
Download the vCenter Converter Standalone from the VMware Web site. Double-click/Right Click and run the VMware-converter file you have downloaded.
From the Welcome Screen, click Next.

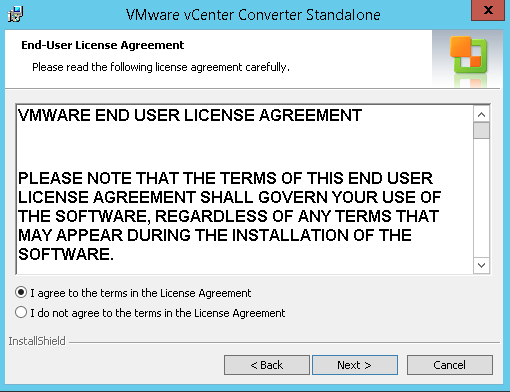
Read the End-user Patent Agreement and click Next

Select I agree to the terms in the License Agreement and click Next.
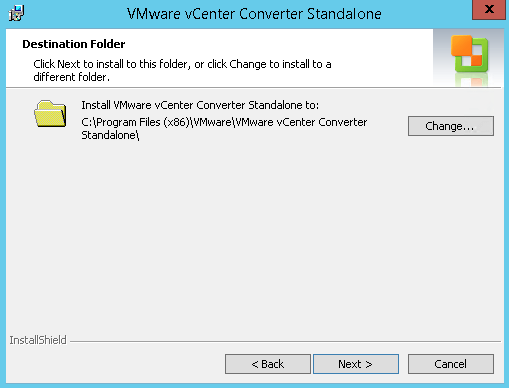
From Destination Folder page, select the location to install Converter Standalone and click Next.
On the Setup Type page, choose the required option and Click Next
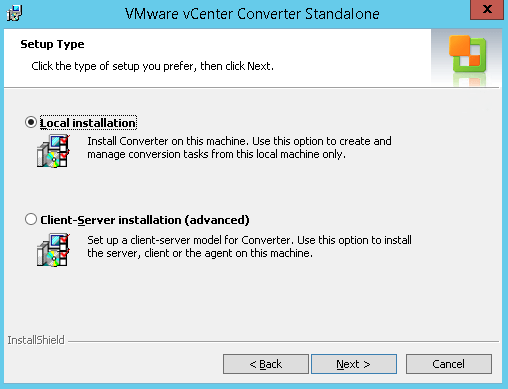
Note: We have already discussed the components, refer that for planning Client-server installation method
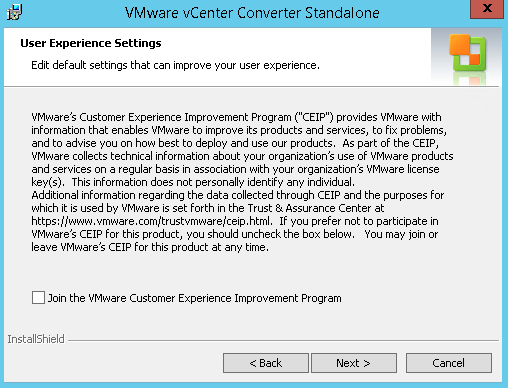
From User Experience Settings page, if you like to join the Customer Experience Improvement Program, select the checkbox else deselect and click Next.
From the Ready to Install page, click on Install.
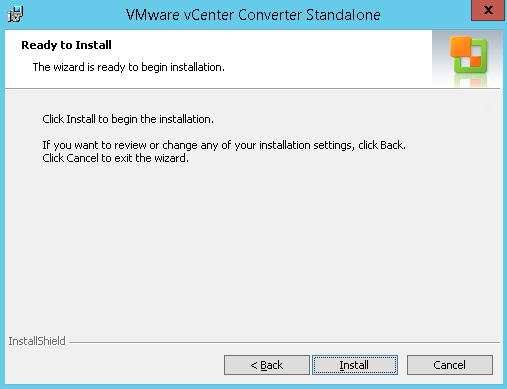
It will take few minutes to complete installation and you can view the progress over there

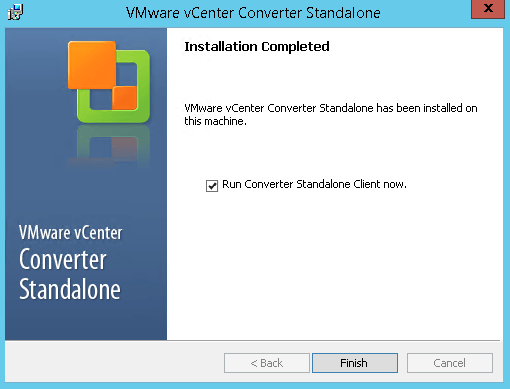
On the Installation Completed page, click Finish.
Note: – A prompt might ask you to restart your system. Also there is an option Run Converter Standalone Client now available, select the checkbox if you want to start the application after click Finish. if you like to Run the application later manually, deselect the checkbox and click Finish
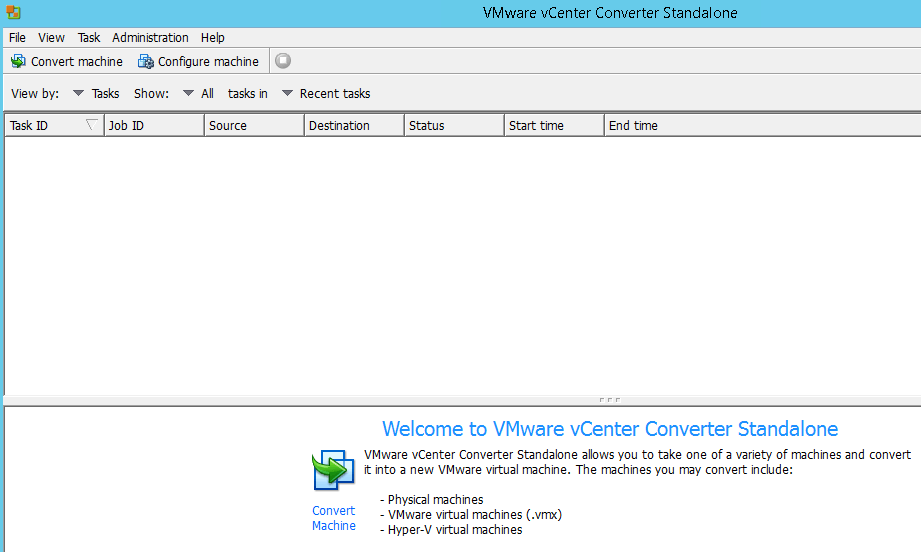
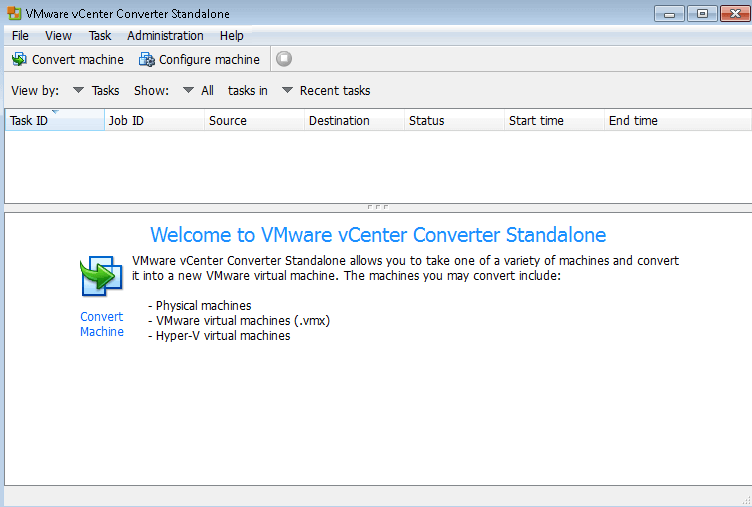
VMware vCenter Server Console is opened and you can start the P2v or V2V migration
PHYSICAL TO VIRTUAL (P2V) MIGRATION USING VMWARE vCENTER CONVERTER
Prerequisites
- Microsoft Windows version of the machine is supported form the VMware Docs
- Check the Source Type Support From VMware Docs
- Converter Standalone server machine has network access to the source machine
- Turn off windows firewall /any other firewall application on the source machine
- Disable or Stop anti-virus software temporary on the Source
- Disable simple file sharing on the source machine
- Local Administrator Access
- Windows Vista and later, either use an administrator account for Converter Standalone or Turn off UAC
- For Windows 8 or later the source machine, turn off Remote UAC
- Make sure that no other conversion job is running on the source
- Remove / Uninstall previous installations of vCenter Converter
Physical to Virtual (P2V) Migration
Open the VMware vCenter Converter and Click on Convert Machine
Select the source as Powered on and Remote Machine Windows/Linux or this Local Machine
Here we are selecting the source type as “Powered on” and “Remote Windows Machine. Since we are performing the conversion of Remote windows machine.
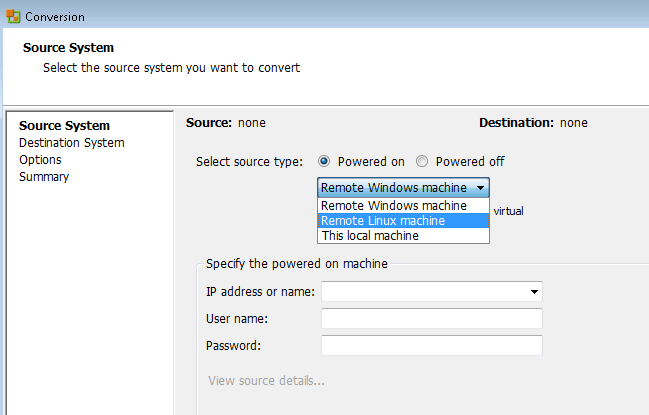
Note:– Power Off option for powered off VMware Infrastructure virtual machine, VMware Workstation , VMware Virtual machine backup images and to convert Hyper-V virtual machine to vSphere Virtual Machine
Provide the remote power on machine IP address and Administrator credentials and Click Next

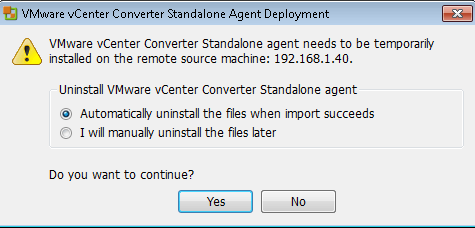
VMware Converter will install the “Converter standalone agent” on the remote windows machine.
Then, you can choose one of the options to uninstall Converter agent. Here we choose “automatically uninstall the files when import succeeds.” Click on Yes
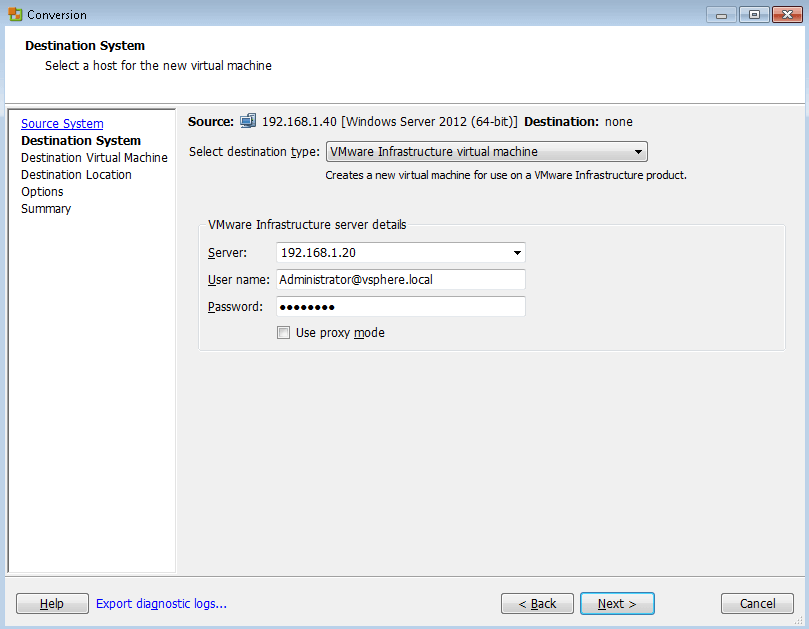
Once converter agent is successfully installed on the remote windows machine, you will get option to choose the destination system.
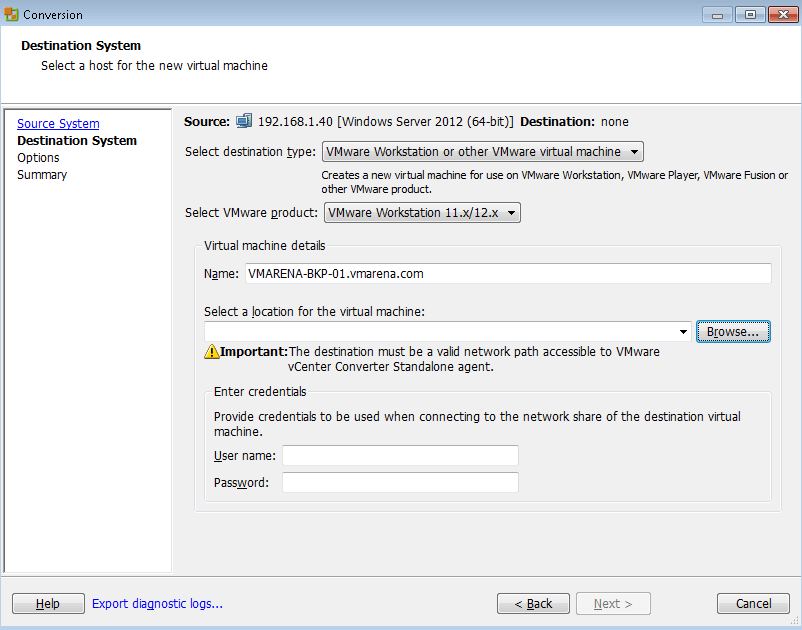
Select “VMware Infrastructure virtual machine” from the destination type and specify the vCenter Server or ESXi server hostname or IP address along with the admin credentials and Click Next
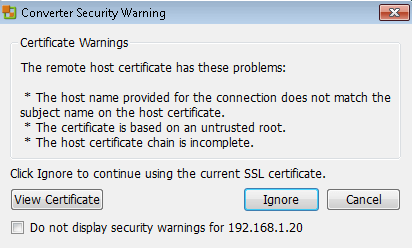
You may ignore the Certificate Warning by Clicking Ignore.
If you choose the destination as VMware Workstation you will get screen as shown below
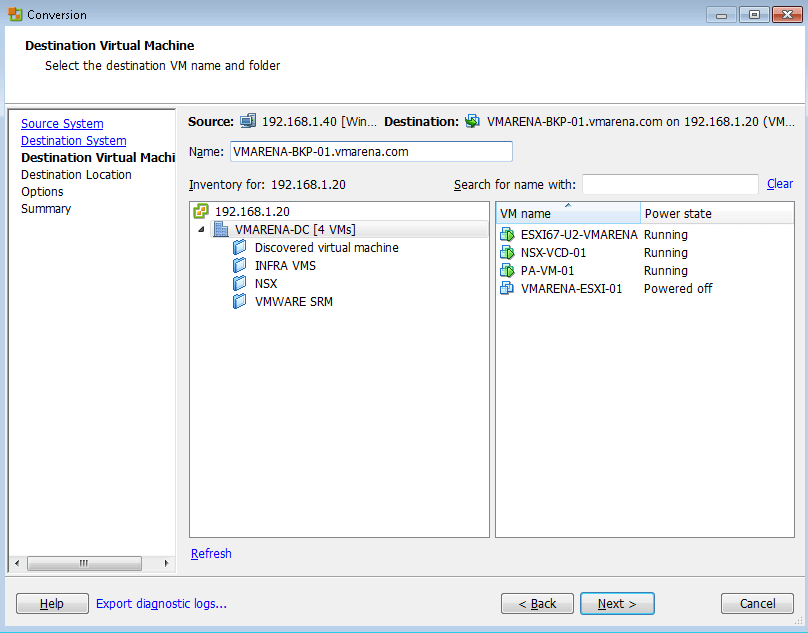
Once Converter connected to vCenter Server the current inventory will be visible. Destination VM name will be automatically generated, name will be FQDN as default and you may modify that. Select the data center location or folders to deploy the virtual machine and Click next.
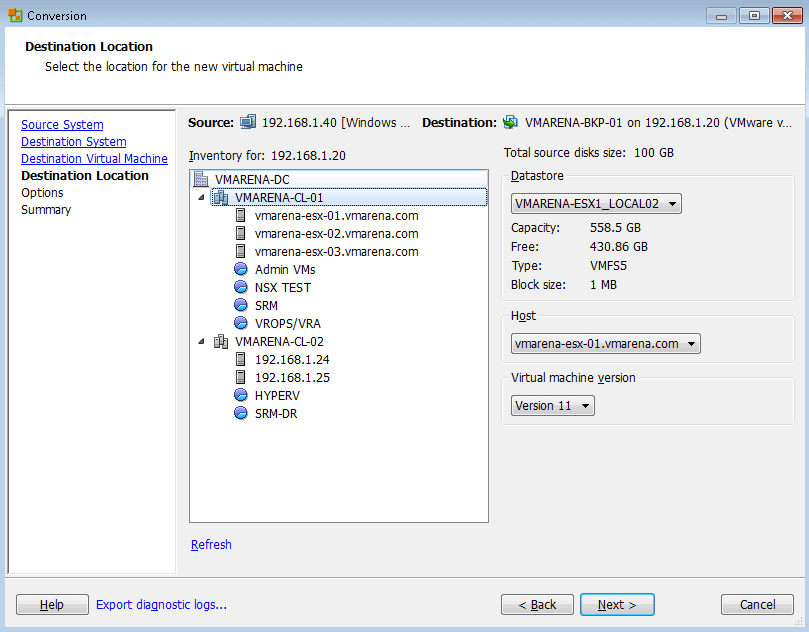
Select the ESXi host or cluster and datastore to place the converted virtual machine. Also, you may choose the virtual machine hardware version from the drop-down.
Click on Next to continue.
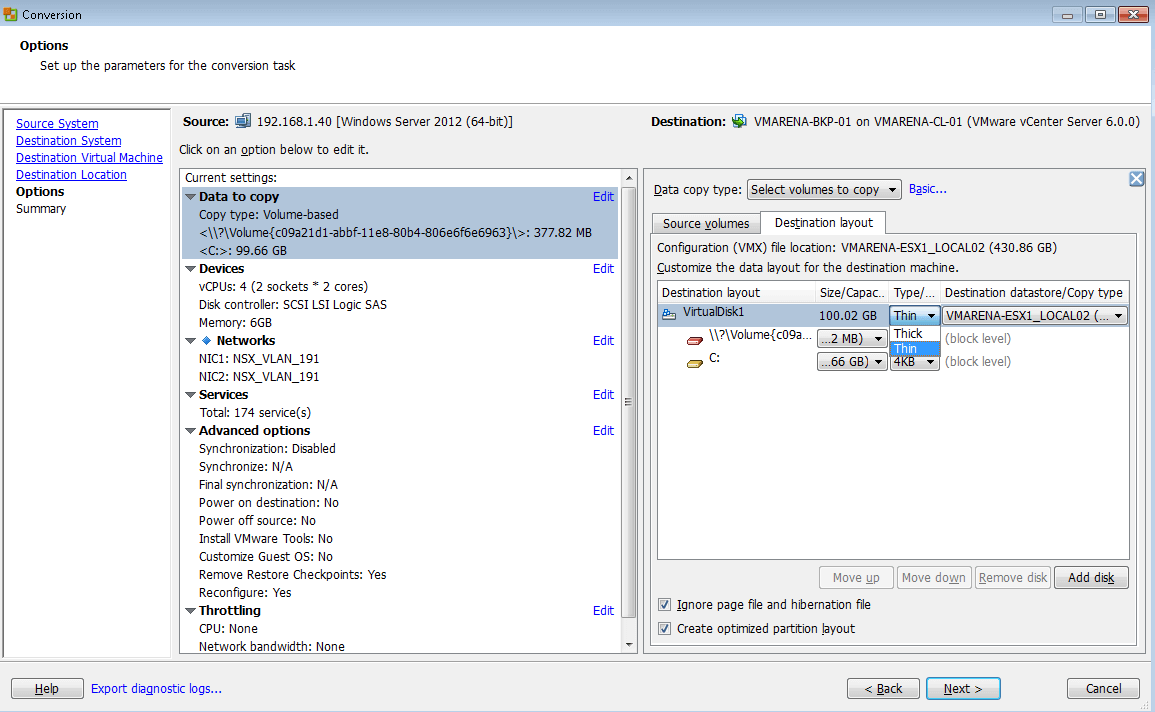
Modify the current configuration of the remote machine with available options and settings and click Next. You can click on Edit option to modify the parameters for the conversion task, below are the available options
- Data to Copy – From this option you can copy all disks to the destination or select the volumes to be copied, also you can configure the destinations with multiple datastores
- Devices – To modify the number of processor Sockets, Cores, and Memory for the Destination Virtual Machine. And configure a Disk Controller for the Destination Virtual Machine
- Networks – Modify Network Adapter Type and VLAN settings of the Destination Virtual Machine
- Services – Configure the Source and Destination services status, you can stop the required services form source and destination select startup mode as Manual, Automatic or Disabled
- Advanced Options – You can perform below operation from advanced settings
- Customize the Windows Guest Operating System with below option
- Enter the Windows License Information
- Set the Time Zone for the Destination Virtual Machine
- Configure the Network Adapters
- Install VMware Tools on the Destination Virtual Machine
- Remove System Restore Checkpoints
- Throttling
- Configure the Network for the Helper Virtual Machine
- Throttling – Control the CPU resources and network bandwidth
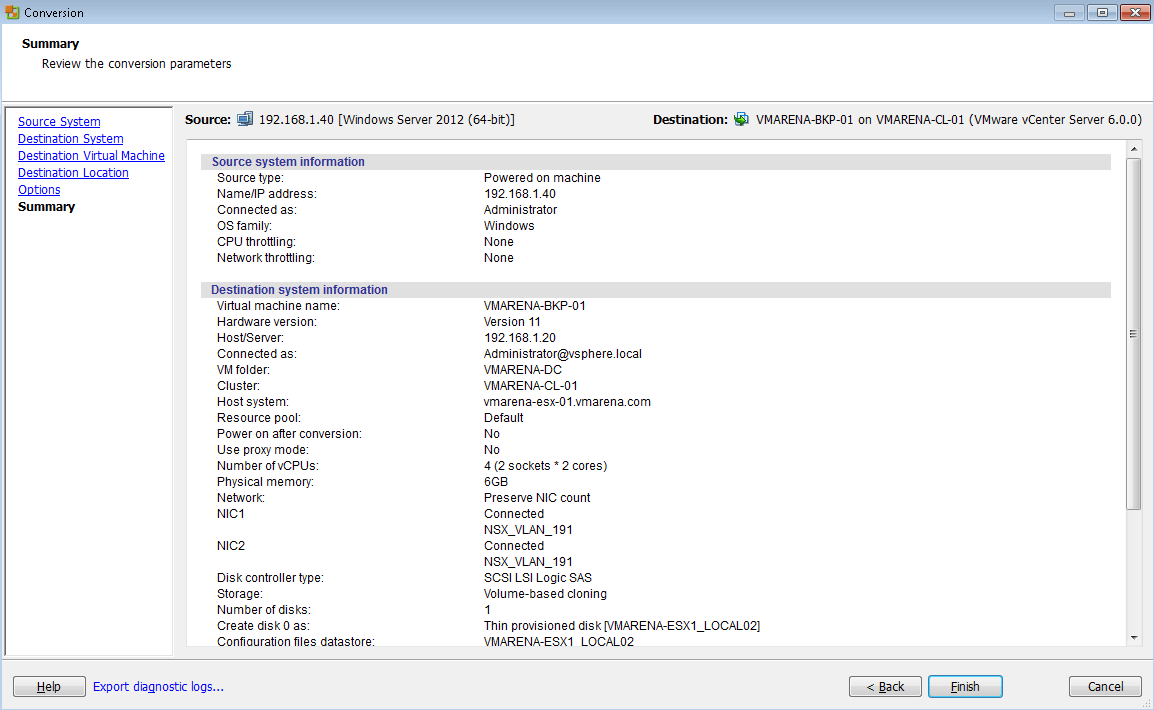
From Summary page review all the conversion parameters and click on Finish to start the P2V conversion.
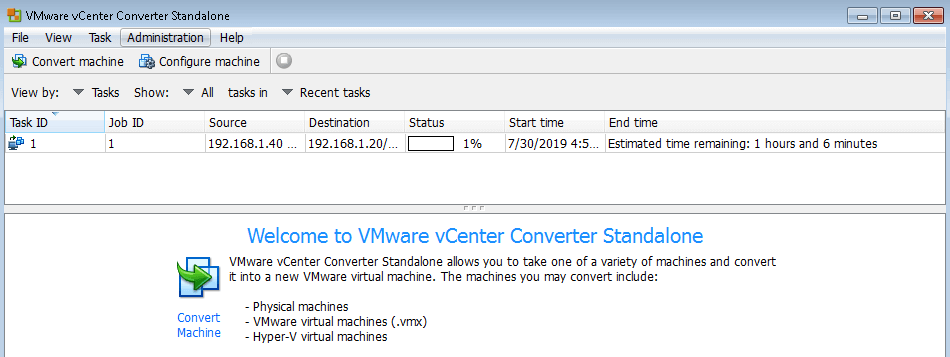
Once the conversion started, you can monitor the progress from the VMware converter Client. Based on the amount of data and network transfer speed, the client will display the estimated time to convert the virtual machine.
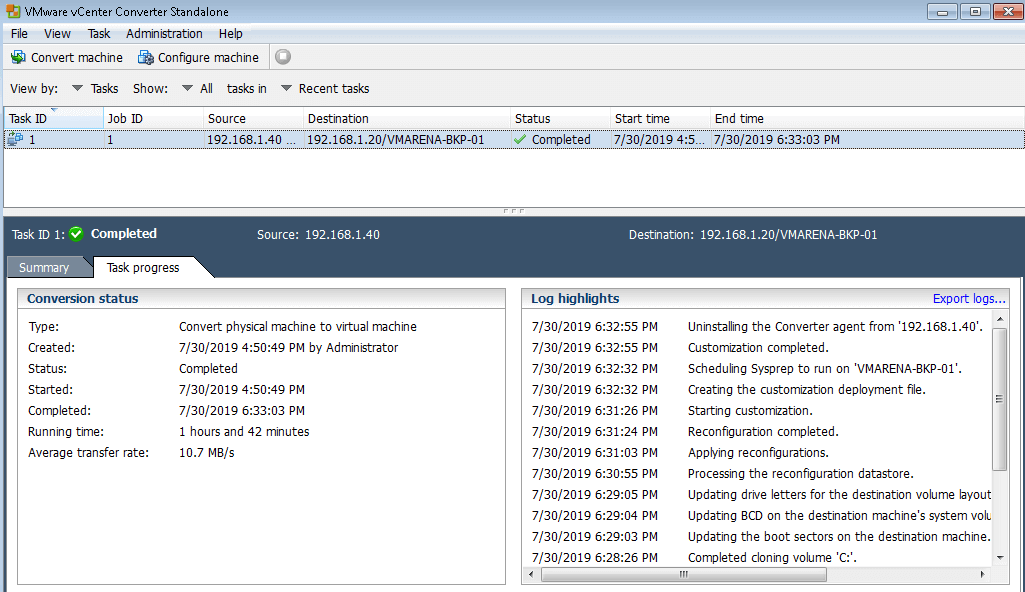
Once the P2V Migration is completed successfully check the conversation status .
As per our migration it took 1 hour 45 minutes and the average transfer rate is 10.7 MB\s.
Now you can shut down your physical server and login to your vCenter Server and power on the converted machines.
Conclusion
Thus, we have successfully converted the physical machine as a virtual machine to a VMware vSphere environment using vCenter Converter.
In our next article – the last part, we’ll look at a powerful solution that offers data protection as well as seamless cross-platform migration across multiple hypervisors (V2V), and across different workloads (P/V).
Follow our Twitter and Facebook feeds for new releases, updates, insightful posts and more.