
Windows Server 2016 is the first version of Windows to ship support for container technology built in to the Operating System. Windows Server 2016 supports two different types of container, Windows Server containers and Hyper-V containers. Deploying a Hyper-V container has different steps depending on the type of operating system and the host system (physical or virtual). This blog will take you through the process of deploying a Hyper-V container in Windows Server 2016 or Windows Server Core 2016 on a physical or virtual system.
In order to deploy Hyper-V container, following components are required to be installed in windows 2016 server.
- Install Hyper-V role & container future on server manager
- Install the latest version of Docker
- Install Base Container Images
Before you run Hyper-V container, we should enable Hyper-V role & Container future on Windows 2016 Server. Please refer the below link to know how to enable Hyper-V role.
https://www.bdrsuite.com/blog/what-is-hyper-v-manager-and-how-does-it-work/
Steps for installation of latest version of Docker
In order to run the Windows container, Docker is required. Docker consists of the Docker Engine and the Docker client. Docker is an open platform which is used for developing, shipping, and running applications. It enables you to separate your applications from your infrastructure so that you can easily run the software quickly.

To install Docker on your Windows 2016 server we’ll use the OneGet provider PowerShell module, which provides you to enable the container feature on your machine. Following are the steps for installation of Docker
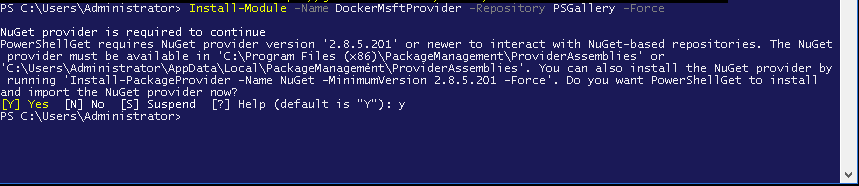
Step1 – Open PowerShell session and run the following commands.
Install-Module -Name DockerMsftProvider -Repository PSGallery -Force
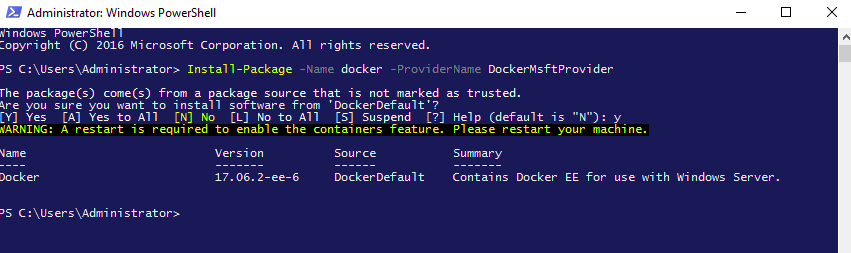
Step2 – Use OneGet to install the latest version of Docker & run the following command on PowerShell module.
Install-Package -Name docker -ProviderName DockerMsftProvider
Reboot the computer once the installation is complete
Run the command for reboot the machine. “ Restart-Computer -Force “
Steps for Installing Base Container Images
In order to run Windows Containers in windows 2016 server, a base image needs to be installed. There are two types of base images that are available with either Windows Server Core or Nano Server as the container operating system.
To know more information about Docker container images, Please visit Build your own images on docker.com.
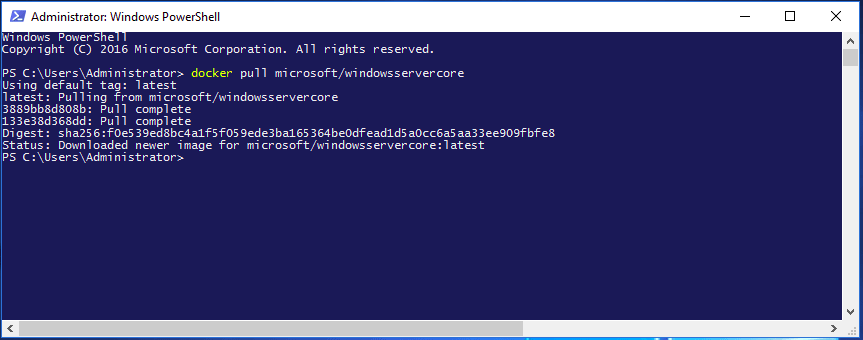
Step1- To install the Windows Server Core base image run the following:
docker pull microsoft/windowsservercore
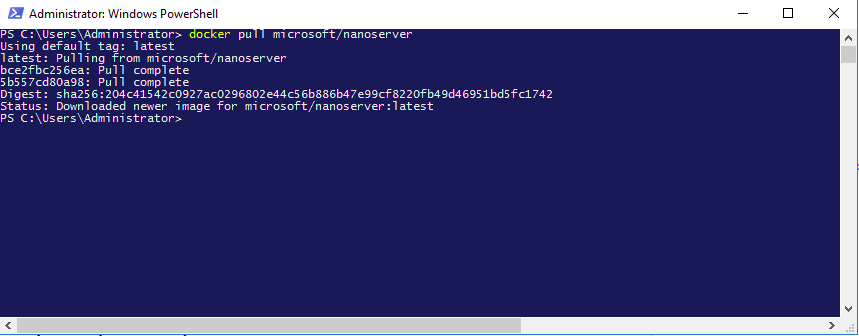
Step2- To install the Nano Server base image run the following:
docker pull microsoft/nanoserver
Running Hyper-V Container
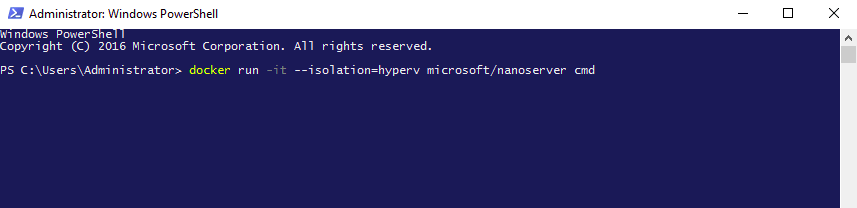
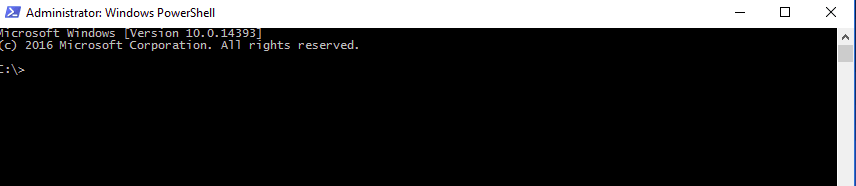
The process of running and managing Hyper-V containers with Docker is almost identical to managing Windows Server containers. When creating a Hyper-V container with Docker, the –isolation=hyperv parameter is used.
Please use the below command to run the Hyper-V container on Windows 2016 server
docker run -it –isolation=hyperv microsoft/nanoserver cmd
Conclusion
Hyper- V container provides application isolation through the process and namespace isolation technology. Deploying Hyper- V containers in Microsoft Windows Server 2016 operating system is simple and it will be managed with Docker and PowerShell tools. And I hope this blog will help you to run Hyper-V containers in Windows 2016 server without any issue.
Follow our Twitter and Facebook feeds for new releases, updates, insightful posts and more.