
Introduction to User Management
SonicWall security appliances provide a mechanism for user-level authentication, as well as a means to enforce or bypass content filtering policies for LAN users attempting to access the Internet. Only authenticated users are permitted to access VPN tunnels and send data across the encrypted connection. The SonicWall authenticates all users as soon as they attempt to access network resources in a different zone (such as WAN, VPN, WLAN, etc.), which causes the network traffic to pass through the SonicWall. Users who log into a computer on the LAN, but perform only local tasks are not authenticated by the SonicWall. User level authentication can be performed using a local user database, LDAP, RADIUS, or a combination of a local database with either LDAP or RADIUS. SonicOS also provides Single Sign-On (SSO) capability, which can be used in conjunction with LDAP. The local database on the SonicWall can support up to 1000 users. If you have more than 1000 users, you must use LDAP or RADIUS for authentication.
Now we are going to see how to configure Sonicwall device with an LDAP server.
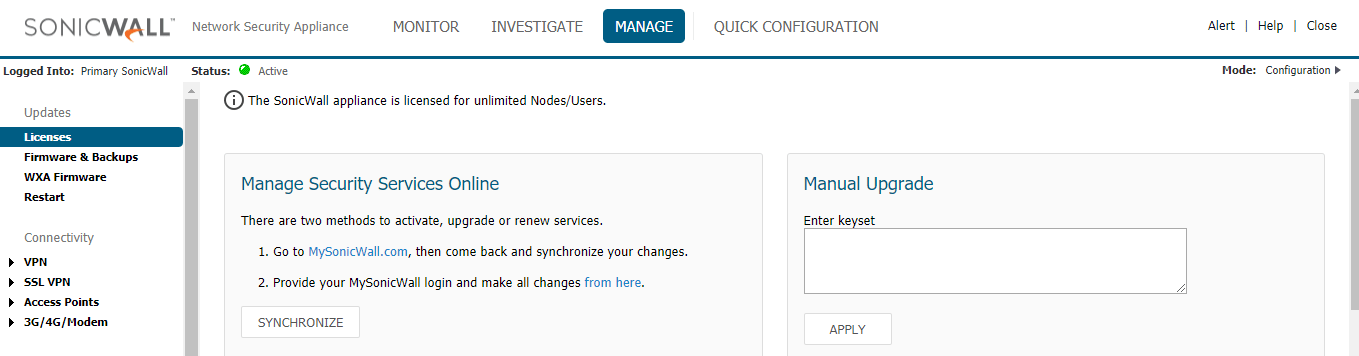
- Open web console for your SonicWall Appliance NSA 2650 in configuration mode
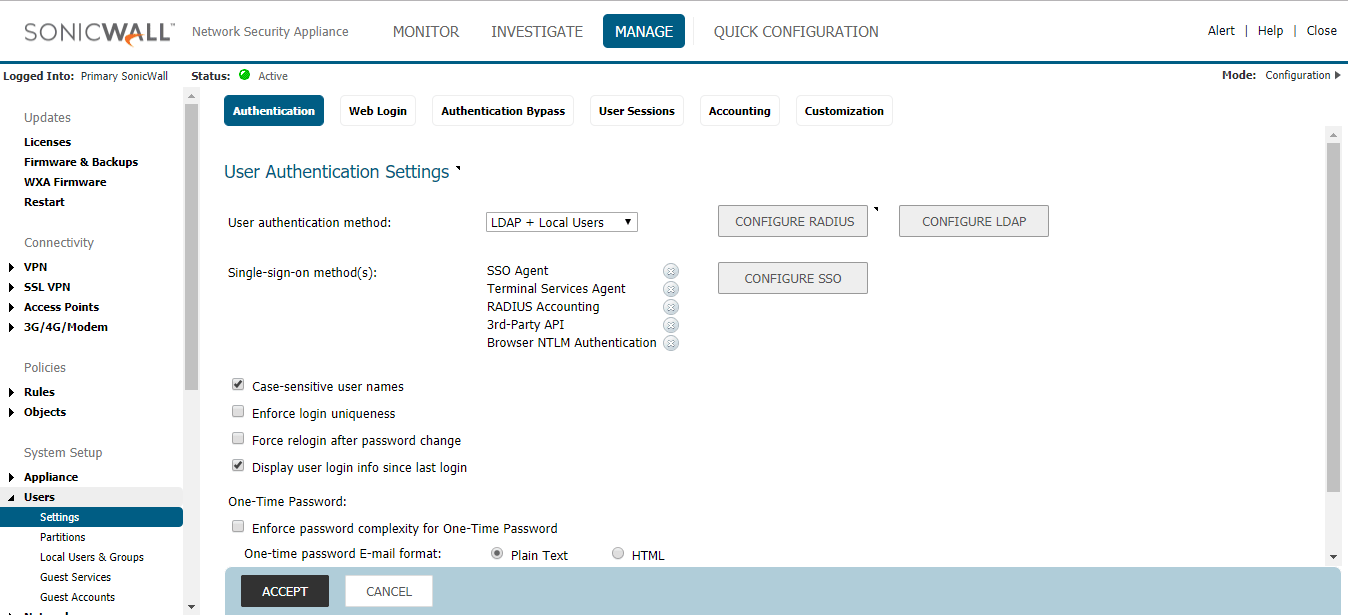
- Move to manage tab and click users and select settings in the left side pane
- Under Authentication select LDAP + Local Users in User authentication method
- Now click configure LDAP button
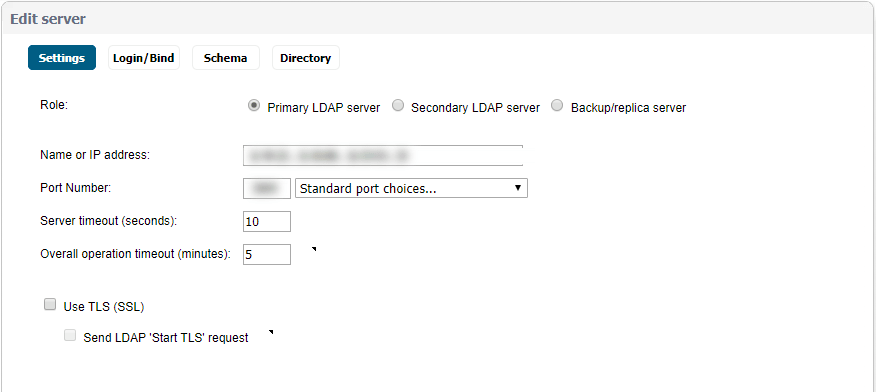
- On the settings page provide FQDN or IP Address of the LDAP server
- Specify the port for the LDAP server. Default LDAP over TLS port is 636, and default LDAP port (unencrypted) is 389
- Leave the server timeout as default. The amount of time, in seconds, that the SonicWall will wait for a response from the LDAP server before timing out. Allowable ranges are 1 to 99999, with a default of 10 seconds. The default overall operation timeout is 5 minutes
- Go to the next tab, provide login credentials and location in the tree
- Specify a username that has rights to log in to the LDAP directory. The login name will automatically be presented to the LDAP server in full ‘dn’ notation. This can be any account with LDAP read privileges (essentially any user account) – Domain Administrative privileges are required. Note that this is the user’s display name, not their login ID
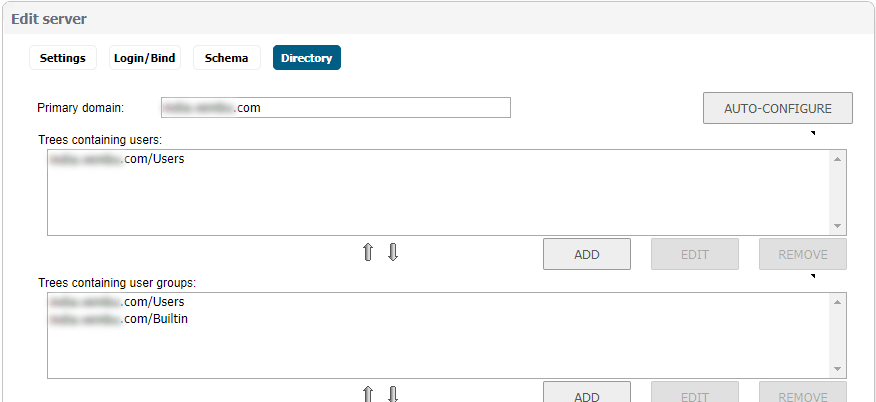
- Now move to directory tab and provide a primary domain name. The user domain used by your LDAP implementation
- Provide User tree for login to the server, that is the location of the tree that the user specified in the settings tab
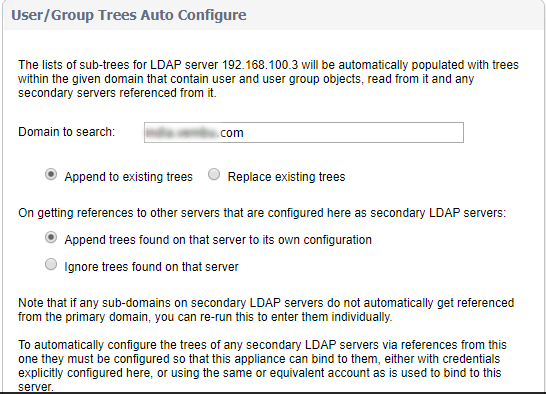
- Click on Auto-configure
- Select Append to Existing trees and Click Start
- This will populate the Trees containing users and Trees containing user groups fields by scanning through the directories in search of all trees that contain user objects
- In Schema tab select Microsoft Active directory in LDAP Schema. Click ok and finish it
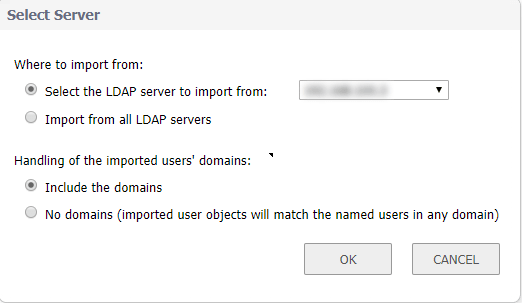
- Now, go to users tab in the left pane, select Local Users, and Groups
- Here in Local users click Import from LDAP button to retrieve the users from the LDAP server
- Now you can select the users as you wish

To test the connectivity, go to Users > Settings > Configure LDAP > Test and provide a Username and Password in the Active directory to make sure that the communication is successful.
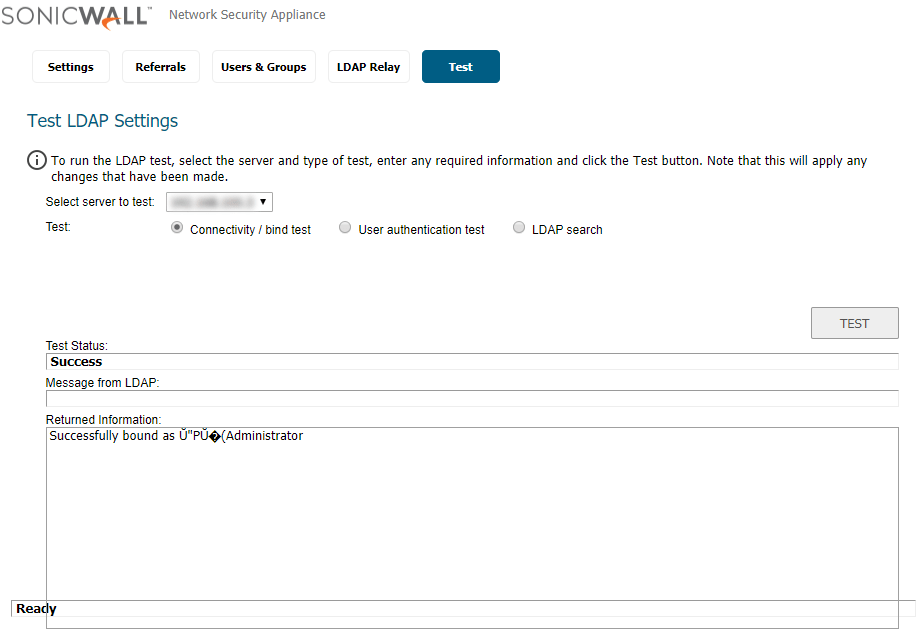
Result:
The LDAP configuration with SonicWall Appliance is a very simple process. We can manage the users efficiently with user groups and assign privileges to a group of people. We can also enable Mirror LDAP users locally to retrieve the user information automatically in a specified interval.
Got questions? Email us at: vembu-support@vembu.com for answers.
Follow our Twitter and Facebook feeds for new releases, updates, insightful posts and more.