
What is Amazon Virtual Private Cloud ( VPC )?
According to AWS documentation, Amazon Virtual Private Cloud (Amazon VPC) is a service that lets you launch AWS resources in a logically isolated virtual network that you define. You have complete control over your virtual networking environment, which includes you can define your IP address range & its subnets. You can also configure table and network gateways to permit access exclusively for your corporate network. This will ensure safe and secure access to your AWS resources from your corporate network.
With Amazon VPC’s simple set-up, you spend less time setting up, managing, and validating, so you can concentrate on building the applications that run in your VPCs. You can create a VPC easily using the AWS Management Console or Command Line Interface (CLI). In this blog, we are going to describe the steps involved in creating a sample VPC on Amazon using the AWS Management console.
VPC Dashboard
An Amazon VPC is nothing but a consolidation of EC2 instances & the supporting network services. The below screenshot shows the dashboard of a running VPC and its network resources. Here you can see a sample VPC dashboard and its resources. You can manage these resources from a single window in the AWS console VPC dashboard.
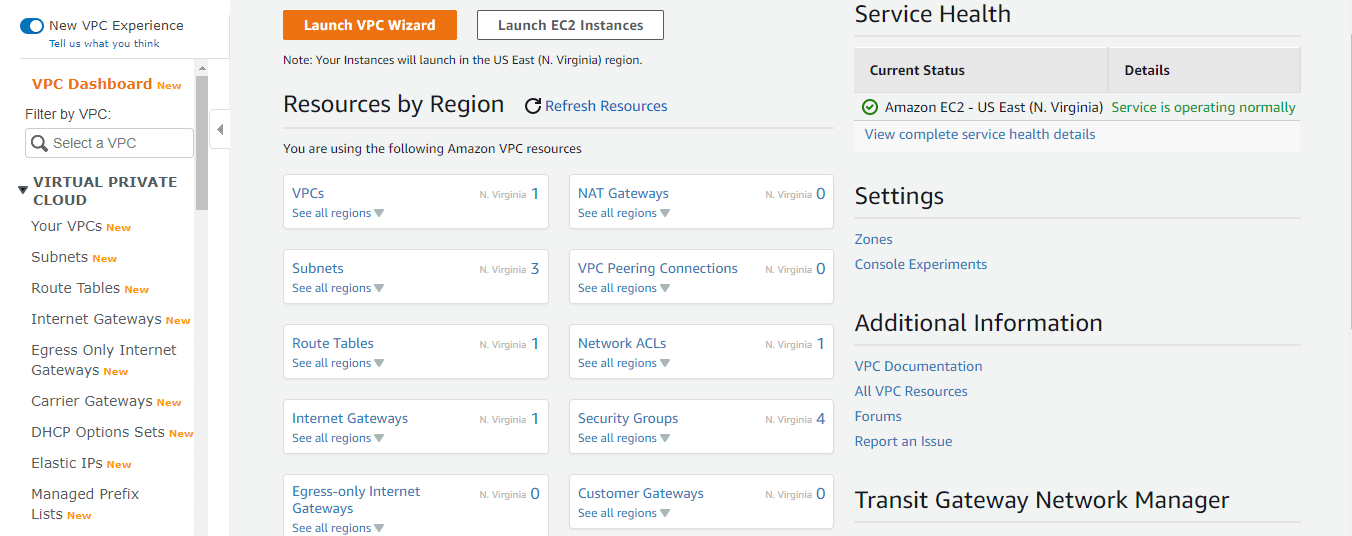
Main resources that constitute a complete Amazon VPC
- Your EC2 instances
- Elastic IPs assigned to the instances
- Virtual Private Network & Subnets
- NAT Gateways, Internet Gateways & Customer Gateways
- Route tables & Network ACLs
- Security Groups
- Endpoint and Endpoint Services
- Site-to-Site VPN connections
Accessing Amazon VPC
You can create, access, and manage your VPCs using any of the following interfaces:

- AWS Management Console — Provides a web interface that you can use to create, access, and manage your VPCs
- AWS Command Line Interface (AWS CLI) — Provides commands for a broad set of AWS services, including Amazon VPC, and is supported on Windows, Mac, and Linux OSes
- AWS SDKs — Provides language-specific APIs and takes care of many of the connection details, such as calculating signatures, handling request retries, and error handling for the VPC resources
- Query API — Provides low-level API actions that you call using HTTPS requests. Using the Query API is the most direct way to access Amazon VPC, but it requires that your application handle low-level details such as generating the hash to sign the request and error handling
How to create an Amazon VPC in Amazon Management Console
Login to AWS management console using root user credentials. Choose All Services → Networking & Content Delivery → VPC
Choose your launch region, and click the “Launch VPC Vizard” button.
Step 1: Selecting your VPC configuration
This step is very important to configure your VPC. AWS allows you to configure your VPC in four different ways ie based on the scenarios that suit the customer network.. So as an administrator, you should understand each of the scenarios and pick any one of the model configurations to implement the VPC on AWS, depending on your network and internet connectivity model.
Available four models (Scenario) are :
VPC with a single public subnet – Your instances run in a private, isolated section of the AWS cloud with direct access to the Internet. Network access control lists and security groups can be used to provide strict control over inbound and outbound network traffic to your instances
VPC with Public and Private subnets – In addition to containing a public subnet, this configuration adds a private subnet whose instances are not addressable from the Internet. Instances in the private subnet can establish outbound connections to the Internet via the public subnet using Network Address Translation (NAT) method.
VPC with Public and Private subnets with Hardware VPN access – This configuration adds an IPsec Virtual Private Network (VPN) connection between your Amazon VPC and your data center – effectively extending your data center to the cloud while also providing direct access to the Internet for public subnet instances in your Amazon VPC. Most of the corporate use this configuration, to use intranet applications hosted on AWS and VPC effectively
VPC with a Private subnet only and Hardware VPN access – Your instances run in a private, isolated section of the AWS cloud with a private subnet whose instances are not addressable from the Internet. You can connect this private subnet to your corporate data center via an IPsec Virtual Private Network (VPN) tunnel. Some corporate use this configuration to use highly confidential applications hosted on AWS to connect through office networks only.
We are choosing the third configuration option, and the below diagram details this setup.
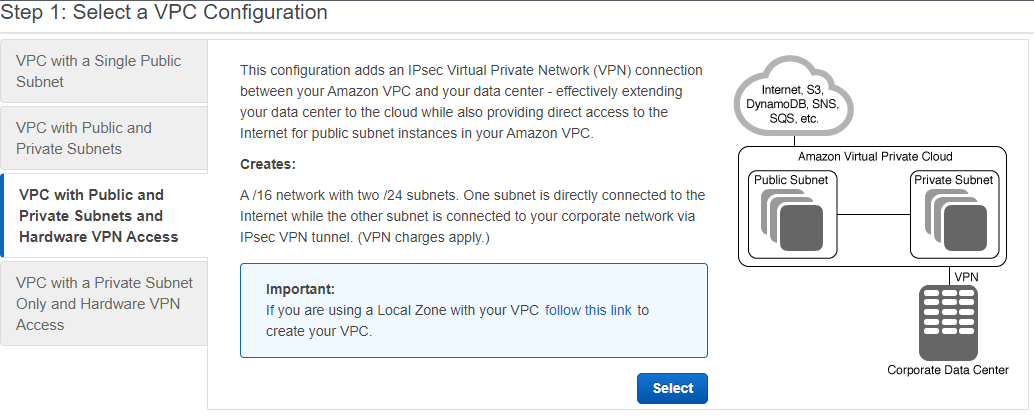
Choose the “select” button to proceed to the next step.
Step 2: VPC with Public and Private Subnets and Hardware VPN Access name and IP configuration
In this step, we are providing a name for the VPC and a name for each public and private subnet. Amazon will assign a private and public subnet IP range automatically, you don’t need to provide any specific IP address range here. You could select a preferable availability zone for private and public subnets, else choose No preference ( default selection )
You could add a service endpoint here if necessary. An endpoint is the URL of the entry point for an AWS web service. The AWS SDKs and the AWS Command Line Interface (AWS CLI) automatically use the default endpoint for each service in an AWS Region. Choose Enable DNS hostname Yes, Hardware tenancy value is the default, and choose to enable classic link No. The below screenshot shows these configurations
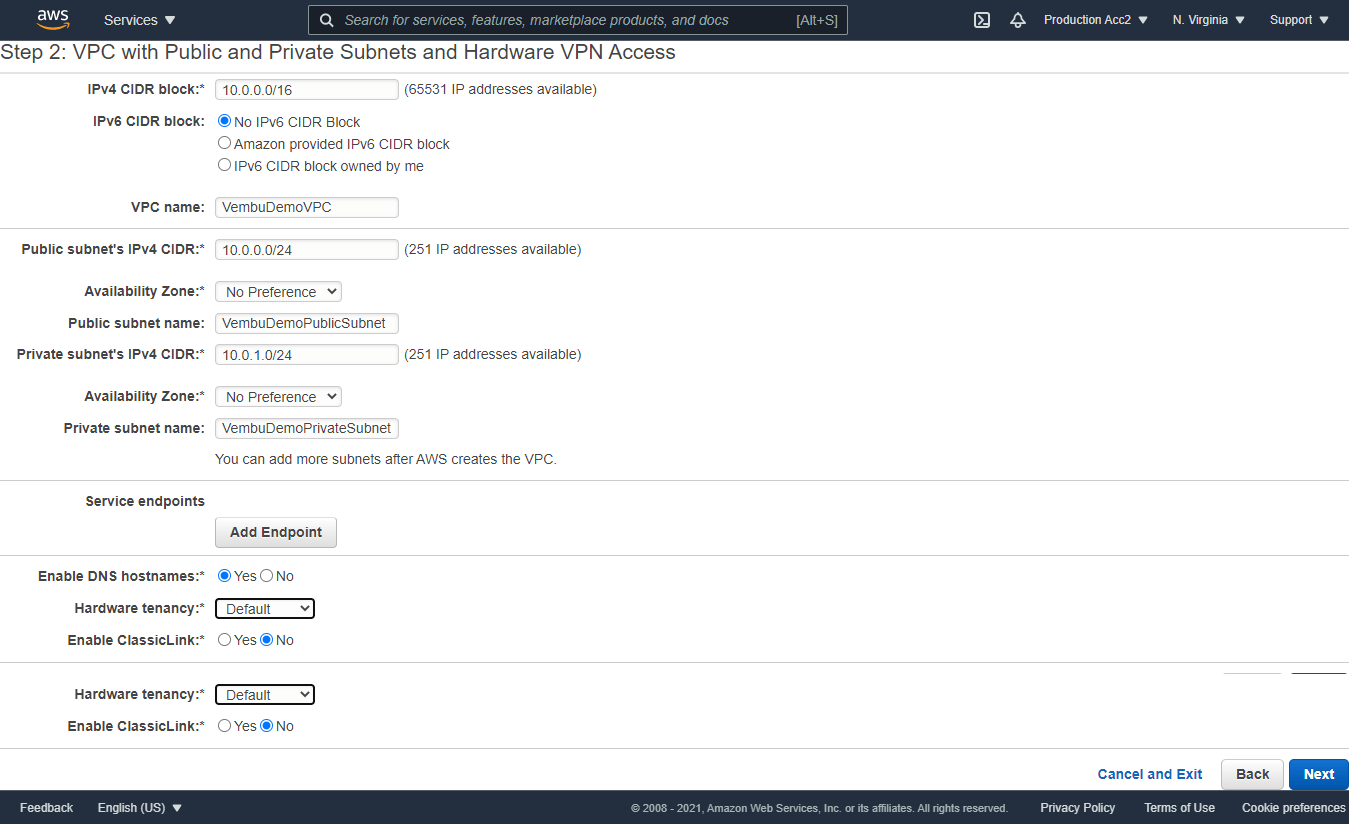
Click Next to proceed to the next step.
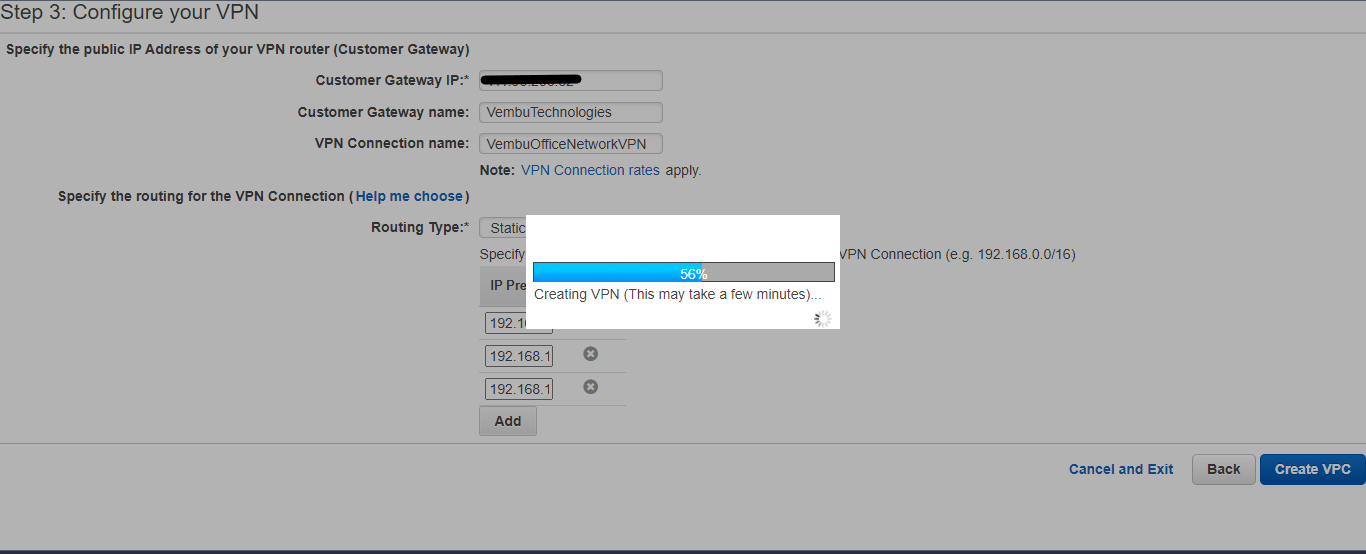
Step3: Configure your VPN
Specify the public IP address of your VPN router ( Customer Gateway )
In this third step, we are providing the details of the customer network VPN router. Usually, this can be a hardware firewall router with a VPN server (for Example Sonicwall, Watchguard, etc ). Here we are providing the public IP address associated with the firewall and the Gateway Name ( Usually it was given when a customer’s VPN server was configured ). Provide a VPN connection name for the resource identity purpose.
Specify the routing for the VPN connection
In this step, specify the routing type either static or dynamic BGP route. ( Depending on the VPN server hardware support ). Then specify the IP prefixes for the network on your side of the network connection. Usually, this can be a separate VLAN(s) configured on your OnPremise VPN server firewall router to assign IP addresses to the VPN clients. You can add one or more IP prefix networks by adding one by one ( Ex 192.168.100.0/24 & 192.168.101.0/24 etc ).
Below screenshot showing these details.
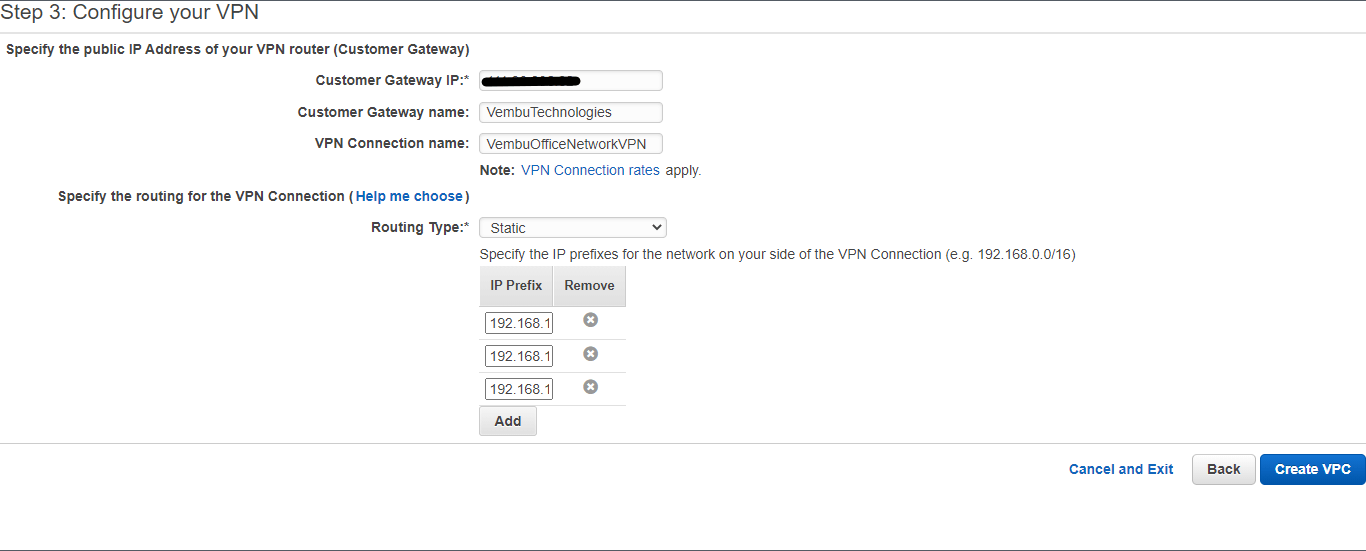
Click the Create VPC button to finalize the settings and create a new VPC. This will take a few minutes, and you will see the progress indicator as shown below.
After successful completion of the task, you will get a message “ Your VPC has been successfully created “ on your VPC dashboard page as shown below.
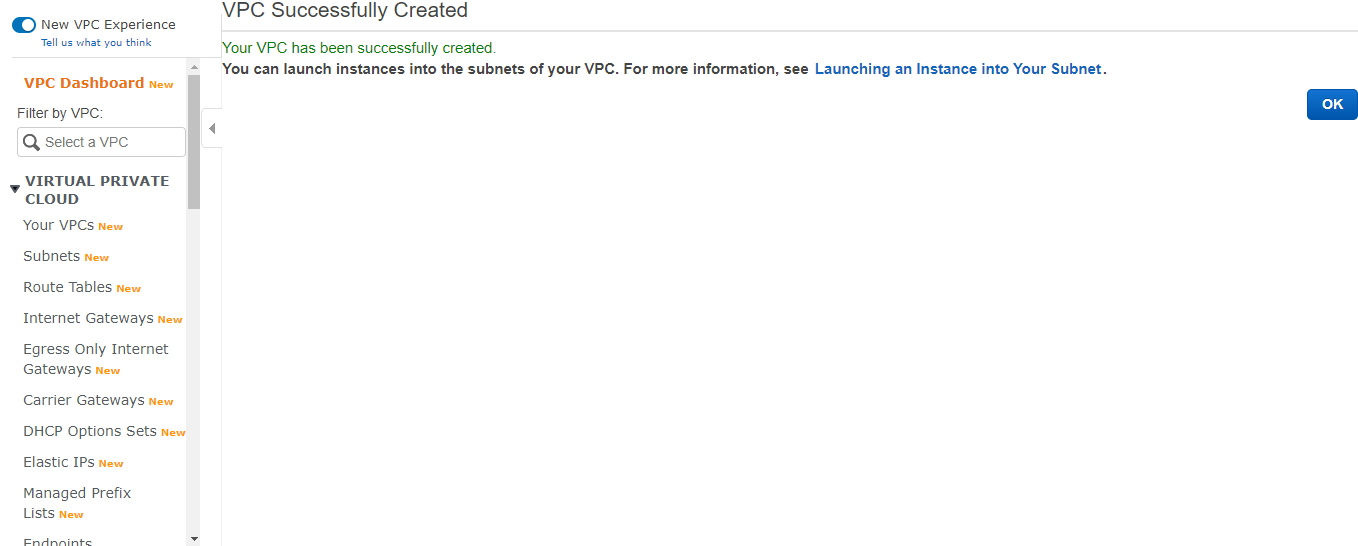
Now, your Amazon VPC is ready to use. In the next step, we need to launch EC2 instances to use this VPC
Launching an Instance into the VPC
- Login to AWS Management console using root user credentials
- Choose the region where your VPC resides
- Choose All services → Compute → EC2
- Under the EC2 dashboard, click the Launch Instance button
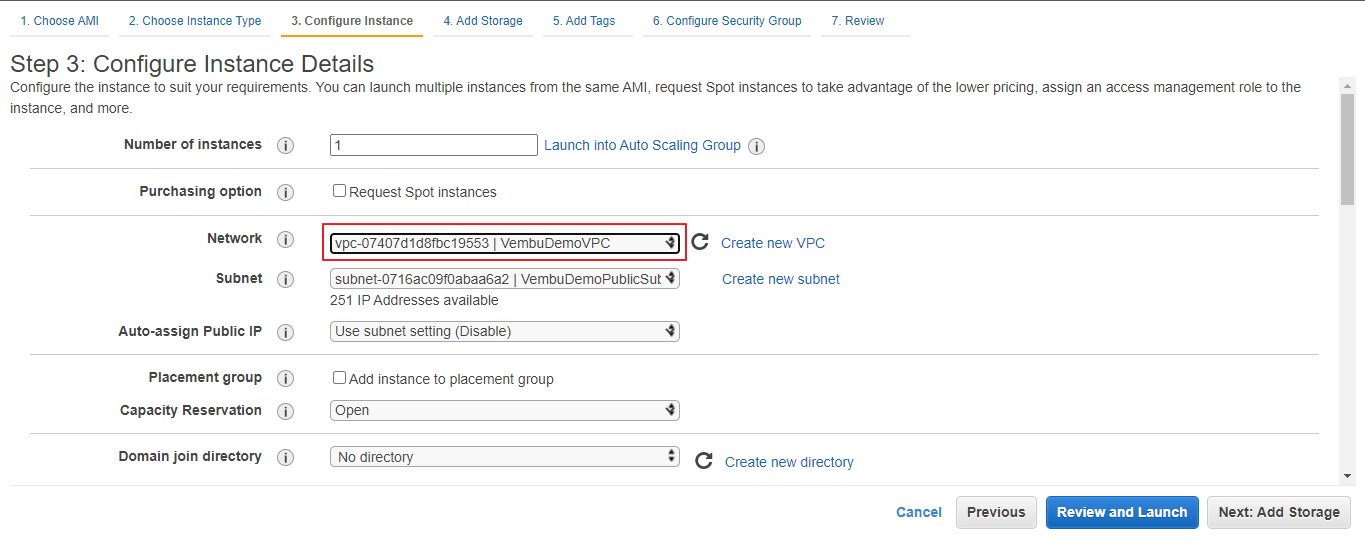
Select any one of either your created EMIs or Amazon-created AMIs. Here all the steps are similar to creating a single normal EC2 instance. You can configure all the details as usual in the First ( Choose AMI ) and Second ( Choose Instance type ) steps. In the Third step, ( Configure Instance ) you need to select your newly created VPC under the Network section. Subnet configuration will be automatically updated as per the associated subnet with the newly created VPC. The below screenshot details this configuration shown in the red box.
Notes :
- Here all the steps are not detailed while creating an AMI. Only the VPC configuration-related step is mentioned
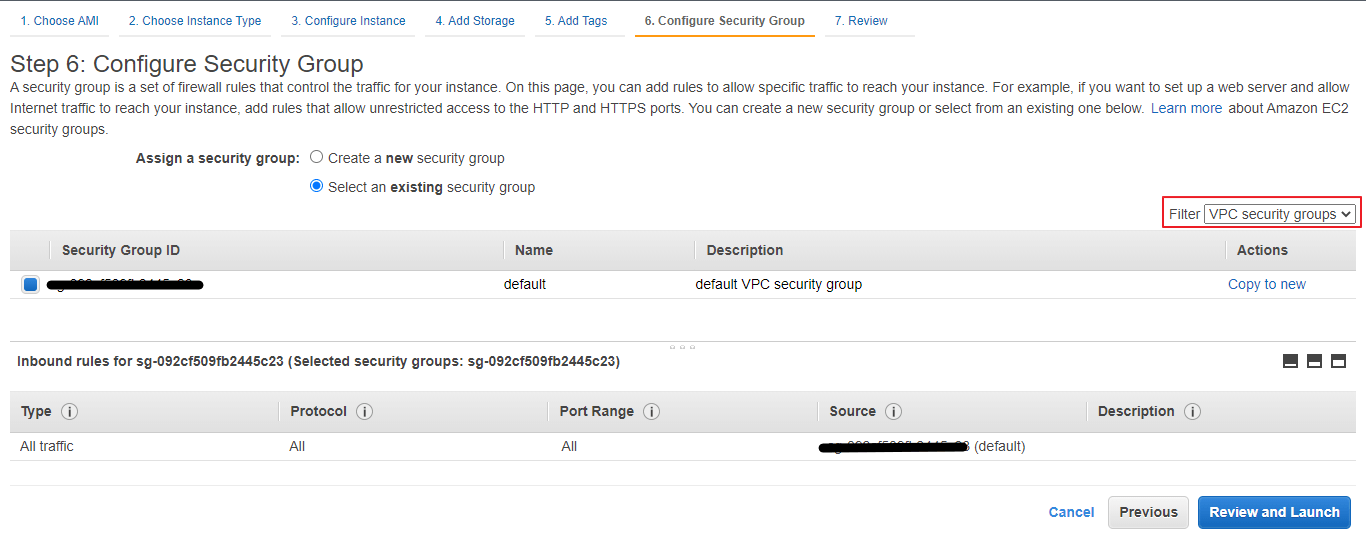
- It is recommended to create a separate security group for each VPC, and the same will be chosen at the 6th step ( Configure Security Group ) while creating the AMI. This can be chosen by filtering the VPC security group on the left side as shown below in the screenshot with a red box
Actions to be performed on an Amazon VPC
- Create flow log – Flow logs can capture IP traffic flow information for the network interfaces associated with your resources. You can create multiple flow logs to send traffic to different destinations in the VPC
- Edit CIDRs – Add or remove CIDR blocks for your VPC
- Edit DHCP options set – The DHCP options are set to associate with the VPC
- Edit DNS hostnames – Indicates whether instances with public IP addresses get corresponding public DNS hostnames
- Edit DNS resolution – Indicates whether the DNS resolution is supported
- Edit ClassicLink DNS support – ClassicLink DNS support enables EC2-Classic instances and VPC instances that are linked via ClassicLink to address each other using Amazon DNS hostnames that resolve to private IP addresses
- Enable ClassLink – User can enable or disable ClassLink for the VPC
- Manage tags – A tag is a label that you assign to an AWS resource. Each tag consists of a key and an optional value. You can use tags to search and filter your resources or track your AWS costs. You can assign a tag for the VPC and track your AWS costs regularly for the VPC resource alone
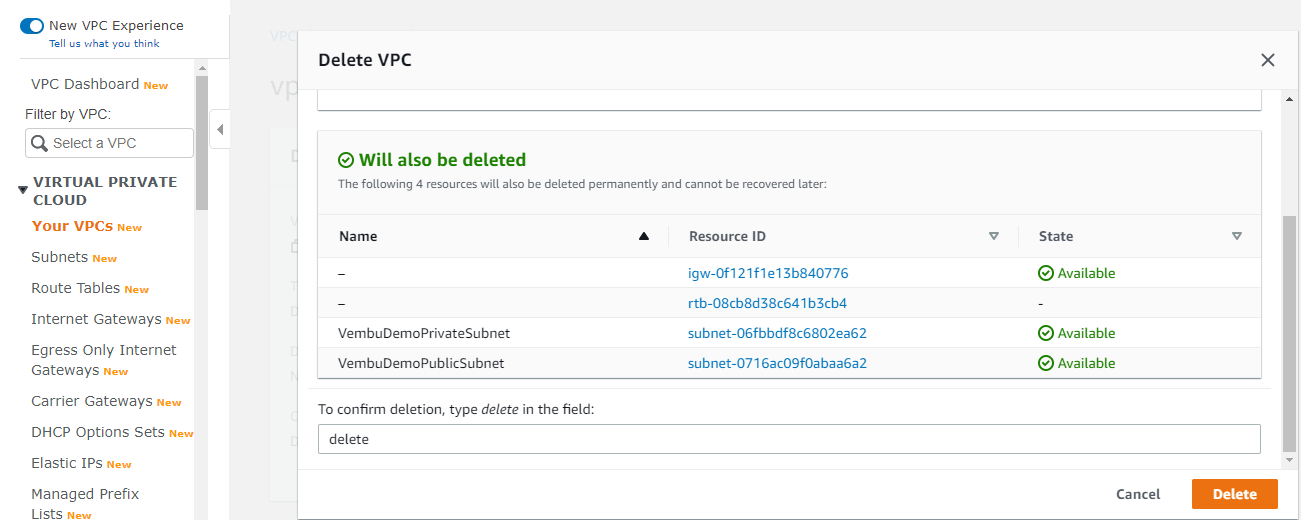
- Delete VPC – Performs a complete deletion operation of VPC. Before deleting a VPC, the user must detach the associated resources such as virtual private gateways. On performing delete operations, your PrivateSubnet and PublicSubnet will be deleted automatically. The below screenshot shows the delete operation of Amazon VPC
Conclusion
Implementing Amazon VPC is the best way to connect your data center to your Instances on Amazon Web Services since it gives a lot of security to your cloud data and EC2 instances. Using security groups in VPC to set which instance can communicate with others & can expose only the relevant EC2 instances to connect outside world. This will allow only your web application components to access the Internet. Also, you can connect your VPC with other VPCs privately in the same region through the VPC peering feature. This way, you can share resources in your VPC with other virtual networks across your AWS accounts or other AWS accounts. On the AWS Management console one can easily set up Amazon VPC quickly and it is straightforward to use the resources in less time.
Download to try our 30-day free trial!
Download the full-featured 30-day free trial of our latest version Vembu BDR Suite v4.2.0 and experience modern data protection for your AWS environment.
Protect your AWS instances with Vembu Backup for AWS now!
Follow our Twitter and Facebook feeds for new releases, updates, insightful posts and more.