
Microsoft Nano Server is a headless operating system that is designed to run services and other cloud infrastructure without any GUI or other management consoles built in. It is especially an exciting platform for certain cloud based applications as well as containers and also in thinking about running Hyper-V on top of Nano Server. The footprint of the Nano Server platform is especially tiny even when compared to the Server Core GUI less operating system that has been around since Windows Server 2008. Nano server unlike Server Core has no command prompt or PowerShell console that can be accessed. However, like Server Core it can be managed using a remote PowerShell connection.
The installation and provisioning of Nano Server is not for the faint of heart as it requires quite a bit of PowerShell to configure and provision the Nano Server image. However, Microsoft released the Nano Server Image Builder utility that provides a graphical interface to allow you to deploy Nano Server images and bootable USB drives.
Let’s take a look at how to use this utility to create a Nano Server image that we can deploy to our Windows Server 2016 Hyper-V server.
Downloading and Installing Nano Server Image Builder
The Nano Server Image Builder utility is a fairly small and lightweight application that can be downloaded directly from Microsoft here. It will run on Windows 10, Windows 8.1, Windows Server 2012 R2, and Windows Server 2016. One of the prerequisites that you do need to be aware of is that you must install the Windows Assessment and Deployment Kit before you can use the Nano Server Image Builder. You can find the download of the Windows 10 ADK for either build 1607 or 1511 here. Also, make sure you have either the optical or ISO media available for Windows Server 2016 before you run the NSIB.

Short checklist of what you need:
- Supported OS for the utility – Win 10, 8.1, Server 2012 R2, or Server 2016
- Download and install Windows ADK
- Make sure you have the install media for Windows Server 2016
One thing to understand about Nano Server is there is no option for installing Nano Server in the Windows Server 2016 installation GUI when we boot from the ISO or media. However, if you mount the Windows Server 2016 ISO or optical media, you will notice there is a special “NanoServer” folder in the root of the installation media.
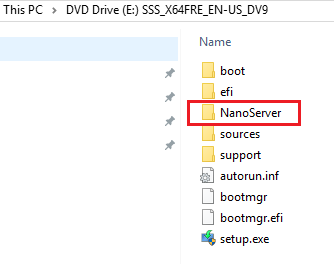
This special folder will be used by the utility in deploying the Nano Server image.
Creating a Nano Server image
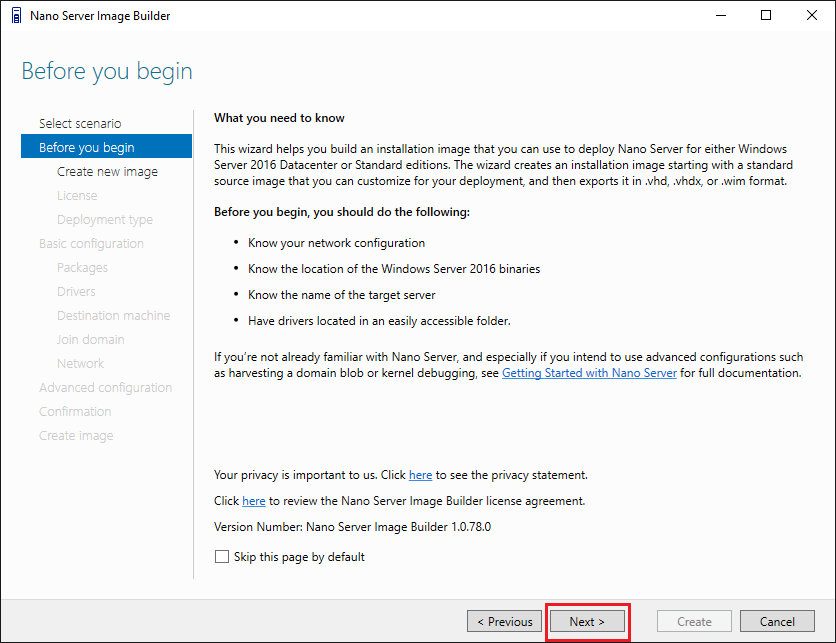
Once we have all the prerequisites installed and have installed our Nano Server Image Builder utility, we are ready to start building our first Nano Server image or USB media. Let’s walk through creating a Nano Server Image for deploying to a Windows Server 2016 Hyper-V host. To begin, we launch the Nano Server Image Builder and we choose Create a new Nano Server image. Note the directive here to have the following:
- Location of the source binaries
- Know the name of the target server being deployed to
- Have any drivers to inject ready

The next screen simply tells us about the utility and what the wizard is helping us to do.
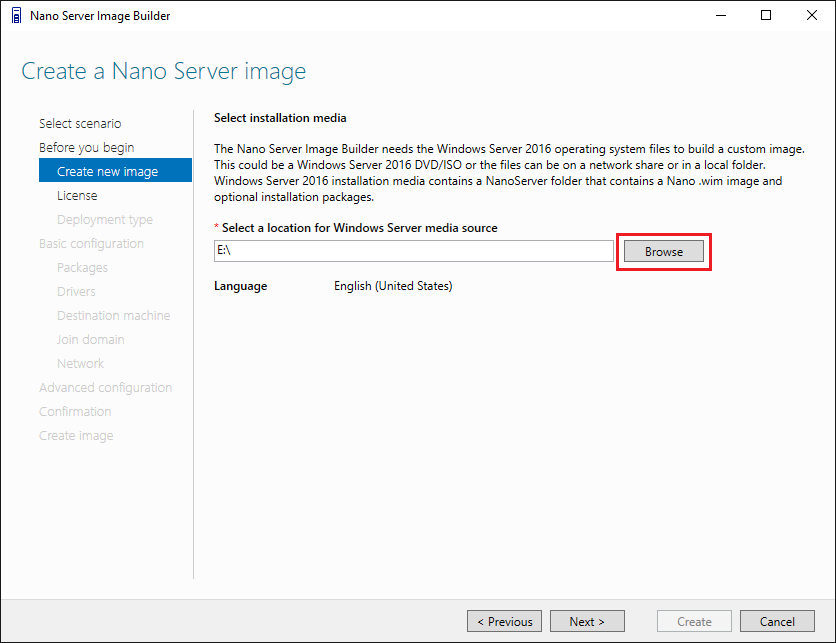
Next, we need to point the utility to our Windows Server 2016 install media. In my case, I have mounted the ISO as virtual media to the E:\ drive on my Windows 10 workstation.
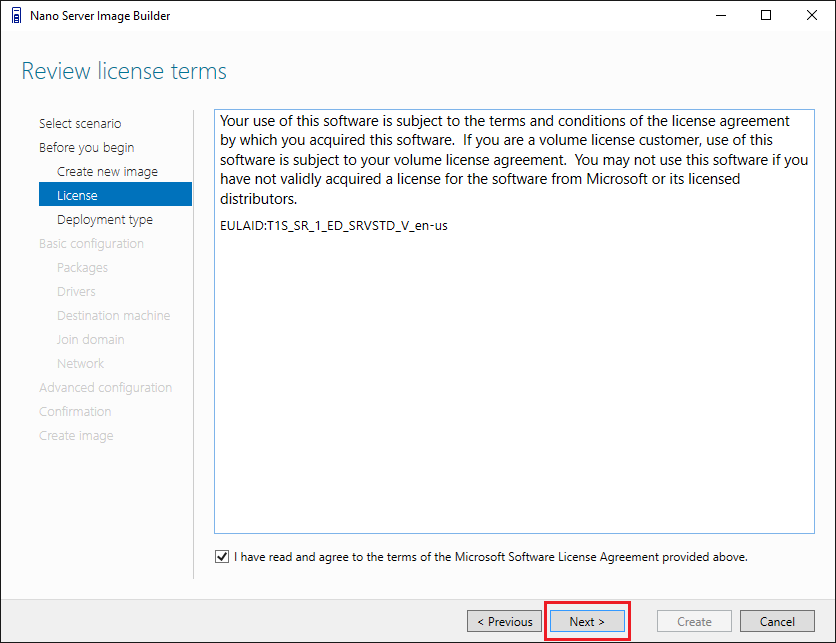
Normal license terms screen next.
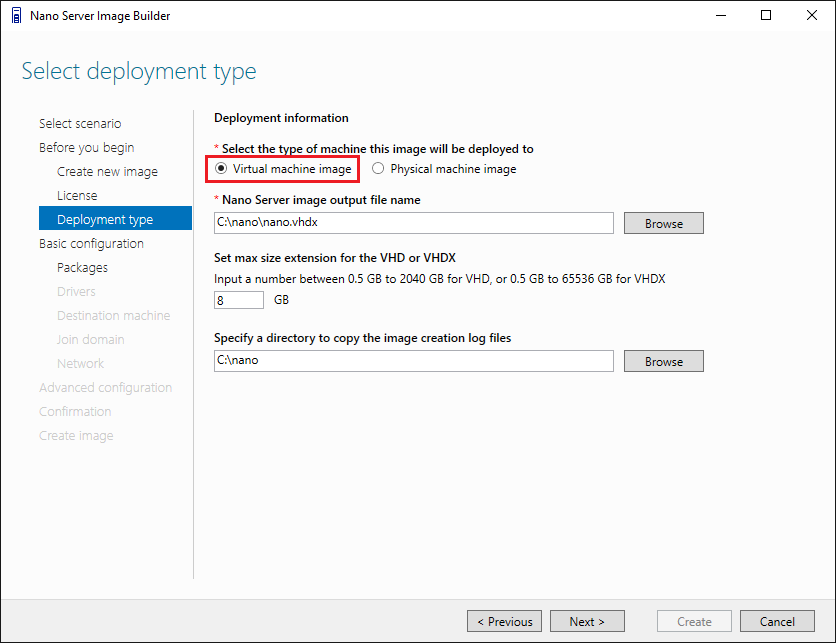
Since we are wanting to deploy our Nano Server to a Hyper-V host, we select the Virtual machine image for the type of machine this will be deployed to. Also, we need to fill in the output file name which determines where the resulting VHDXfile will be stored.

Next, we begin the phase of specifying the basic configuration information for the image.
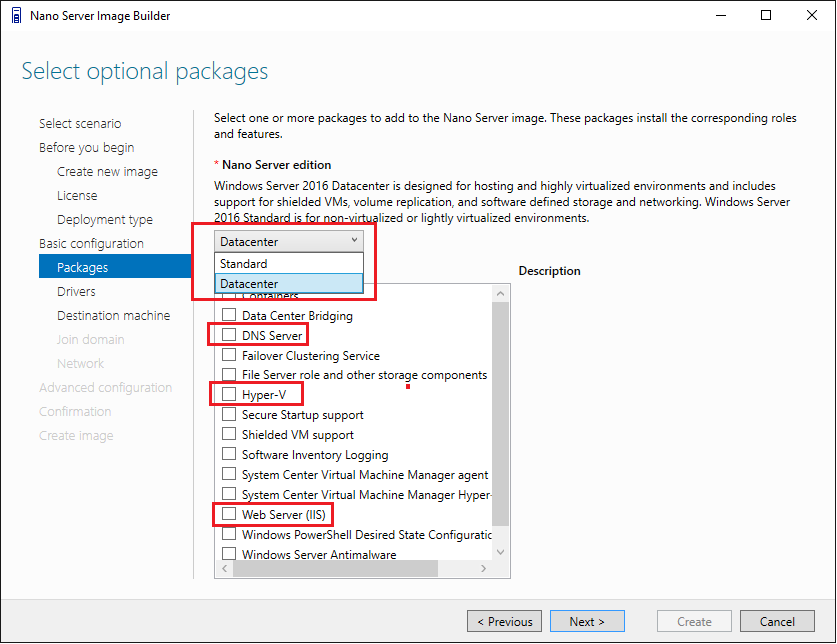
Next, we get to the meat of our installation – selecting our Nano Server edition as well as selecting packages to be installed. Note some of the various roles we can install to our Nano Server – DNS Server, Hyper-V, Web Server (IIS) just to highlight a few.
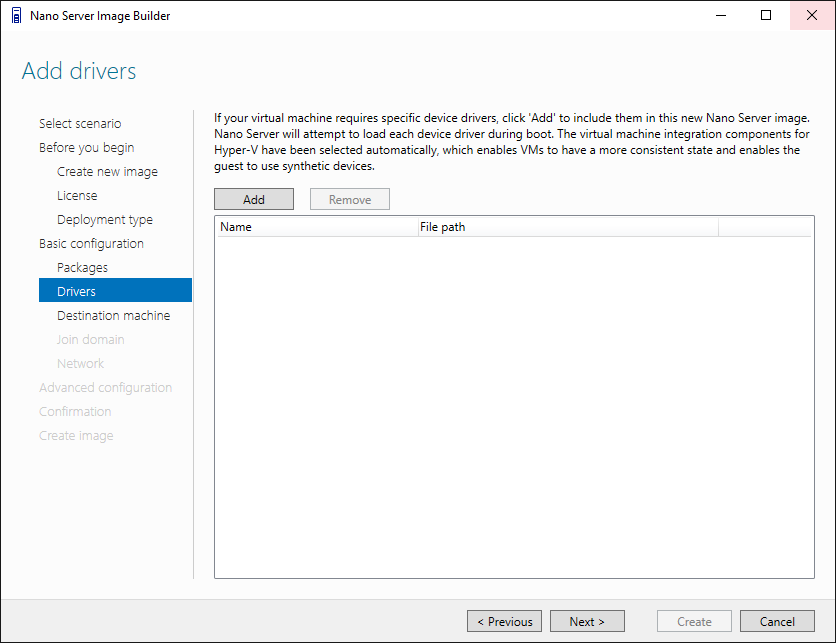
Here we can add custom drivers if need be.
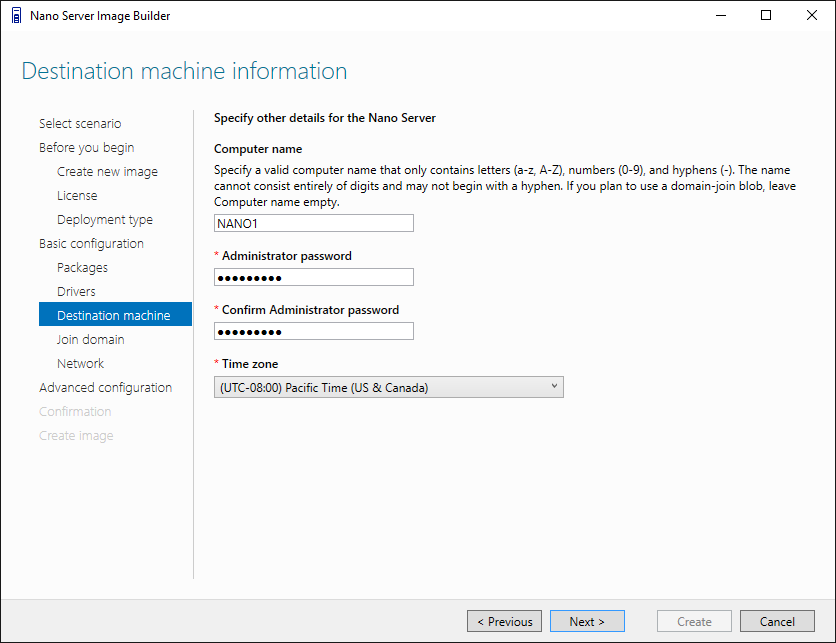
On the destination machine configuration screen, we set the computer name and administrator password along with the time zone.
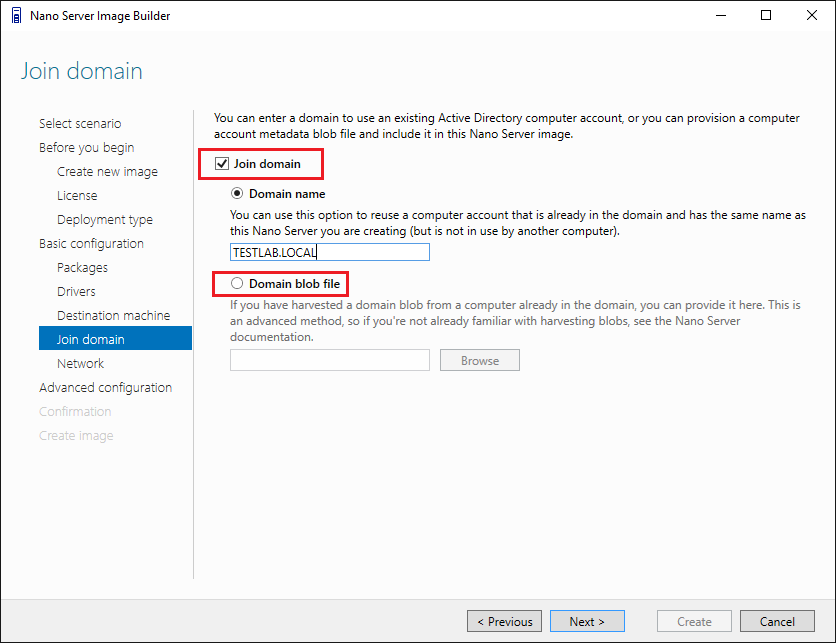
Next we can choose to join a domain with an existing computer account or we can use a domain join blob file. To join the Nano Server to the domain using the domain blob file, on a domain controller, run the following command to provision a computer account and save the resulting blob file for using with the Nano Server domain join.
- djoin /provision /domain somedomain.local /machine NANO1 /savefile c:\nanojoin.djoin
This file can then be browsed to in the Nano Server Image Builder utility.
Next, we configure network settings. There are quite a few options here we can configure including the WinRM and remote PowerShell connections security, VLAN association, as well as choose to either let DHCP assign an address or manually assign a static IP address to Nano Server.

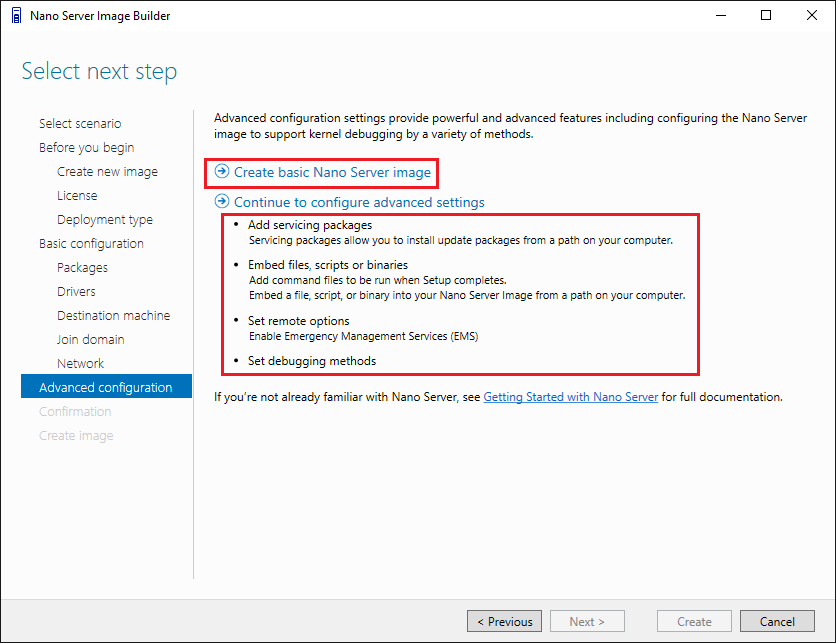
Finally, we can choose at this point to either begin the creation of the Nano Server image or move on to the Advanced configuration. The Advanced configuration has many advanced and developer options:
- Add servicing packages
- Embed files, scripts or binaries
- Set Emergency Management Services (EMS)
- Set debugging methods
Here we will choose not to configure any additional Advanced configuration and simply choose to Create basic Nano Server image.
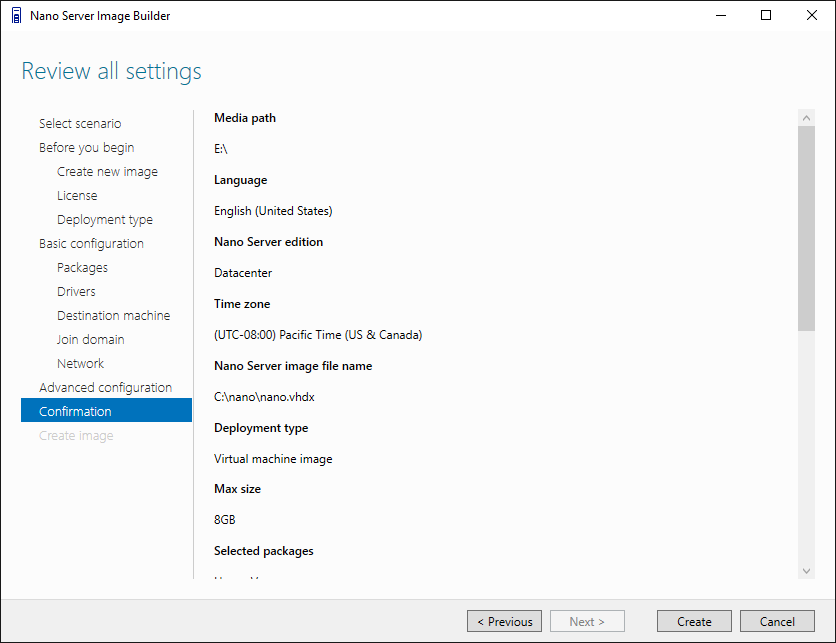
Finally, we can review the configuration settings configured through the wizard.
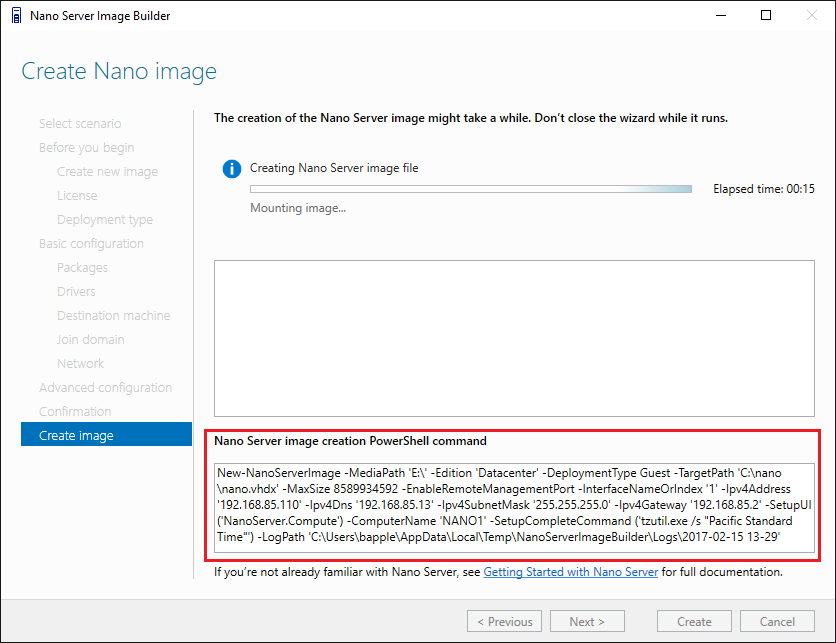
Nano Server image creation begins! One of the really neat things about the Nano Server Image Builder is that if you felt slighted on getting to learn the underlying PowerShell code, the final screen shows the PowerShell code being used to configure the Nano Server Image – very cool! You can copy the code from this screen as well.
Upload the Nano Server VHDX file to Windows Server 2016 Hyper-V
After the Nano Server Image Builder utility finishes creating the Nano Server image, we simply need to copy the VHDX file over to the Windows Server 2016 Hyper-V host where we want to run the Nano Server VM. Then, we create a new VM, and simply attach the VM to the Nano Server VHDX file that we copied to the server.
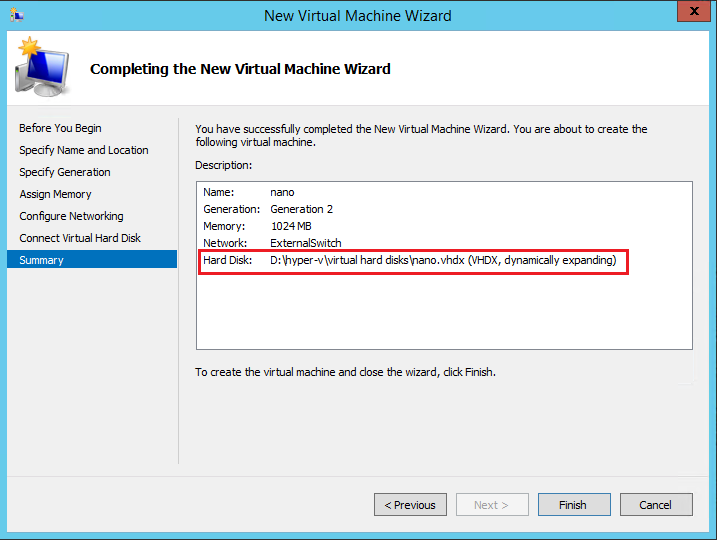
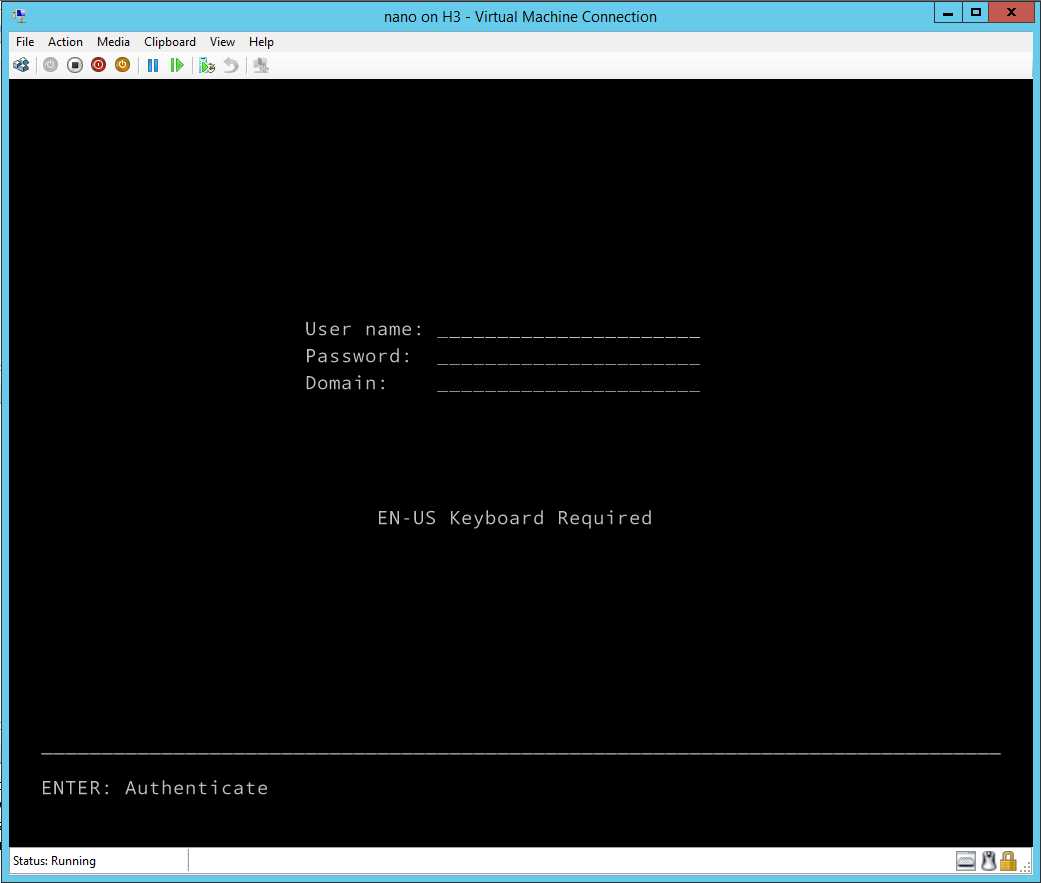
Once we have created the VM, attached the Nano VHDX file, we can simply power up the Nano Server VM and we are up and running.
Thoughts
Using the Nano Server Image Builder utility is a great way to easily spin up a functional Nano Server for the lab as well as for production. The utility makes the underlying PowerShell code a non-issue when correctly provisioning and configuring a functional Nano Server.
Microsoft’s Nano Server technology with Windows Server 2016 is an exciting platform with a lot of possibilities. The extremely small footprint as well as the purpose-built code for cloud applications and containers makes it well suited for not only today’s applications but also the future and beyond. It will be interesting to see how the Nano Server platform matures and evolves in the cloud centric demands of Enterprise IT.