
In today’s world, organizations need to make sure that their IT operations do not encounter any outages to run their business without interruption. Business Continuity and fault tolerance are remaining as the significant driving factors of any organization. This is because they need to recover their business data within minimal downtime for enabling the continuity of their business. To do so organizations need to implement Business Continuity and Disaster Recovery (BCDR) strategy in their environment.
The BCDR strategy is implemented by employing a Disaster Recovery as a Service (DRaaS) solution. Microsoft’s Azure Site Recovery (ASR) is one of the leading Cloud-based DRaaS solution. ASR orchestrates and manages DR for Azure VMs, and on-premises VMs and physical servers and will keep your data safe as well as keeps your workloads up and running, when planned and unplanned outages occur.
Azure Site Recovery (ASR)
Microsoft Azure Site Recovery is a Azure Service which provides failover from Primary Datacenter to Secondary Datacenter without any interruption on your Business applications and data during planned and unplanned outages. The ASR can be managed by the following ways:
- Replication Azure VMs between Azure regions
- Replicating On-Premise VMs or Physical servers to Azure or Secondary site
Contribution of Azure Recovery Service to provide Business Continuity and Disaster Recovery (BCDR)

Site Recovery Service
Site Recovery Service replicates data and applications running on Virtual machines (VMs) and Physical machines to a secondary location. During outages, you can failover the services from the primary location to the secondary location and access applications and data from a secondary location. Once the primary location is restored, you can failback to primary location.
Backup Service
The Azure Backup service safeguards your Data by backing them to Azure and allows you to recover the data whenever you need.
This blog is on How to replicate, failover, and failback the Azure Virtual Machines to different Region.
Create a Recovery Services vault
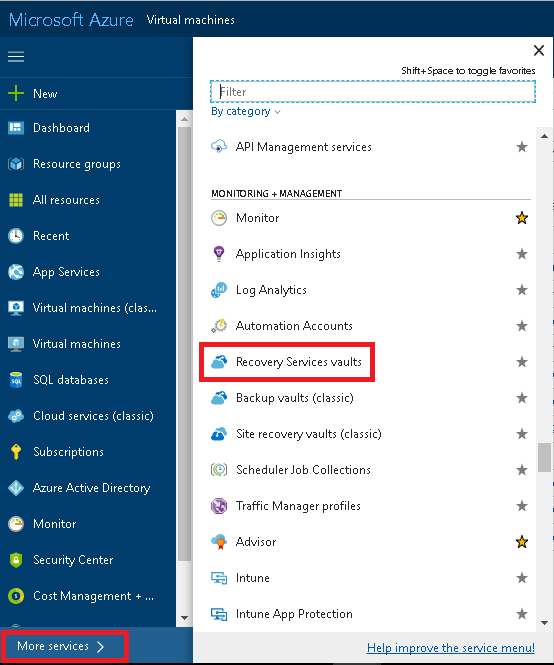
Login to Azure portal and go to dashboard -> more services and click Recovery Services Vaults (RSV)
Then, Click the ‘add’ button and fill the required details to create the new recovery services vault. Also, update the vault details like Name, Subscription, new or existing Resource group and location.
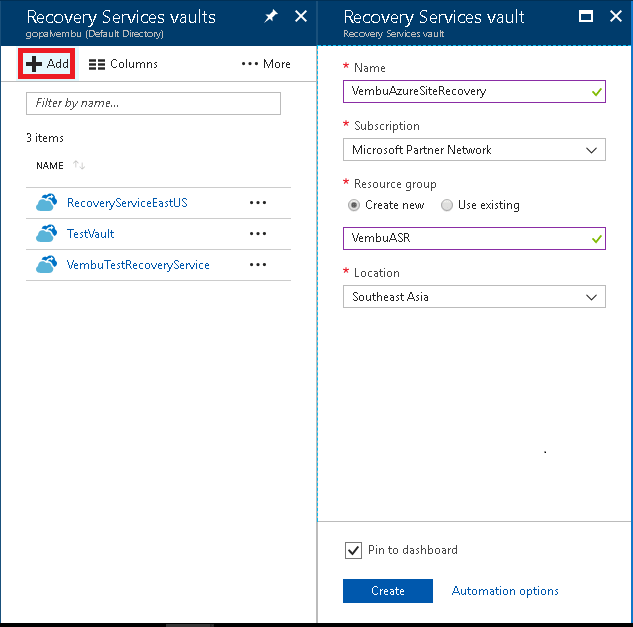
Select the ‘pin to dashboard’ option to pin RSV in your dashboard and click create tab.
Note: Don’t maintain Recovery services Vault and VM in same location.
Verify Target Resources
Before VM replication verify the target resources since your Azure subscription allows you to create the VMs in the target region that can be used for Azure Disaster Recovery.
Enable Replication
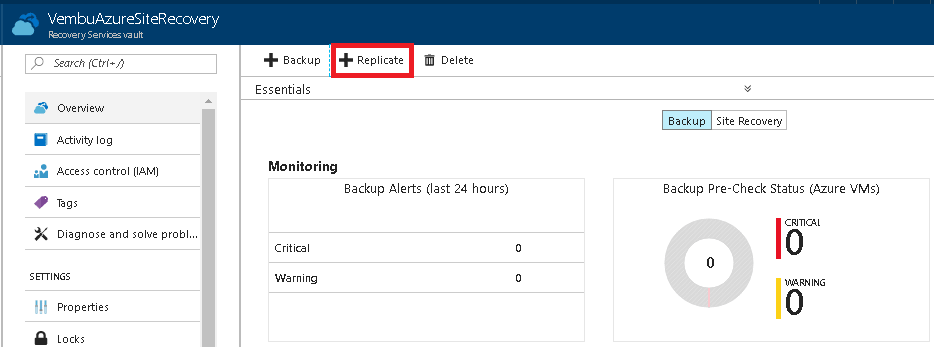
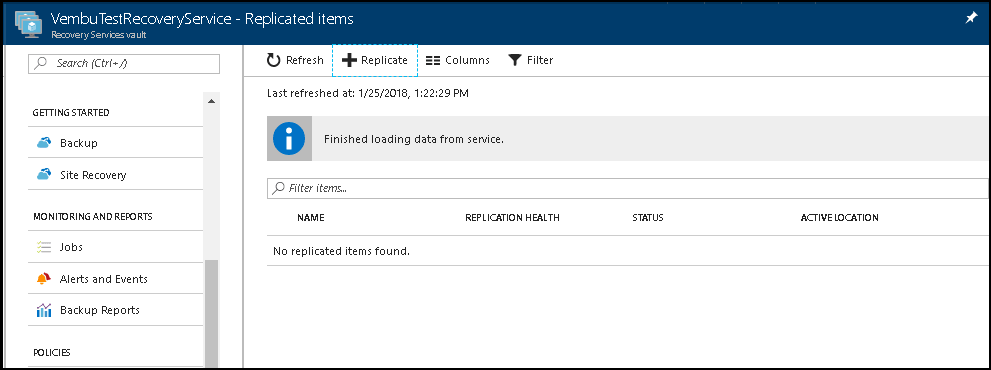
In RSV, click the vault name. It opens the Vault details then click Replicate option.
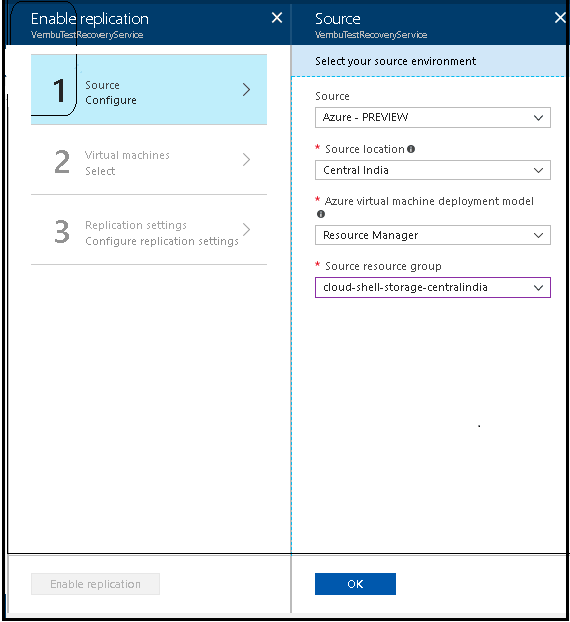
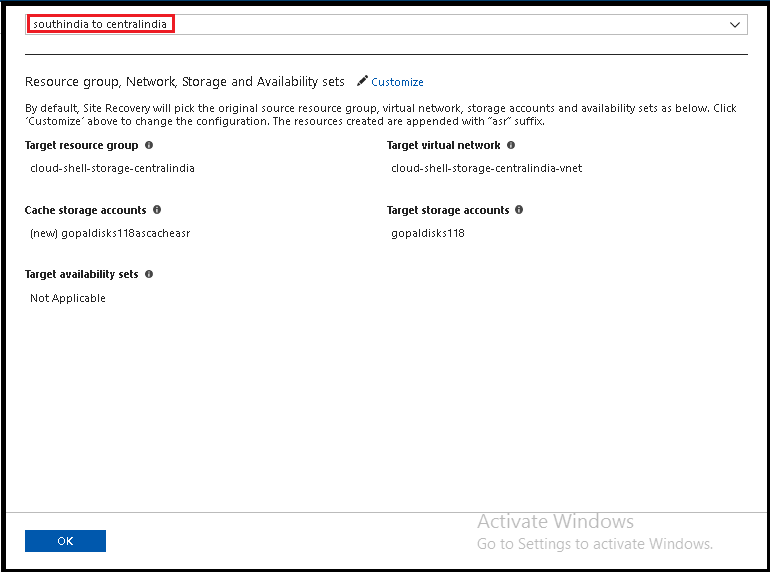
After that provide the details like source configuration – source location, source resource group.
Select the Virtual Machines
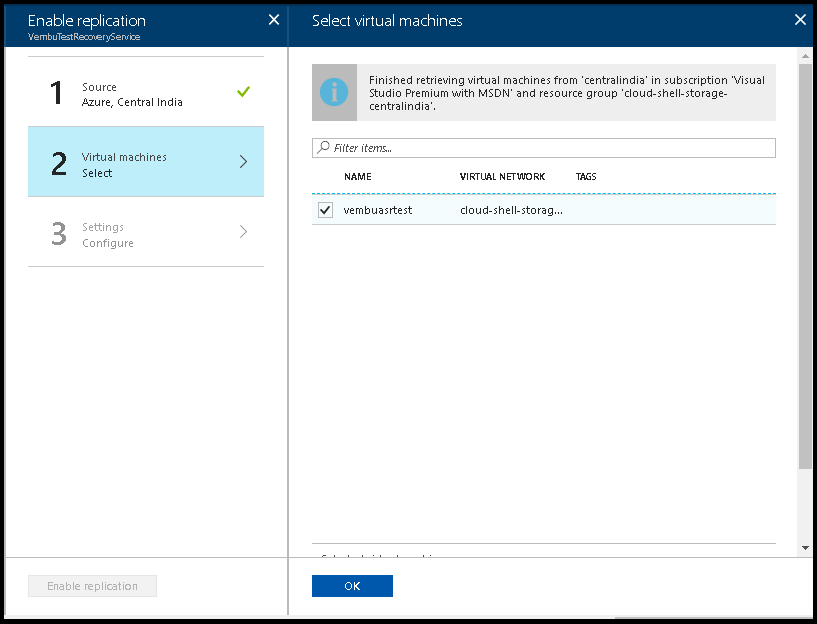
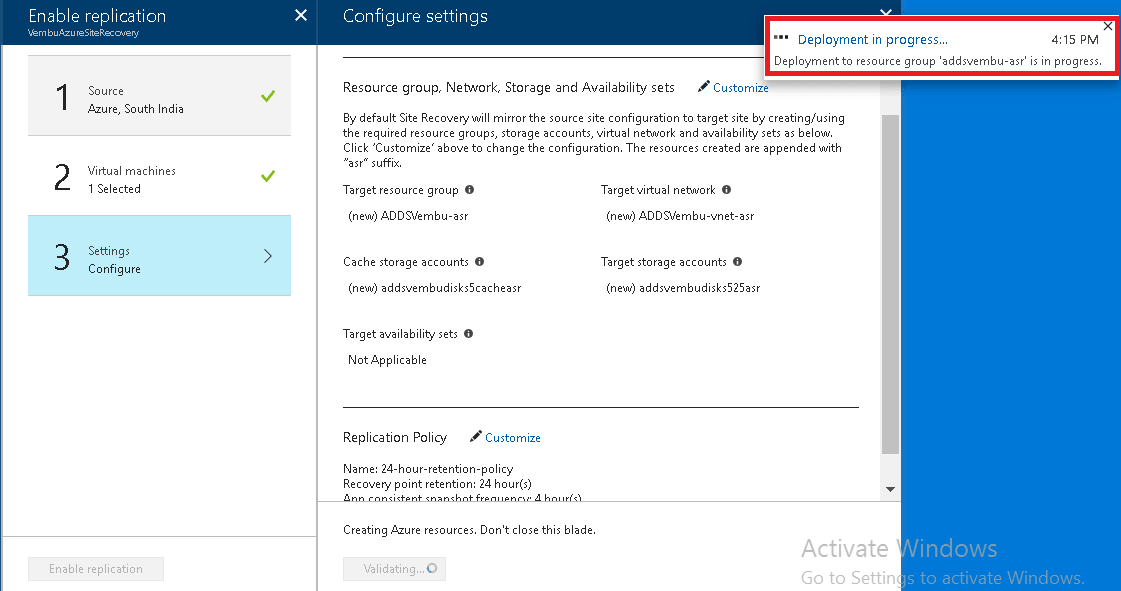
Provide target location and verify the settings then click Create target Resources.

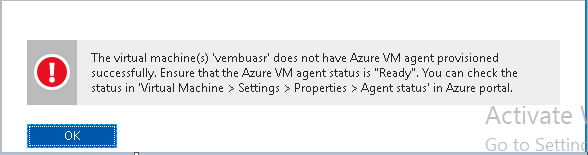
Before clicking on create target resources, verify whether the source Virtual machine agent is in ready status else an error will be thrown.
After that, Azure validates the source Virtual machine and target resource group. Once the validation is complete, deployment will start.
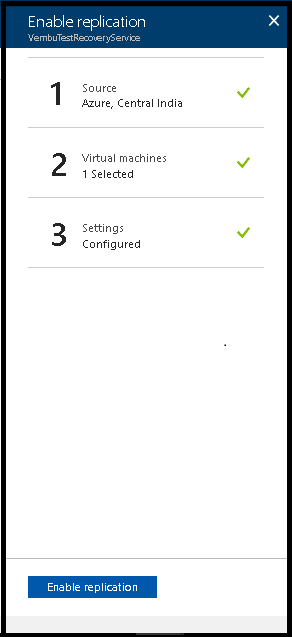
Once the deployment is complete, we can enable the replication. Refer below screenshot to enable replication.
Post replication, you can check the replication status and also change replication setting, if anything requires to be changed you can modify it.
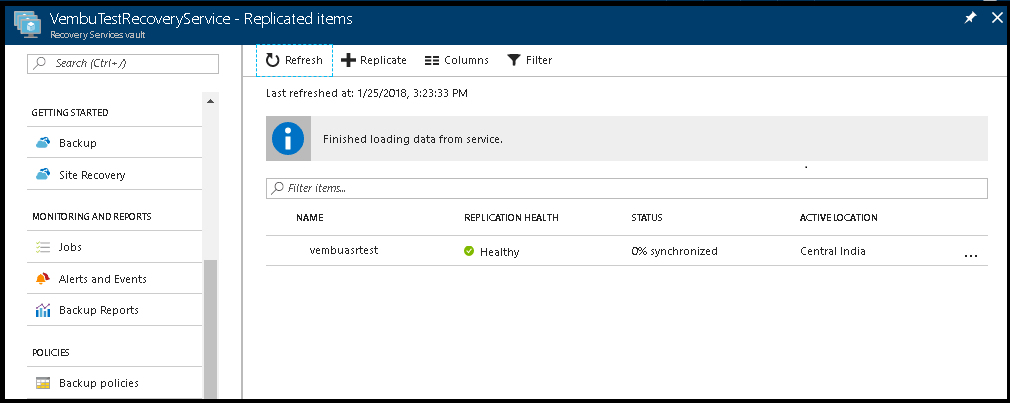
Once replication is completed, you need to create the recovery plans.
Setup Recovery Plans
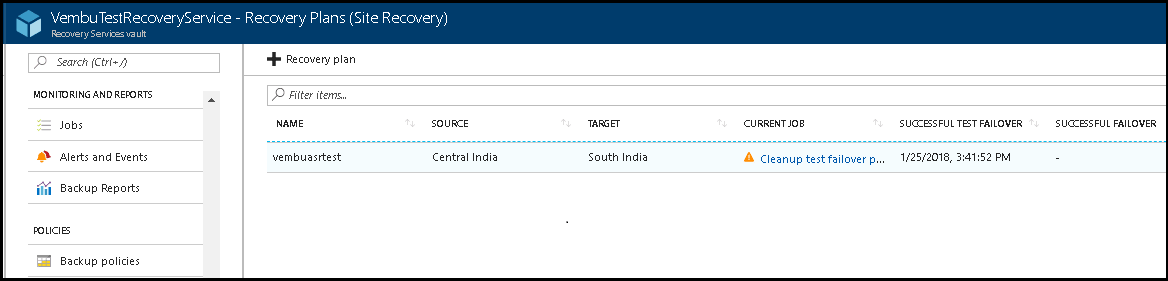
Go to create recovery plans and go to Service Recovery Vault and click the created Recovery vault name. (VembuTestRecoveryService created for this Blog)
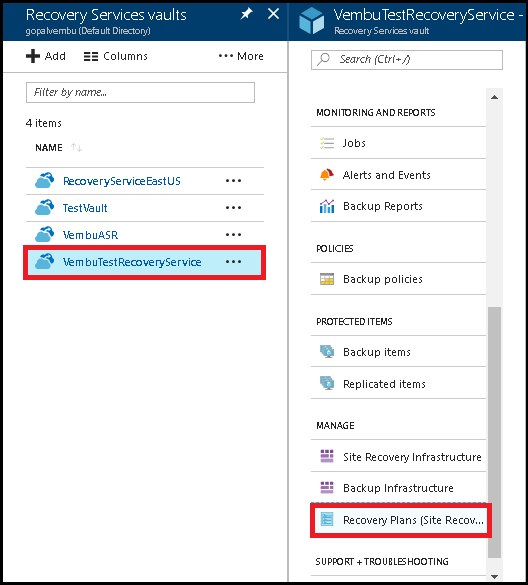
After clicking the Recovery Vault, new tab will be opened, then click on Recovery plans(Site Recovery)
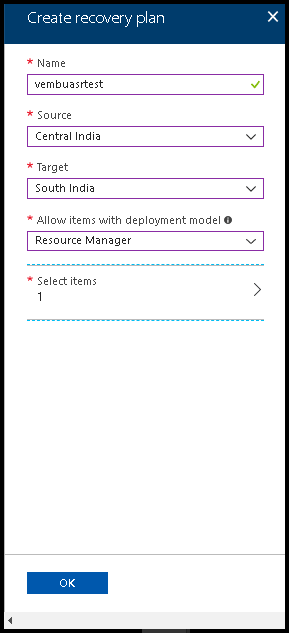
After clicking the Recovery plans, enter the name, source and target location details. Update the details and click ‘OK’.
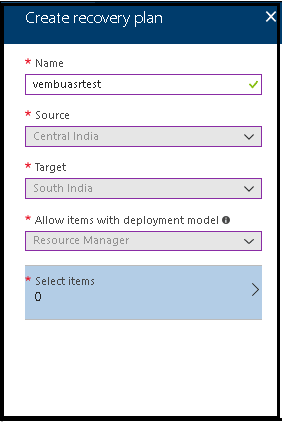
In select items page, select the VM to perform data retrieving process. Then click OK.
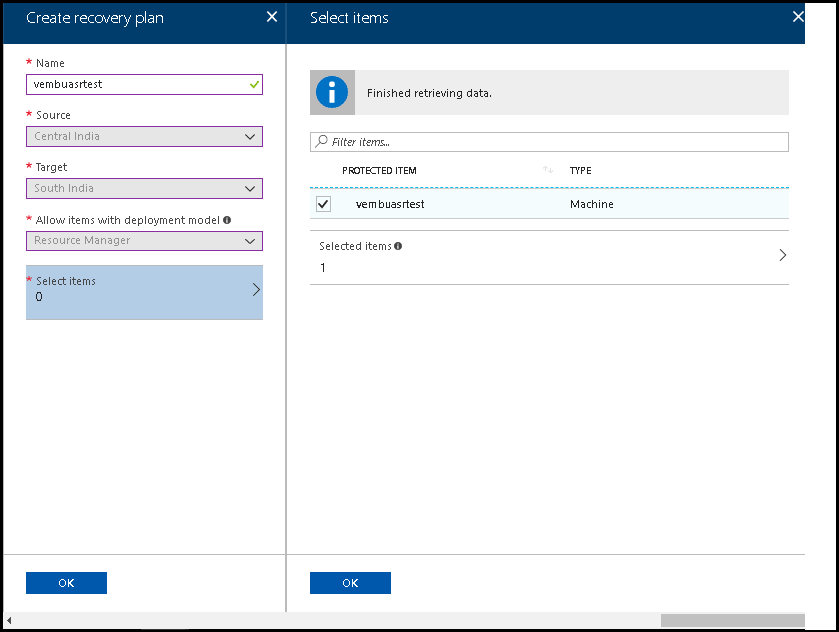
Finally, click ok to create the recovery plan.
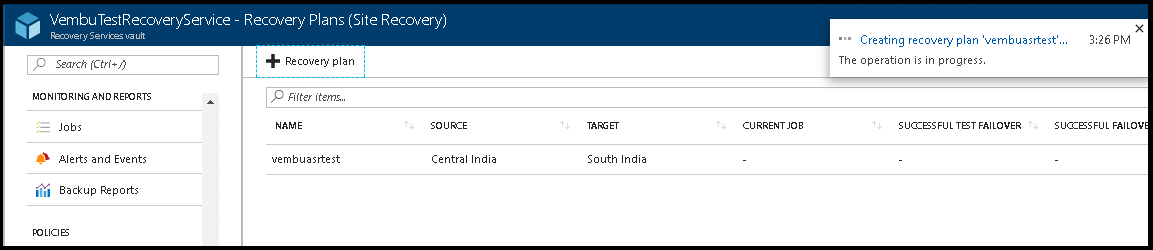
Once recovery plan is completed, it will display recovery plan page.
After creating recovery plan, next step will be the test failover. Before running the production failover, we can do the test failover to check whether the Virtual Machine is working as expected.
Run Test Failover
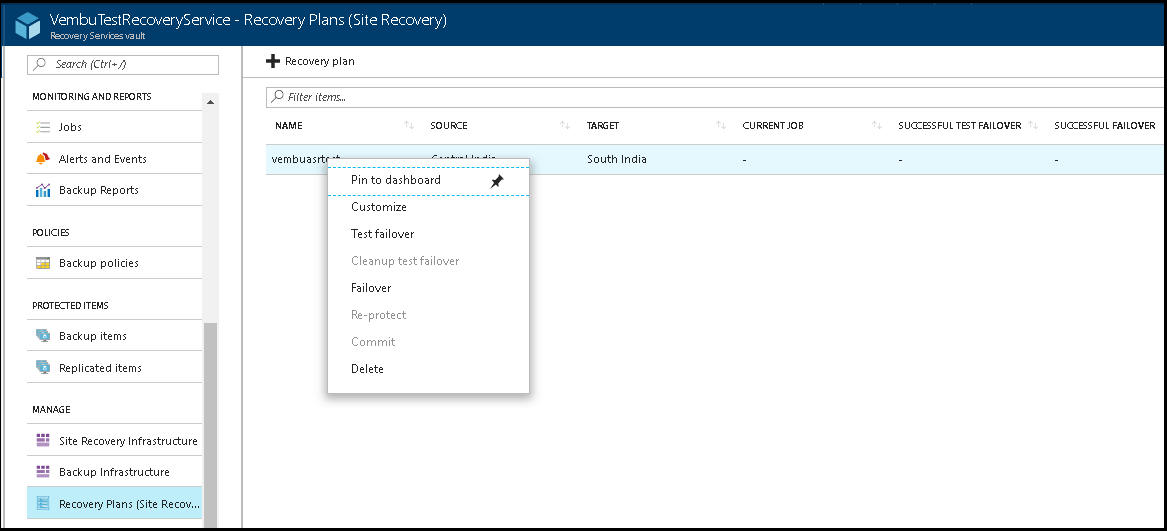
To run the test failover, go to Recovery Plans -> created recovery plans, select the recovery plan you want to run the test failover. And right click -> click ‘Test failover’.
After clicking test failover, you need to select the failover direction, azure Virtual Network and recovery point details. Update the details and click ok.
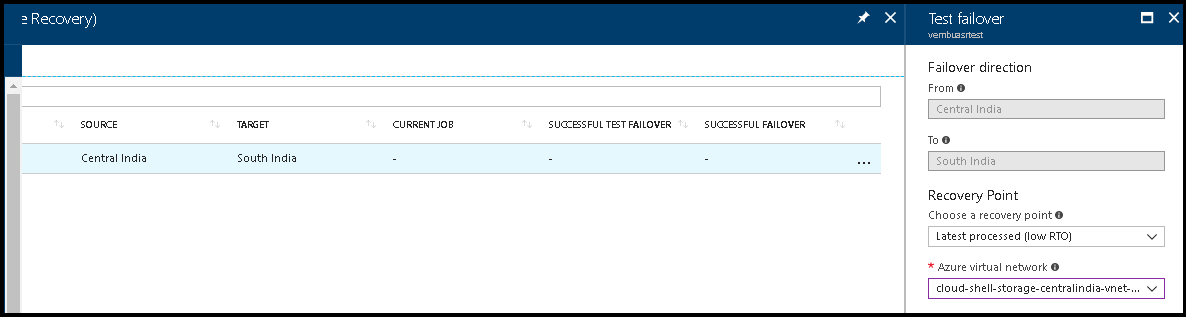
For Failover direction, you need to select the source virtual machine location and target location for performing failover.
The Recovery point is defined as three types: select recovery point to use failover.
Latest processed: Latest processed is the most current data restored by the site recovery Service. The time stamp is shown accordingly
Latest app-consistent: This option fails over all the VMs to the latest app-consistent.
Custom: you can select any recovery point.
Finally, select the Virtual machine and click ok.
Once the test failover is completed, you can verify the process through reports
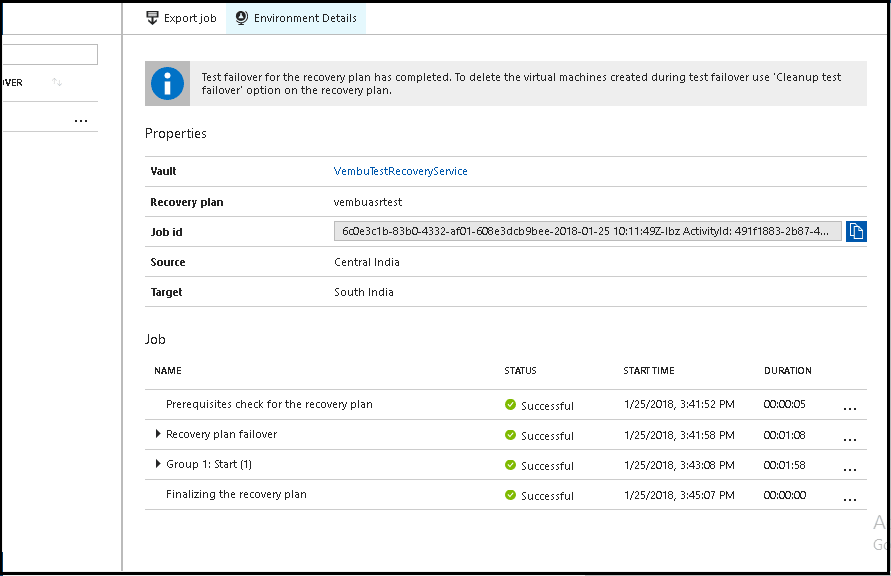
After successful completion of test failover, you can see the test Virtual machine on Virtual machine tab.
Check if you are able to login to the VM and connect the Network to know that everything is working fine as per source Virtual machines.
Then, you need to enable Public IP address and manually add the Network security.

After completing the test failover checkouts, you can clean up the test failover progress. Delete the test Virtual Machine.
In recovery service vault, click recovery plan tab, right click the test VM. and click cleanup test failover.
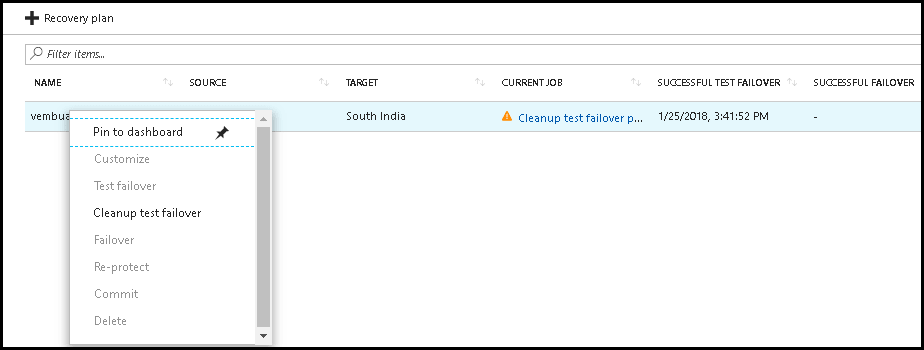
And then enter the reason for the action and select the checkbox and click ok.
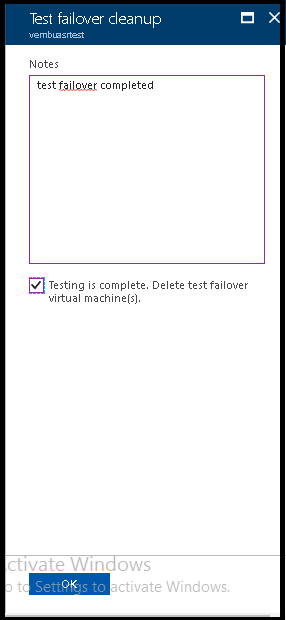
Then it takes some time to verify and you will get the message as test clean up completed.

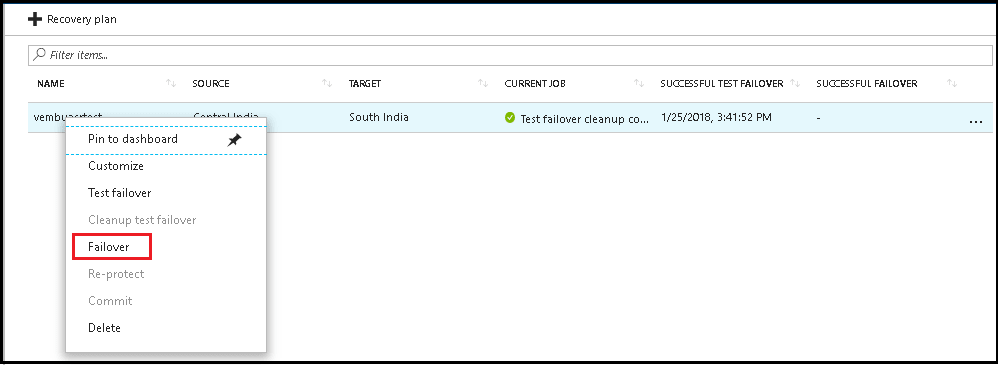
After test failover is cleaned up, perform production failover. Go to recovery plan and right click the virtual machine and click the Failover option
After clicking the failover verify the ‘from’ and ‘to’ direction, in case any changes in from and to direction update the field and also checkout the options shut down machines, if required.
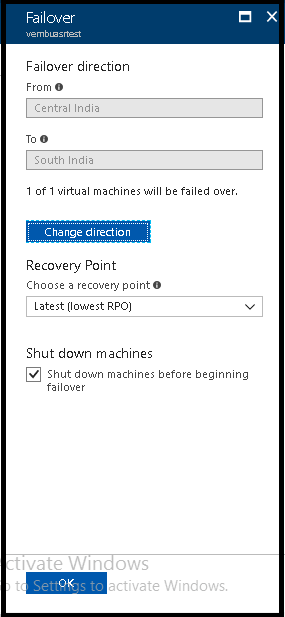
click ok to proceed the failover. You can see the working progress on screen, it will take some time to complete the failover


Once completing the failover, you can check the failover virtual machine in virtual machine list.

Now you can login and check the failover virtual machine working status. Before that login to the virtual machine and verify whether public IP address is enabled or not. Also, check Network Security Group (NSG) to see whether firewall ports are enabled or not.
Reprotect the Secondary VM
Now we can complete the failover the virtual machines from one region to another Azure region and failover VM in unprotected state. In case you need to bring back to primary region you need to replicate the VMs from secondary to primary region, and then perform failover. Before starting this reprotect, make sure that the primary VM is in committed state and is available.
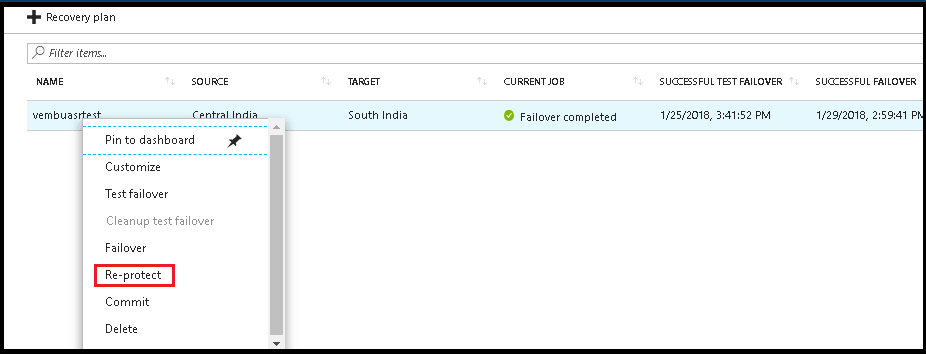
Go to Recovery Service Vault, right click the failover VM and click reprotect.
In case of any changes on target network and storage account details, update it and click ok.
Click ok to start the reprotect job.
Once the job gets completed, the target location will hold the latest updated data. Now the Virtual machine is in protected state. After completing the reprotect state, you can also failover the Virtual machine to primary region.
Conclusion
Thus, with the help of Azure Site Recovery (ASR) you will be able to automate the recovery of your services when a site outage happens in primary datacenter. Also, it allows you to easily create DR plans for your environment. The disaster recovery plans can be simple or advanced as per your business requirements demand, but everything can be customised using ASR. You can also test your DR plans whenever you want without disrupting the services at your primary location. Thus, ASR is a simple automated protection for your businesses.
Experience modern data protection with this latest Vembu BDR Suite v.3.9.0 FREE edition. Try the 30 days free trial here: https://www.bdrsuite.com/vembu-bdr-suite-download/
Got questions? Email us at: vembu-support@vembu.com for answers.
Follow our Twitter and Facebook feeds for new releases, updates, insightful posts and more.