
What is AWS Redshift?
Amazon Redshift is a data warehouse product that forms part of the larger cloud-computing platform Amazon Web Services. It is built on top of technology from the massive parallel processing (MPP) data warehouse company ParAccel (later acquired by Actian), to handle large scale data sets and database migrations. Redshift differs from Amazon’s other hosted database offering, Amazon RDS, in its ability to handle analytic workloads on big data sets stored by a column-oriented DBMS principle.
Amazon Redshift is based on an older version of PostgreSQL 8.0.2, and Redshift has made changes to that version. An initial preview beta was released in November 2012 and a full release was made available on February 15, 2013. The service can handle connections from most other applications using ODBC and JDBC connections.
The first step to creating a data warehouse is to launch a set of nodes, called an Amazon Redshift cluster. After you provision your cluster, you can upload your data set and then perform data analysis queries. Regardless of the size of the data set, Amazon Redshift offers fast query performance using the same SQL-based tools and business intelligence applications that you use today. In this blog, we are going to create a demo cluster to get an overview of the Redshift cluster and its capabilities.
Accessing AWS Redshift from AWS Console
You can access the AWS Redshift service from the AWS management console under Services → Database → AWS Redshift. Or you can directly access the Redshift home page URL
https://console.aws.amazon.com/redshiftv2/home

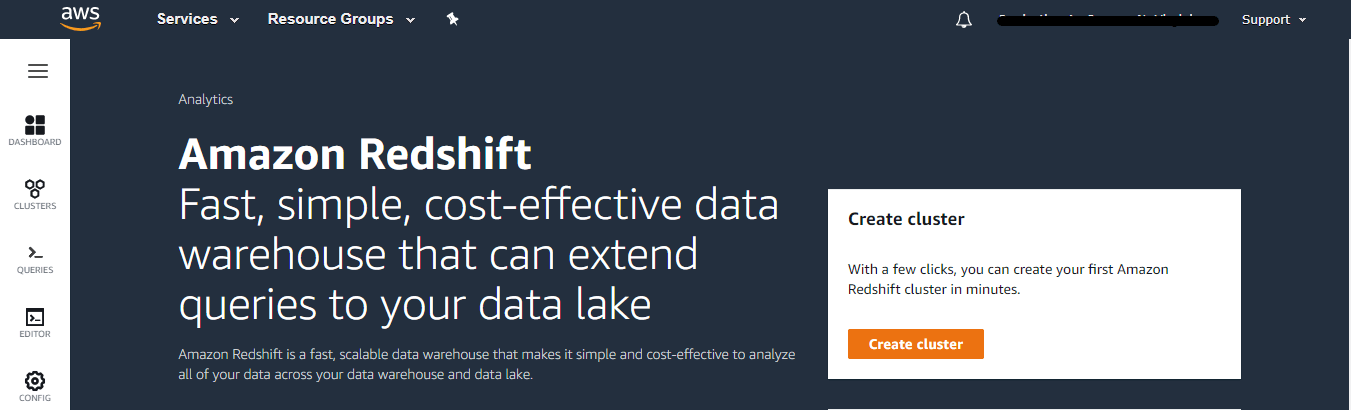
Click Create cluster to Continue
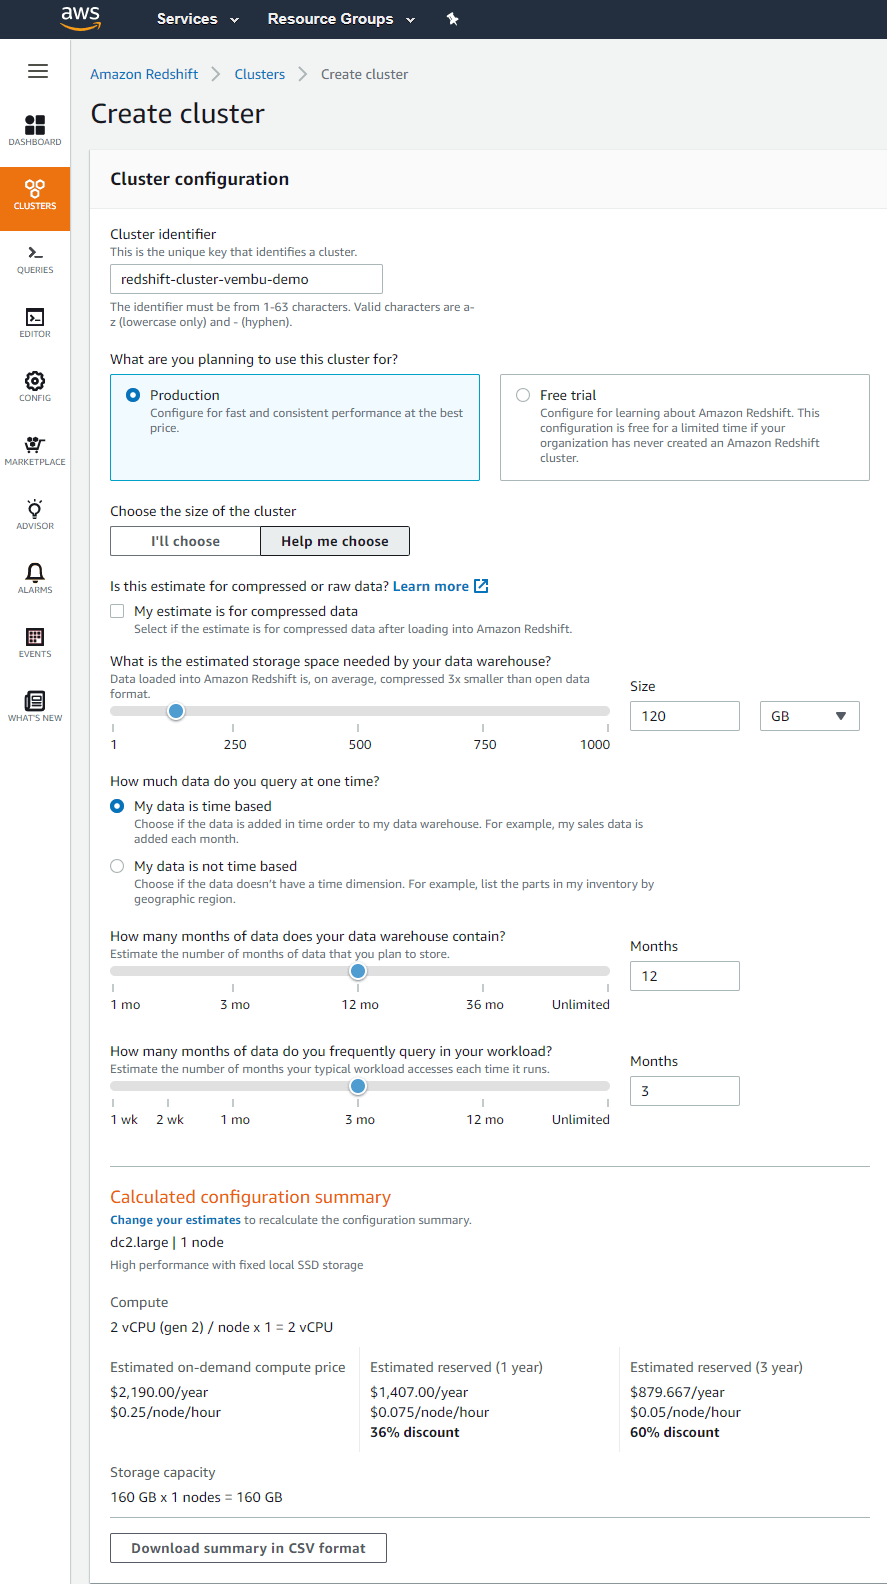
Create Cluster: Cluster configuration
Cluster identifier – This is the unique key that identifies a cluster. Here we were given the identifier name as “redshift-cluster-vembu-demo”
On the next step, you will be provided with two options to use this cluster for the purpose. Production or Free trial
The production cluster is meant for configuring for fast and consistent performance at the best price.
The free trial is meant for configuring learning about Amazon Redshift. This configuration is free for a limited time if your organization has never created an Amazon Redshift cluster. In this blog, we are using a free trial cluster, but detailed information provided for the production cluster below.
Choosing the Cluster
When you select production, you can choose the cluster based on your requirements such as storage size, time period of your data, how frequently you query the data, and whether the data is compressed or not.
What is the estimated storage space needed by your data warehouse?
Data loaded into Amazon Redshift is, on average, compressed 3x smaller than open data format. Here you can choose the size of the storage space from 1Gb to 9 Pb ( Petabyte ). Also, you can choose the estimation based on compression or without compression.
How much data do you query at one time?
Here you have two options to choose,
- My data is time-based – Choose if the data is added in time order to my data warehouse. For example, my sales data is added each month.
- My data is not time-based – Choose if the data doesn’t have a time dimension. For example, list the parts in my inventory by geographic region.
If your data is time-based,
- How many months of data does your data warehouse contain?
- Estimate the number of months of data that you plan to store. Available range from 1 month to unlimited period.
- How many months of data do you frequently query in your workload?
- Estimate the number of months your typical workload accesses each time it runs. Available range from 1week to unlimited period.
If you data is not time-based,
What is the estimated percent of data that your queries frequently access? – This estimate helps us to determine how many compute nodes to provision for optimal performance. For example, if you access 20% of your total data volume frequently, we recommend a fewer number of steady-state compute nodes than if you query 80% of total data volume. You need to provide the details in percentage.
Based on your above selection criteria, a calculated configuration summary is shown under. Shows computing, storage, instance type, and the cost ( both on-demand and reserved instances for 1 and 2 years ). You can also download the calculated configuration summary in CSV format for future reference.
Note: For both production and Free trial clusters, the below configurations are the same
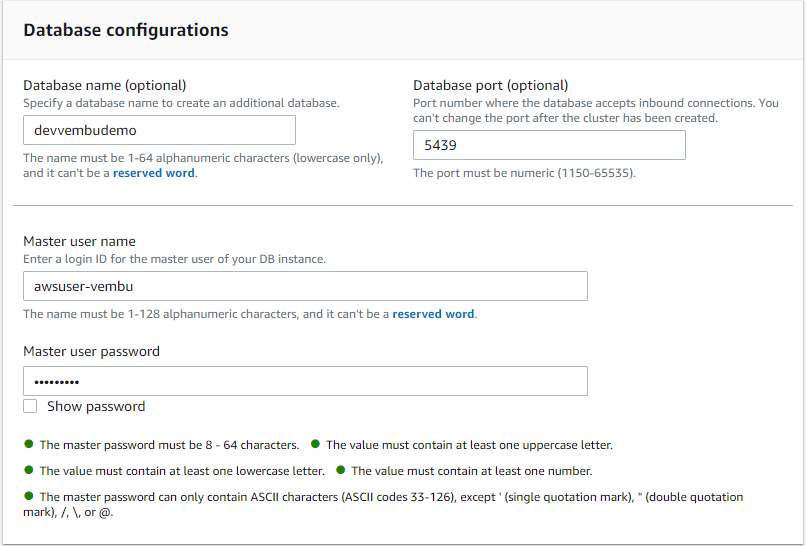
Database configuration
In this section, you will have the option to provide database name and port no. The database name must be 1-64 alphanumeric characters (lowercase only), and it can’t be a reserved word. Port number where the database accepts inbound connections. You can’t change the port after the cluster has been created. Provide a Master user name and password.
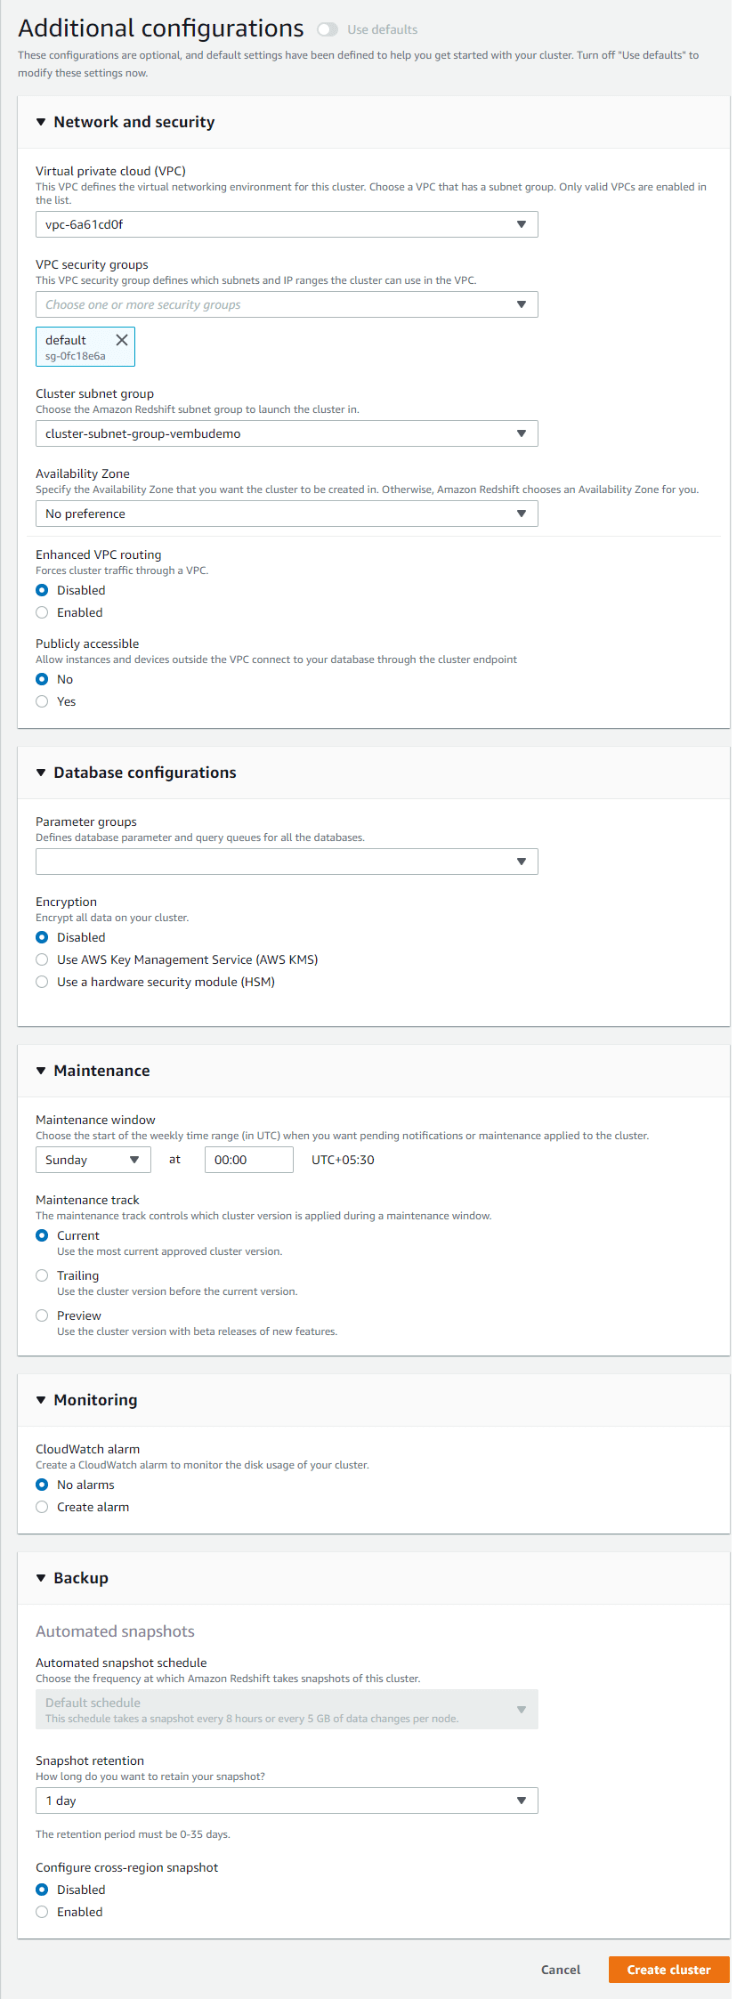
Additional Configurations – These configurations are optional, and default settings have been defined to help you get started with your cluster. In case you want to change the default settings you can specify the settings according to your requirements.
Network and Security settings
In the network and secret settings, we are providing default settings for VPC, VPC security groups, cluster subnet groups, availability zone, etc.
VPC – This VPC defines the virtual networking environment for this cluster. Choose a VPC that has a subnet group. Only valid VPCs are enabled in the list.
VPC security groups – This VPC security group defines which subnets and IP range the cluster can use in the VPC.
Cluster subnet group – Choose the Amazon Redshift subnet group to launch the cluster in. Here you need to create a cluster subnet group when you create a redshift cluster the first time. Follow the below steps to create a cluster subnet group.
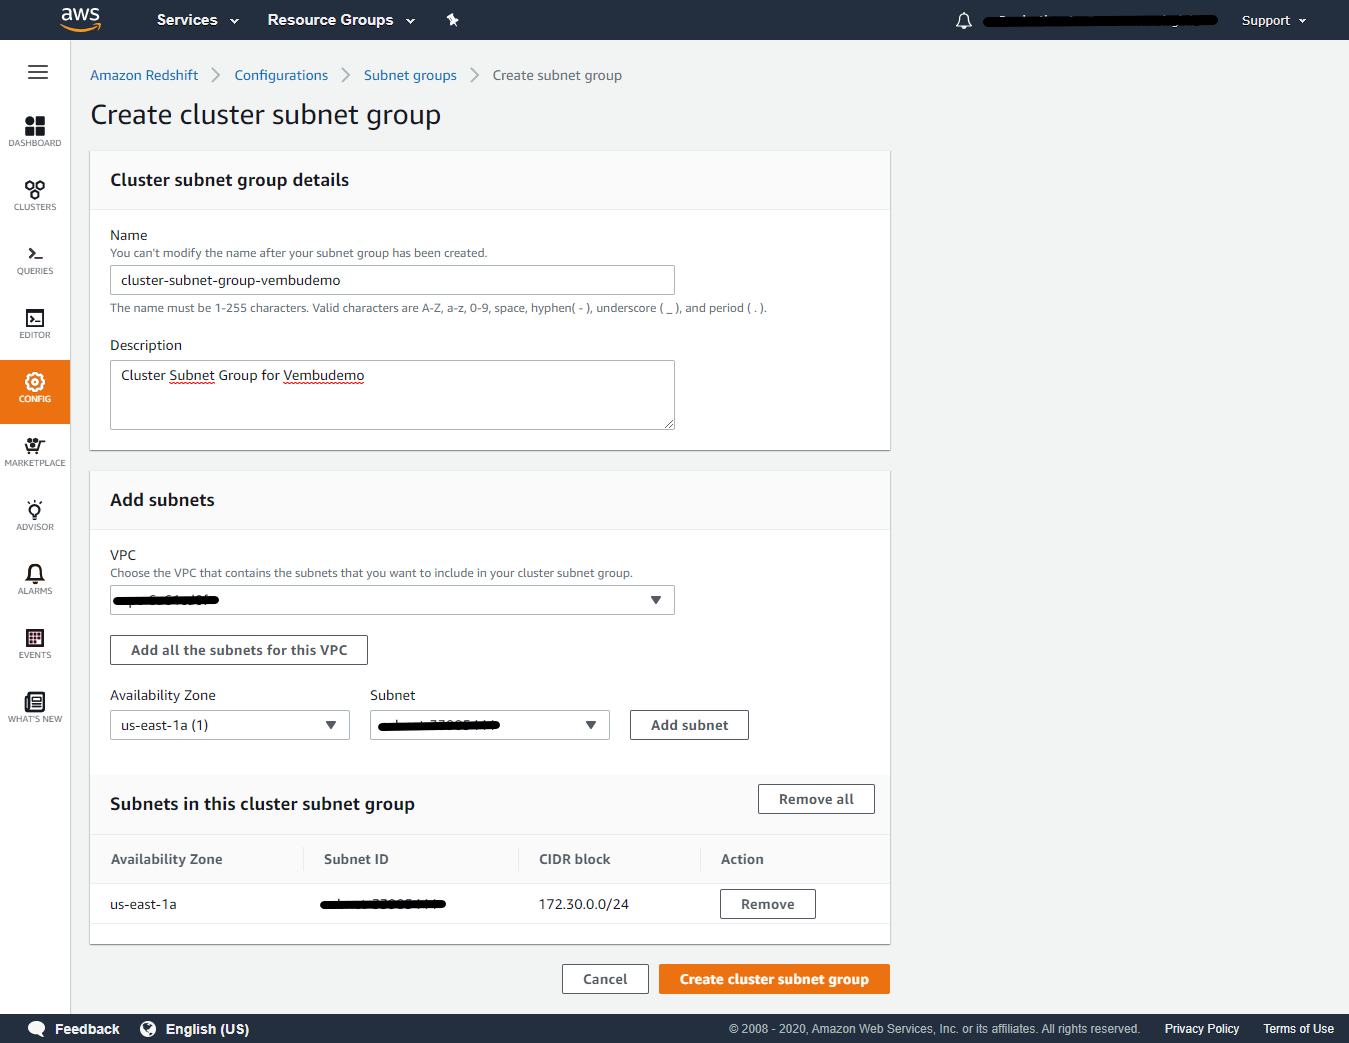
To create a cluster subnet group
- Sign in to the AWS Management Console and open the Amazon Redshift console at https://console.aws.amazon.com/redshift/.
- On the navigation menu, choose CONFIG, then choose Subnet groups. The list of subnet groups is displayed.
- Choose Create cluster subnet group to display the create page.
- Enter information for the subnet group, including which subnets to add.
- Choose Create cluster subnet group to create the group with the subnets that you chose.
Here we created a subnet group called “cluster-subnet-group-vembudemo” is added and the same is listed under the cluster subnet group in the Redshift cluster creation page.
Availability zone – Specify the Availability Zone that you want the cluster to be created in. Otherwise, Amazon Redshift chooses an Availability Zone for you. You can choose No preference or Cluster security group associated availability zone.
Enhanced VPC routing – Forces cluster traffic through a VPC. Here you can Disable and Enable Enhanced VPC routing. The default is disabled and the same is selected.
Publicly accessible – Allow instances and devices outside the VPC connect to your database through the cluster endpoint. Here the default option is No.
Database configurations
Parameter groups – Defines database parameters and query queues for all the databases. Here Default is “default-redshift-1.0” and the same is selected.
Encryption – Encrypt all data on your cluster. Available options are Disabled, Use AWS Key Management Service (AWS KMS), and Use a hardware security module (HSM). Here we chose the default option which is “Disabled”
Maintenance configurations
Maintenance window – Choose the start of the weekly time range (in UTC) when you want pending notifications or maintenance applied to the cluster. Here you can select the day ( Sunday to Saturday ) and time ( in 24-hour format )
Maintenance track – The maintenance track controls which cluster version is applied during a maintenance window. Available options are
- Current – Use the most current approved cluster version.
- Trailing – Use the cluster version before the current version.
- Preview – Use the cluster version with beta releases of new features.
Here the default is “Current”
Monitoring configuration
CloudWatch alarm – Create a CloudWatch alarm to monitor the disk usage of your cluster. Available options are No Alarm and Create Alarm. The default is “No Alarm”
Backup configurations
Automated snapshots –
Automated snapshot schedule – Choose the frequency at which Amazon Redshift takes snapshots of this cluster. The default schedule is taking snapshots every 8 hours or every 5 Gb of data changes per node.
Snapshot retention – The time period to retain your backup snapshots. Available options starting from 1 day to 7 days. Or even you can put custom days or indefinite.
Thus all the additional configurations are over, and click “Create cluster”.
It takes a while to create a Redshift cluster, after creation you can see the status as available as shown below. You can separate tabs for cluster configuration properties such as Cluster Performance, Query monitoring, Maintenance and monitoring, Backup, Properties, and schedule.
Cluster Performance – You will have a graphical representation of cluster metrics related to its performance in this tab.
- CPU utilization – The percentage of CPU utilization.
- Percentage disk space used – The percent of disk space used.
- Auto vacuum space freed – Space reclaimed by auto vacuum in all tables.
- Database connections – The number of database connections to a cluster.
- Health status – Indicates the health of the cluster.
- Query duration – The average amount of time to complete a query.
- Query throughput – The average number of queries completed per second.
- Query duration per WLM queue – The average length of time to complete a query for a WLM queue.
- Query throughput per WLM queue – The average number of queries completed per second for a WLM queue.
- Usage limit for concurrency scaling – Concurrency scaling usage limit.
- Usage limit for Redshift Spectrum – Redshift Spectrum usage limit.

Query Monitoring – This tab shows Queries runtime and Queries workloads. You can see the query activity on a timeline graph of every 5 minutes. Use this graph to see which queries are running in the same timeframe. Choose a query to view more query execution details.
Database performance
– This includes
- Workload execution breakdown – the time used in query processing stages of every 5 minutes.
- Queries by duration range – , the number of short, medium and long queries taken place at a given time, and you can see the duration range of every query for every 5 minutes.
- Query throughput – The average number of queries completed per second.
- Query duration – The average amount of time to complete a query.
- Average queue wait time by priority – The total time queries spent waiting in the WLM queue by query priority.
Workload concurrency – This includes the below characteristics of the cluster for every query for the duration of 5 minutes in graphical representation
- Queued vs. Running queries on the cluster – The number of queries running (from the main cluster and concurrency scaling cluster) compared to the number of queries waiting in all WLM queues in the cluster.
- Queued vs. Running queries per queue – The number of queries running (from the main cluster and concurrency scaling cluster) compared to the number of queries waiting in each WLM queue.
- Concurrency scaling activity – The number of concurrency scaling clusters that are actively processing queries.
- Concurrency scaling usage – The usage of concurrency scaling clusters that have active query processing activity.
Maintenance and Monitoring – This tab recommends reducing the Cost of Underutilized Amazon Redshift Cluster and setting Alarms, enabling Audit log, schedule maintenance window, and setting usage limits of the cluster.
Backup details – This tab is configuring backup for the AWW redshift cluster. By default, automated snapshots of the cluster are enabled, and snapshots are retained for one day. You can edit the settings and change them if you require them. The below screenshot shows three automated snapshots taken for the cluster.

Properties – In this tab, you can set cluster permissions by adding an IAM user, since your cluster needs permissions to access other AWS services on your behalf. For the required permissions, add IAM roles with the principal “redshift.amazonaws.com”. You can associate up to 10 IAM roles with this cluster.
Cluster details – Here you can resize the cluster by clicking the Resize button and can change the Node type and number of nodes. You can also schedule the resize at a later time or can do it immediately.
Network and security – You can edit the VPC and subnet groups here if required to change. And also can change the accessibility status from public to private or vice versa.
Cluster Actions – You can also do all the above activities by clicking the cluster, and select the Activities tab on top. It is an easier way to Resize, Modify, Reboot, Pause, and Delete actions.
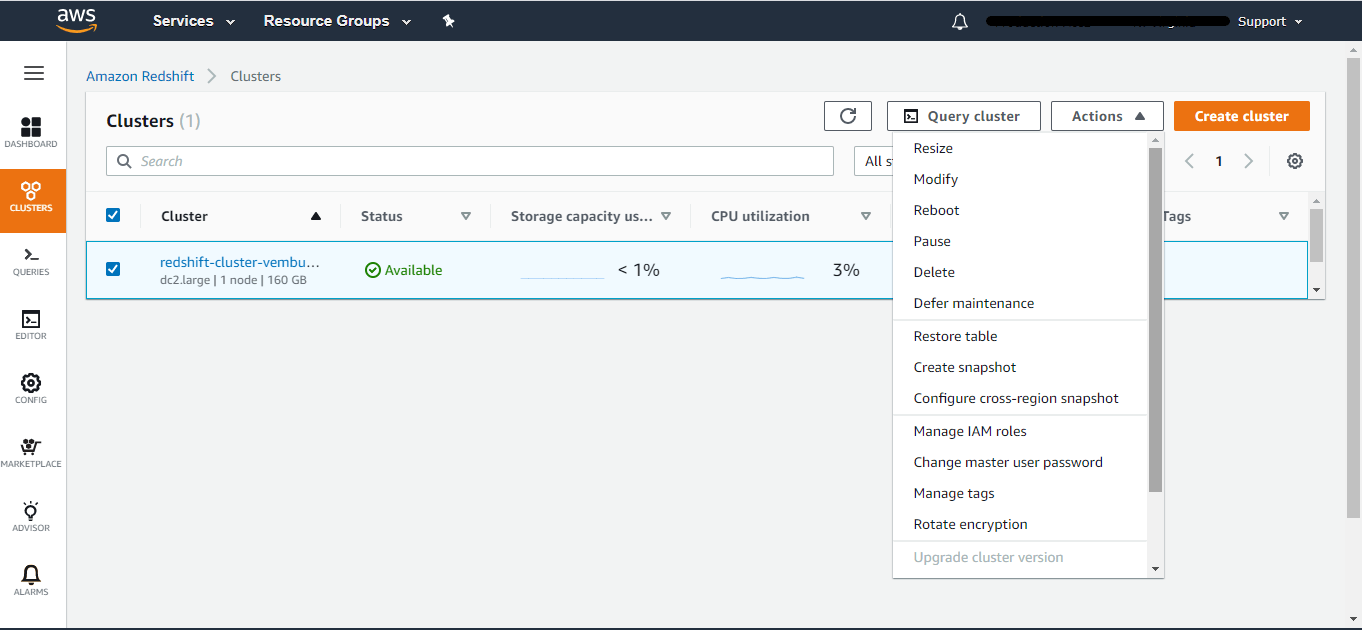
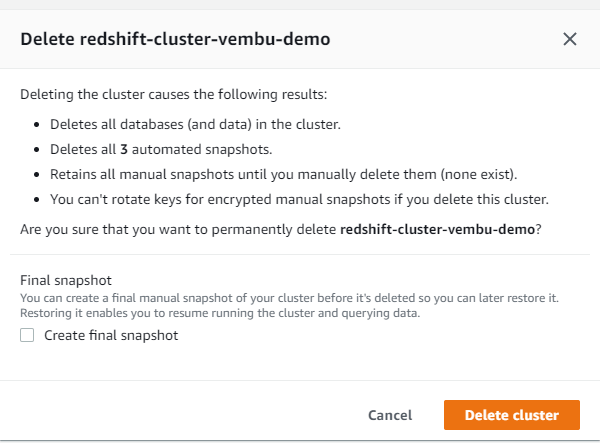
Deleting cluster – You can use the Actions tab to Delete your cluster. On clicking cluster, you will be asked to confirm the delete process. You can also take a final snapshot of the cluster if required.
Conclusion :
AWS Redshift is an excellent solution for data warehousing. Compared with other data warehousing competitive products AWS Redshift is a frugal solution and allows you to store even a mid-level company to afford it to store entry-level data. It is extremely powerful and scalable and provides high-performance throughput. Some of the readily available management points such as automated backup, fault tolerance, and flexibility on upscaling the data storage of clusters on-demand are pretty much useful for a database administrator. Integration with third-party tools, security features such as network isolation, end to end encryption provides a massive advantage over the competitive products.
Follow our Twitter and Facebook feeds for new releases, updates, insightful posts and more.