
PowerShell for Hyper-V – why?
While the Hyper-V management console is great and works fine, sometimes, it is important to automate some tasks. If you work with Virtual Machine Manager, then you are able to automate some actions, which is great. But, if you only work with the Hyper-V Manager console, then you will need to use Windows PowerShell to automate several tasks. The Hyper-V console is limited because it only allows you to work on a single VM at a time, unlike PowerShell which you can use to interact with multiple machines simultaneously.
In some cases, you have no option other than using PowerShell because Microsoft does not automatically include all the features of Hyper-V in the GUI. So, there are a handful of PowerShell cmdlets that can make your life easier and especially when you want to deploy a new Virtual Machine on Hyper-V.
Even if you deploy one Virtual Machine per week, or may be 10 Virtual Machines per day, it is important to know how to automate this process in order to save time in your day-to-day tasks.
It is not exactly a secret that Windows PowerShell can be used to create and configure Hyper-V Virtual Machines!
So, in this article, I will use PowerShell to create and configure a new VM in the following steps,

- First, I will describe how to create the Virtual Machine using the New-VM cmdlet which is the very first step
- Then, I will configure the Virtual Machine using the Set-VM cmdlet in order to configure the memory, the processor, and so on…
- Next, I will attach a disk to this new Virtual Machine
- To finish, I will add a network adapter to this VM
For those of you who want to learn PowerShell Scripting, I advise you to read this article https://www.bdrsuite.com/blog/beginning-learn-powershell-scripting/ written by Brandon Lee.
Create a Virtual Machine
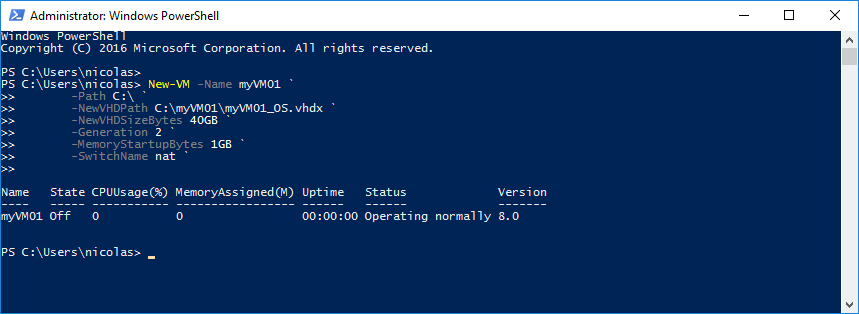
Let’s start this article by creating a new Virtual Machine. It is not a complex task but we have to start with this step. To create a Virtual Machine using PowerShell, you can run the New-VM PowerShell cmdlet as below:
New-VM -Name
-Path
-NewVHDPath
-NewVHDSizeBytes
-Generation
-MemoryStartupBytes
-SwitchName
Generation 2 provides the following new functionality on a Virtual Machine:
- PXE boot by using a standard network adapter
- Boot from a SCSI virtual hard disk
- Boot from a SCSI virtual DVD
- Secure Boot (enabled by default
- UEFI firmware support
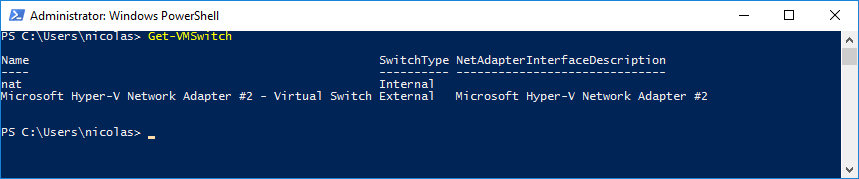
When a VMSwitch is linked to a Physical Network Adapter, then VMs will use this VMSwitch to be connected to the network; so we must identify which one will be used. If you don’t know your Hyper-V Switch Name, you can get the information with the Get-VMSwitch cmdlet.
Now, you can confirm if the Virtual Machine exists in the Hyper-V management console:

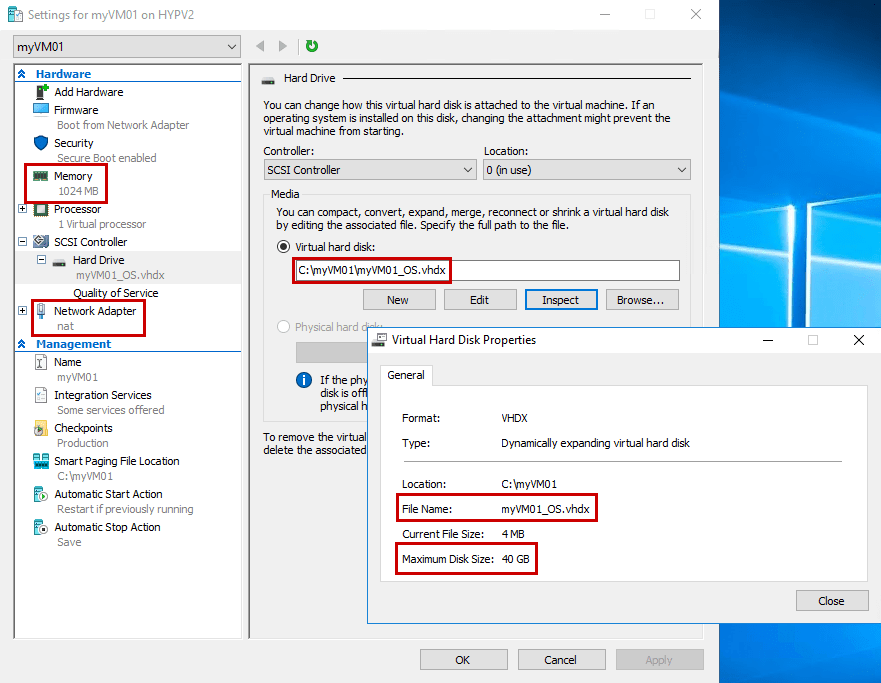
The Virtual Machine has been successfully created. Note that the Virtual Machine is not running by default which is nice because the Virtual Machine is not fully configured. And you also can confirm the settings:
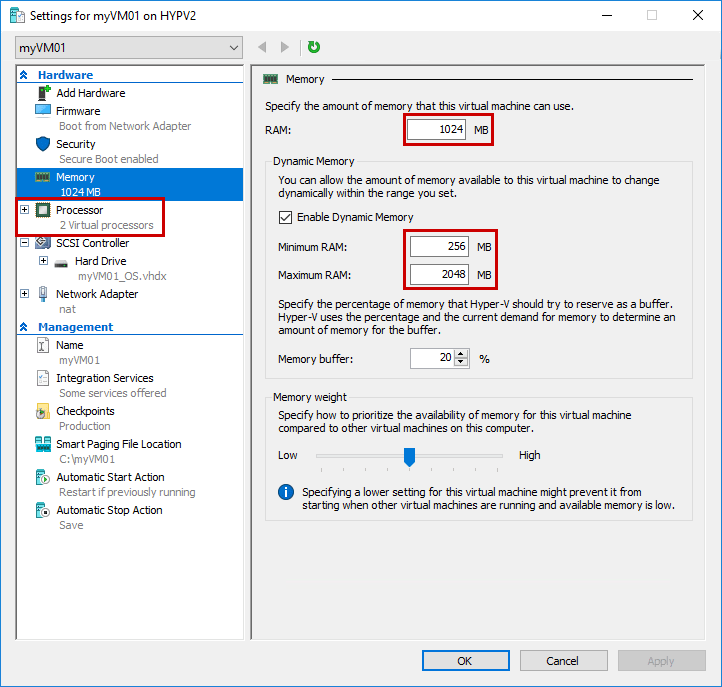
Configure a Virtual Machine
Great! At this step, the VM is created. We need to configure some settings to suit our needs. In this example, I will configure the VM with 2 processors, and to use the Dynamic Memory feature.
Note: Dynamic memory allows the amount of memory available to this VM to change dynamically within the range you set. In my case, I will set the range between 256MB and 2048MB.
Set-VM -Name
-ProcessorCount
-DynamicMemory `
-MemoryMinimumBytes
-MemoryStartupBytes
-MemoryMaximumBytes
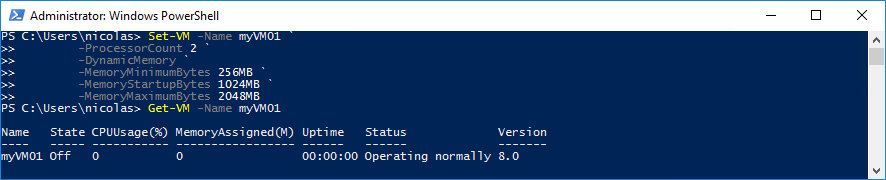
Open the settings and confirm the new settings applied with PowerShell:
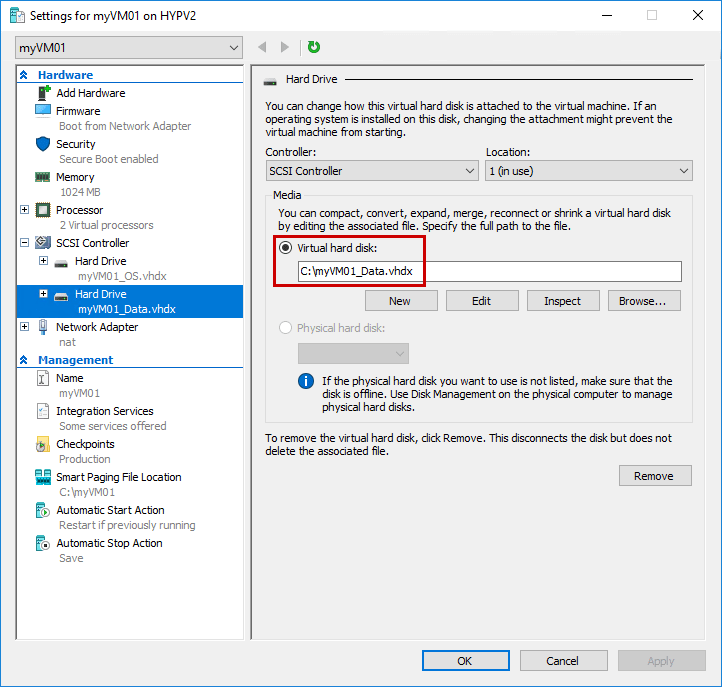
Manage VM Storage
You will probably need to attach an existing disk to this Virtual Machine. Using the Add-VMHardDiskDrive cmdlet, you can easily attach a disk. Below is the syntax:
Add-VMHardDiskDrive -VMName
-Path

Once again, confirm if the data disk has been attached:
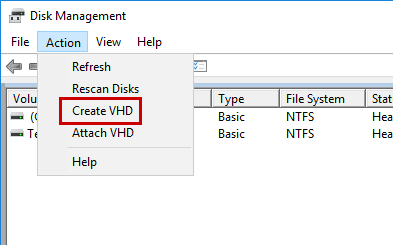
If you want to create easily an empty VHDX disk, you can use the disk management MMC. Go to the action pane, and click ‘Create VHD’:
Add the name and the location of your disk, select the format between VHD and VHDX, and the disk type between Thick and Thin:
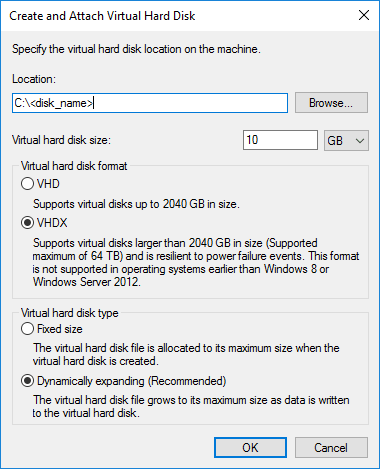
Virtual hard disks with the .VHDX format can be as large as 64 terabyte (TB), whereas virtual hard disks with the .VHD format are limited to 2 TB.
Of course, you can create a new VHD using PowerShell.
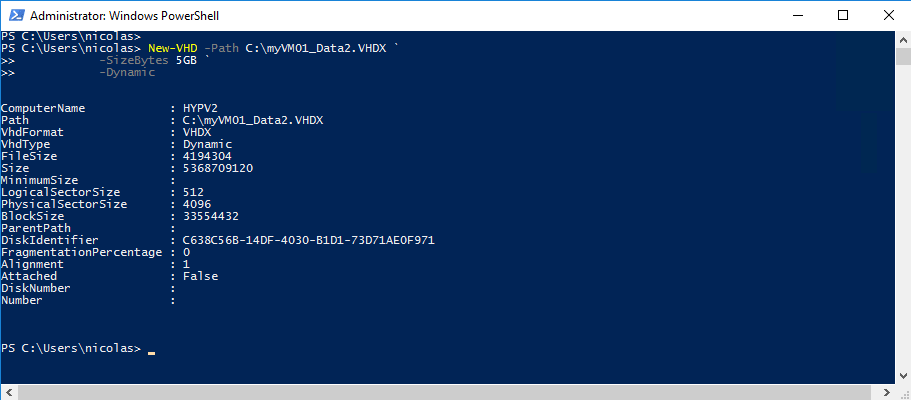
To create a new VHD(X) you can use the New-VHD cmdlet as below:
New-VHD -Path
-SizeBytes
-Dynamic
- Path: Path to the VHDX file
- SizeBytes: Size of the VHDX
- Dynamic: Dynamic or fixed VHDX
Manage VM Network
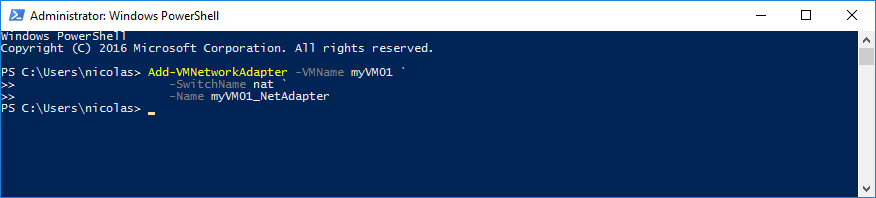
Here is the final step. The VM is created, configured; a data disk has been attached, so we may need to create a new network adapter. To add a new network adapter, you can run the following command:
Add-VMNetworkAdapter -VMName
-SwitchName
-Name
- VMName: Name of the VM
- SwitchName: Name of the VM Switch to connect to
- Name: Name of the network adapter
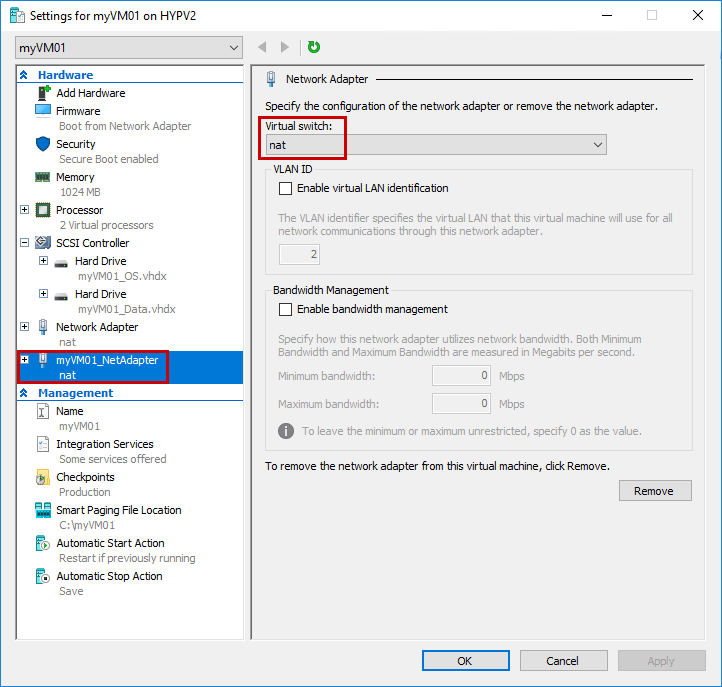
Let’s confirm if the new network adapter exists on the Virtual Machine. In this example, the default network adapter should be removed from the Virtual Machine, except if you want to bind two NIC on your Virtual Machine.
Thanks to all these previous steps, you are now able to write a full script to create Virtual Machine. There are a lot of parameters that can be customized. Don’t forget to use the Get-Help cmdlet to get more information about these cmdlets to suit your needs.
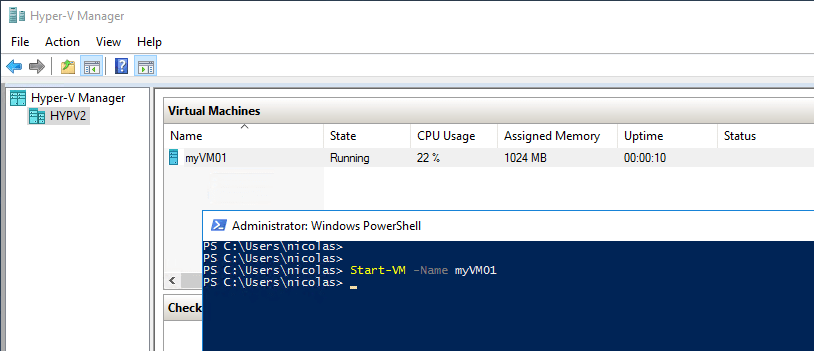
Finally, your Virtual Machine can be powered on with the Start-VM cmdlet:
After deploying a fresh Virtual Machine, it could be interesting to create a Hyper-V Checkpoint in order to revert to the initial configuration in case the VM crashes! To create a checkpoint, select the virtual machine using the Get-VM cmdlet and pipe this to the Checkpoint-VM cmdlet:
Get-VM -Name myVM01 | Checkpoint-VM -SnapshotName ‘Initial_Config’
You can easily view the checkpoints with the Get-VMCheckpoint cmdlet.
As you may notice, automating the provisioning process is not a big deal. Please note, that you also can automate the provisioning process for your Hyper-V host. Let’s imagine you deploy many Hyper-V hosts per week, you can easily automate the creation using PowerShell. You also can retrieve information about your Hyper-V host using the Get-VMHost cmdlet:
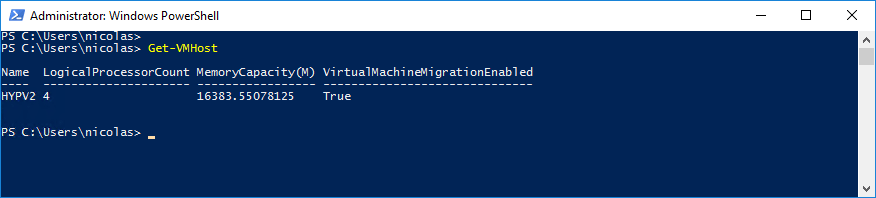
Don’t forget to pipe this command to the Format-List cmdlet. It also pays to update the help files before you begin with Hyper-V and PowerShell.
Update-Help -Module Hyper-V
Conclusion
All these steps can be merged in a single PowerShell Script that you can run when you want to deploy a new Virtual Machine. Thanks to these steps, your script will create and configure entirely your Virtual Machine without human interaction. One of the great things about Windows PowerShell is that it allows VMs to be managed in bulk mode. So you must use PowerShell to save time, and automate boring tasks.
For those of you who work on VMware ESXi, note that you can perform the same steps using VMware PowerCLI. Read this article to install PowerCLI on your machine: https://www.bdrsuite.com/blog/vmware-powercli-10-0-release-and-installation/
Follow our Twitter and Facebook feeds for new releases, updates, insightful posts and more.