
What is Amazon Elastic Container Service ECS?
Amazon Elastic Container Service (ECS) is yet another service from AWS Cloud that deploy, manage, and scale Docker containers that allow developers to run applications in the cloud without having to configure an environment for the code they wish to run. In a nutshell, a Docker container image is a lightweight, standalone, executable package of software that includes everything needed to run an application: code, runtime, system tools, system libraries, and settings.
Generally in AWS ECS, Docker containers are running in clusters, meaning a group of Docker containers communicating with each other through software application calls (APIs) and custom task definitions. Amazon ECS places containers across the cluster based on your resource needs and is integrated with familiar features like Elastic Load Balancing, EC2 security groups, EBS volumes, and IAM roles.
How to access Amazon ECS?
If you have an AWS account, you can access ECS from the management console. Elastic Container Service is available under Service → Container or you can access from the URL
https://console.aws.amazon.com/ecs, and you can select the region where you want to deploy ECS.
For the first time user, use the “Get Started” icon to start deploying your Docker container cluster.

Click “Get Started” icon for the first run
Getting Started with Amazon Elastic Container Service (Amazon ECS) using Fargate
This contains four steps viz
- Step 1: Container and Task
- Step 2: Service
- Step 3: Cluster
- Step 4: Review
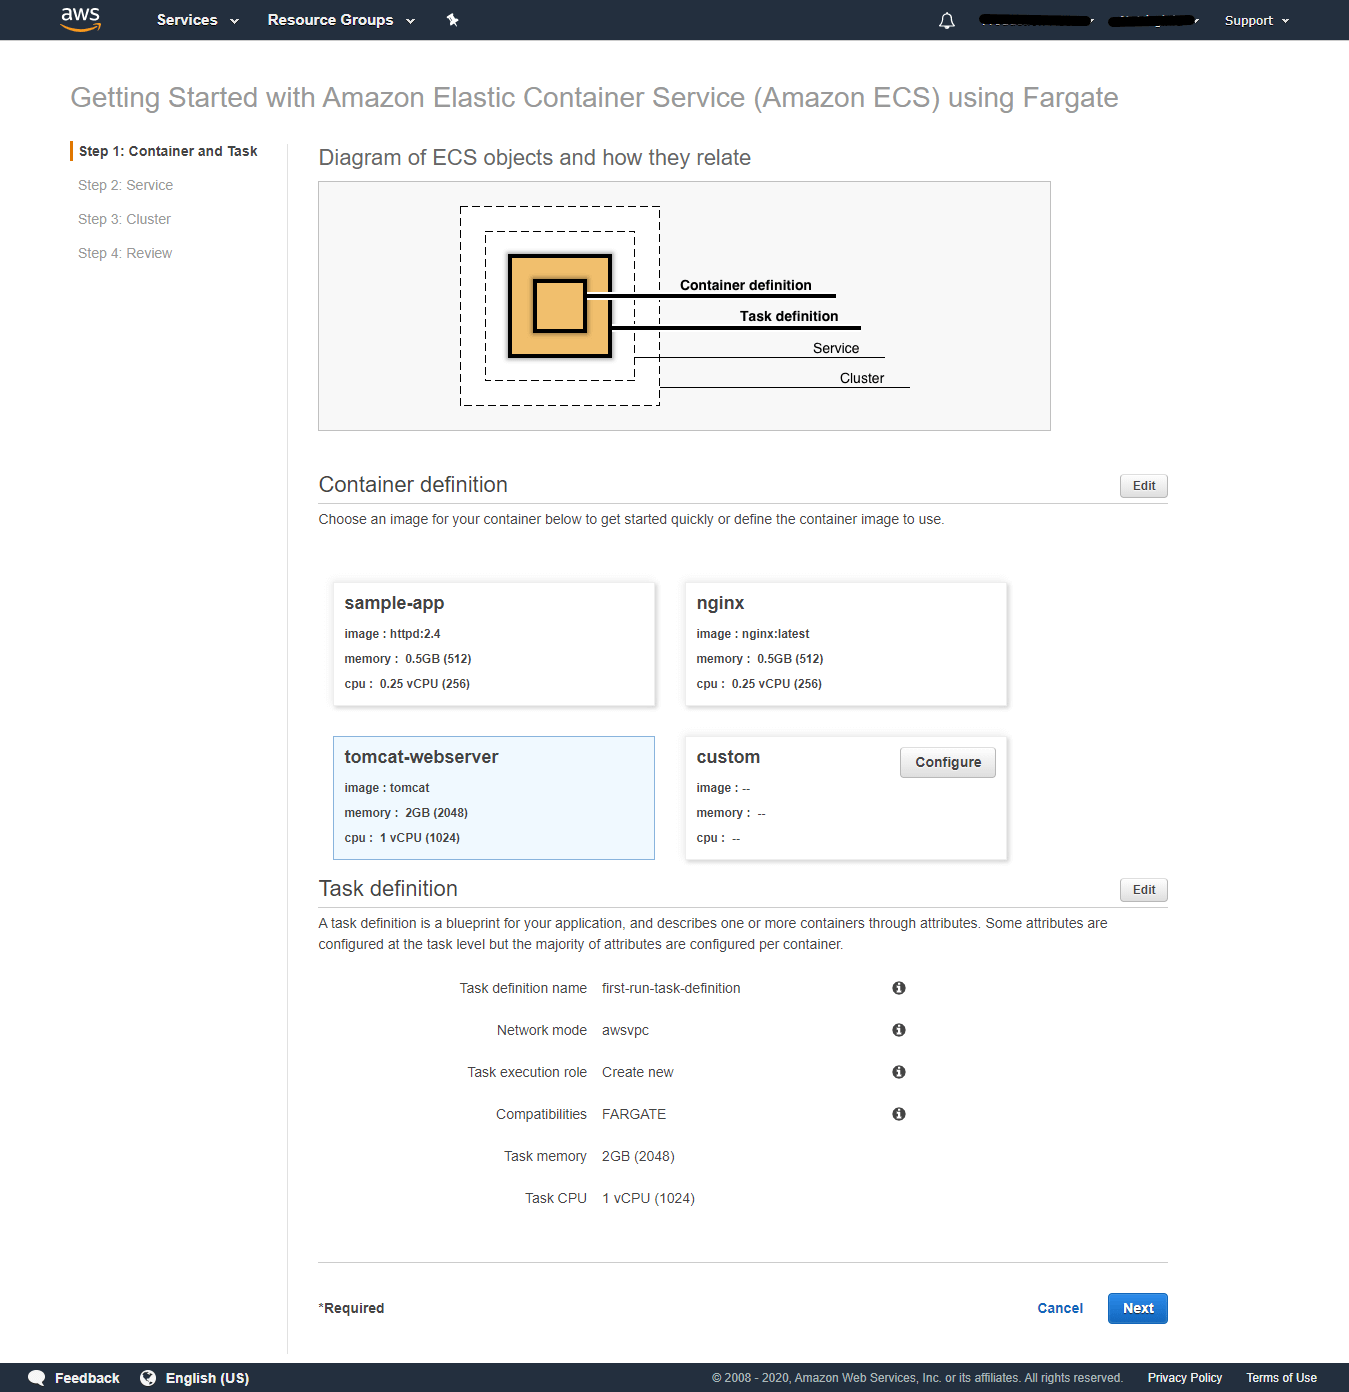
Step 1: Container and Task
In this step, you are asked to choose the container image or configure a custom container and provide details for the task definition. A task definition is a blueprint for your application and describes one or more containers through attributes. Some attributes are configured at the task level but the majority of attributes are configured per container.
Available attributes to be configured before creating a container from the image are :
- Task definition name – The name of your task definition.
- Network mode – The Docker networking mode to use for the containers in the task.
- Task execution role – The IAM role used by your task
- Compatibilities – The launch type to use with your task.
- Task memory – Initial allocation of memory to the container
- Task CPU – Initial allocation of vCPU to the container.
In this step, we are selecting tomcat web server image, Click Next to continue
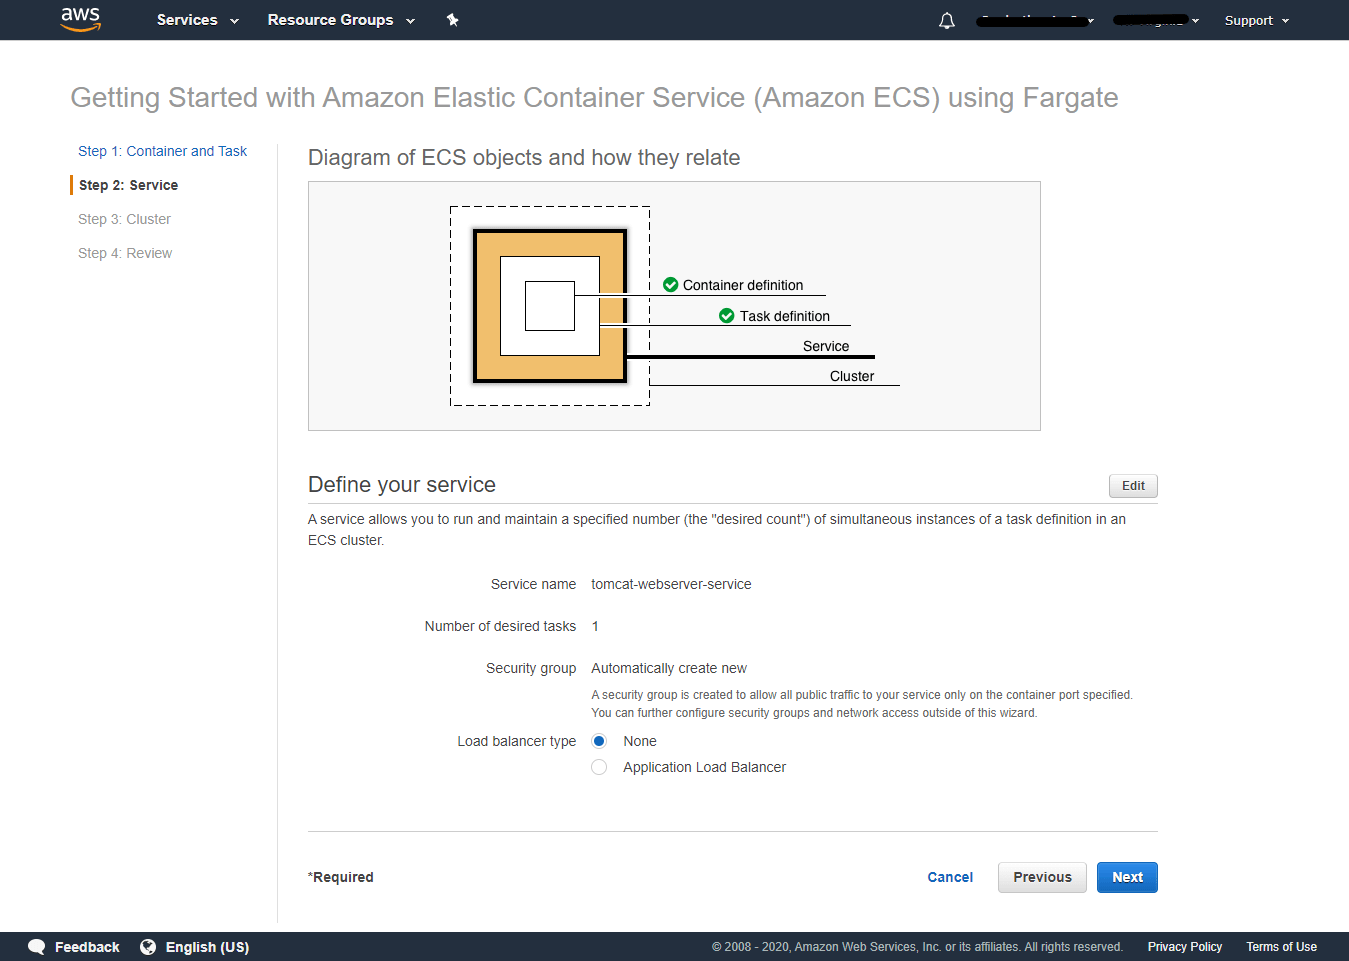
Step 2: Service
In this step, you are defining your Service offered by the container you are creating. A service allows you to run and maintain a specified number (the “desired count”) of simultaneous instances of a task definition in an ECS cluster.
- Service Name – Provide a service name that the container offers. Example tomcat-webserver-service
- Number of desired tasks – 1
- Security Group – A security group is created to allow all public traffic to your service only on the container port specified. You can further configure security groups and network access outside of this wizard. Recommended to create a new security group automatically.
- Load balancer type – You can choose None or Application load balancer.
By clicking edit, you can modify these settings.
Note: If you do not use a load balancer ( If you choose None ), a security group is created to allow all public traffic to your service ONLY on the container port specified. If you use an Application Load Balancer, two security groups are created to secure your service: An Application Load Balancer security group that allows all traffic on the Application Load Balancer port and an Amazon ECS security group that allows all traffic ONLY from the Application Load Balancer security group.
When you choose Application load balancer, additionally you need to configure load balancer listener port and health check path as shown below
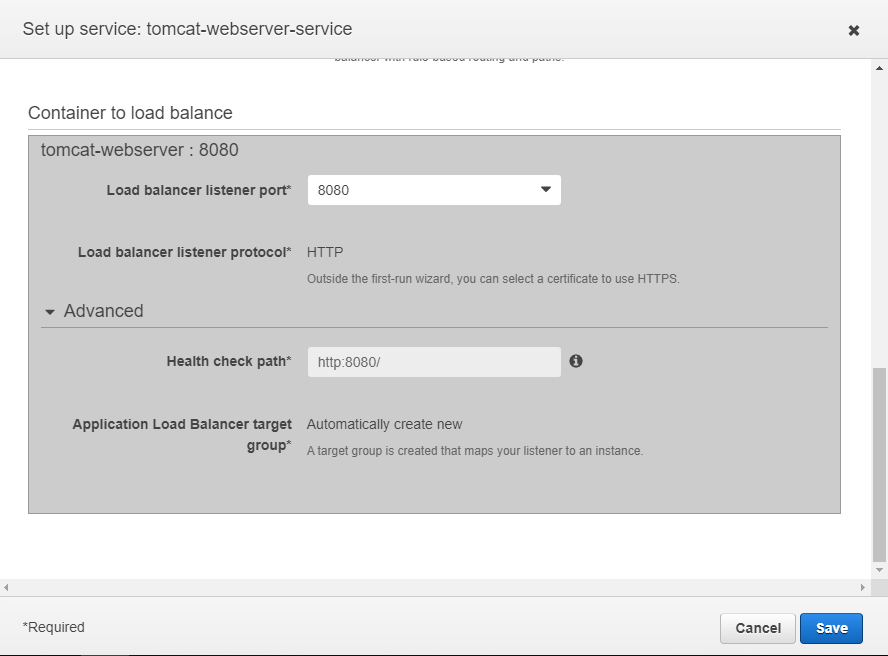
In our case, we are not choosing Application load balancer, so selected None for Load balancer type and click Next to continue
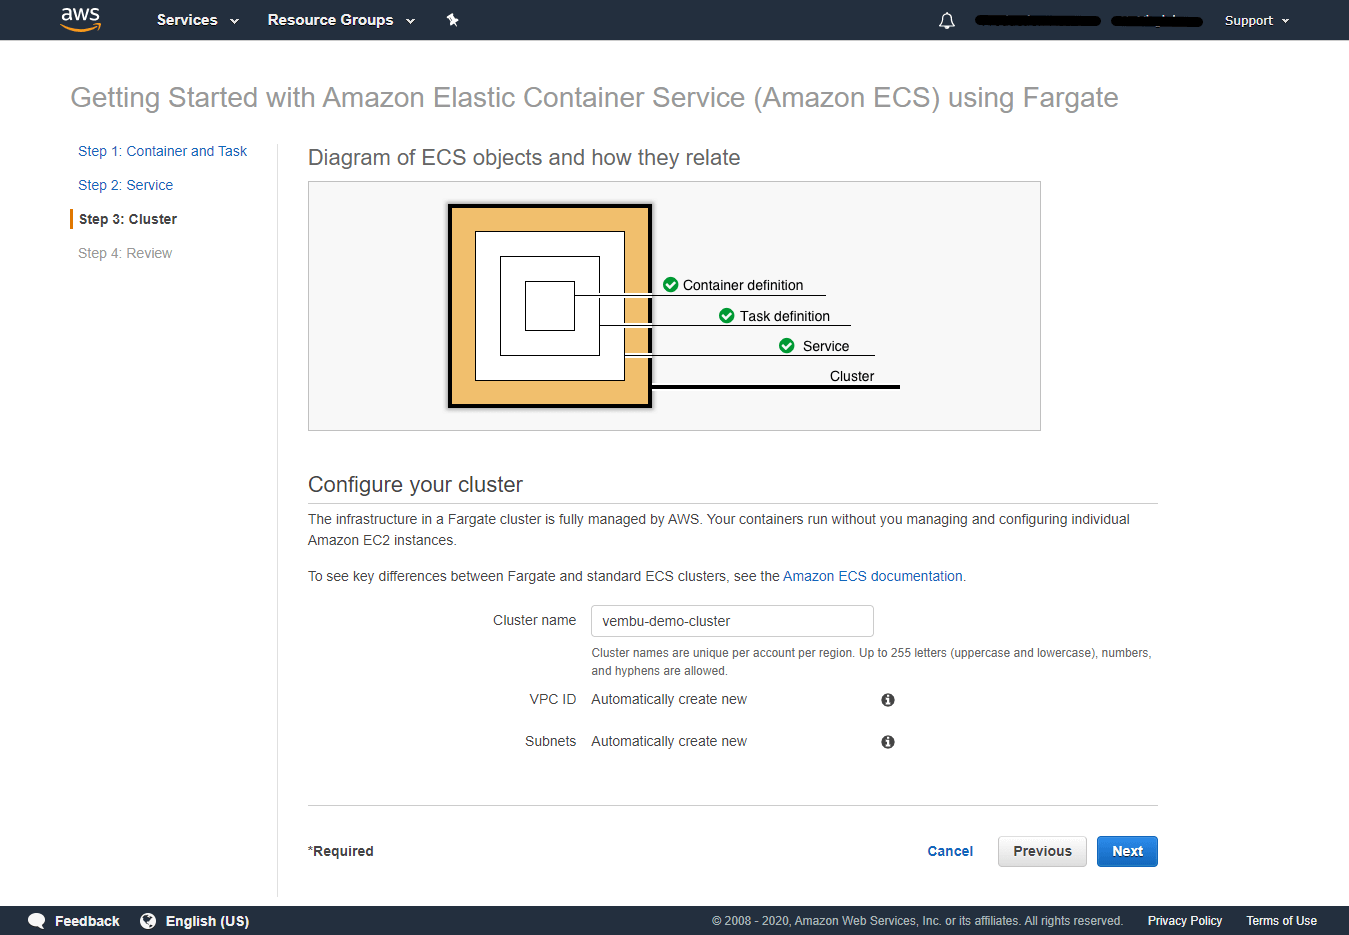
Step 3: Cluster
In this step, you are configuring cluster settings.
Provide a cluster name – Cluster names are unique per account per region. Up to 255 letters (uppercase and lowercase), numbers, and hyphens are allowed. Here the cluster name is vembu-demo-cluster
VPC ID – The ID of the VPC to be used by the container. Create a new VPC ID automatically
Subnets – The ID of the subnet to be used by the container. A subnet is a range of IP addresses in a VPC. Create a new subnet automatically.
Click Next to Continue
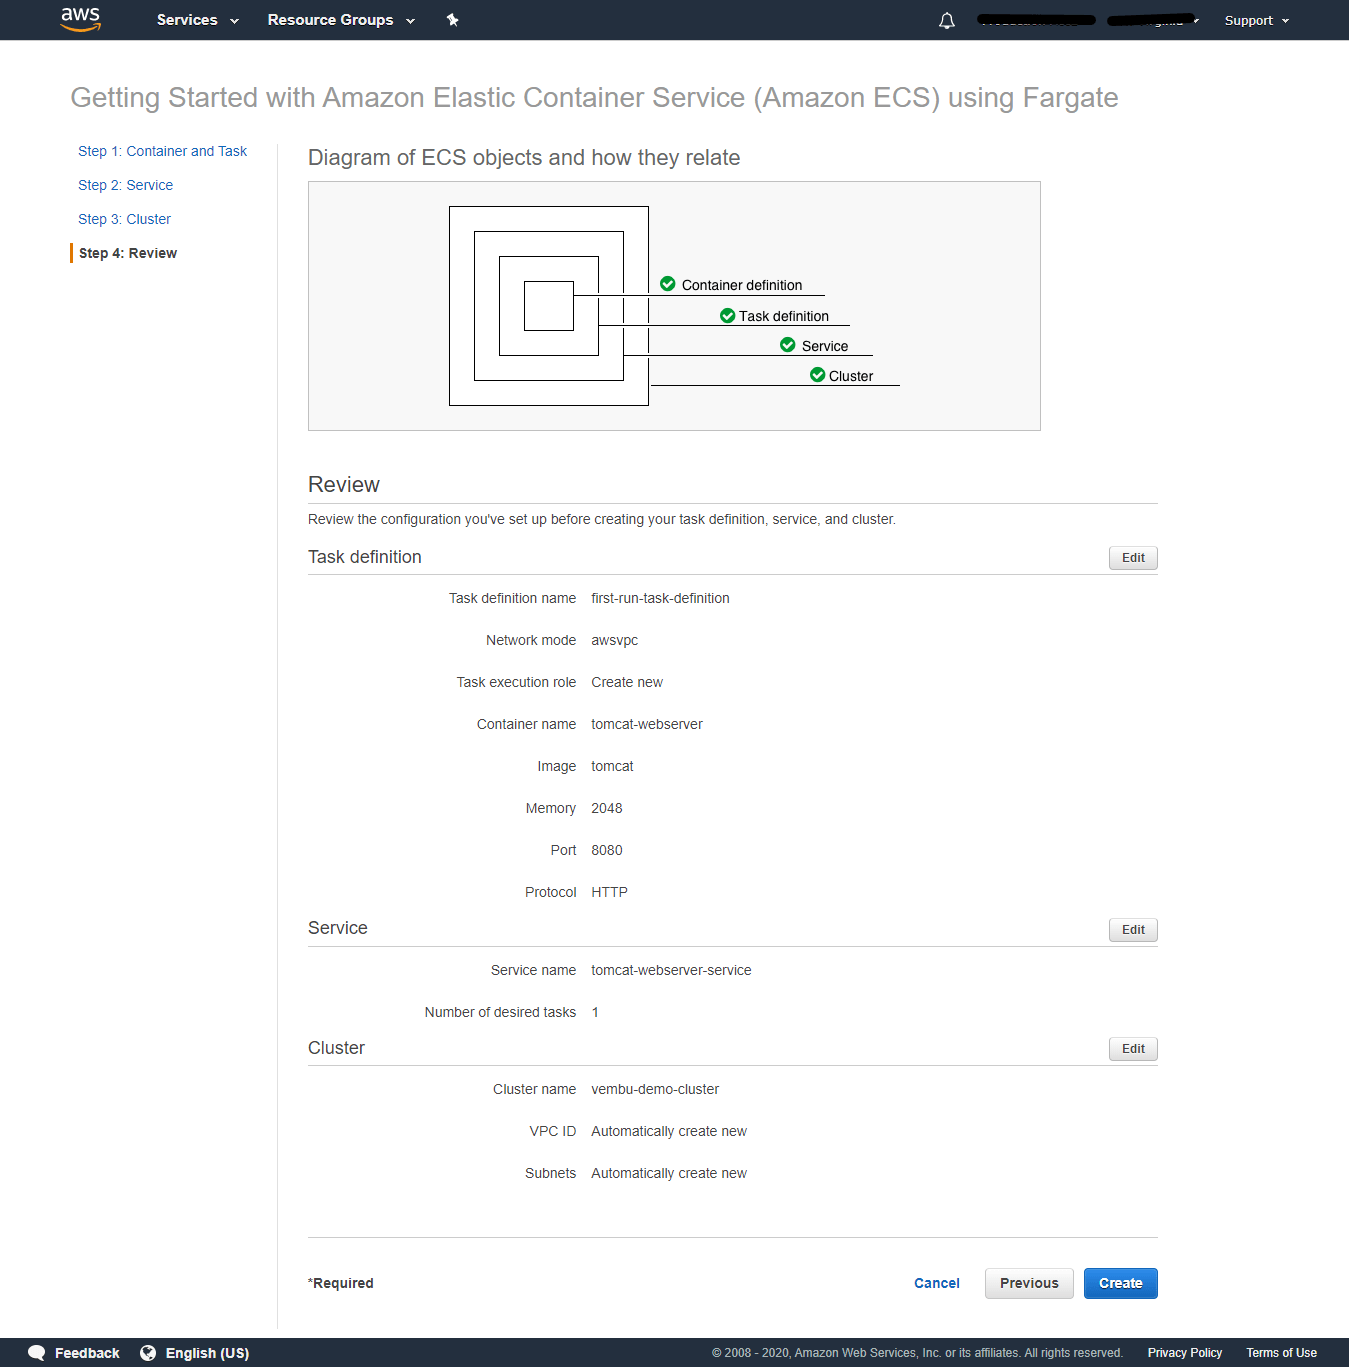
Step 4:Review
In this final step, review the configuration you’ve set up before creating your task definition, service, and cluster. Here you can edit the relevant portions of the settings created above and make final changes before creating the docker container cluster.
Click Create to Continue
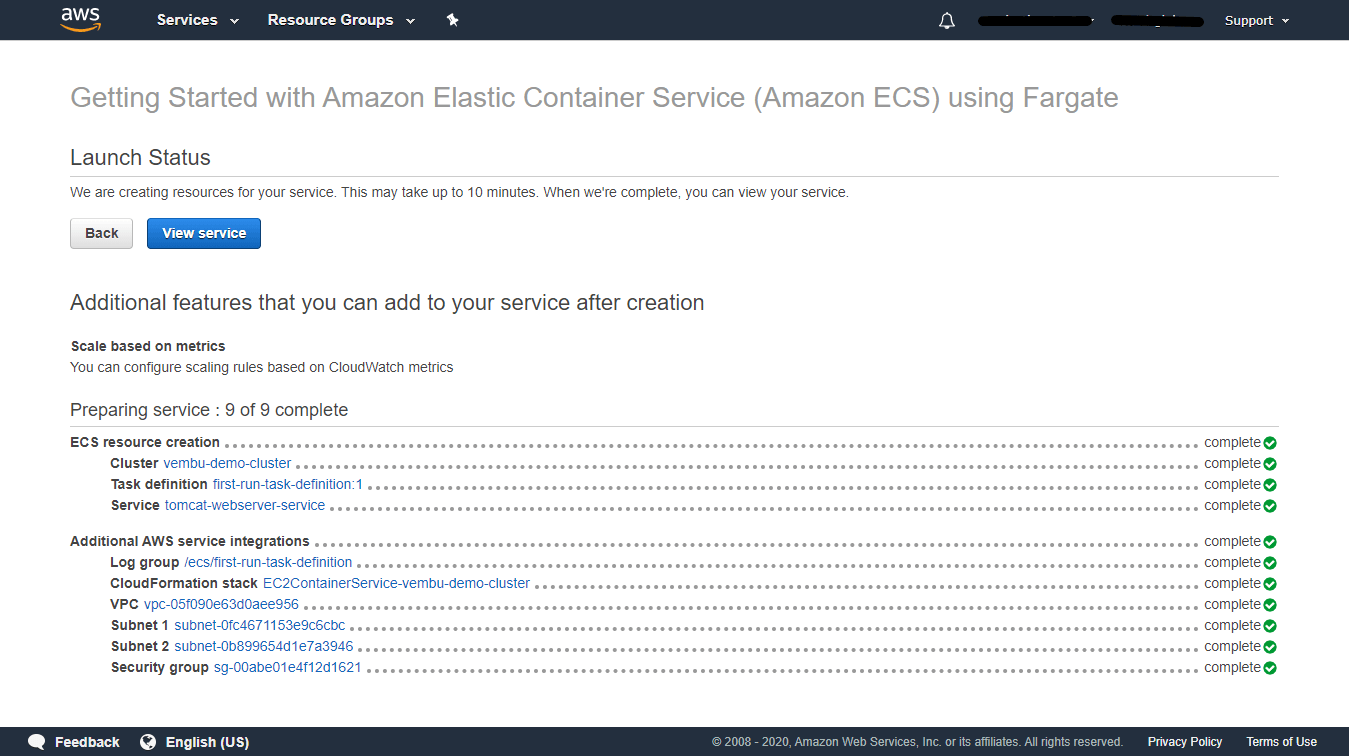
Launching a new ECS will take up to 10 minutes, once all resources have been created, you will get a complete notification of each resource as below. Then you can view the service by clicking the “View Service” icon.
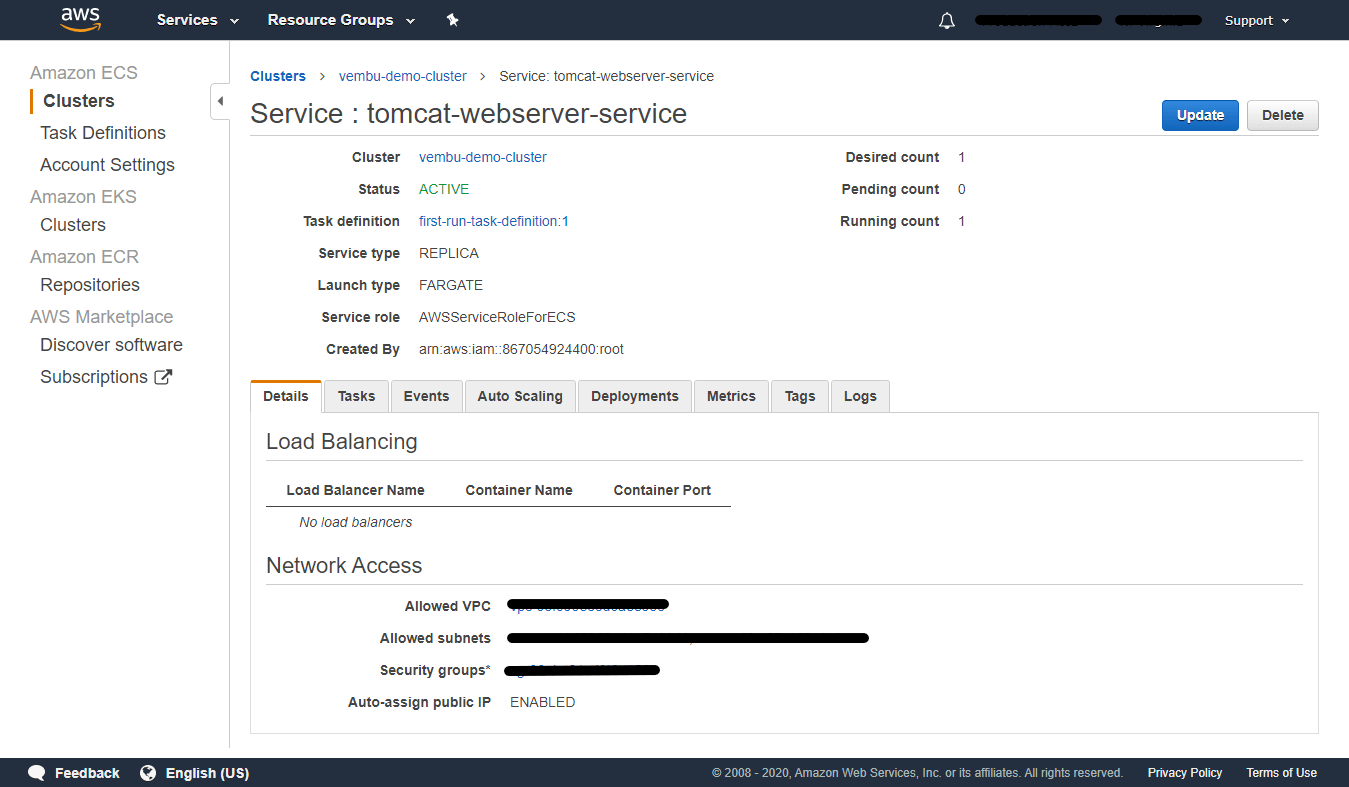
Cluster characteristics details
Once your cluster is created, you can view all the characteristics of the cluster in separate tabs.
Cluster details:
This tab provides detailed information of the cluster, such as status, load balancing details, allowed VPC, allowed subnets, and security group details.
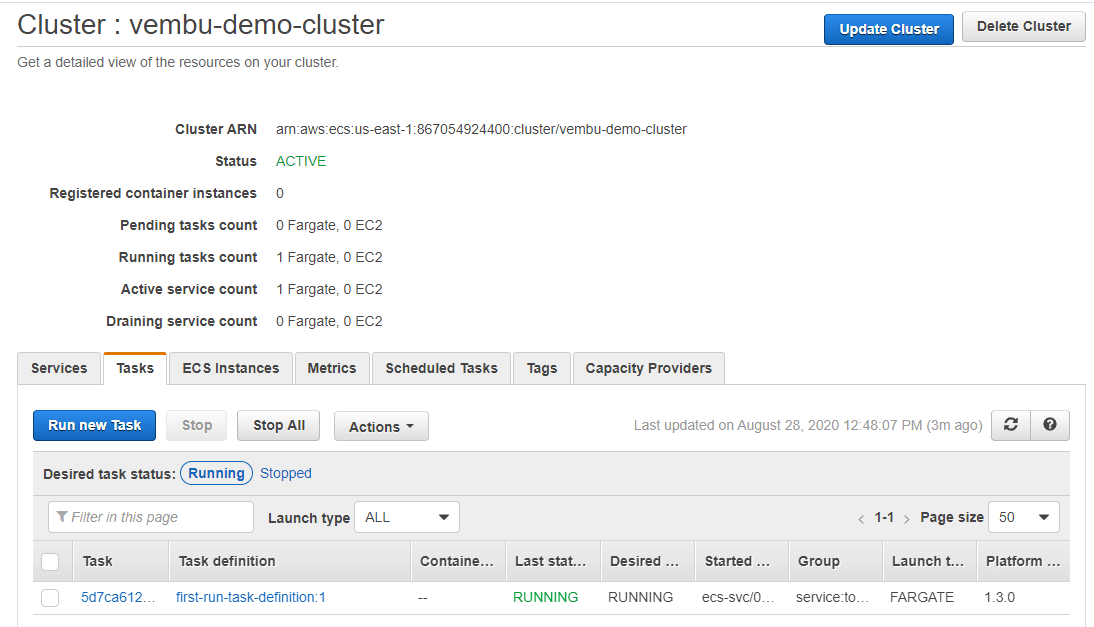
Cluster tasks:
To prepare your application to run on Amazon ECS, you create a task definition. The task definition is a text file, in JSON format, that describes one or more containers, up to a maximum of ten, that form your application. It can be thought of as a blueprint for your application. Each task has its own task ID, task definition, and running status. You can stop and start the running task anytime from this page. You can also create a new task definition. Task definitions specify the container information for your application, such as how many containers are part of your task, what resources they will use, how they are linked together, and which host ports they will use
Cluster ECS Instances – In this tab, you can add additional ECS Instances using Auto Scaling or Amazon EC2 to this cluster.
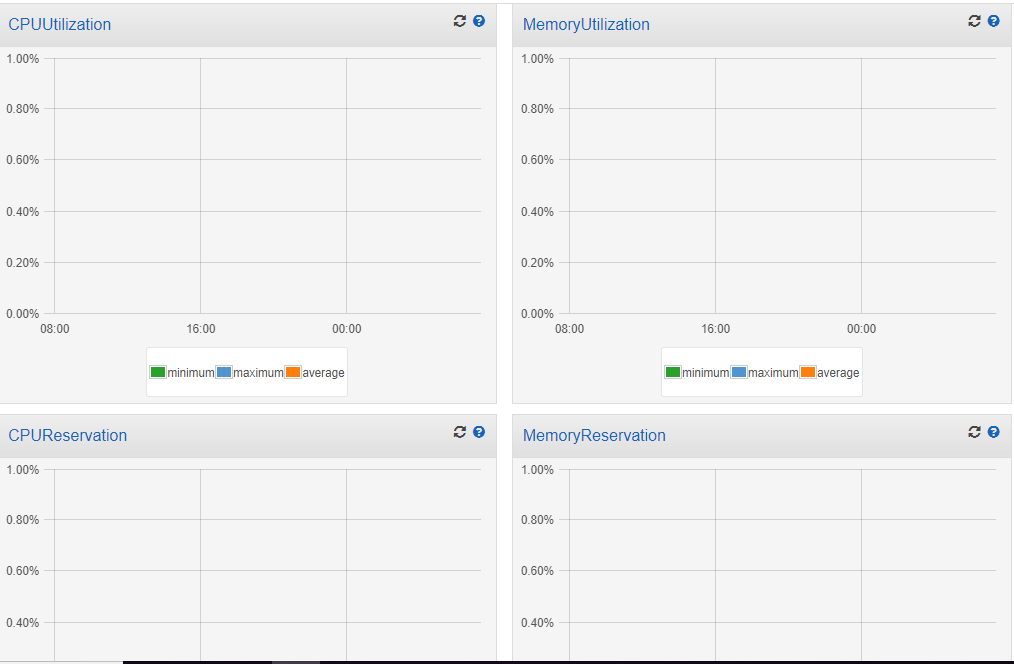
Cluster Metrics – In this tab, you have a graphical representation of CPU utilization, Memory utilization, CPU reservation, and Memory reservation with the minimum, maximum, and average load points.
Cluster scheduled tasks: Amazon ECS allows you to create your own schedulers that meet the needs of your business, or to leverage third-party schedulers. The service scheduler is ideally suited for long-running stateless services and applications. The service scheduler ensures that the scheduling strategy you specify is followed and reschedules tasks when a task fails (for example, if the underlying infrastructure fails for some reason).
Cluster capacity providers – A capacity provider is used in association with a cluster to determine the infrastructure that a task runs on. When creating a capacity provider, you specify the following details: An Auto Scaling group Amazon Resource Name (ARN) Whether or not to enable managed scaling. When managed scaling is enabled, Amazon ECS manages the scale-in and scale-out actions of the Auto Scaling group through the use of AWS Auto Scaling scaling plans. When managed scaling is disabled, you manage your Auto Scaling groups yourself.
Deleting a cluster – You can delete an Amazon ECS service using the console. Before deletion, the service is automatically scaled down to zero. If you have a load balancer or service discovery resources associated with the service, they are not affected by the service deletion.
Use the following procedure to delete an Amazon ECS service.
- Open the Amazon ECS console at https://console.aws.amazon.com/ecs/.
- On the navigation bar, select the Region that your cluster is in.
- In the navigation pane, choose Clusters and select the name of the cluster in which your service resides.
- On the Cluster: name page, choose Services.
- Check the box to the left of the service to update and choose Delete.
- Confirm the service deletion by entering the text phrase “delete me” and choose Delete.
Conclusion :
Amazon Elastic Container Service makes it easy for you to focus on building your applications. It removes the need to provision and manage servers, lets you specify and pay for resources per application, and improves security through application isolation by design. It allocates the right amount of computing, eliminating the need to choose instances and scale cluster capacity. You only pay for the resources required to run your containers, so there is no over-provisioning and paying for additional servers. For any DevOps engineer, setting up an Amazon Elastic Container Service is pretty easy and straightforward to manage.
Follow our Twitter and Facebook feeds for new releases, updates, insightful posts and more.