Step-by-Step Guide: Deploying Vembu BDR Virtual Appliance for Efficient Data Backup and Recovery
KB ID : 37
Purpose
To deploy Vembu BDR server virtual appliance in VMware virtual environment.
Solution
To import OVF file to VMware ESXi host, follow below steps
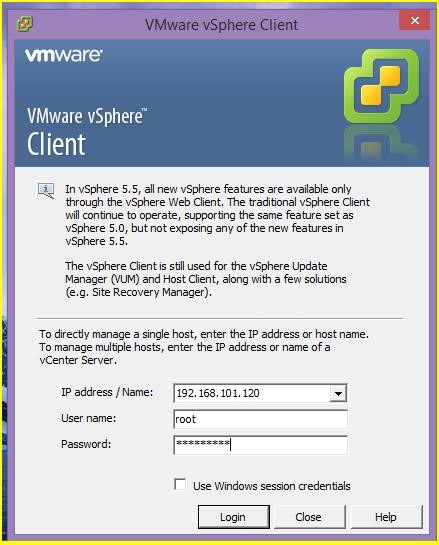
- Login ESXi server from the vSphere client
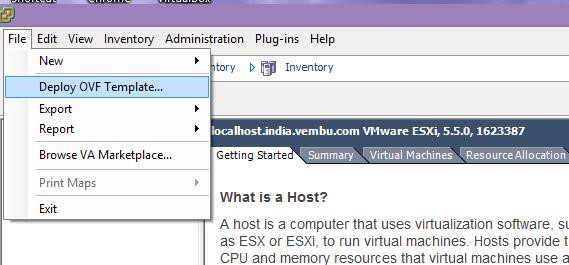
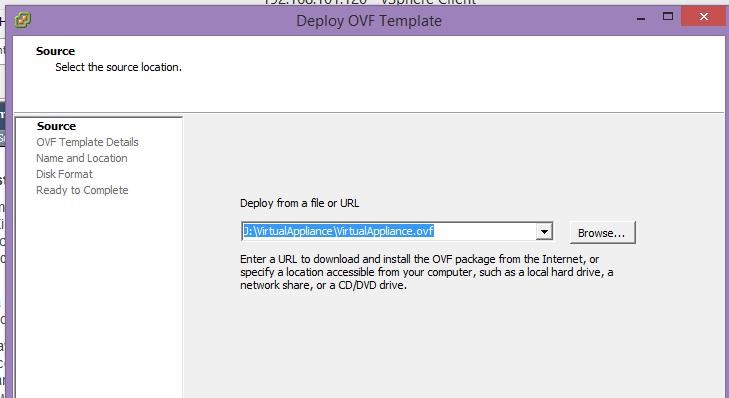
- Go to File > Deploy OVF template, browse and select the OVF file.
- Select the required options to launch virtual machine.
- Then click next.
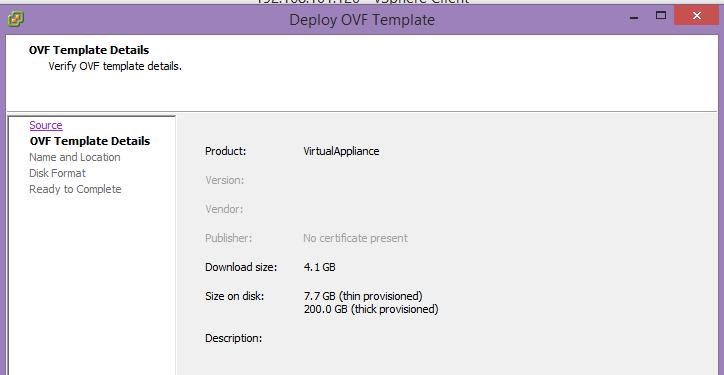
- OVF template details are shown this page. Click the next button.
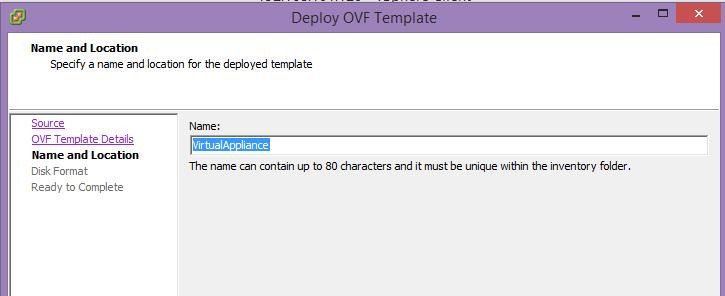
- Give the virtual appliance name to create an EXSi host machine.
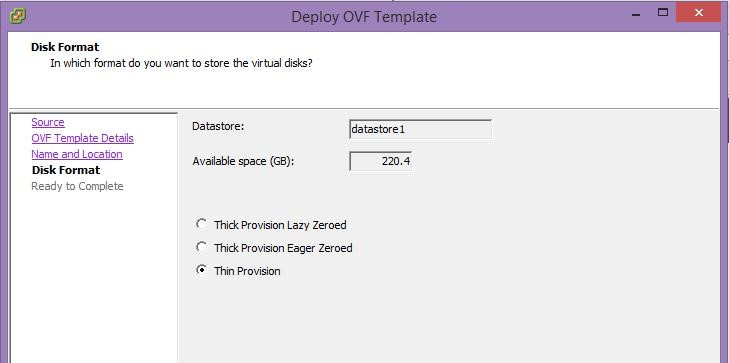
- Here select the hard disk type as thin or thick.
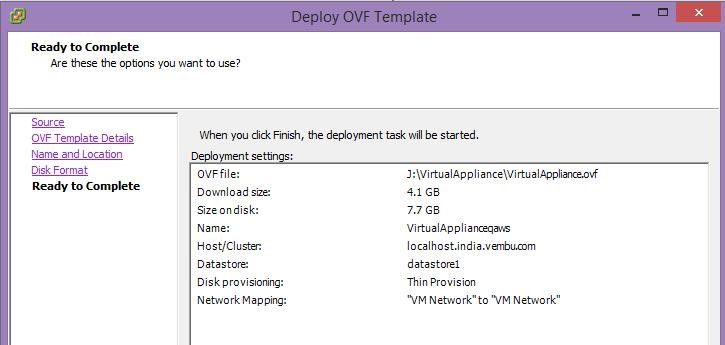
- Click finish and check if the deployment has started in the ESXi server
Default User details: User name: root Password: password
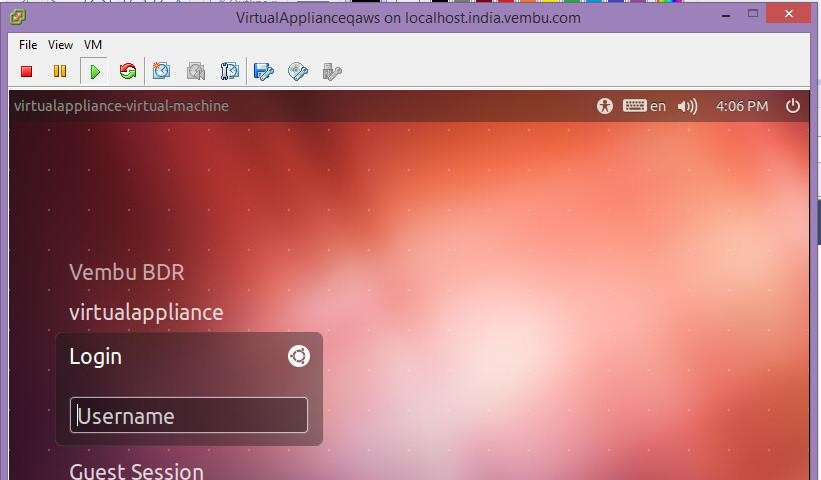
- Once the deployment is completed successfully, try logging in the virtual machine with the given username and password.
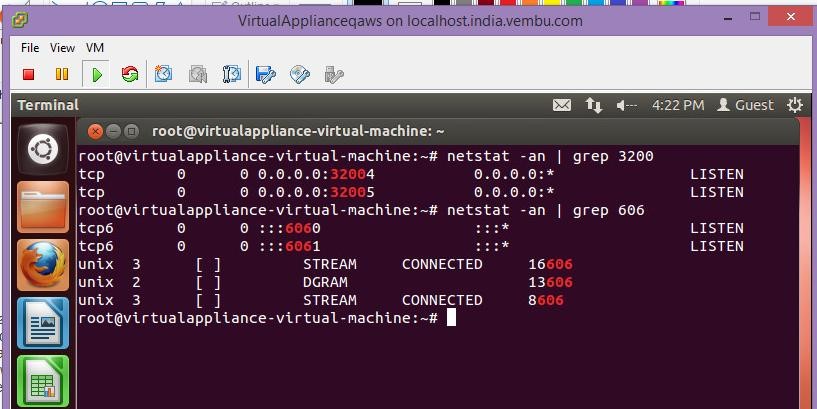
- Open terminal to verify if Mysql, Mongo and Vembu BDR services have started.
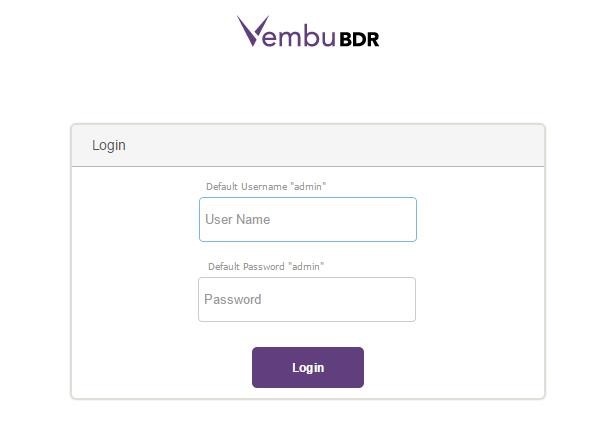
- Then open any web browser(FireFox or Chrome) and browse (`https://localhost:6061`)
- Login Vembu BDR Backup Server web console with the given username and password
User name: admin Password: admin
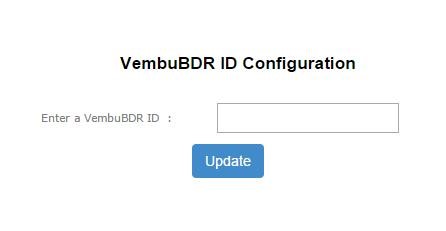
- Then select the time zone setting for this machine.
- Then enter the Vembu BDR ID
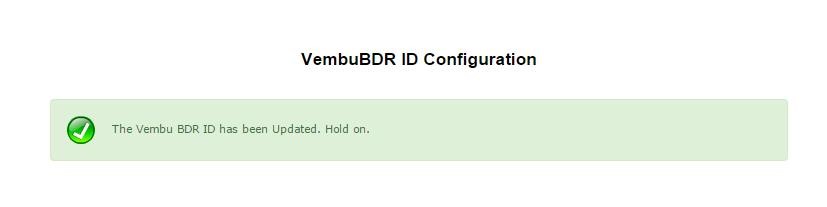
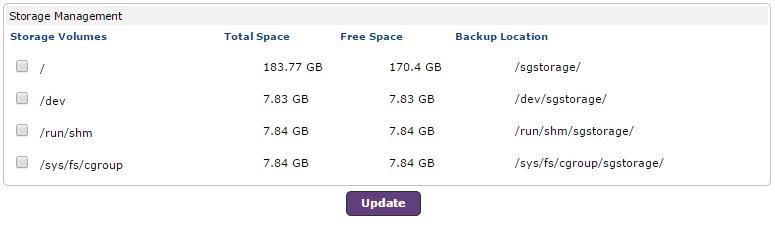
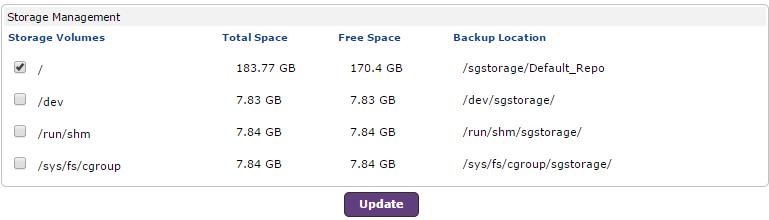
- Once Vembu BDR ID configuration successfully done after selecting the repository
- Once update the Repository
- From now on, configure a backup from the client end.
Limitation:KVM installation has some permission issues.Supported:This template can be deployed to ESXi server 6.0,5.5, and 5.1
Related Articles
Step-by-Step Guide: Restoring a Specific SQL Database from Image Backup for MS SQL Database Recovery
KB ID: 62 The need arises to restore a specific SQL Database from an Image Backup, specifically focusing on MS SQL Database recovery. Solution: Follow the steps below for the MS SQL DB Recovery: Step 1: Mount Vembu Virtual Drive and attach the VHD ...Mastering Exchange Mail Level Recovery: Step-by-Step Guide on Restoring Specific Emails from Disk Image Backup
KB ID: 63 Purpose: How To Restore Specific Emails From Disk Image Backup - Exchange Mail Level Recovery. Solution: To perform Mail Level Recovery from Disk Image Backup and restore specific emails, follow the steps below: Prerequisites: 1. Copy and ...Increasing Storage Space on Existing Volume - BDRSuite VMware Virtual Appliance
KB ID: 30 Objective: IT Administrators deploying BDRSuite Backup Server on VMware VM using the BDRSuite VMware Virtual Appliance often start with a 1 or 2 TB volume for storage. As data grows, there might be a need to expand the disk to accommodate ...Step-by-Step Guide: Setting Up Azure Data Box Gateway
KB ID: 115119 Purpose This guide provides step-by-step instructions to set up Azure Data Box Gateway. If you encounter any issues during the process, you can contact the support team at vembu-support@vembu.com. Solution Step 1: Prerequisites Before ...Vembu BDR v3.7 and Above Migration with PostgreSQL Server
KB ID: 115041 Objective: Guide users through the migration process of Vembu BDR server (utilizing PostgreSQL) from one machine to another in both physical and virtual environments. Source Machine (Machine A - Old Backup Server): A1: Stop the VembuBDR ...