
Table of Contents
Introduction
Google Cloud Platform offers storage as a separate service along with Compute Engine service. By default, each Compute Engine instance has a single boot persistent disk (PD) that contains the operating system. When your apps require additional storage space, you can add one or more additional storage options to your instance.
Cloud Storage is a flexible, scalable, and durable storage option for your virtual machine instances. You can read and write files to Cloud Storage buckets from almost anywhere, so you can use buckets as common storage between your instances, App Engine, your on-premises systems, and other cloud services.
Storage Options
Compute Engine offers several types of storage options for your instances. Each of the following storage options has unique price and performance characteristics:
- Zonal persistent disk: Efficient, reliable block storage
- Regional persistent disk: Regional block storage replicated in two zones
- Local SSD: High performance, transient, local block storage
- Cloud Storage buckets: Affordable object storage
- Filestore: High-performance file storage for Google Cloud users
In addition to the storage options that Google Cloud provides, you can deploy alternative storage solutions on your instances as mentioned below

- Create a file server or distributed file system on Compute Engine to use as a network file system with NFSv3 and SMB3 capabilities
- Mount a RAM disk within instance memory to create a block storage volume with high throughput and low latency
In this blog, we are concentrating on three major storage categories available in the GCP console, they are disks, snapshots, and images. These are very much essential when you work with VM instances and other relevant GCP storage services.
Disks
GCP offers below storage type persistent disks ( PD ). Persistent disks are durable network storage devices that your instances can access like physical disks in a desktop or a server. . Persistent disks are located independently from your virtual machine (VM) instances, so you can detach or move persistent disks to keep your data even after you delete your instances.
- Zonal standard PD – Efficient and reliable block storage
- Regional Standard PD – Efficient and reliable block storage with synchronous replication across two zones in a region
- Zonal balanced PD – Cost-effective and reliable block storage
- Regional balanced PD – Cost-effective and reliable block storage with synchronous replication across two zones in a region
- Zonal SSD PD – Fast and reliable block storage
- Regional SSD PD – Fast and reliable block storage with synchronous replication across two zones in a region
- Zonal extreme PD – Highest performance persistent block storage option
- Local SSDs – High-performance local block storage
- Cloud Storage buckets – Affordable object storage
In this section. We are describing how to create a disk in the GCP console and attaching the new disk to an existing VM instance.
- Login to the GCP console using a super administrator or administrator privileged user
- Create a new project or use an existing project where the disk attaching VM resides
- Choose Compute Engine → Disks under Storage section
- Click the create disk button as shown in the picture below
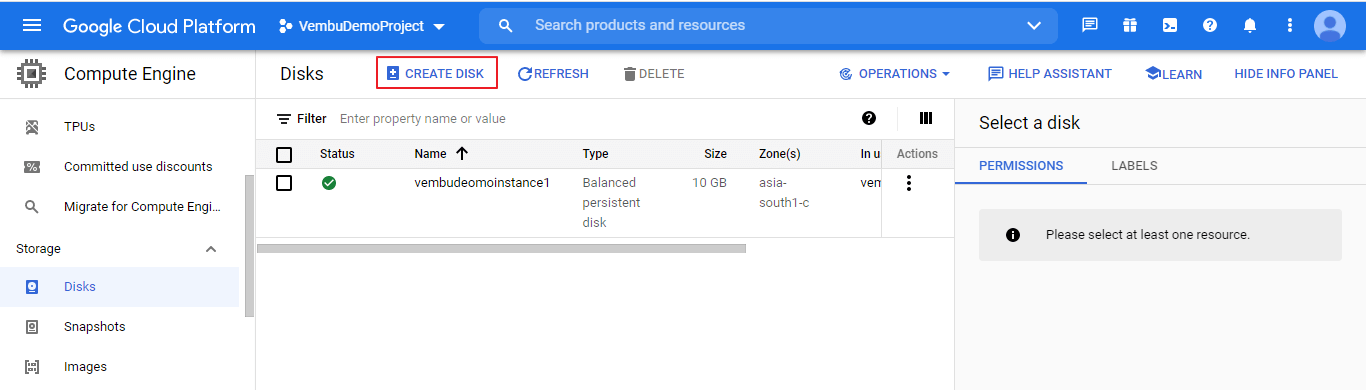
On clicking the Create disk button, will open up a new browser window. The user needs to provide the details as requested.
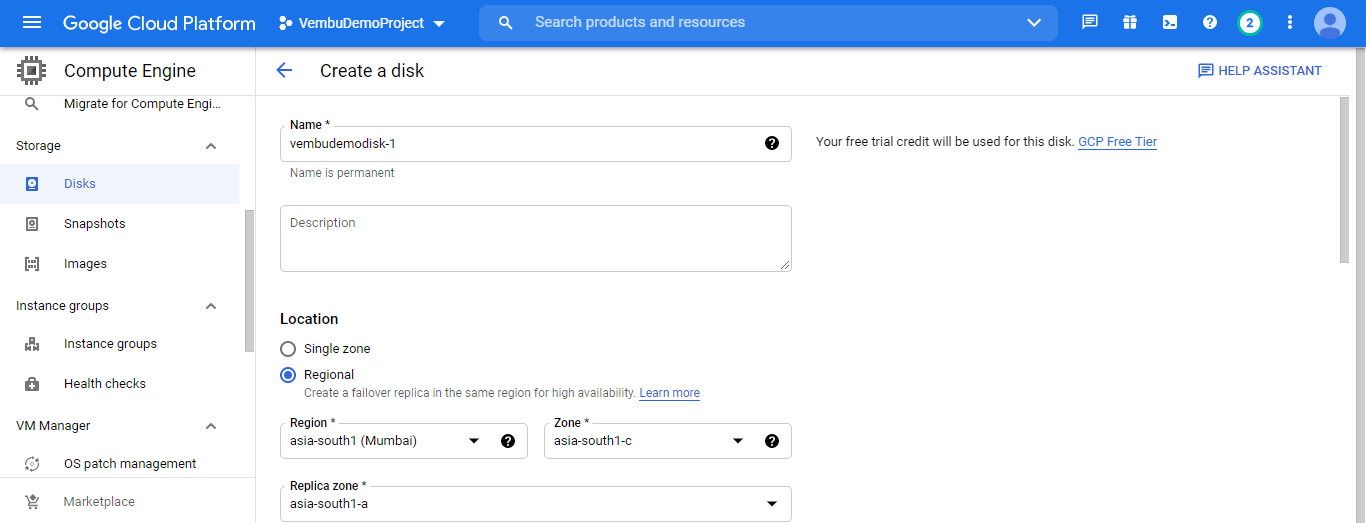
Provide a name – Provide a name for the disk to be created
Location – Choose Single-zone or Regional. Choosing Regional, allowing you to create a replica of the disk in the same region but in a different zone. It is recommended to choose regional and has a replica of the disk in another region.
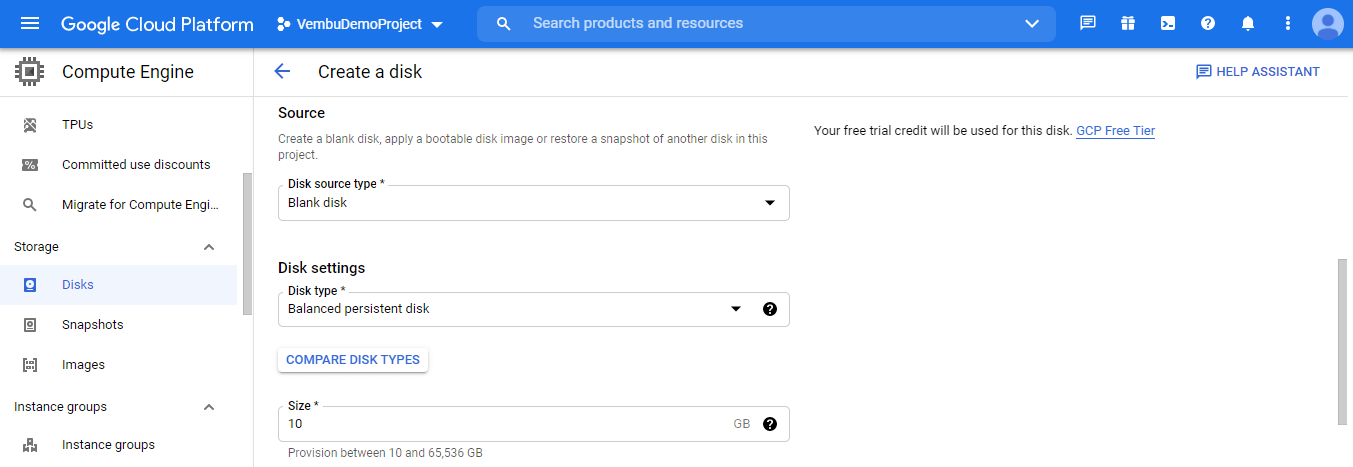
Disk source type – Choosing the disk source type allows you to create a blank disk, apply a bootable disk image or restore a snapshot of another disk in this project, depending on your requirement, and accordingly the user has to choose from the available options, viz. Blank disk or Image or Snapshot. Here we are going to create a blank disk, and so choose the “blank disk” from the available options.
Disk type – Available options are
- Standard persistent disk – Standard persistent disks (PD-standard) are backed by standard hard disk drives (HDD)
- Balanced persistent disk – Balanced persistent disks (PD-balanced) are backed by solid-state drives (SSD). They are an alternative to SSD persistent disks that balance performance and cost
- SSD persistent disk – SSD persistent disks (PD-SSD) are backed by solid-state drives (SSD)
The default option is Balanced persistent disk, and so we are choosing the same,
Size – Size of the provisioned disk starting from 10 Gb to 65,536 GB. Here we are choosing the least value 10 Gb.
Snapshot schedule – Users can automate the backup schedule here by creating a new backup schedule so that the full disk and its contents can be backed up periodically.
Encryption – Data is encrypted automatically, User needs to select the encryption key management solution from the three options.
Google managed encryption key – No configuration required.
The customer-managed encryption key (CMEK) – Managed via Google Cloud Key Management service. The user has to provide a key in the GC Key management service.
Customer supplied encryption key (CSEK) – Managed via third party management service, and it is accessed through API
Below screenshots shows these details
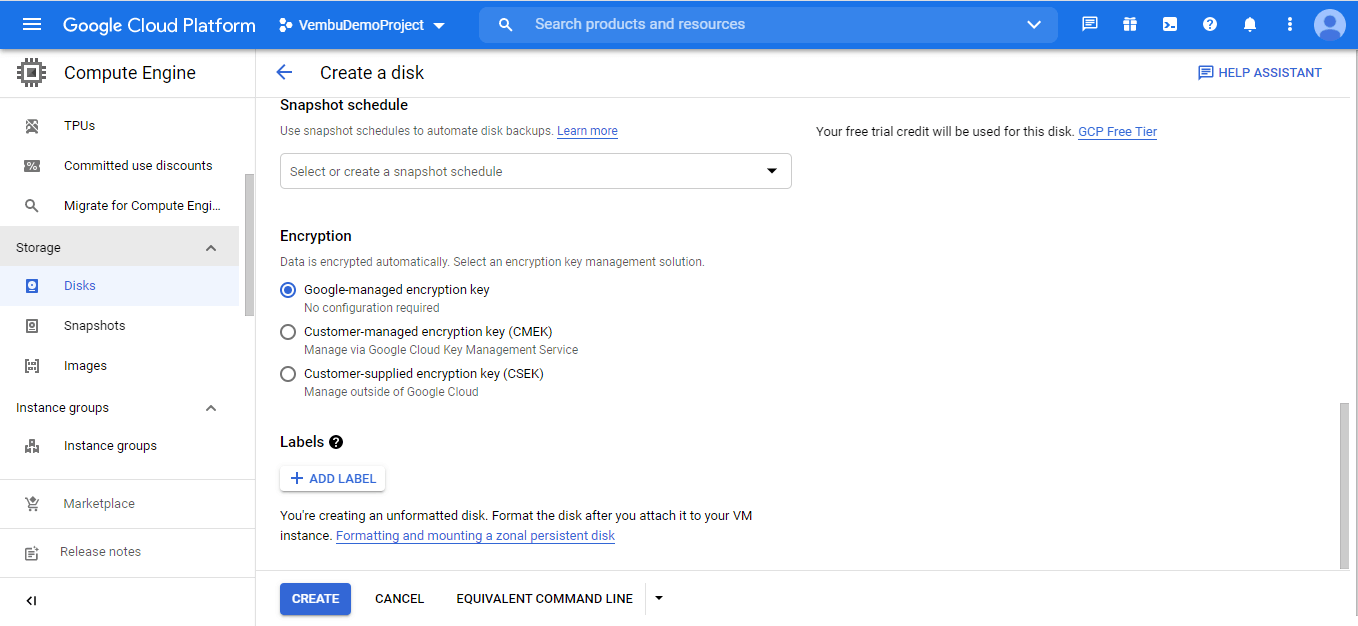
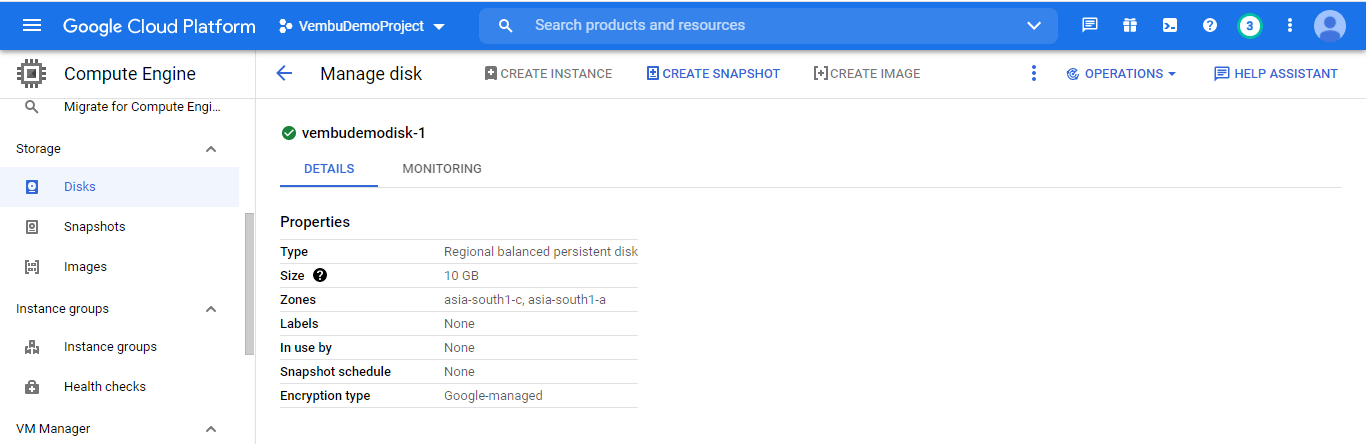
Click the CREATE button, after a few minutes your disk is ready. You can view the disk details by clicking the name of the disk as shown below
Attaching the newly created disk to an existing VM instance in the GCP console
In this step, we are going to attach the newly created disk “vembudemodisk-1” to the running instance “vembudemoinstance1” by editing the VM instance properties.
Login to the GCP console using a super administrator account or privileged administrator account, and choose the project under which the VM instance is running.
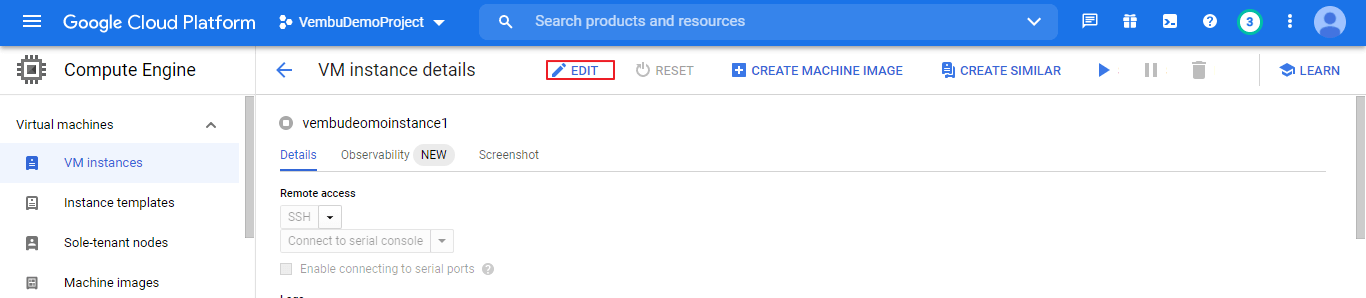
From the navigation menu, Choose Compute Engine → VM Instances -> select the vembudemoinstance1
Click Edit at the top of the page as shown in the picture below.
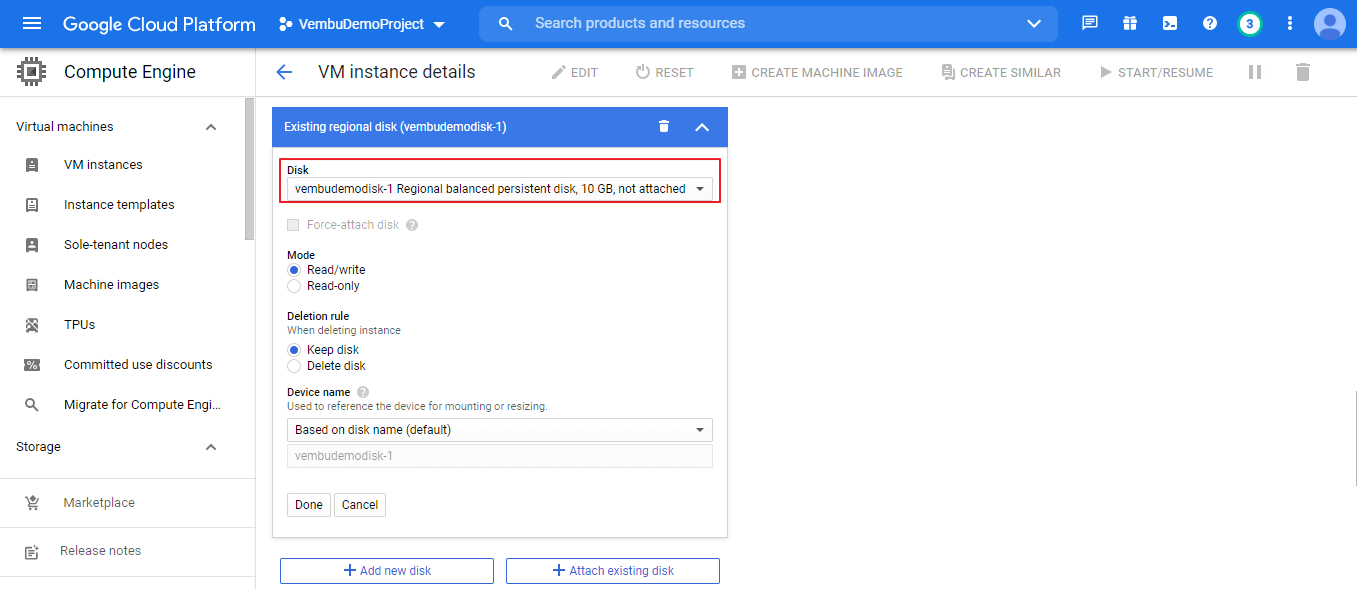
Go to the Additional disks section and select “Attach Existing disk” and choose the disk name ( in our case vembudemodisk-1 ) from the added disk list. Click the button “Done” to add the disk, and click Save at the bottom of the page.
Note: When attaching the disk, make sure Read & Write mode is selected and Keep disk mode is selected when the instance is deleted so that the disk and its contents can not be deleted even if you delete the instance attached to it.
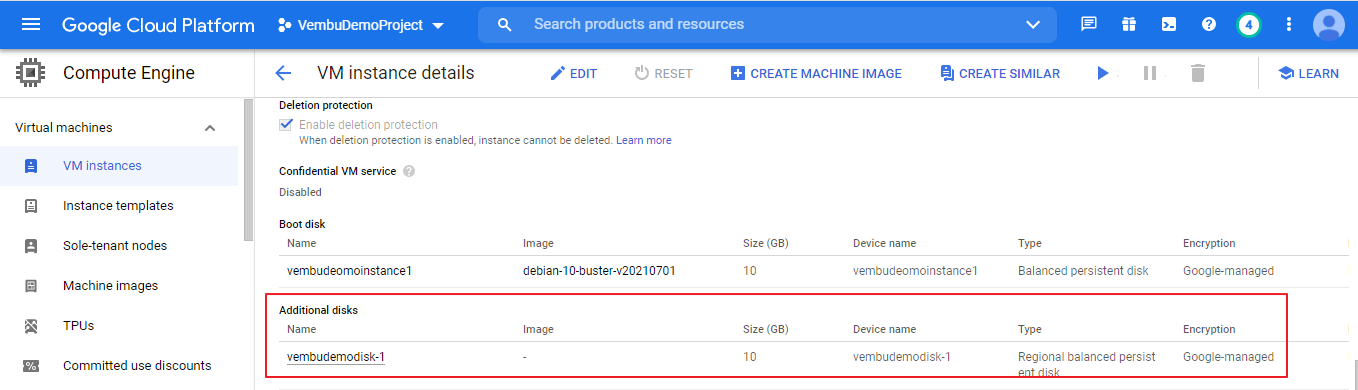
You can verify the added additional disk in VM instance details. The below screenshot shows these steps in detail.
Snapshots
Snapshots incrementally back up data from your persistent disks. After you create a snapshot to capture the current state of the disk, you can use it to restore that data to a new disk. … You can create snapshots from disks even while they are attached to running virtual machine (VM) instances.
You can create a snapshot or schedule a snapshot for any persistent disk attached to any running virtual machine on a GCP console directly.
- Login to the GCP console using a super administrator or administrator privileged user
- Choose the project you want to use to take the snapshot of the disk
- Choose Compute Engine → Storage → Snapshot
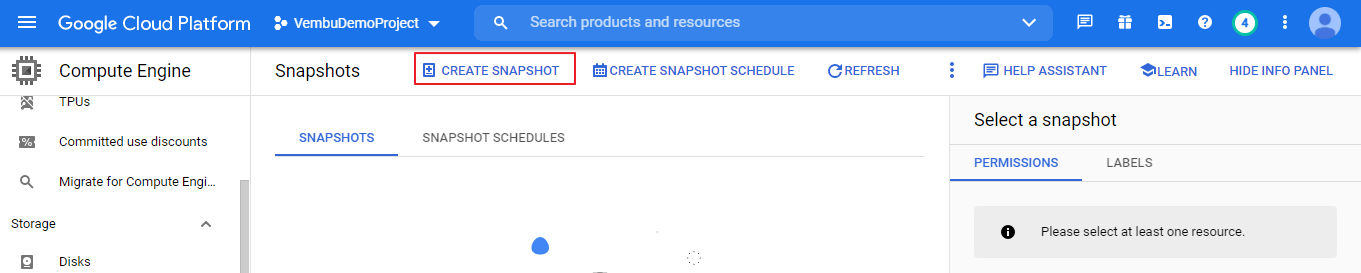
- Select Create snapshot or schedule a snapshot
In this blog, we are going to create a disk snapshot manually. You can also schedule creating a snapshot at your convenient time. Click Create Snapshot to take a snapshot of the disk manually as shown in the below picture.
On clicking the Create Snapshot button, a new browser window opens, user needs to provide the details related to the disk snapshot. These details are described below.
Name of the Snapshot – Provide a name for the snapshot.
Description – Provide a meaningful description for the snapshot, and it is optional.
Source disk – Choose the source disk to be used for taking a snapshot. You can select from the list of disks you have created in the same region.
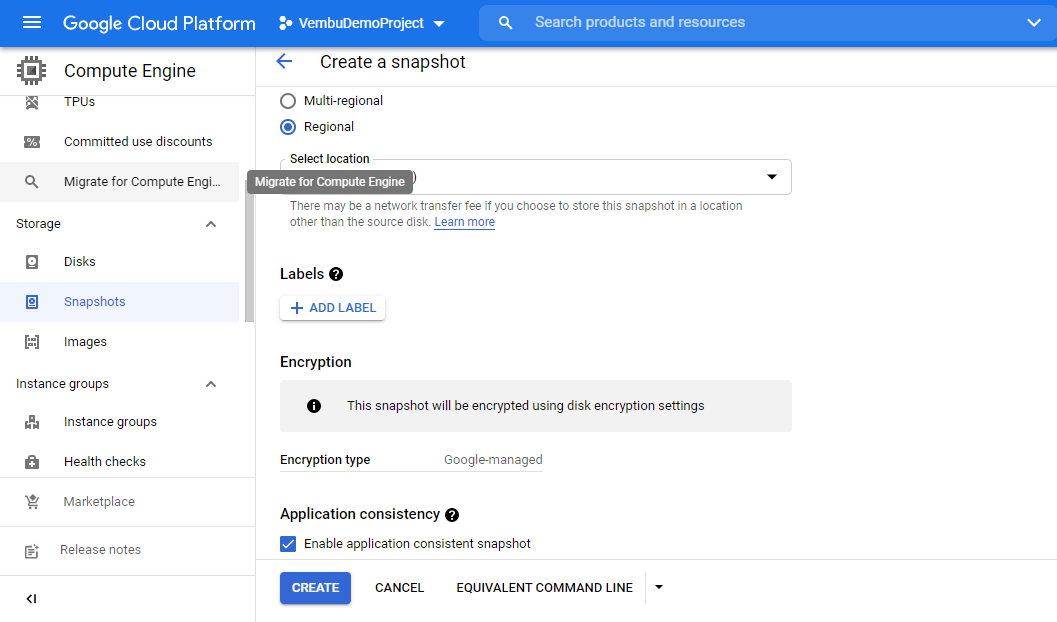
Region – Select the location where the snapshot should be stored, which may be a region or a multi-region.
Encryption – This snapshot will be encrypted using disk encryption settings. Usually, you will provide the encryption type you use at the time of disk creation. So the same encryption settings will be applied for its snapshot too.
Application consistency – The user can enable or disable this application consistency setting for the snapshot. When enabled, create an application-consistent snapshot of a disk while it’s in use, so there’s no need to shut down the instance or take the disk offline.
After providing the above details, click Create button to create the snapshot of the disk. The below screenshot shows these details.
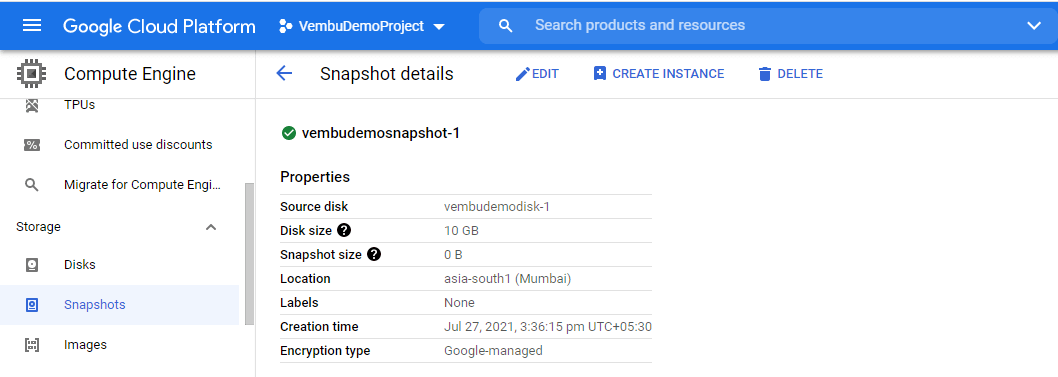
It takes a few minutes to create the snapshot, and it will be shown under Snapshots left side navigation menu. On clicking each snapshot you will get all the details of the snapshot. Also from this window, you can create a new instance using the snapshot ( if it is an OS persistent disk ) and you can delete the snapshot.
Images
Images are nothing but boot disks of various OSes and can be used to create VMs you want to use OSes. There are two types of images available, they are :
- Public images are provided and maintained by Google, open-source communities, and third-party vendors. By default, all Google Cloud projects have access to these images and can use them to create instances
- Custom images are available only to your Cloud project. You can create a custom image from boot disks and other images. Then, use the custom image to create an instance
Also on this page, you can import and export images
Image import builds – If you have virtual disks in your on-premises or cloud environment with software and configurations that you need (sometimes referred to as golden disks or golden images), you can save time by importing those virtual disks into Compute Engine and using the resulting image to create new virtual machines. The import tool supports most virtual disk file formats, including VMDK and VHD.
Image Export – If you need to move your Compute Engine image outside of your Compute Engine project, you can export an image to Cloud Storage. The export tool supports most virtual disk file formats, including VMDK and VHD.
Note: The import & export tool uses Cloud Build API, which must be enabled in your project, and the Cloud Build service account must have permission to create and manage resources in your project.
In this blog, we are going to provide steps for creating a custom image using a boot disk from a running VM instance.
- Login to the GCP console using a super administrator or administrator privileged user
- Choose the project you want to use to take the snapshot of the disk
- Choose Compute Engine → Storage → Image
- Select Create Image
This will open up a new browser window, and users need to provide the details described screenshot below.
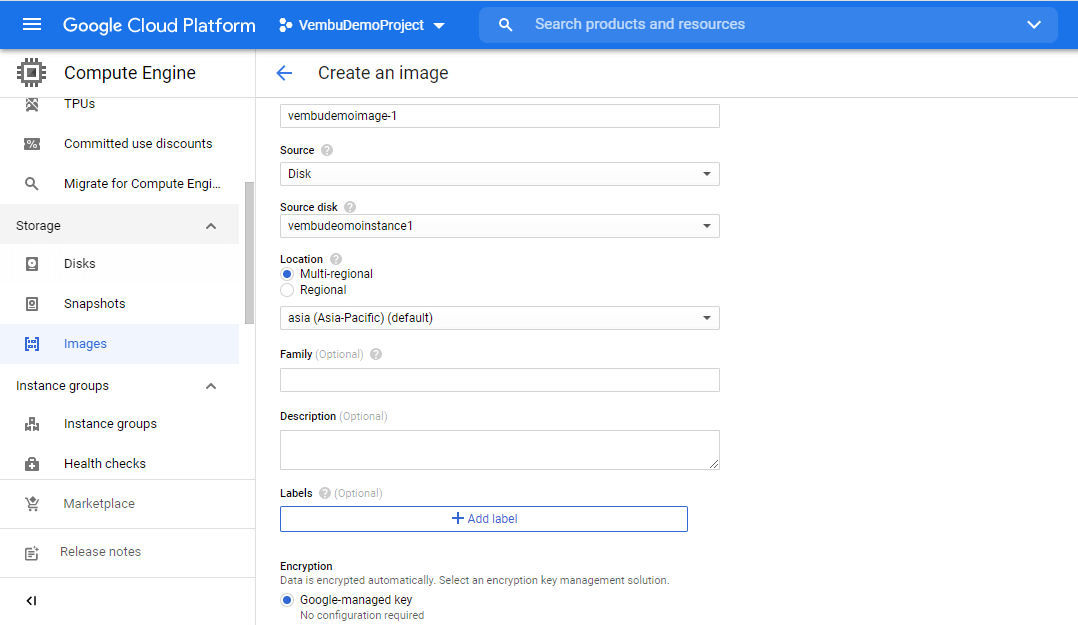
Name – Provide a name for the image you create.
Source – Choose to create an image from a Cloud Storage file, a Compute Engine disk, an image, or a virtual disk ( vmdk or VHD ) In our case we are creating the image from the disk.
Source Disk – Choose the disk, you want to create the image from the list.
Location – The location of your image resides. Usually, the image location will be the same disk location or region.
Encryption – Data is encrypted automatically. The user has to provide the available encryption key management solution. By default, it is Google managed key. The below picture shows these details.
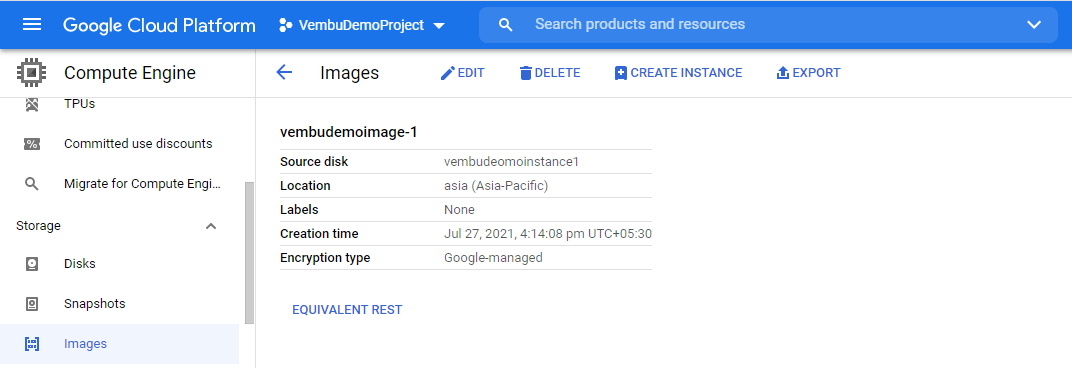
Click Create at the bottom of the page, to start creating the image. After few minutes your created image will be listed under Images. From the Images list, you can select the newly created image to get more details of the image. From here you can create an instance using the image or can export the image to the screenshot below GCP. The export tool supports most virtual disk file formats, including VMDK and VHD. You can also delete the image from this page.
Conclusion
It is easy and simple to create disks, snapshots, and images under the Google Cloud console. Snapshots are pretty useful when you don’t want to take risks or your disk and its data. As a best practice, take a snapshot of the disk once per hour. Avoid taking snapshots more often than that. The easiest way to achieve this is to set up a snapshot schedule. Use a machine image to store all the configuration, metadata, permissions, and data from one or more disks for a VM instance running on Compute Engine. The VM instance that you use to create a machine image is referred to as a source VM instance with moderate knowledge of GCP, one can get used to creating disks, snapshots, and images easily.
Safeguard your AWS EC2 instances and Google Workspace effortlessly using our free, resilient BDRSuite for a 30-day trial. Start protecting your Cloud and SaaS workloads today!
Follow our Twitter and Facebook feeds for new releases, updates, insightful posts and more.