
Certificate authorities play critical roles in organizational security. Some CAs can help you enhance internet security, while others are effective at protecting internal networks and resources. You can choose to obtain certificates for your users and applications through one of the following ways:
- You can use certificates from a Public Certificate Authority (public CA)
- You can create and operate a Private Certificate Authority (private CA or internal CA) to issue certificates
In this article, I’ll be covering the steps to implement your own CA using Active Directory Certificate Services (AD CS) in Windows Server 2016 which allows you to implement public key infrastructure (PKI) for your organization.
What is PKI?
Properly authenticating and maintaining certificates is essential to keep your infrastructure secure. Public Key Infrastructure (PKI) issues and manages digital certificates between authenticated users and trusted resources which enables an organization to secure its data, communications, and business transactions through encryption.
Active Directory Certificate Services (AD CS): Explained
Active Directory Certificate Services (AD CS) is one of the Microsoft Services that allows you to create and manage public key infrastructure (PKI) certificates. These digital certificates are used to authenticate users and devices on a network, secure HTTPS communications, and more.
Prerequisites to Install AD CS
- Windows Server 2016
- The computer (Windows Server 2016) on which you are installing AD CS must be:
- Joined to a domain where Active Directory Domain Services (AD DS) is installed
- Configured with a static IP address
- Log on as a member of both the Enterprise Admins group and the root domain’s Domain Admins group is required
Installing Active Directory Certificate Services (AD CS) – Step by Step
Step 1: Open Server Manager, go to Manage, and click Add Roles and Features. It opens the Add Roles and Features Wizard. Click Next. Note: If you have previously selected to skip this page by default, you will be going to the next page directly

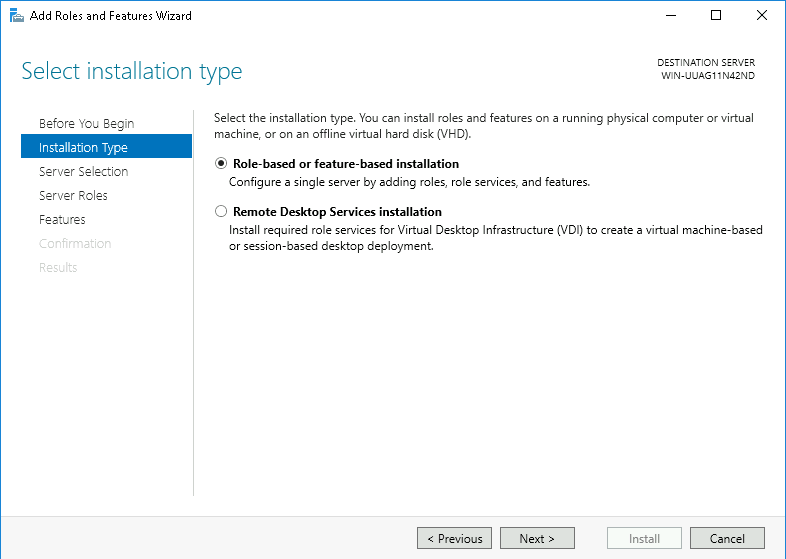
Step 2: In Select Installation Type, select Role-based or feature-based installation and click Next.
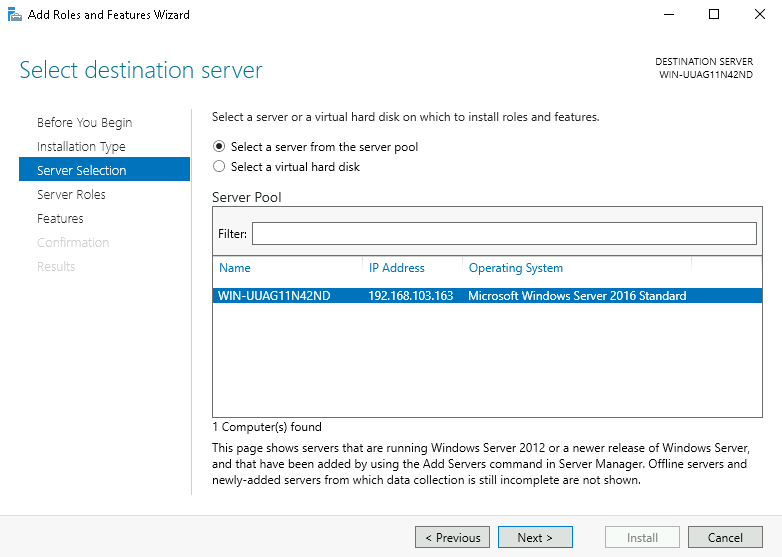
Step 3: Select ‘Select a server from the server pool’. In Server Pool, ensure that the local computer is selected and click Next.
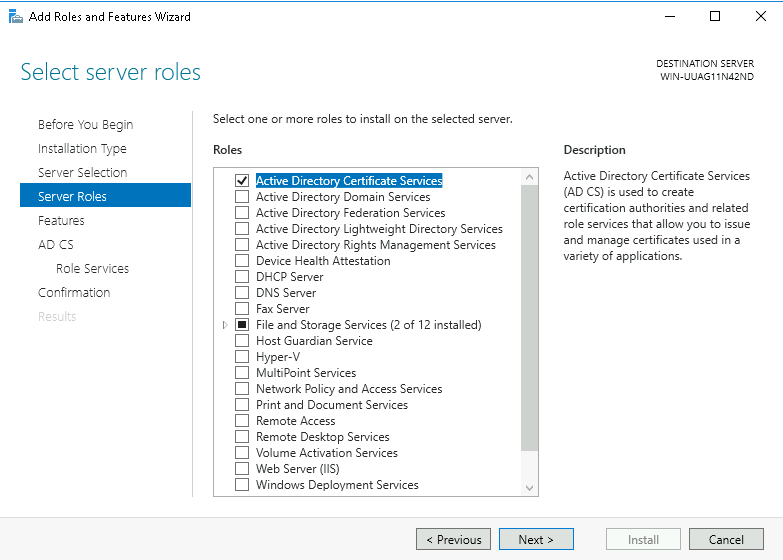
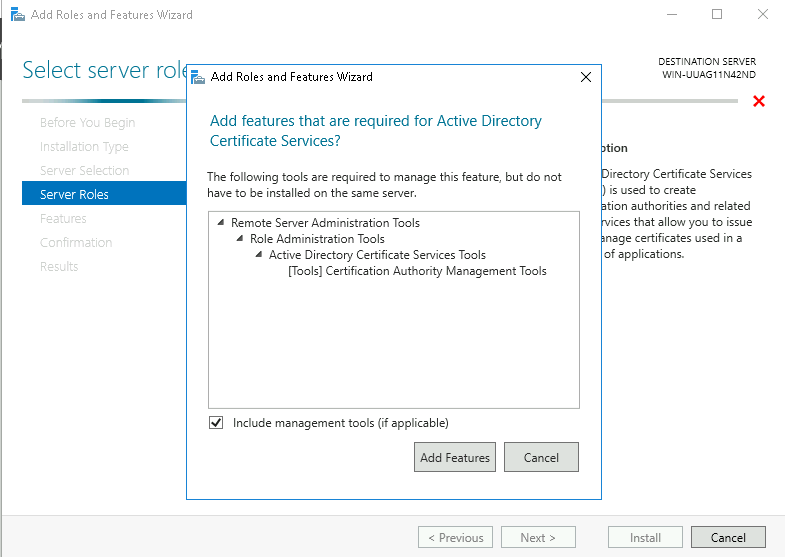
Step 4: Select Active Directory Certificate Services from Roles. Then, you will be prompted to add the required features. Click Add Features and then click Next.
Step 5: In Select Features, click Next.
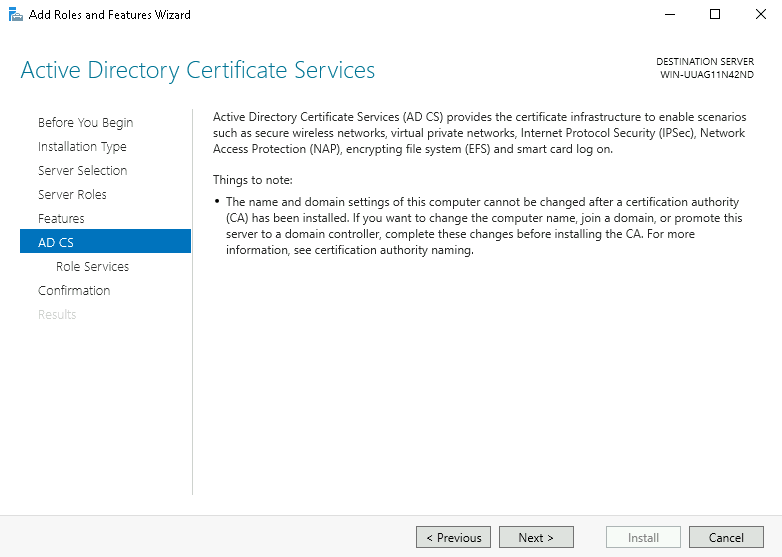
Step 6: On the Active Directory Certificate Services page, read the information and click Next.
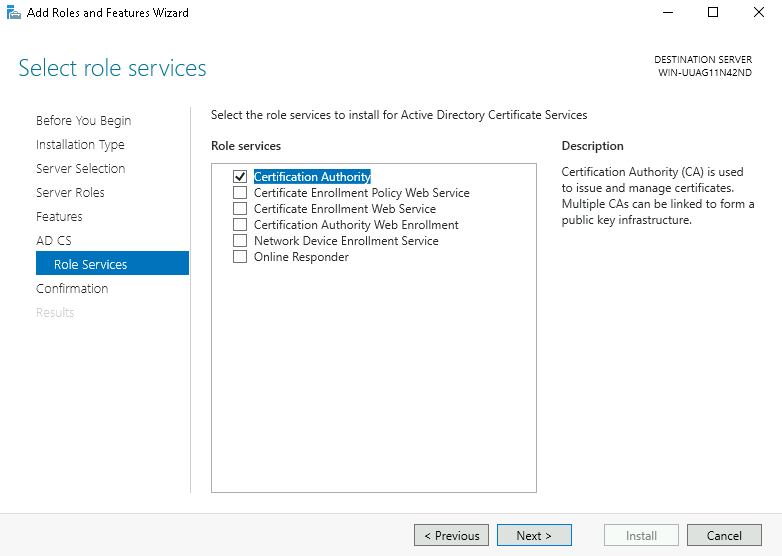
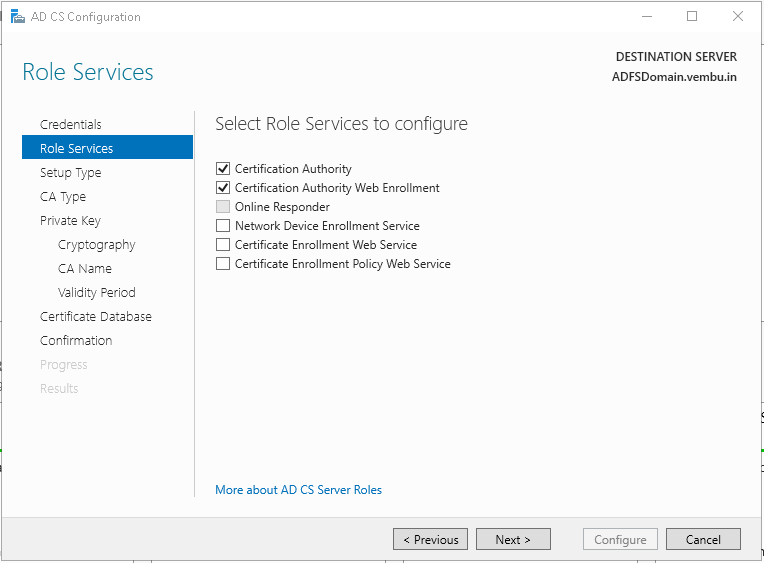
Step 7: In Role Services, select Certification Authority, and click Next.
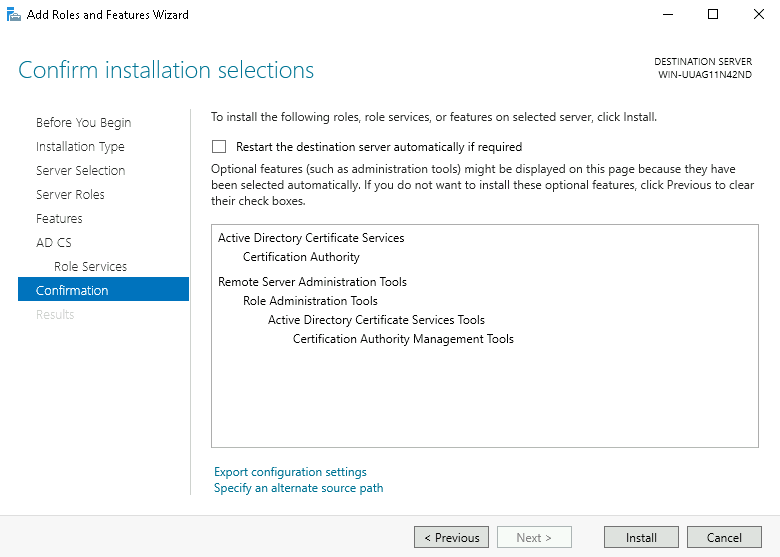
Step 8: Click Install. Note: Do not close the wizard during the installation process.
Step 9: When the installation is complete, click the link: Configure Active Directory Certificate Services on the destination server
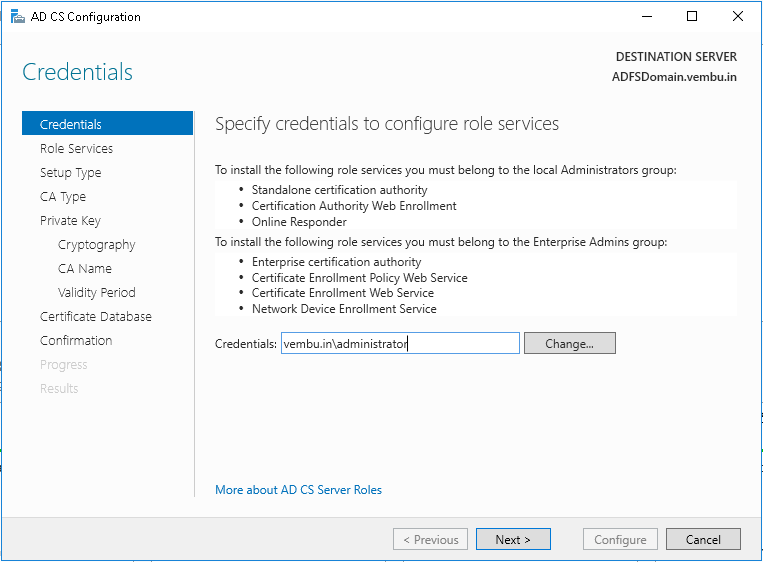
Step 10: The AD CS Configuration wizard opens. You need to first specify credentials to configure roles. Enter the credentials of a member in the Enterprise Admins group and click Next.
Step 11: In Role Services, click Certification Authority, and then click Next.
Step 12: On the Setup Type page, select Enterprise CA and click Next.

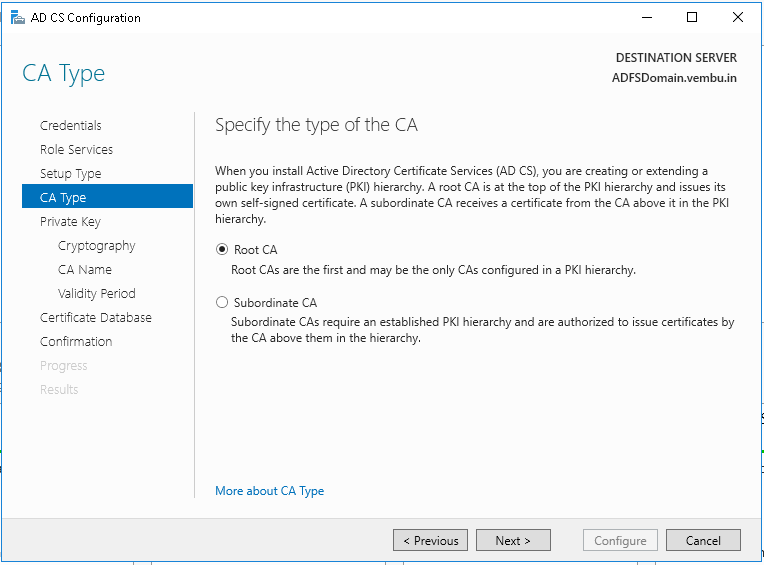
Step 13: On the Specify the type of the CA page, select Root CA is selected, and click Next.
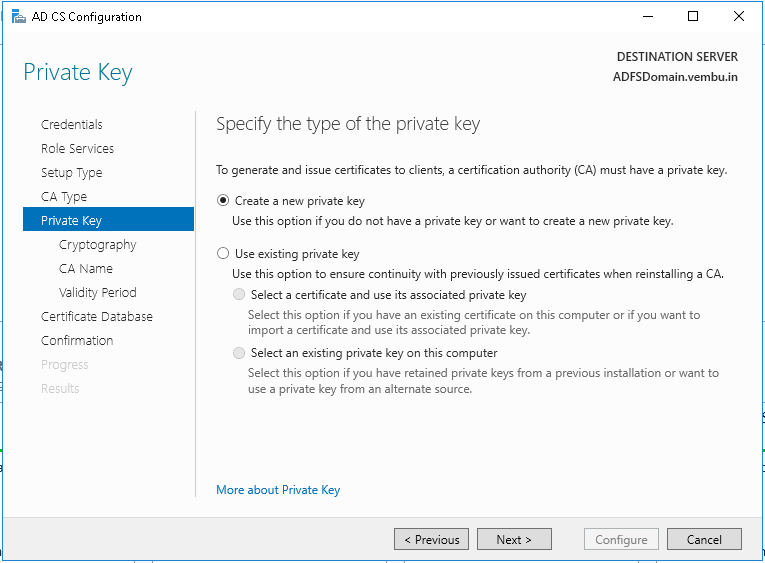
Step 14: On the Specify the type of the private key page, select Create a new private key and click Next.
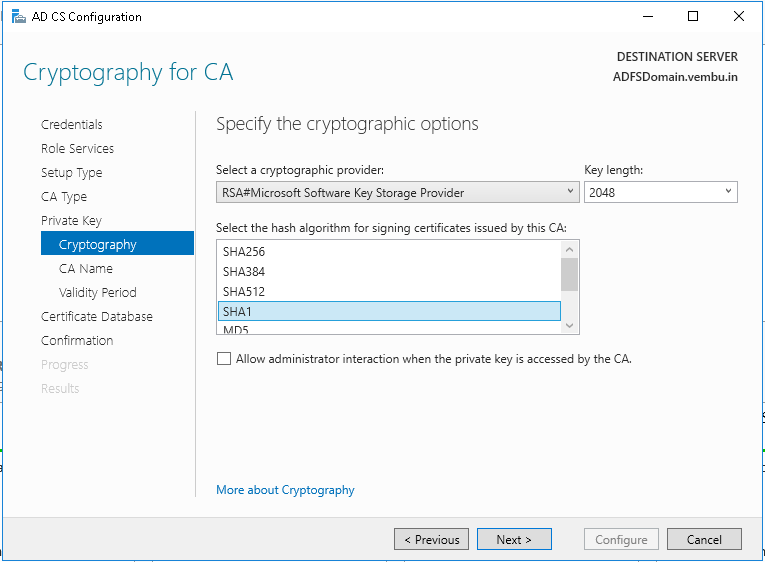
Step 15: On the Cryptography for CA page, you can keep the default settings for the cryptographic provider (RSA#Microsoft Software Key Storage Provider) and the hash algorithm (SHA2). The default key length is 2048
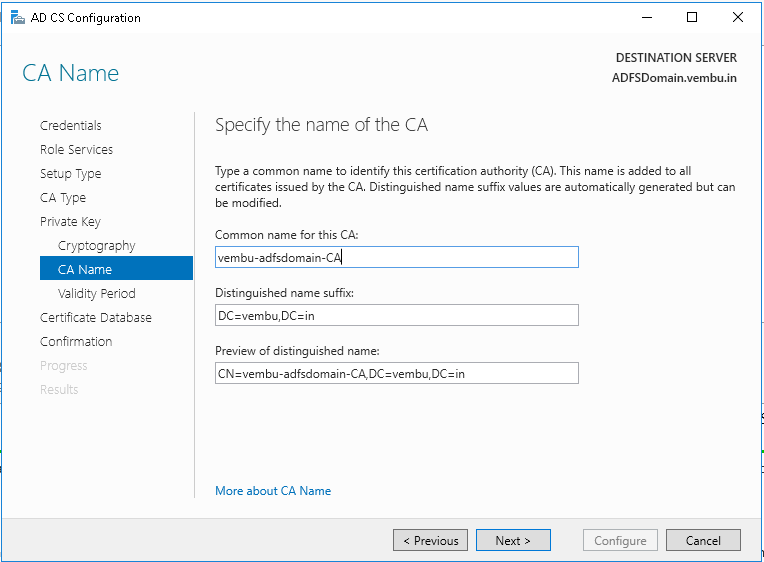
Step 16: On the CA Name page, You can either keep the suggested common name or specify a name to identify this CA. Note: You cannot change the CA name after you have installed AD CS.
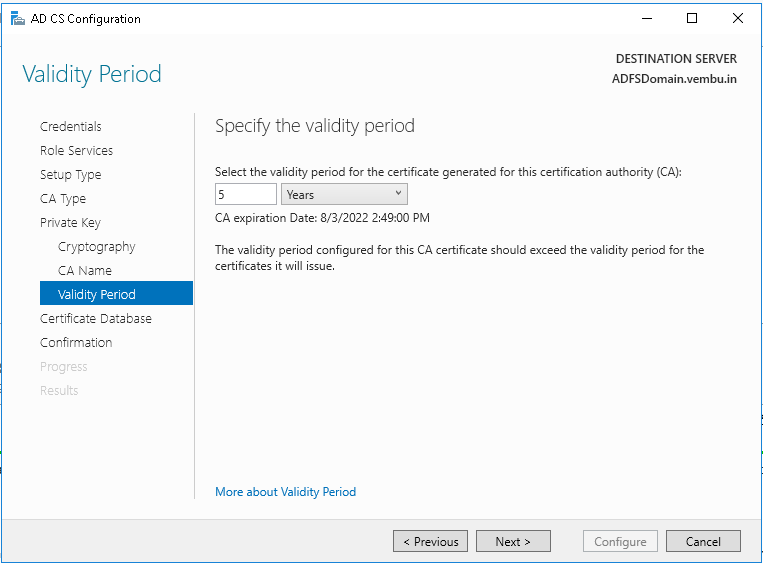
Step 17: On the Validity Period page, you can specify the validity period in Years, Months, Weeks, or Days. The default setting is 5 years
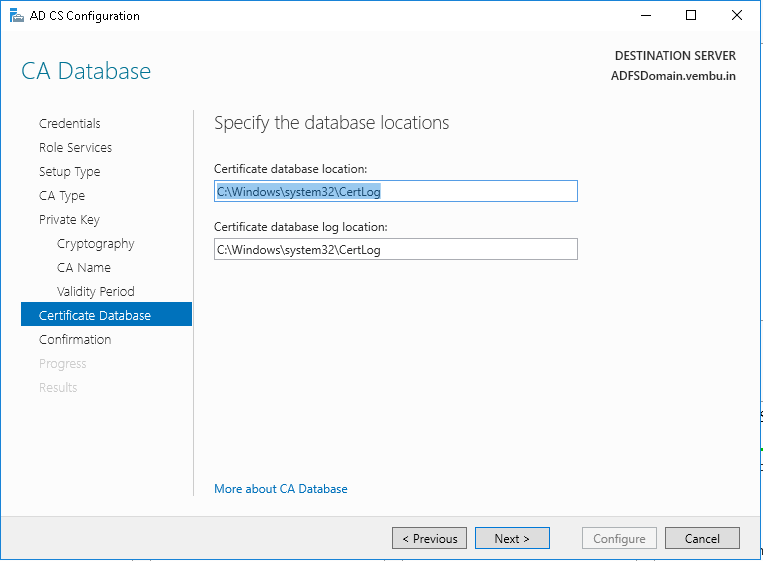
Step 18: On the CA Database page, specify the folder location for the certificate database and the certificate database log. Then, click Next.
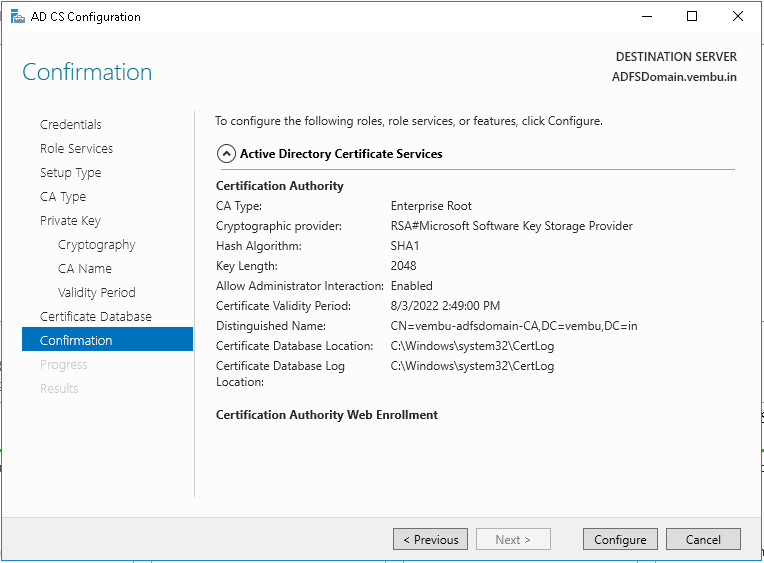
Step 19: In Confirmation, click Configure to apply your selections, and then click Close.
Step 20: The installation process will begin and the specified role will be configured.
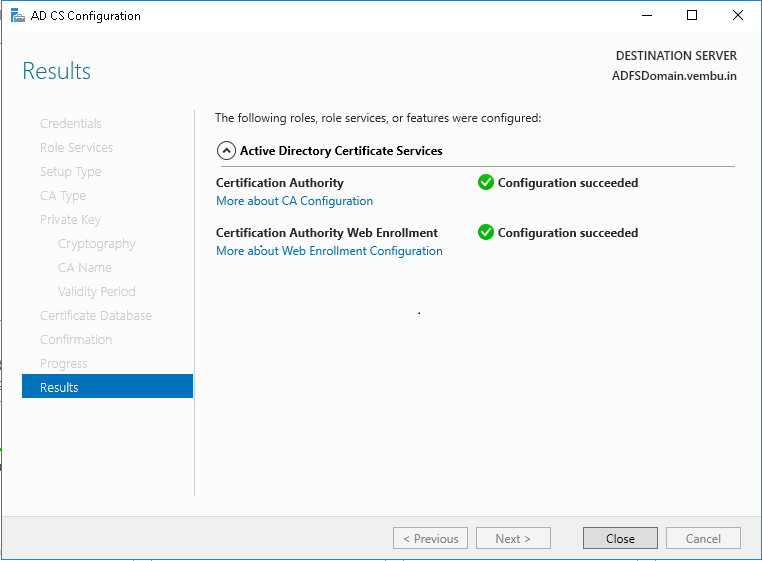
Now Active Directory Certificate Services have been successfully installed in your Windows Server.
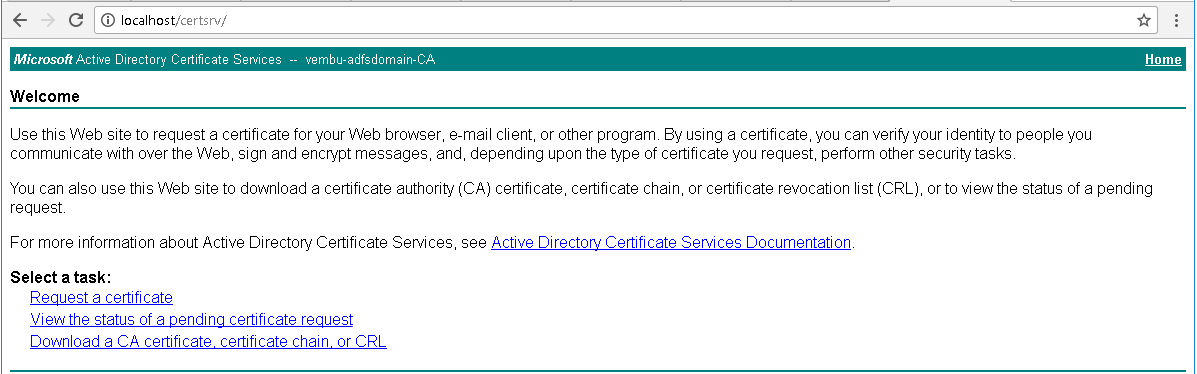
Download CA
Open the following path in the web browser: localhost/certsrv. Then, click on the link: Download a CA certificate to download private key details for Certificate Authority.
Follow our Twitter and Facebook feeds for new releases, updates, insightful posts and more.