
In vCenter Server Appliance (VCSA) 6.5 you could already perform file-based backups of the server using the vSphere Appliance Management Interface (VAMI). This was great, but the scheduling of the backup was missing so you had to remember to run the backup manually every now and again. A bit odd you may say but it is the way VMware does, they release a feature and improve it over time, and they did just that in 6.7.
In this version we can finally configure a schedule to run the backup of a VCSA, you can now specify basic options for the backup that we will cover here.
Prerequisites / Considerations
The repo that will be the destination of your backups must be reachable by the vCenter server on the ports of the protocol you will choose. The destination must support one of the following protocols:
- FTPS
- HTTPS
- SCP
- FTP
- HTTP
A few other considerations from VMware also apply:

- FTP and HTTP are not secure protocols
- Backup servers must support a minimum of 10 simultaneous connections for each vCenter Server Appliance
- You must have write permissions for upload and read permissions for download
- Only an explicit mode is supported for FTPS
- If you use HTTP or HTTPS, you must enable WebDAV on the backup Web server
- You can use only FTP, FTPS, HTTP, or HTTPS to transmit data through an HTTP proxy server
- You can use IPv4 and IPv6 URLs in file-based backup and restore of a vCenter Server Appliance. Mixed mode of IP versions between the backup server and the vCenter Server Appliance is unsupported.
- If you use SCP protocol, you must use the Linux backup server
- If you use a distributed virtual switch, you are advised to export separately the distributed virtual switch configuration before you restore to a backup. You can import the configuration after the restore.
I highly recommend that you get familiar with the limitations in the documentation as there are quite a few gotchas you should be aware of, that will probably influence how you schedule the backups. The documentation gives an insight into potentially unexpected behaviour after a restore of different components like sDRS, DPM, resources, spbm, HA…
Given the fact that an out of date backup can cause major issues when restoring, it is probably not a bad idea to back it up every night.
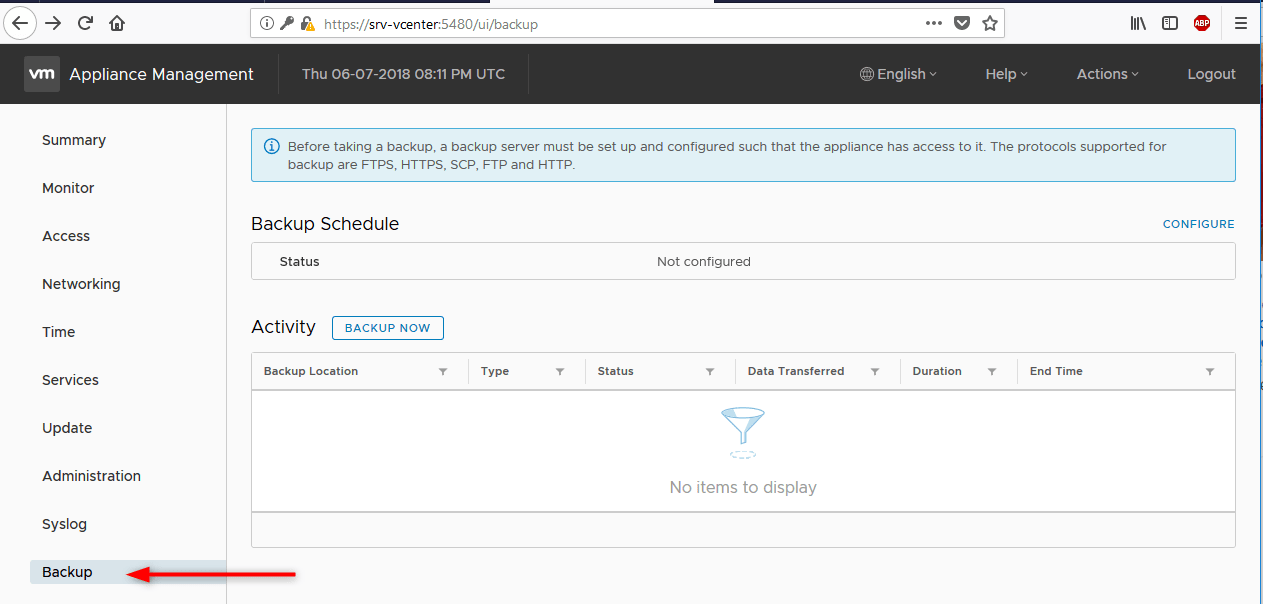
Backup configuration
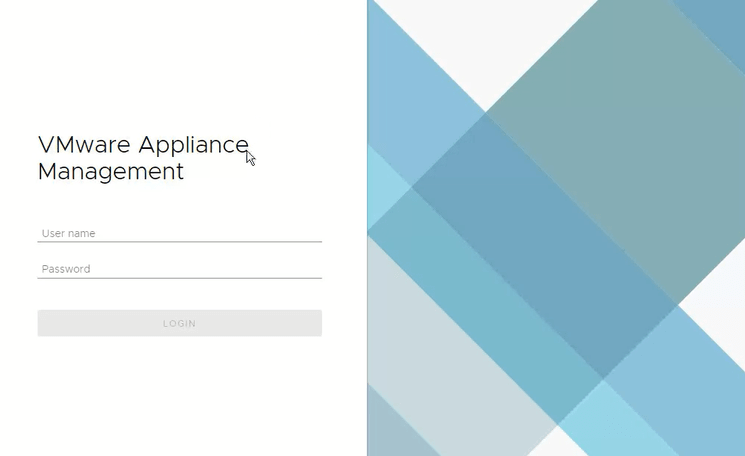
- Open a browser on the Appliance Management Interface on port 5480 and login with the root account of the appliance (not domain nor vsphere.local). As you can see the landing page of the VAMI now uses the new design like Log Insight.
- Click on ‘Backup’ to open the appliance backup menu. We start with a manual one to validate the communication with the repo and create the first backup.
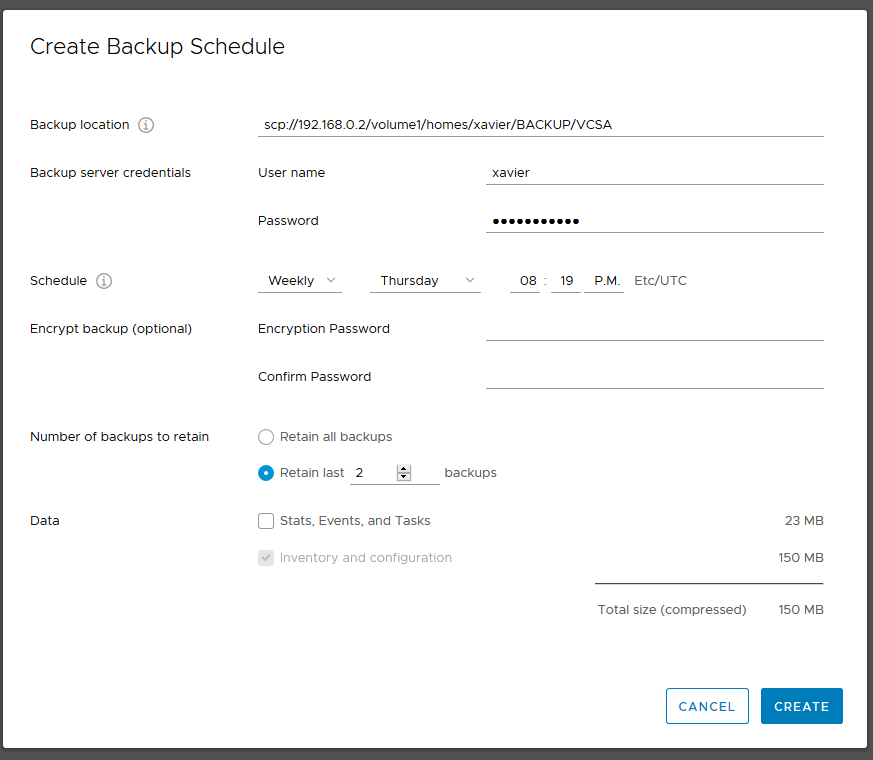
- Configure the options as per your environment.
https://srv-vcenter.domain.local:5480
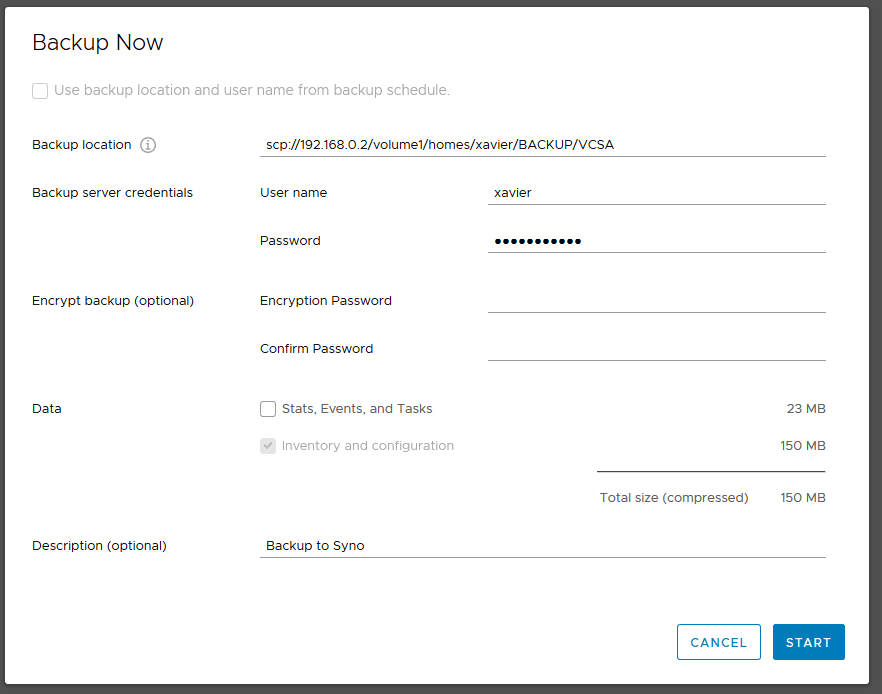
Backup location: Must be in the form “protocol://server-address<:port>/folder/subfolder”
The protocol must be one of the ones cited in the prerequisites. In this example, I use SCP on my Synology NAS.
Backup server credentials: Credentials of the repo. In my case, I used SCP so I use the same credentials I would use for SSH. The account you use must have write access to the destination folder.
Encrypt backup: You have the possibility to encrypt your backups with a password if you so wish. Make sure that the password is stored in a safe location if you decide to do so as you will need it to restore the backup.
Data: You can choose to back up the stats, events, and tasks or not. On the right, there is a handy estimate of the size your backup will take up. You can save some space by unchecking it, especially if you plan on running it every day.
Description: Self-explanatory.
- Wait for the backup to finish.
- Once the backup is complete, create the schedule by clicking on CONFIGURE on the top right corner of the screen. The settings are the same except for the scheduling and the retention.

Schedule: Configure your schedule accordingly to your needs.
The number of backups to retain: The number of backups you want to keep in your repository.
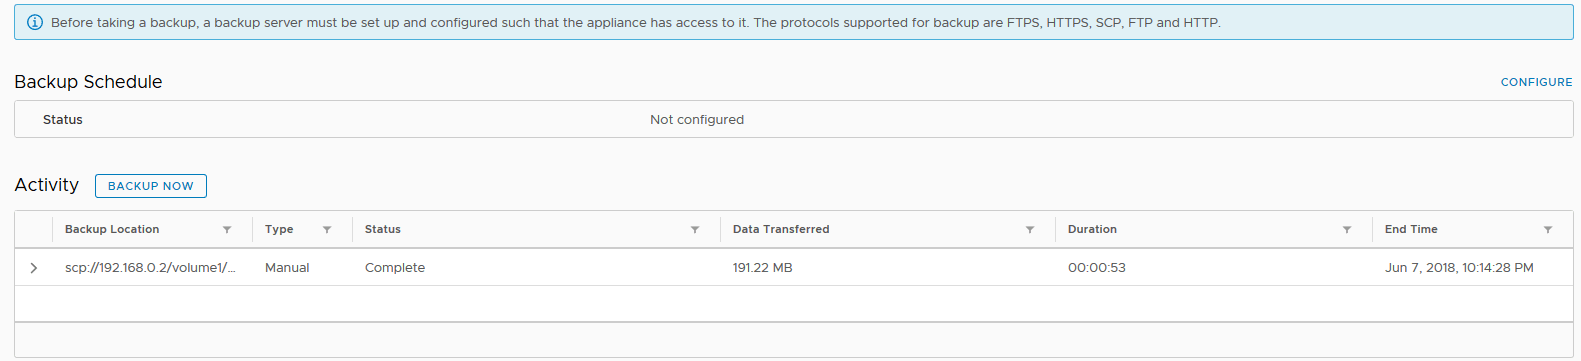
- In the Activity pane, you can see whether a backup runs as part of a schedule or if it was triggered manually. You get some more information about the backup by clicking on the arrow to expand the view.
- If you look at the folders in the repo you will see folders associated with the backups.
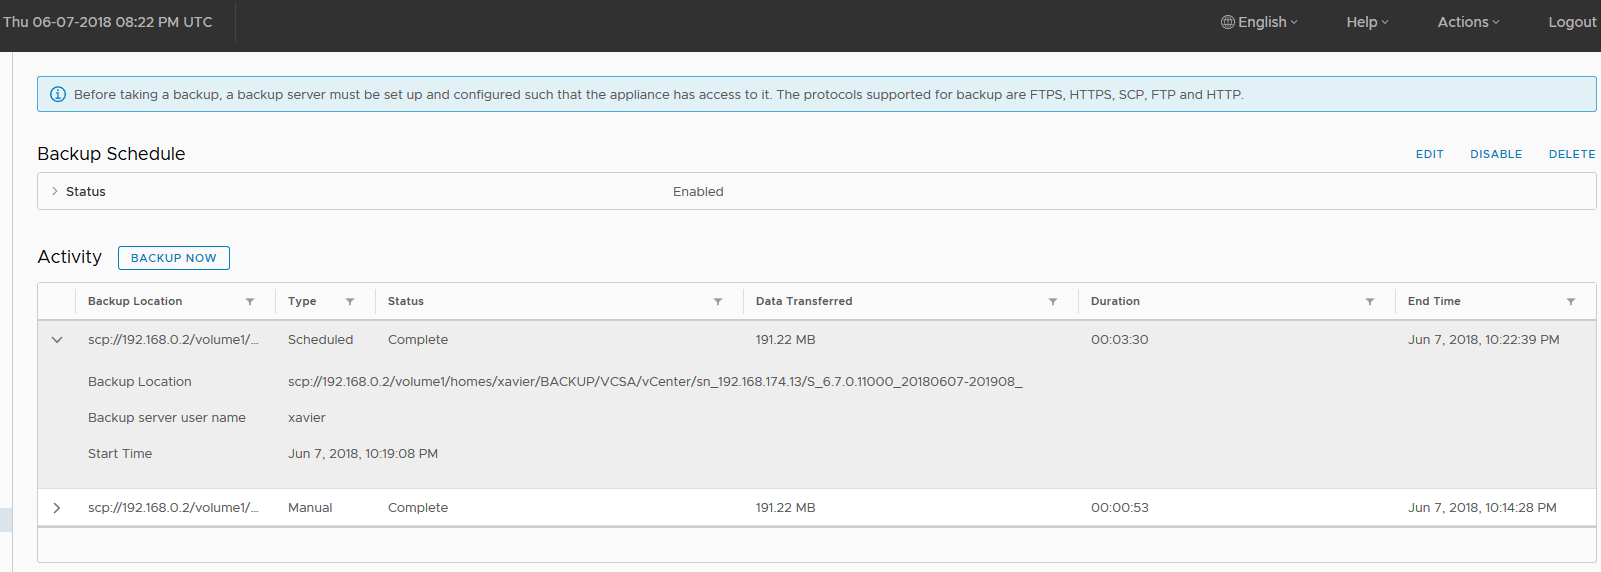
M_ stands for manual backups.
S_ stands for scheduled backups.

And this is it, your vCenter appliance is now backed up and will follow the schedule so you don’t have to do it manually or with some exotic scripting.
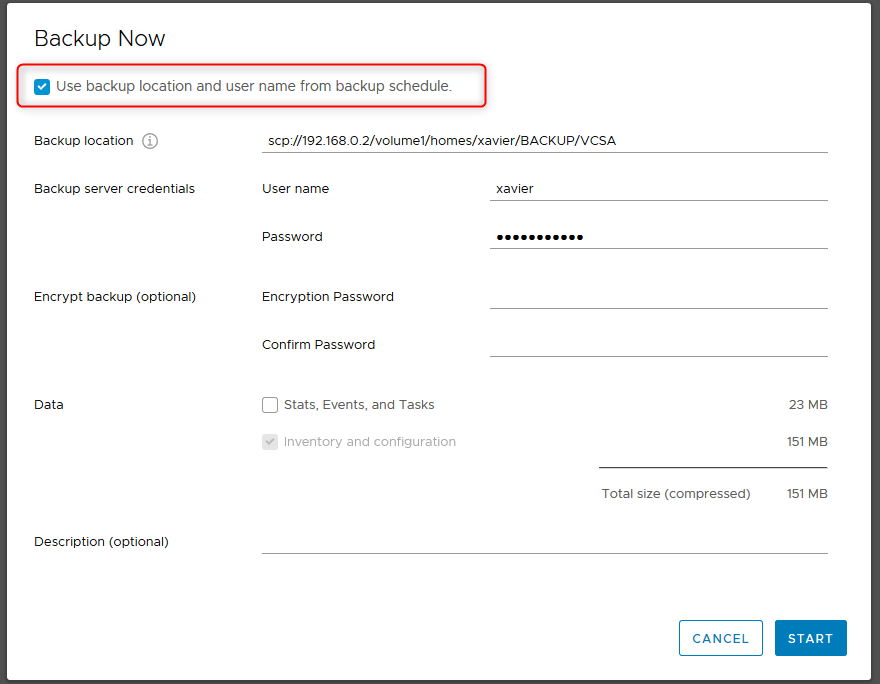
Note that you can now use the location of the scheduled backup to start manual backups so you don’t have to type it again. The checkbox was greyed out when no schedule was configured.
Conclusion
VMware made it easy to backup a vCenter Appliance. Being able to natively schedule such operation will be much appreciated by VMware admins. It is important to keep in mind that there are some more complexities, hence more care need to be given into reviewing the documentation as mentioned earlier in the prerequisites.
If you are not prepared, then there comes the day of the restore, you may very well have some nasty surprises and the need to put the fire extinguisher hat on. Further, the restore procedure will be covered in my next article.
Follow our Twitter and Facebook feeds for new releases, updates, insightful posts and more.