
Have you ever wanted to optimize your Windows gold image in a Virtual Environment? As a System Engineer, you probably need to optimize your Windows image in order to speed the login process, to disable unwanted scheduled tasks, to stop specific Windows Services, and so on… Either you work on Citrix, Microsoft or VMware products, then you should “tweak” your gold image.
In this article, I will describe how to tune your VMware Gold Image using the VMware OS Optimization Tool, which is an excellent tool to optimize all the versions of Windows on VMware.
What is VMware OS Optimization Tool (OSOT)?
The VMware OS Optimization Tool helps optimize Windows systems for use with VMware Horizon View. You can perform the following actions using the VMware OS Optimization Tool:
- Local Analyze/Optimize
- Remote Analyze
- Optimization History and Rollback
- Managing Templates
You can select some existing templates, but you can also create your own templates. Some templates have been created based on VMware recommendations and best practices.
Please note that this tool is experimental and you must accept the technical preview license before downloading it. More information here: https://labs.vmware.com/flings/vmware-os-optimization-tool/license

One important thing to notice, OSOT is free and it includes settings to optimize the following Windows operating systems for both desktops and servers:
- Windows 7
- Windows 8
- Windows 8.1
- Windows 10
- Windows Server 2008 (including R2)
- Windows Server 2012 (including R2)
- Windows Server 2016
Getting Started with VMware OS Optimization Tool
First, you must download the tool from the following website: https://labs.vmware.com/flings/vmware-os-optimization-tool
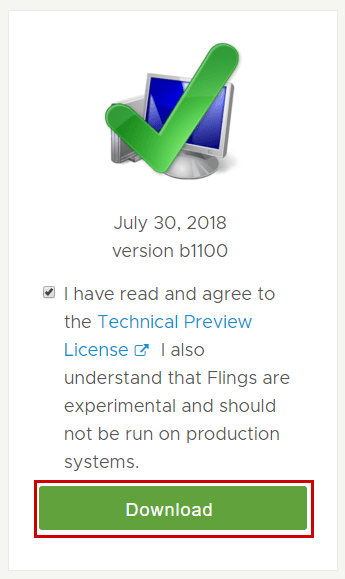
At the time of writing this article, the latest version is “b1100”, and this version was released in July 30, 2018. Change log of this version:
- Issue fix: With group selection operation, unselected optimization items are applied
- Issue fix: can not export analysis report
Go to the VMware Labs website, download the file, extract it and run it on your Gold Image. You do not need to install this tool because it is a standalone executable:

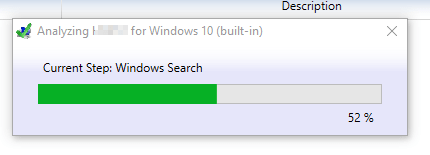
In my case, the gold image is a Windows 10 Enterprise version. Start the tool and the first analysis will run automatically. If you run manually your analysis, make sure to select the specific Windows 10 template.
When the analysis has been completed, the results will appear as shown below:
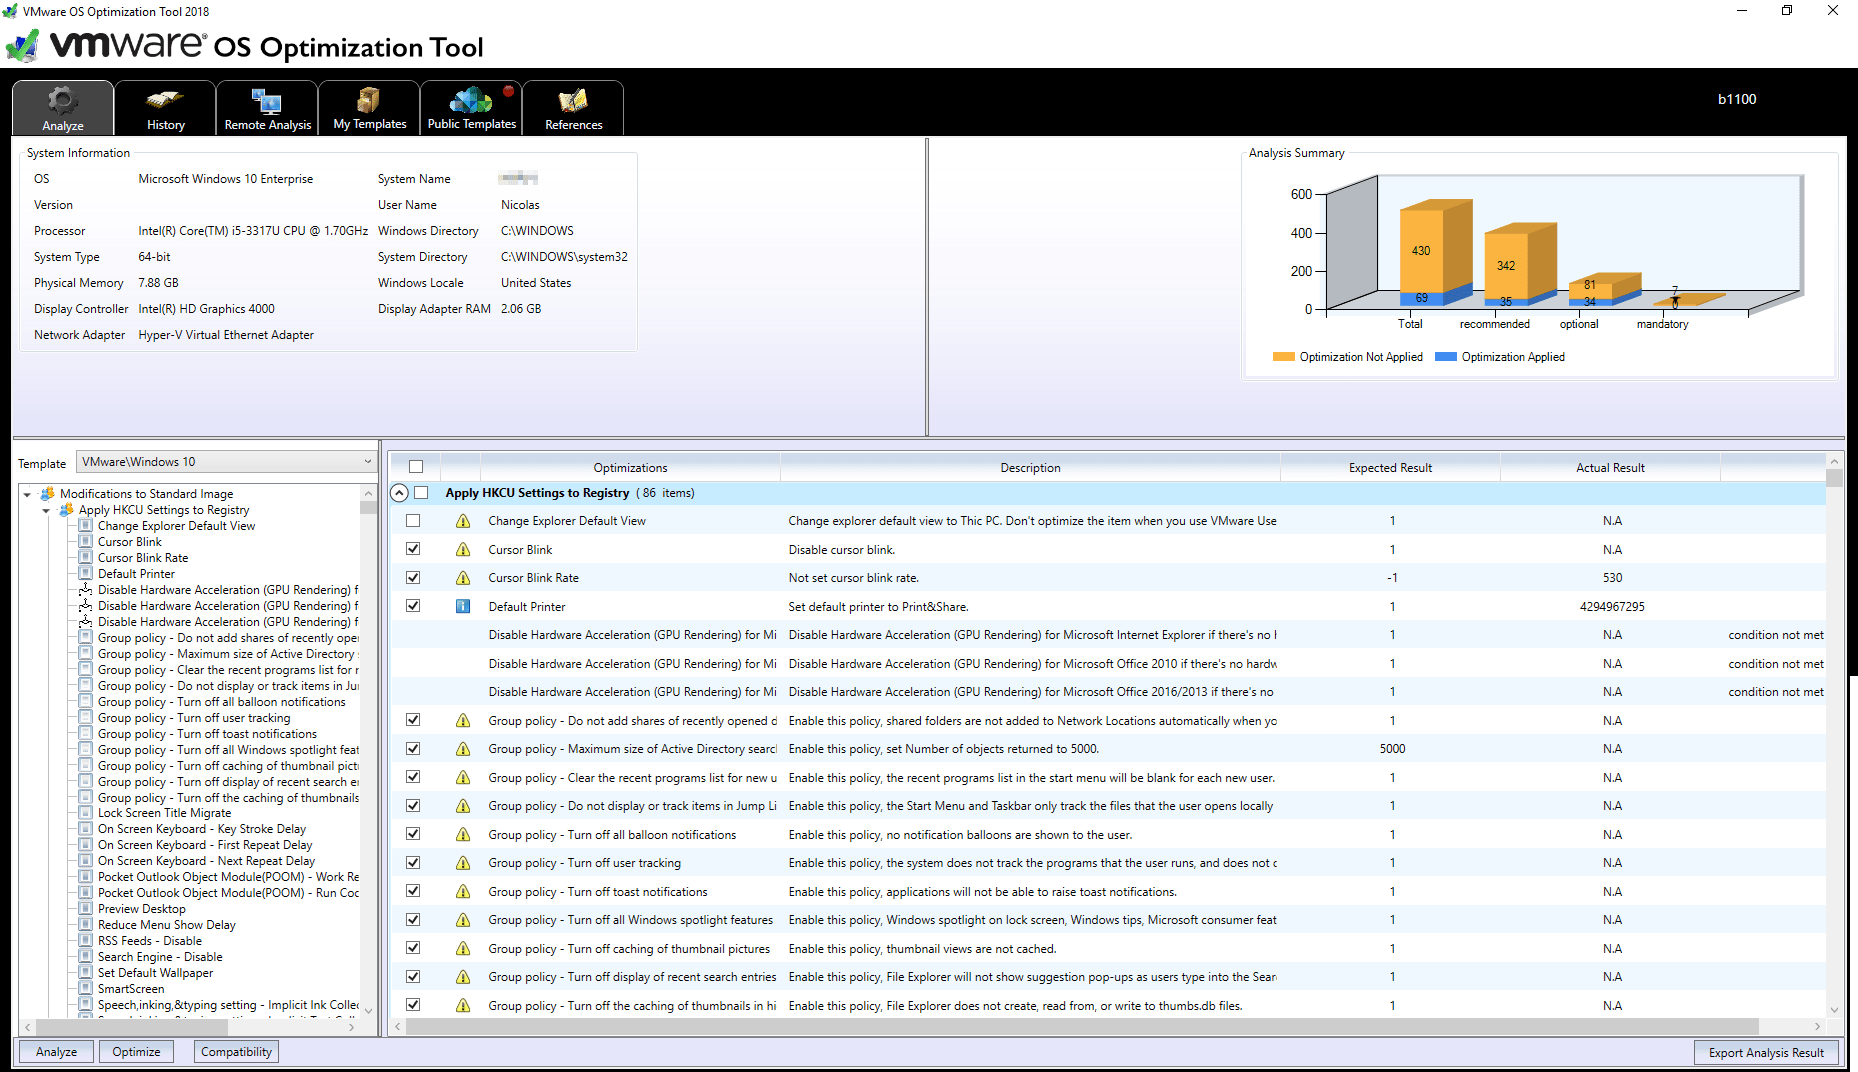
Please note that every VDI environment is unique and has different components/requirements, so you must find the perfect balance between performance and stability. You should perform many tests in your lab environment before applying these optimizations in your production gold image.
Before going deeper, you can notice several tabs on top of the tool, which are the following:
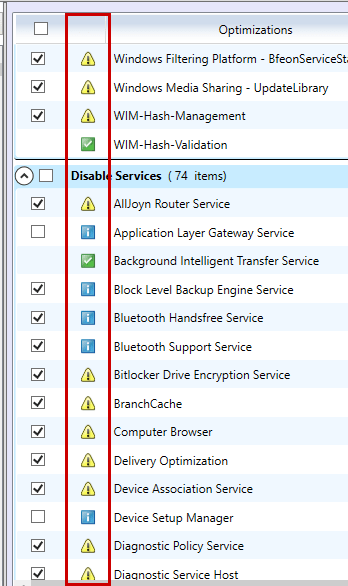
- Analyze: This tab will display all the registry keys, scheduled tasks and Windows Services you can enable or disable in order to optimize your system
- History: This tab is like a snapshot history, I mean that you can rollback to a previous state if something goes wrong
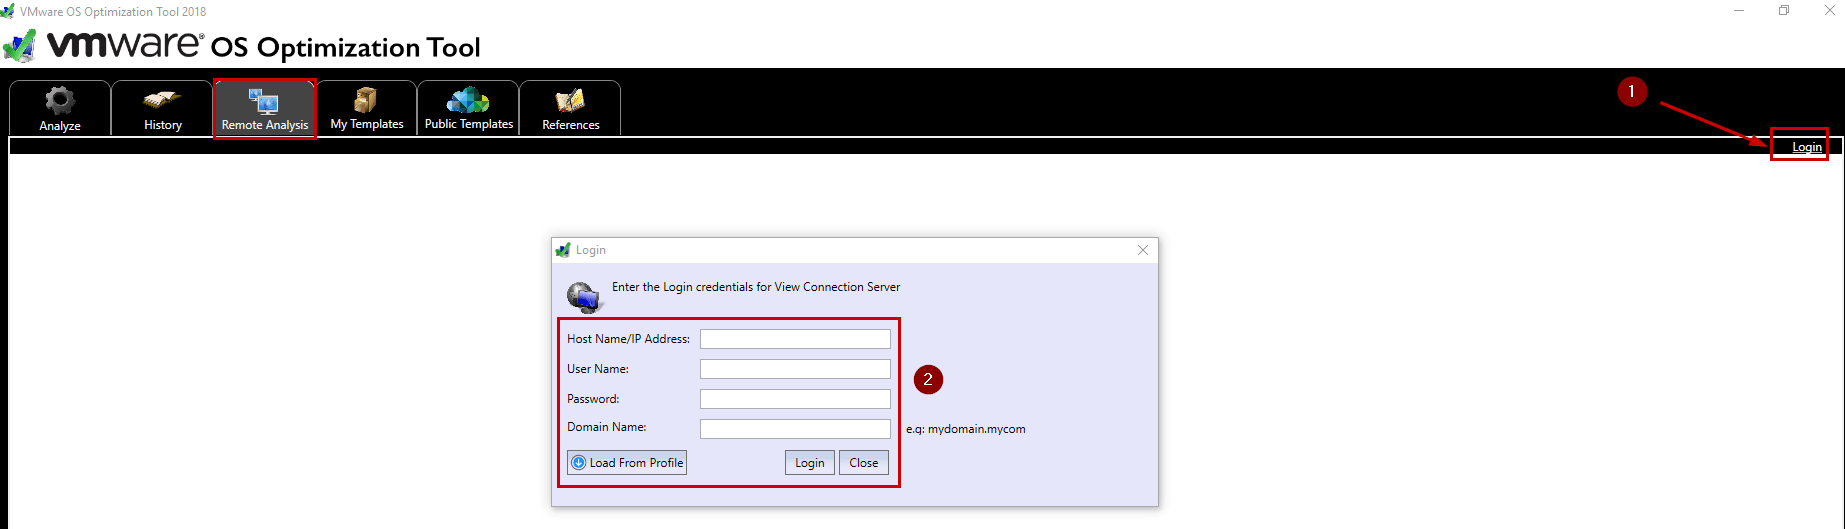
- Remote Analysis: This tab allows you to do the analysis on a remote machine based on your VMware View Environment
- My Templates: This tab lets you create your own template in order to suit your needs
- Public Templates: This tab lets you apply public template created by the community. It can be very interesting because these templates are evaluated by the community and compatible with specific versions
- References: This tab helps you to use this tool by listing all the links that can help you (blog, official guide, feedback, comments …)
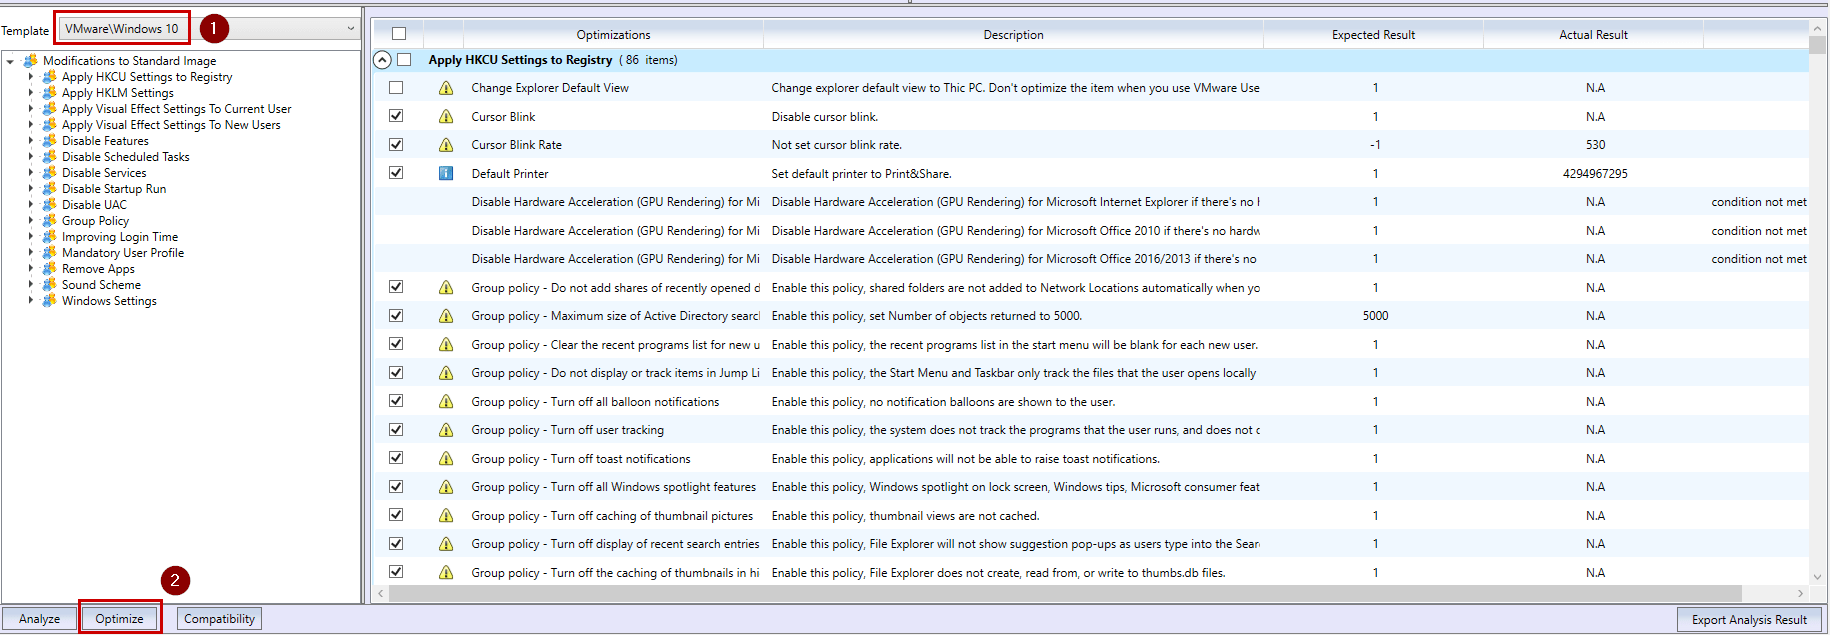
Now, if you just want to apply optimizations without more investigation, then you should do the following steps:
- Select the template you want to apply depending the Windows version
- Click “Optimize” and wait until the template has been optimized
During your optimization process, you must check all the settings and check if these settings are useful for your end users. Because, do not forget that optimization can affect your end users!
Note that most items have an icon indicating how important it is to optimize it:
- Mandatory: You must apply the optimization because it is a problem or an issue that OSOT has identified
- Recommended: It depends on your environment. OSOT recommends to apply this setting but you have to check if is valid for your environment
- Optional: OSOT has no recommendation regarding this setting. So you have to decide to apply or not this setting
- OK: The item already has the proper value on the target system. You do not need to perform specific action
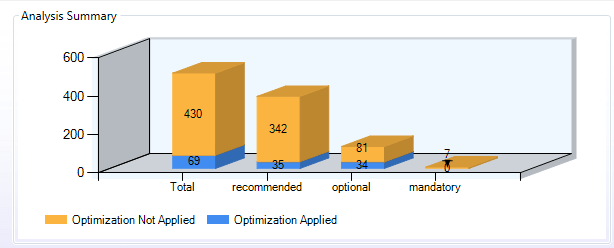
On the right side, you can see the following diagram. OSOT shows the analysis summary and provides a graphical representation of the current optimization of the targeted system. Orange color means that settings do not match the expected values and Blue color means that settings match expected values.
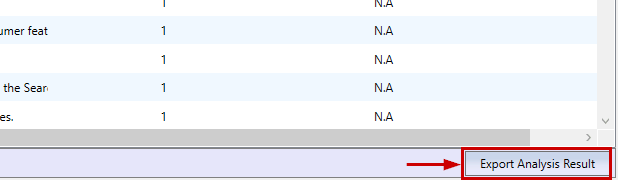
You can also export the analysis result in HTML format to share results with your colleague or manager.
Remote Analysis
To run an analysis on a remote computer, navigate to the “Remote Analysis” tab and click “Login”. Then you must enter your View Connection Server information to browse a list of desktops it manages.
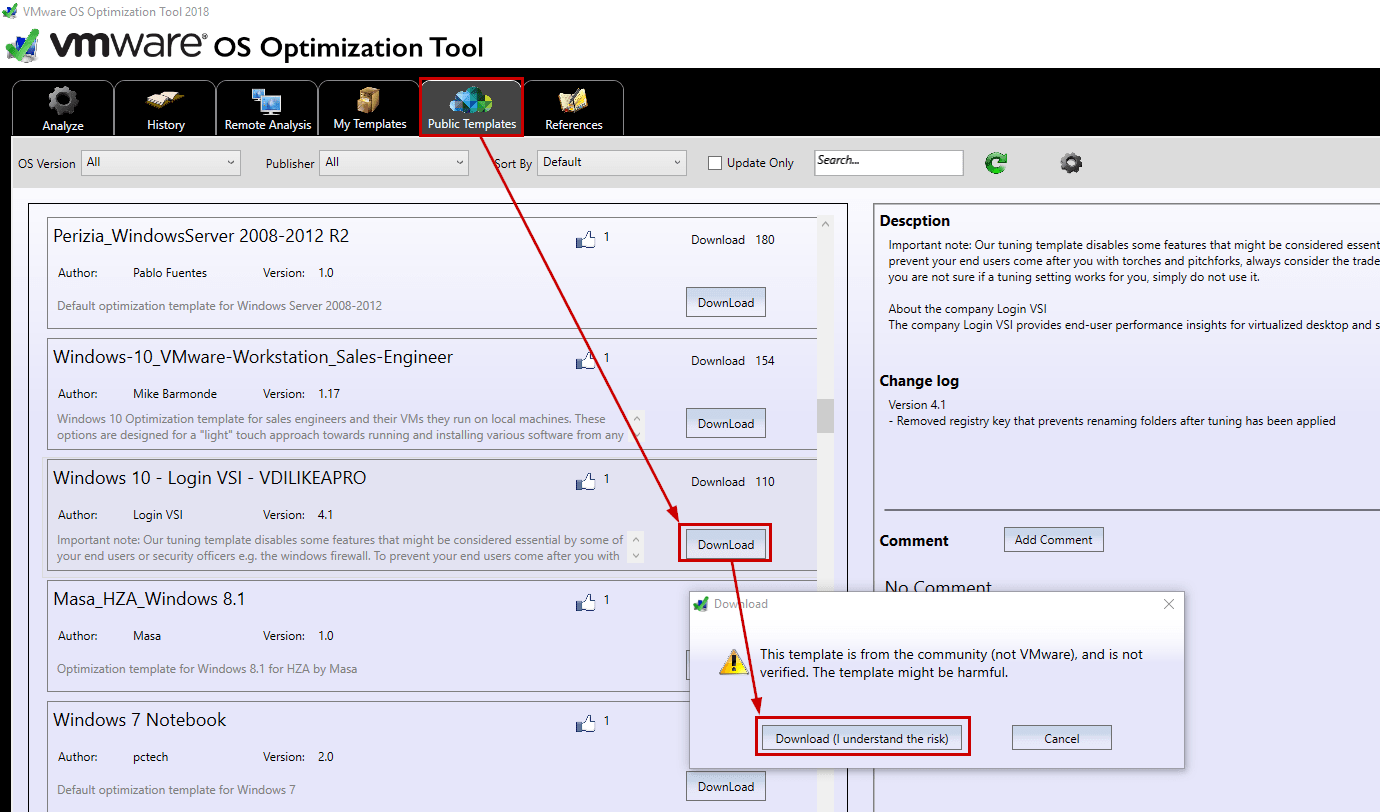
Public Templates
You can download public templates from the community by clicking the “Download” button or updating an existing template by clicking the “Update” button. Navigate to the “Public Templates” tab and select the template you want to download:
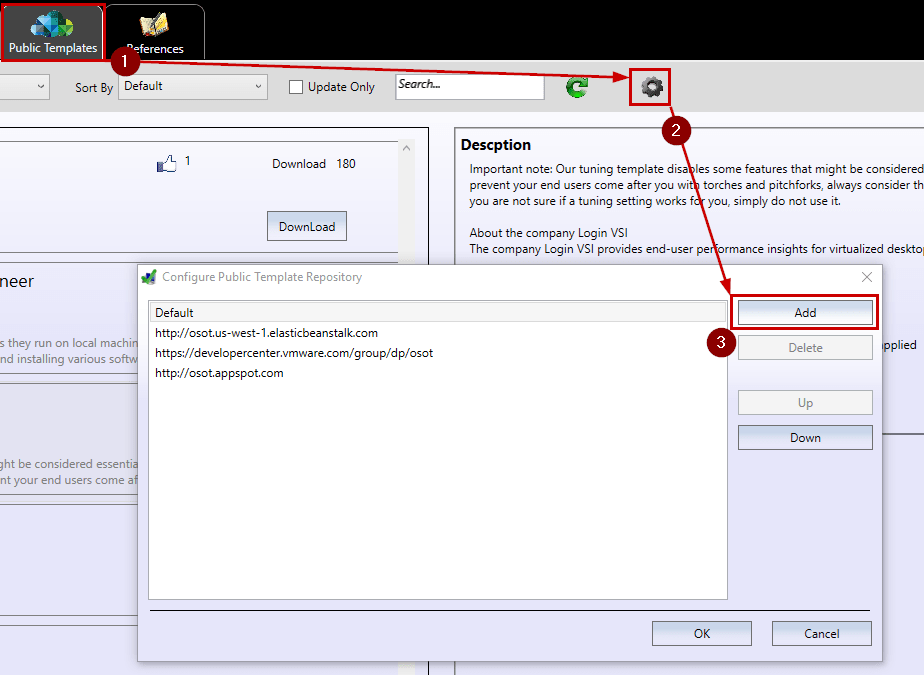
OSOT will list several templates based on few public repositories that are already registered in the tool. However, you can add other repositories by clicking the following icon and adding a new repository:
Automation using the Command Line
VMware OS Optimization Tool provides a great command line utility in order to automate the optimization process in your environment. It is nice to notice that automation is available!
Navigate to the directory where the executable is located, and run the following command:
.\VMwareOSOptimizationTool.exe /?
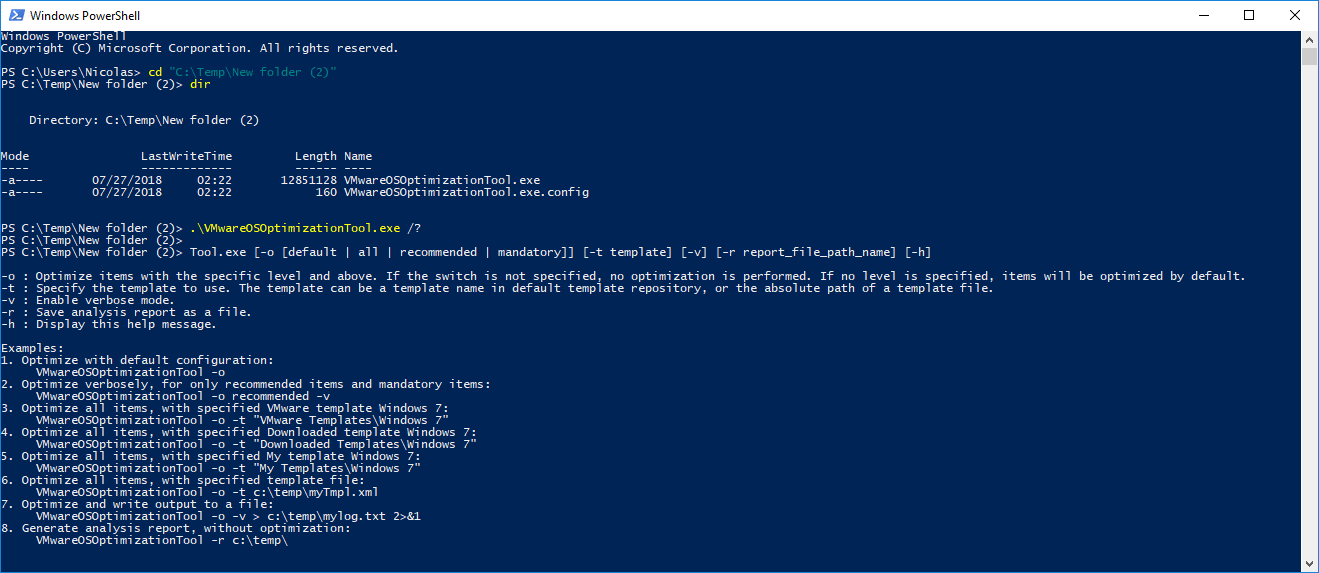
Below are some examples in order to automate the optimization process:
Examples:
1. Optimize with default configuration: VMwareOSOptimizationTool -o
2. Optimize verbosely, for only recommended items and mandatory items: VMwareOSOptimizationTool -o recommended -v
3. Optimize all items, with specified VMware template Windows 7: VMwareOSOptimizationTool -o -t “VMware Templates\Windows 7”
4. Optimize all items, with specified Downloaded template Windows 7: VMwareOSOptimizationTool -o -t “Downloaded Templates\Windows 7”
5. Optimize all items, with specified My template Windows 7: VMwareOSOptimizationTool -o -t “My Templates\Windows 7”
6. Optimize all items, with specified template file: VMwareOSOptimizationTool -o -t c:\temp\myTmpl.xml
7. Optimize and write output to a file: VMwareOSOptimizationTool -o -v > c:\temp\mylog.txt 2>&1
8. Generate analysis report, without optimization: VMwareOSOptimizationTool -r c:\temp\
Conclusion
Thanks to the VMware OS Optimization Tool, you can use it to build a Virtual Desktop that will be used as the parent image or source image for additional virtual desktops and your desktop will be optimized to suit your needs.
Before running VMware OS Optimization Tool, do not forget to snapshot your parent image in order to be able to revert in case of strange behavior with the gold image or use the “history” tab in OSOT to rollback to a previous version.
Follow our Twitter and Facebook feeds for new releases, updates, insightful posts and more.