
In our previous article on vCenter HA, how to install vCenter HA using the basic install option was explained. This option automatically installs vCenter HA with minor user interaction.
In part two, we focus on how to install vCenter HA with Advanced option.
In the previous article, the explanation of what vCenter HA is and how it works was given. We also discussed the difference between a basic install and an advanced install.
We learn that vCenter HA is a high available feature for vCenter availability. If the main (Active node) vCenter is down, then the backup (Passive Node) takes over, and your VMware infrastructure management is still available.
Note: Since we already went through how to create the vCenter HA network, you can check how to in the previous article, you can check the first article to know how to create the vCenter HA network. So let us go directly to the implementation of the vCenter HA advanced option.

vCenter HA pre-requirements – Advanced
- A vCenter Server Appliance 6.5 (for this example we are using version 6.5) deployed with either an embedded or external Platform Services Controller (PSC)
- Minimum of 3 ESXi hosts on each Active, Passive and Witness nodes can be allocated and run
- One additional port group the vCenter HA Network (as explained in the previous article, this port group should run in a different Network or VLAN from the vCenter management IP)
- Manually add a 2nd vNIC to the vCenter Appliance and configure its IP settings
- Create a Reverse DNS record (PTR) for vCenter (Active Node)
- Clone vCenter twice to create Passive Node, Witness Node
Note: For this example: a vCenter with embedded PSC. vCenter HA deployment with an external PSC is a little different (needs two PSC in place behind a load balancer to replicate each other).
In this example, we create a vCenter HA for a vCenter that is running in a different vCenter (vCenter is not managed by itself).
For this, example, we use a different subnet and VLAN (33) to configure this vCenter HA Network.
The vCenter Appliance that we are using to create this vCenter HA Advanced is a vCenter vSAN (no difference from a normal vCenter) and is allocated in a different vCenter Appliance and is running with a different single sign-on (SSO) domain.
Environment details:
- Source vCenter management IP: 192.168.1.95
- Destination vCenter management IP: 192.168.1.30
- vCenter HA Active Node IP: 192.168.10.200
- vCenter HA Passive Node IP: 192.168.10.201
- vCenter HA Witness Node IP: 192.168.10.202
vCenter Server 6.5 U2e Build 11347054 – Before starting implementation, it is essential to update vCenter 6.5 to the latest version.
Pre-Install tasks:
First, add the 2nd vNIC to your vCenter Appliance and select the vCenter HA port group created for vCenter HA Network.

Next, connect to your vCenter Appliance Management Interface (VAMI) and add the first IP address selecting for Active Node. In our case, it is 192.168.25.1.
Connect to your VAMI using https://vCenter IP or FQDN:5480 then add the IP to the new vNIC.
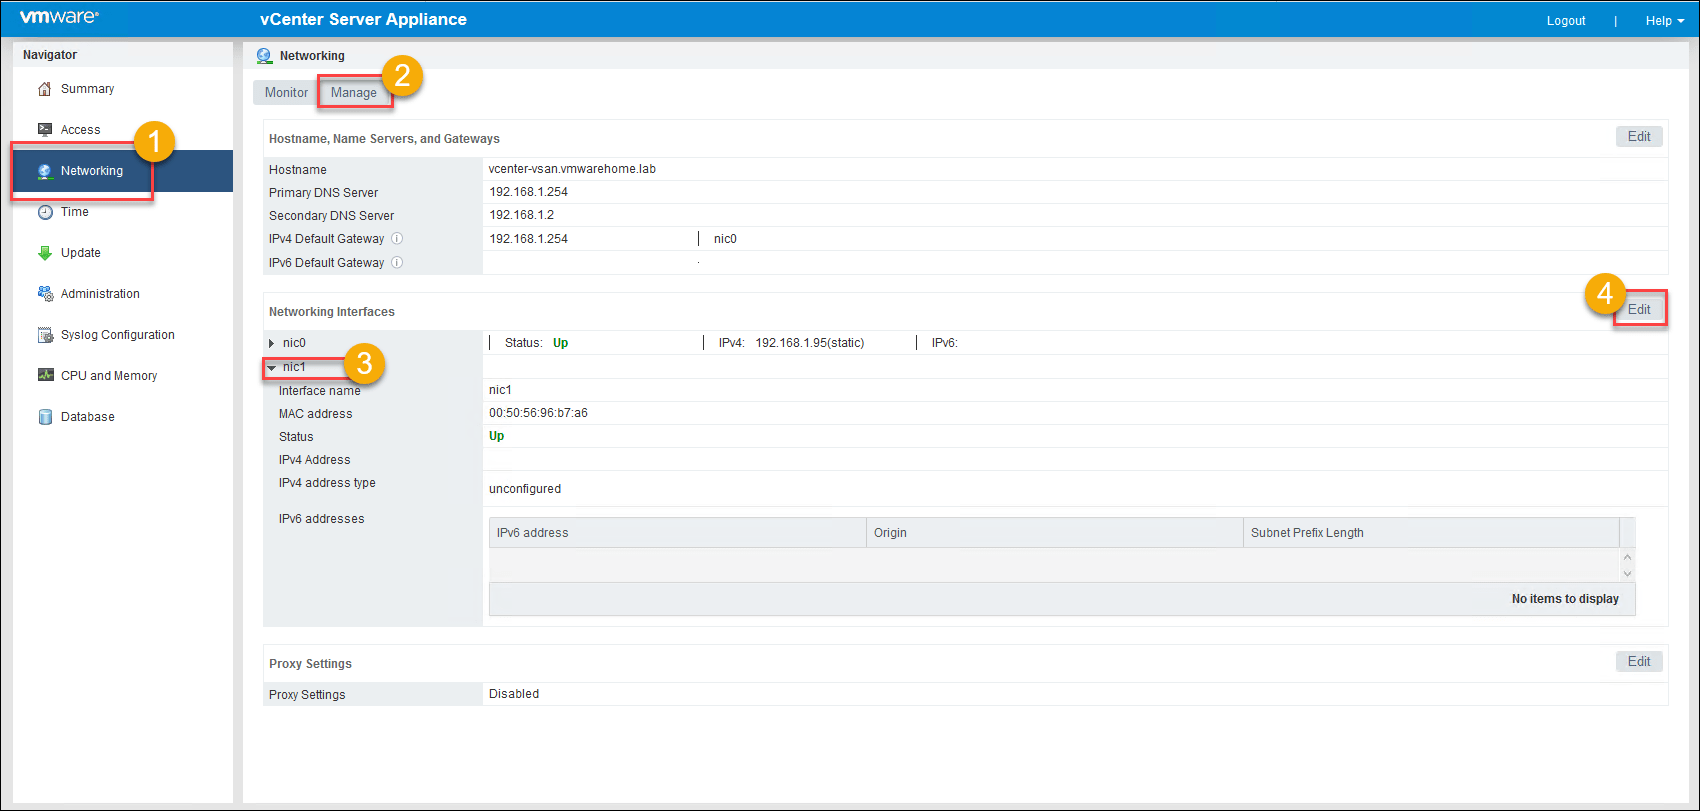
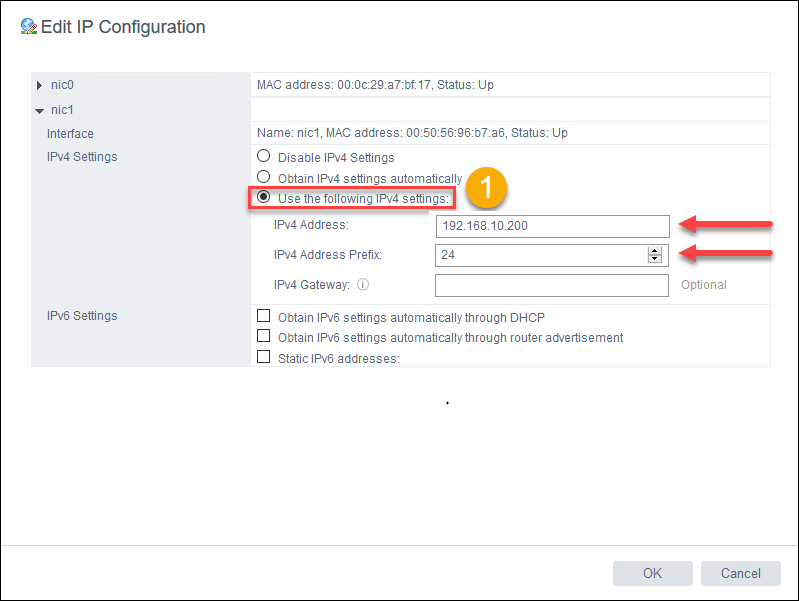
Note: Depending on your network routing, Gateway is optional.
You now should see both virtual interfaces up and with the new IP.

If it doesn’t exist, create a PTR record in your DNS for the Active Node.
After we configure the new IP address for in vCenter for the Active Node, we start the vCenter HA implementation.
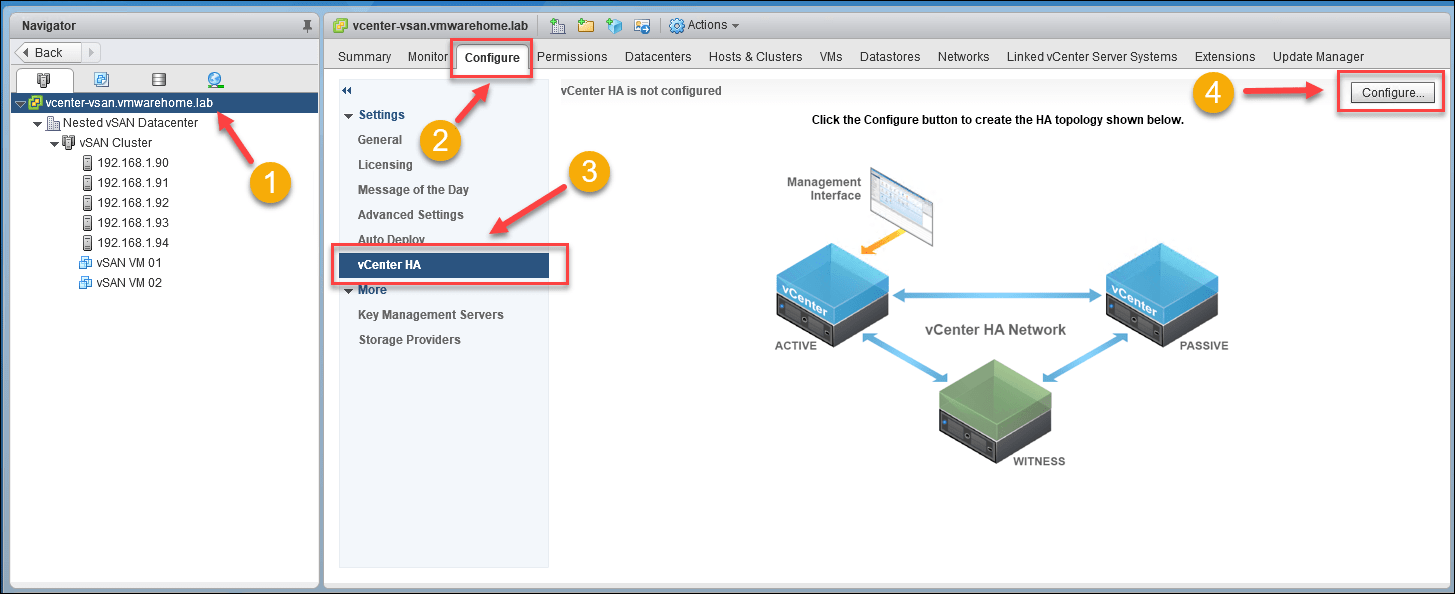
Start implementation by selecting the vCenter HA option to implement the advanced option.
Log in to vCenter Appliance and at vCenter level(1) select Configure(2) tab, select vCenter HA(3) option and click Configure(4) button.
Since this an advanced implementation, in the configuration option select Advanced.
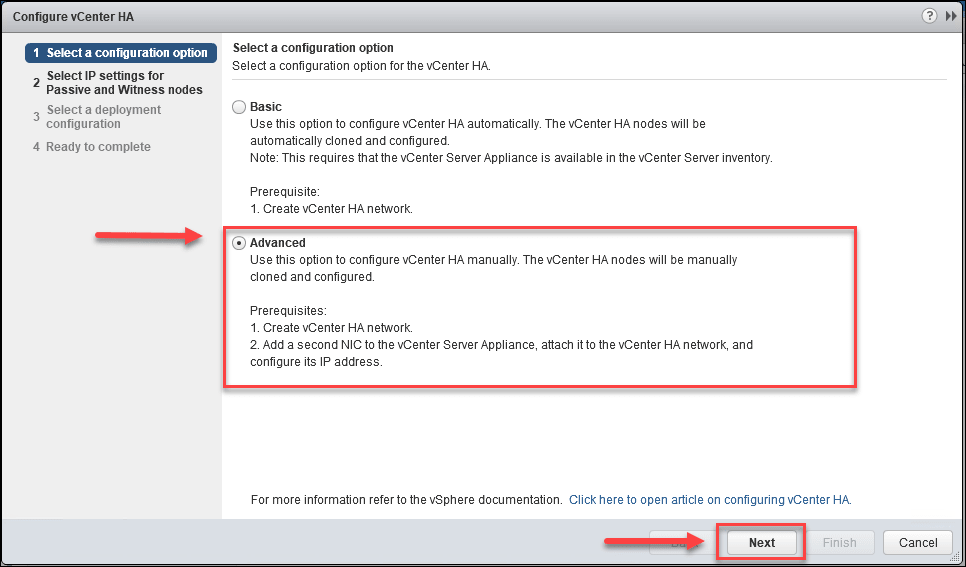
Then you need to configure vCenter HA network adding IPs for Passive Node and Witness node.
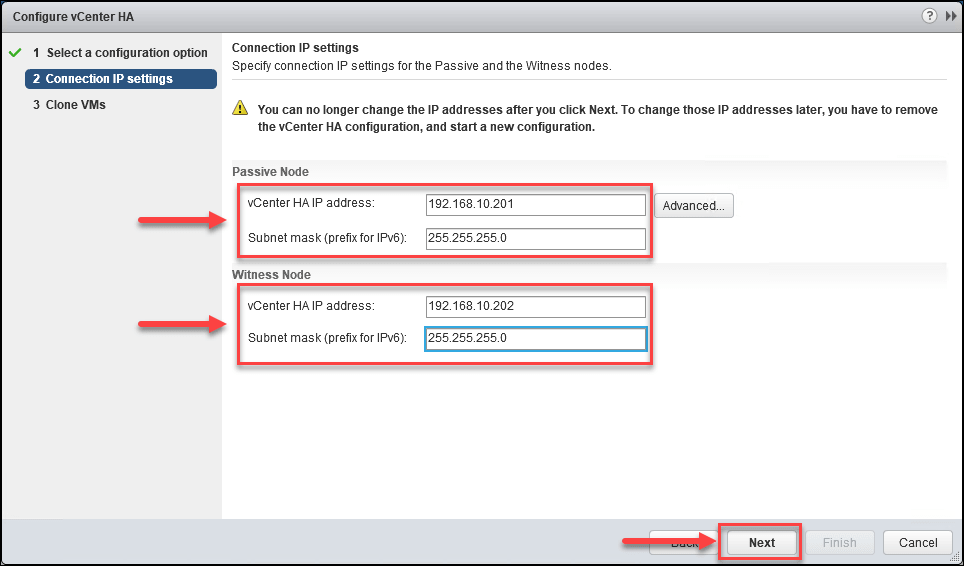
As explained in the first article, you can add different management IP address for the Passive Node.
In some infrastructure, this is necessary when using a different location, or subnets. In case of failover of the main vCenter, Passive Node takes over and use the IP address you added in this option.
Note: If using this option, don’t forget to create a DNS entry for this IP and the subnet or VLAN that you are using in this new IP needs to reach your ESXi hosts.

Error: This is the type of error you encountered when you did not create a reverse DNS entry for your vCenter.

You can log in to vCenter console shell and run the following command: prepare-vcha
We get the following error when testing the vhca:
Exception(‘Unable to get hostname resolved IP address for eth0’)
Exception: Unable to get hostname resolved IP address for eth0
It seems the problem is the DNS entry. As listed in the pre-requirements for vCenter HA a reverse DNS entry is mandatory for vCenter HA.
However, in this case, there wasn’t DNS entry (since it was created before starting the implementation), and vCenter DNS wasn’t properly configured and not reachable.
So make sure your DNS settings are correctly configured in the vCenter network settings.
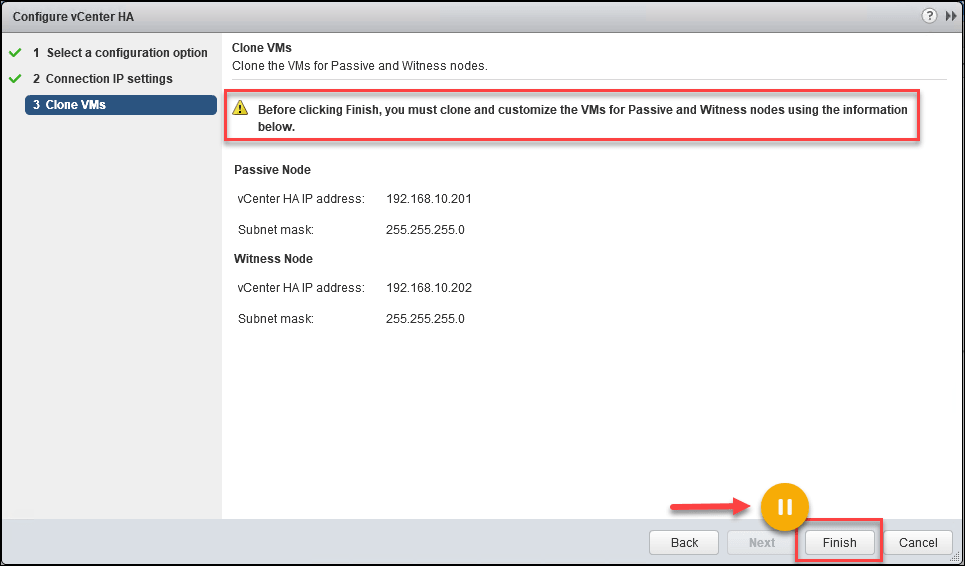
Continuing with the vCenter HA implementation, you now need to clone your vCenter twice — the first clone for Passive Node, a second clone for Witness Node.
Put your implementation on hold (do not close the Window) and go back to your vCenter where this vCenter is allocated and start the cloning process.
Note: vCenter HA clone only work during the vCenter HA process. If you try to clone before vCenter HA install it wouldn’t work.
If for any reason you cancel the vCenter HA installation, you need to delete the clone that you have already created and when starting the vCenter HA again, you need to create those clones again.
However, the VM Guest Customization profile you can create before starting the cloning or vCenter HA installation.
The cloning process takes some time — not only for the clone itself but also providing all necessary data on each clone.
In this article, we go through the clone of the Passive Node only. The Witness is similar; just the network settings are different (shown in the next steps).
Cloning process
Clone Passive Node:
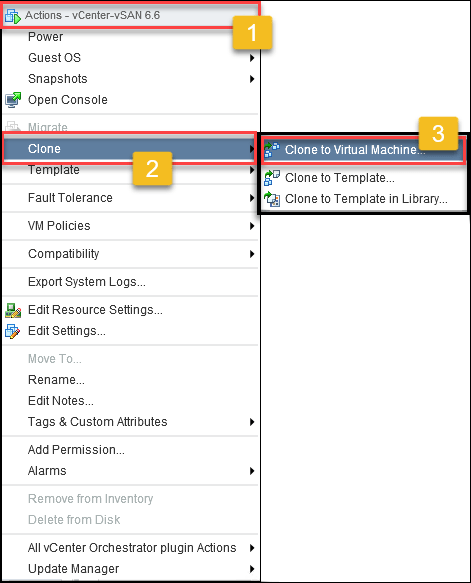
Log in to the vCenter where the vCenter to be cloned, select vCenter Appliance(1), right-click and select the Clone(2) option and Clone to Virtual Machine(3).
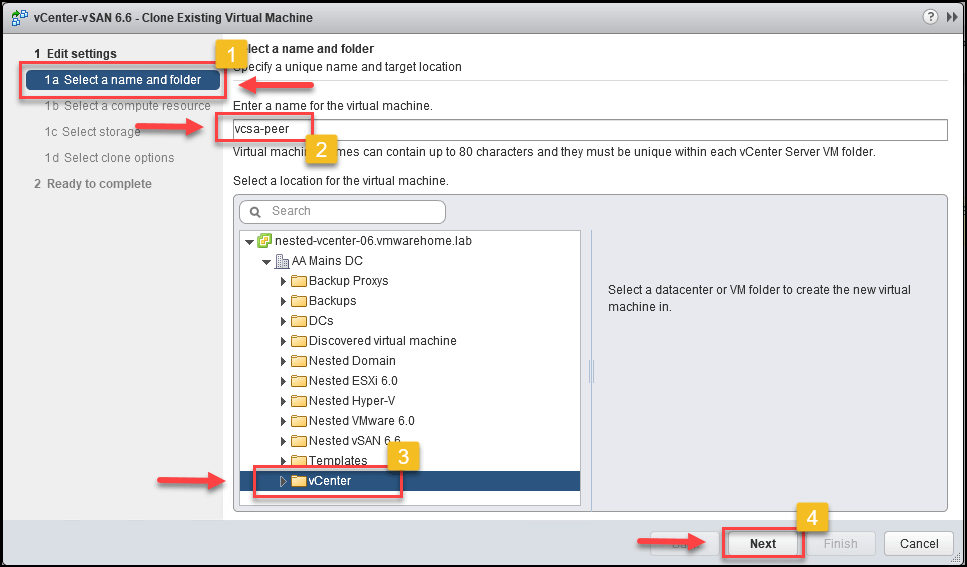
Select the name for this Passive Node (this is just the VM name) and choose the location folder.
In our example name is vcsa-peer(2) and is stored in the folder vCenter(3).
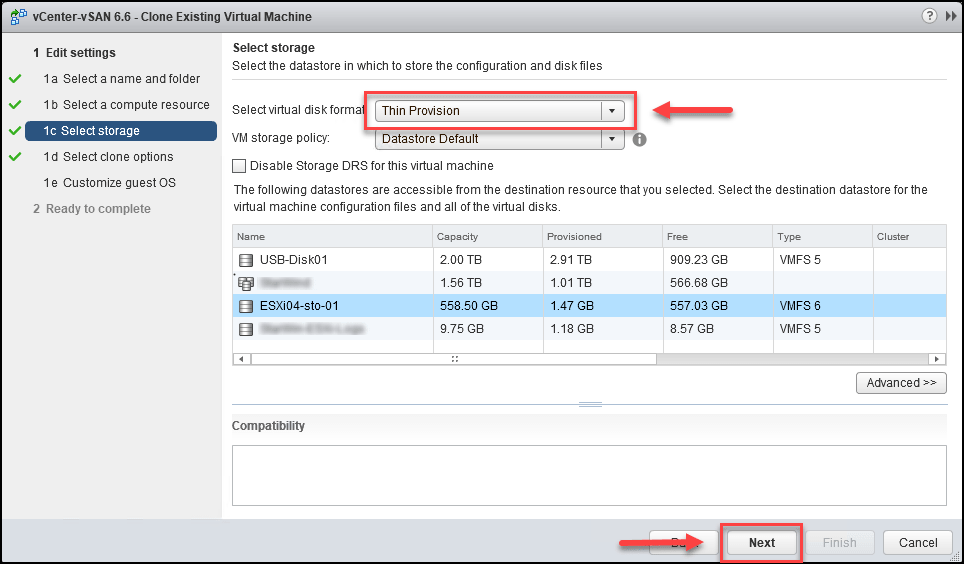
Select the ESXi host for this clone.

If you don’t have any VM Storage Policy in place, change the “Select virtual disk format” option to “Thin Provision” format and select the Storage (Datastore) to allocate this clone.
Note: Again you should select a different datastore where vCenter is stored.
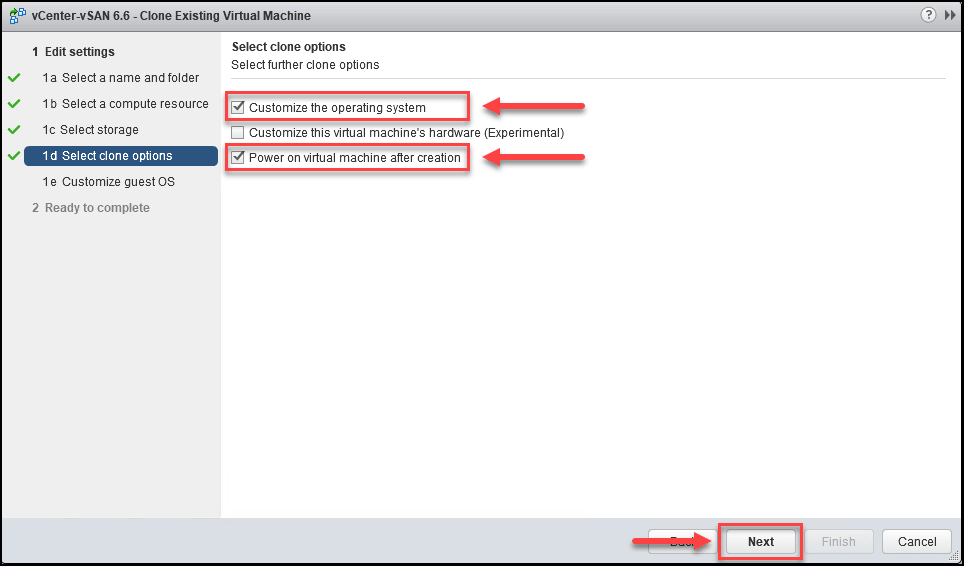
In the next step, it is essential that you enable “Customize the operating system” and “Power on virtual machine after creation. Enabling these two options is necessary to make the changes on the clone(mainly network settings).
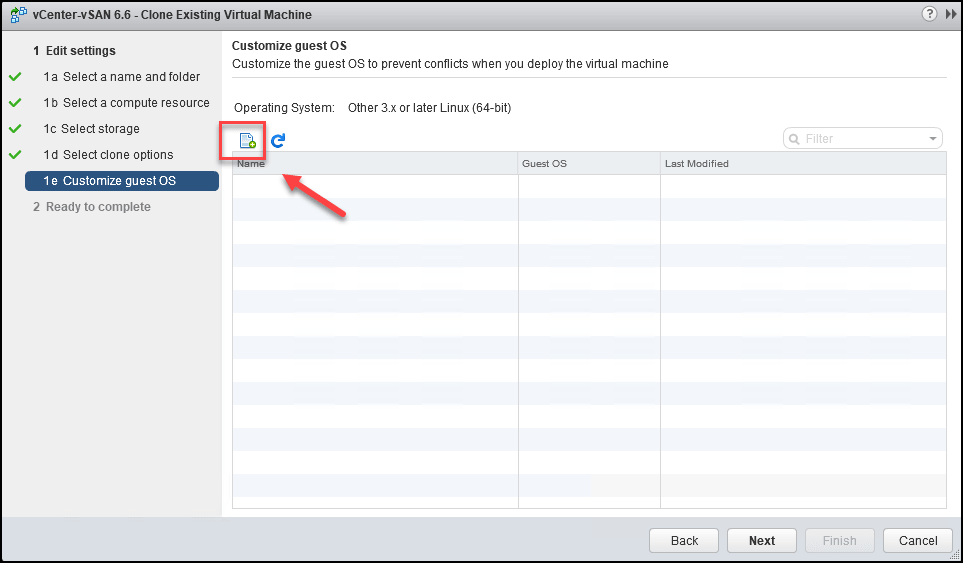
Since there is no VM Guest customization profile for this clone, we need to create one (it is possible to create this before and use it in this step).
Click the customization button to create the VM Guest customization.
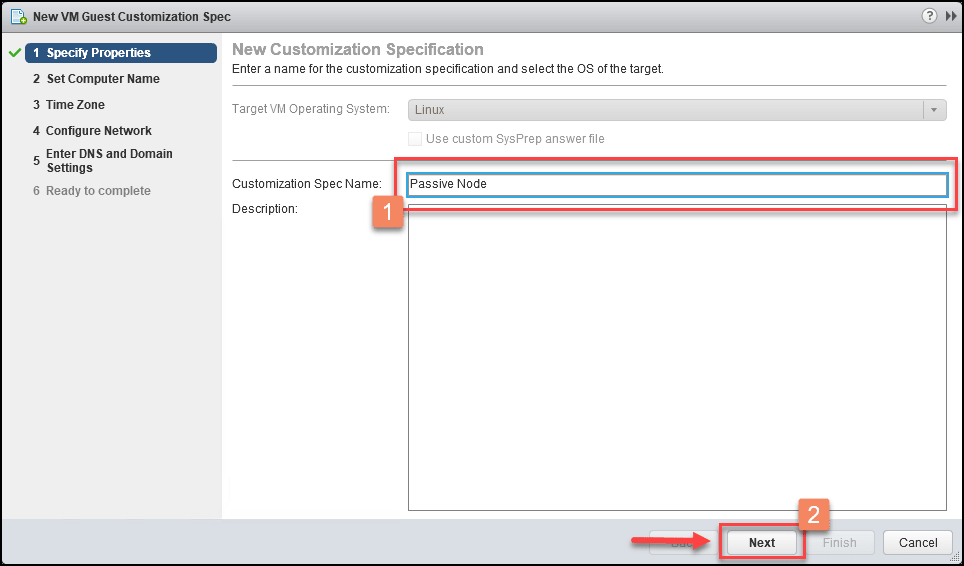
After you click customization button, the customization window process will pop-up, and create a customized profile for this clone.
Note: This is a process with many steps, in the next example we only focus and show the essential steps only.
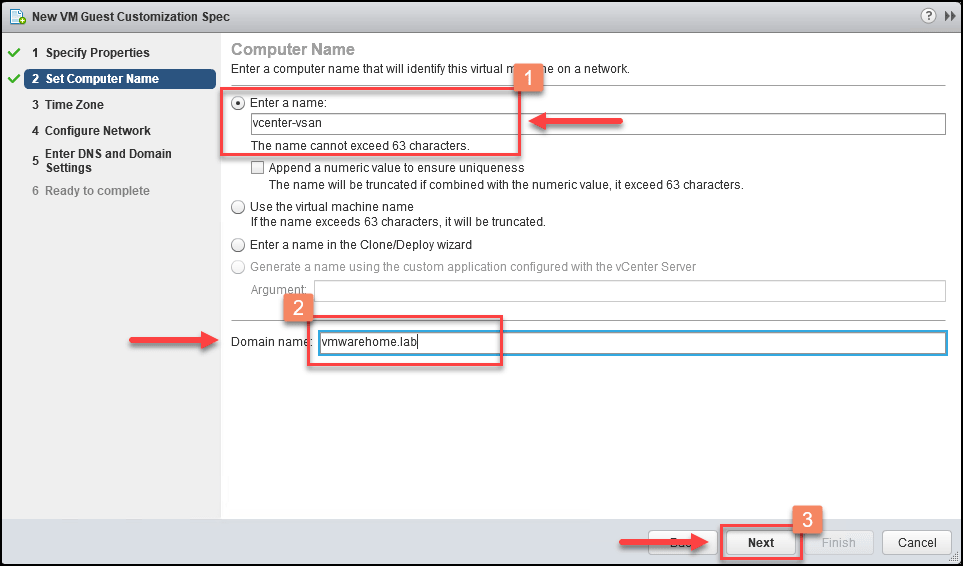
Start by giving a name to this customization. Since this is for the Active Node, we give that name for a better identification when needed.
Next, add the name of the vCenter and your domain.
Note: Since in a case of failover this Passive Node takes over so the host name needs to be the same as the Active Node. The option with vCenter Appliance host name is mandatory.
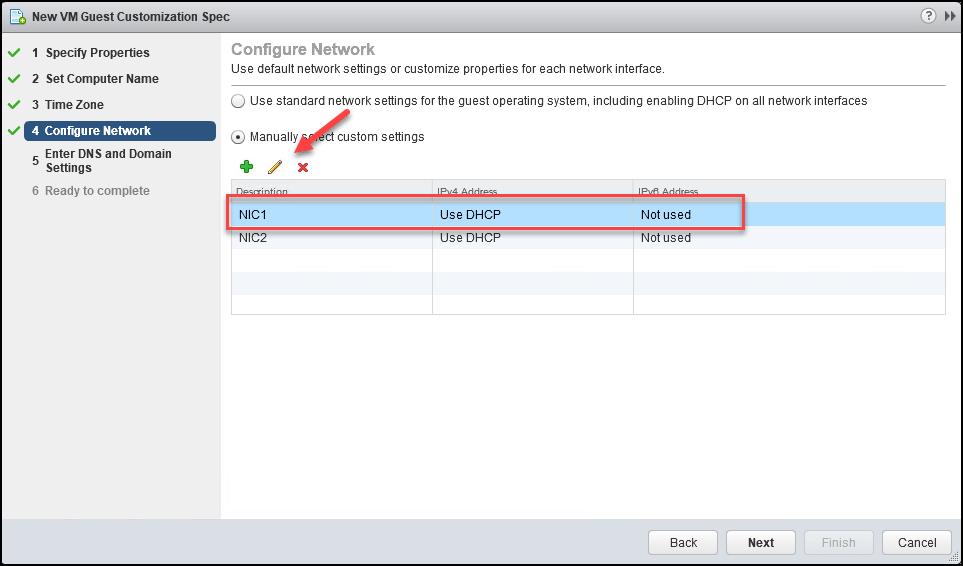
After time zone option (use your time zone) we have the network settings.
For the NIC1 adapter, add the management IP of your vCenter (in this case 192.168.1.95), for NIC2 adapter, add Passive Node vCenter HA IP (in this case 192.168.10.201).
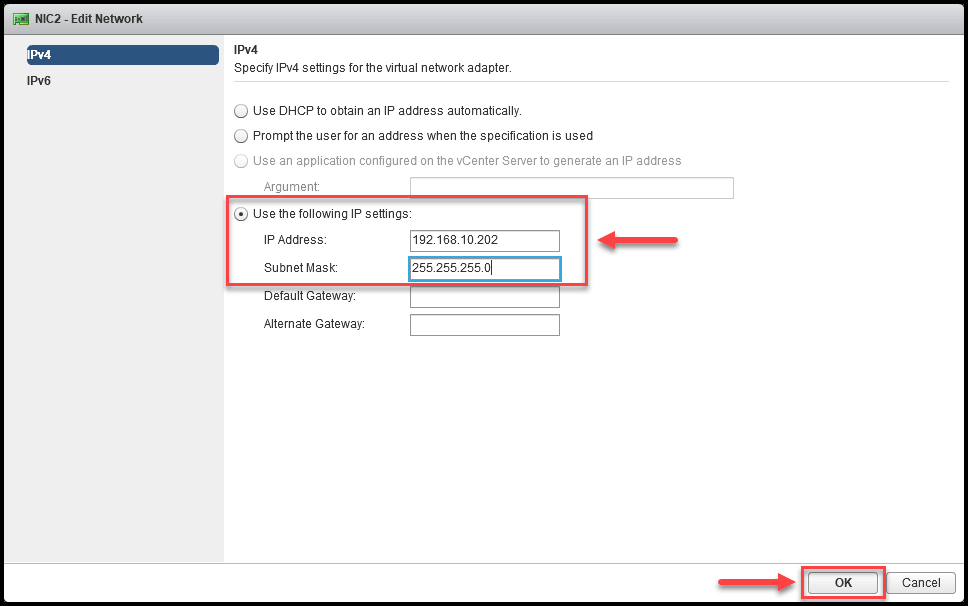
Select the NIC adapter and click edit.
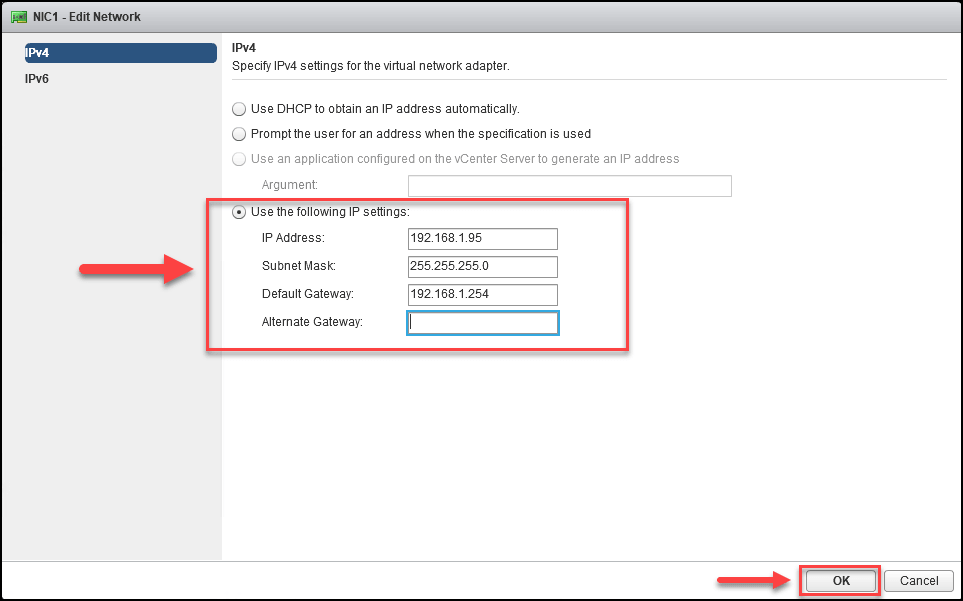
Now add the second IP for vCenter HA.
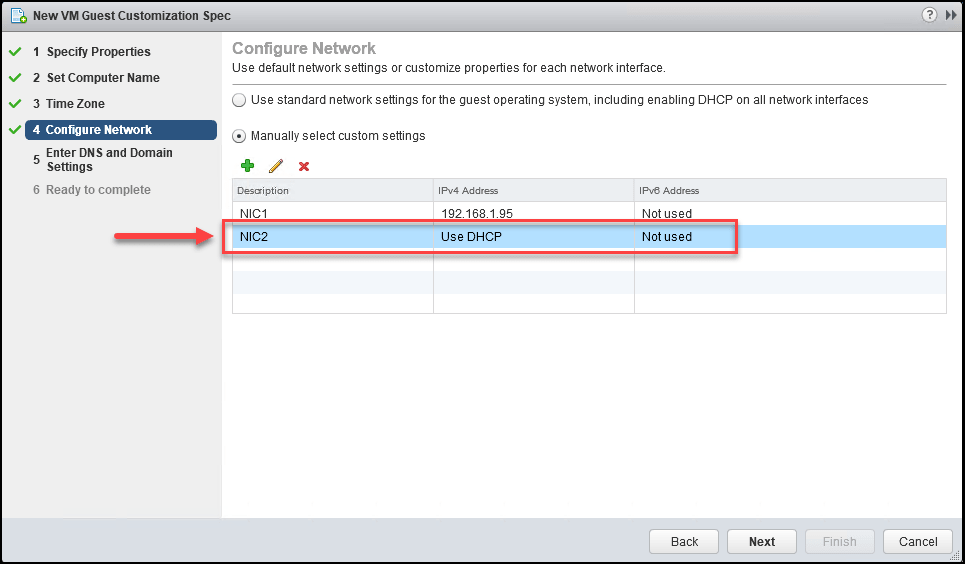
Add the IP address for your vCenter HA network and leave the gateway field blank.
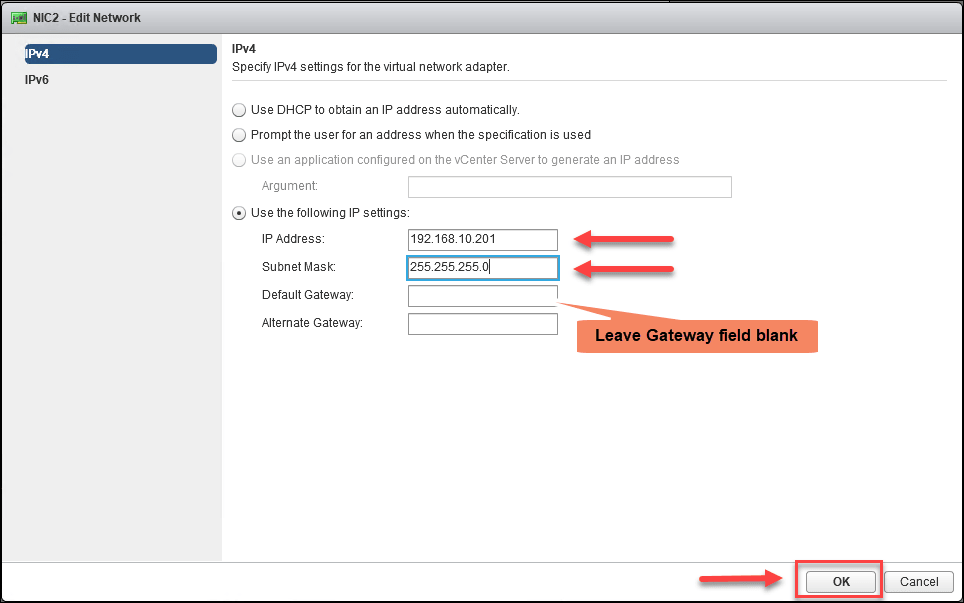
After both adapters are configured click Next.

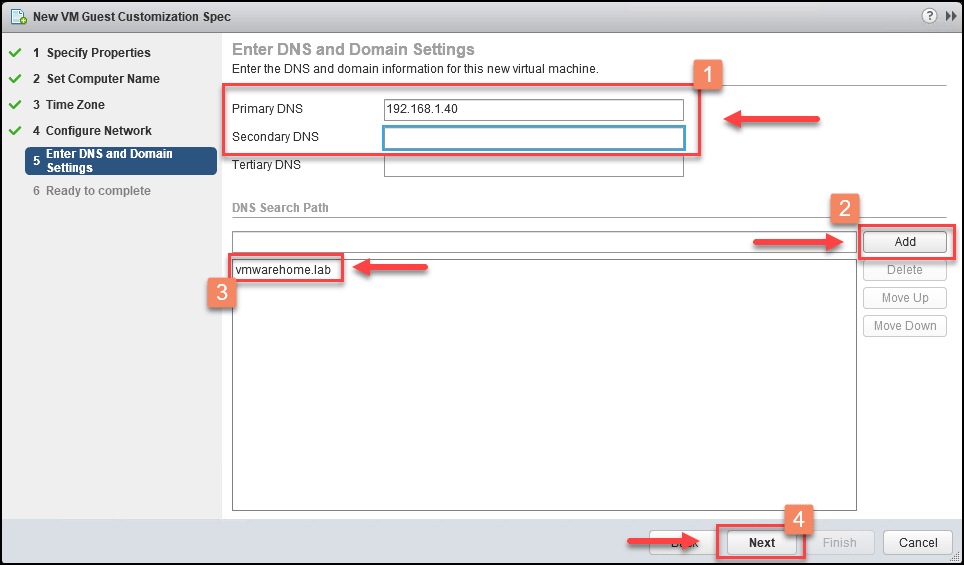
Next, add your DNS IPs and your DNS search path (domain) click next to finish the customization profile.
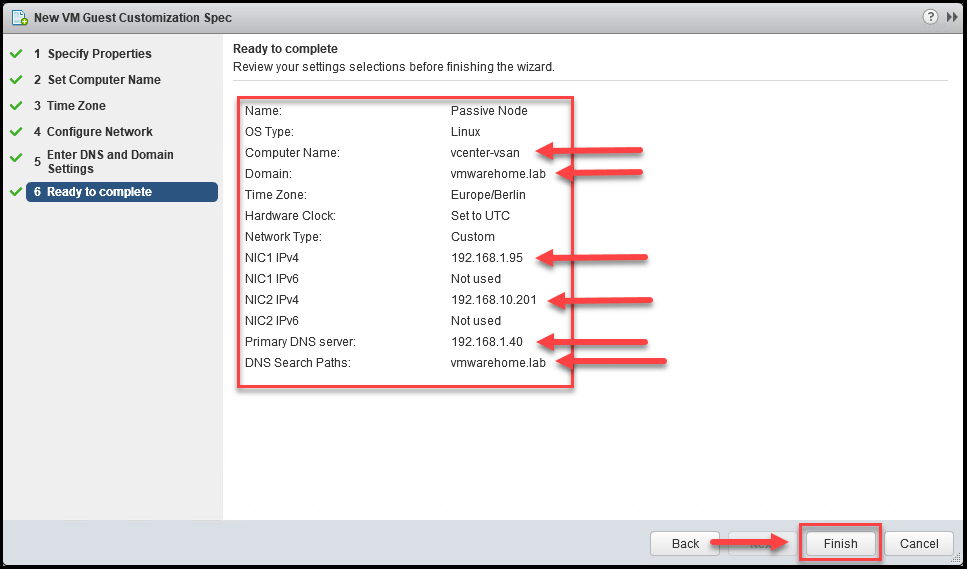
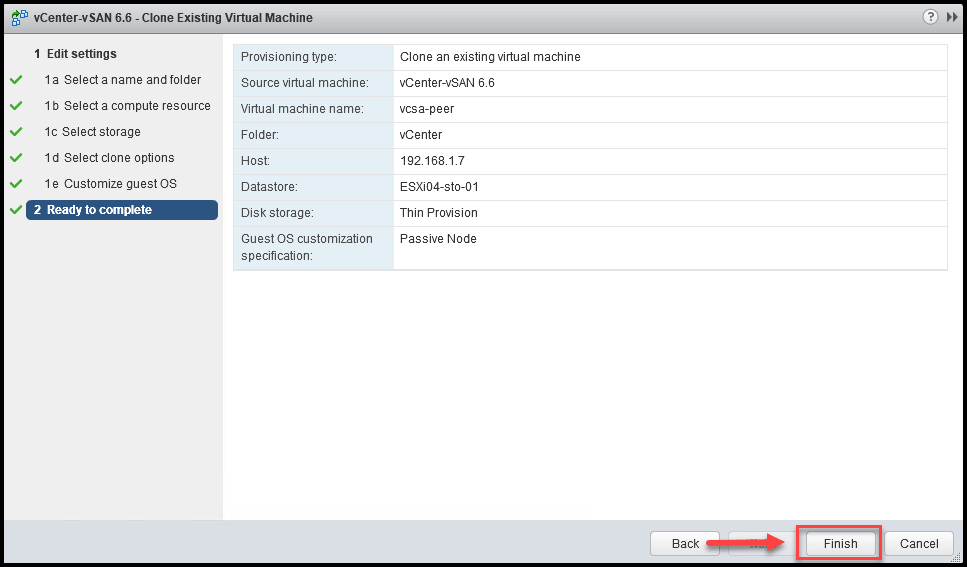
Review the details and Finish.
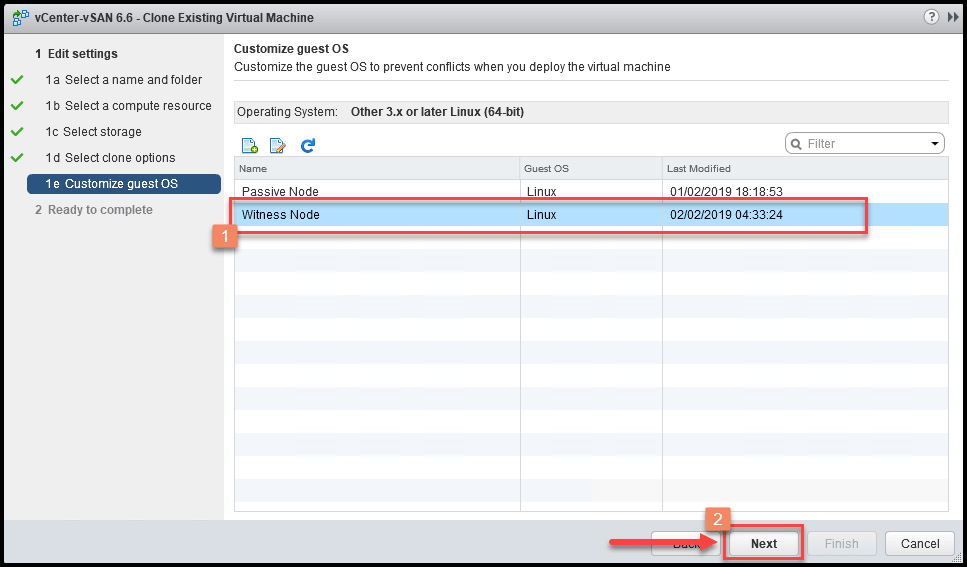
Note: The highlighted part In the next image is the essential information that you need to fill to match the Active Node for your VM Guest customization.
After the VM Guest customization is finished, the cloning process brings you back to the cloning process.
Select the above created customize profile for the Passive Node clone and click Next.
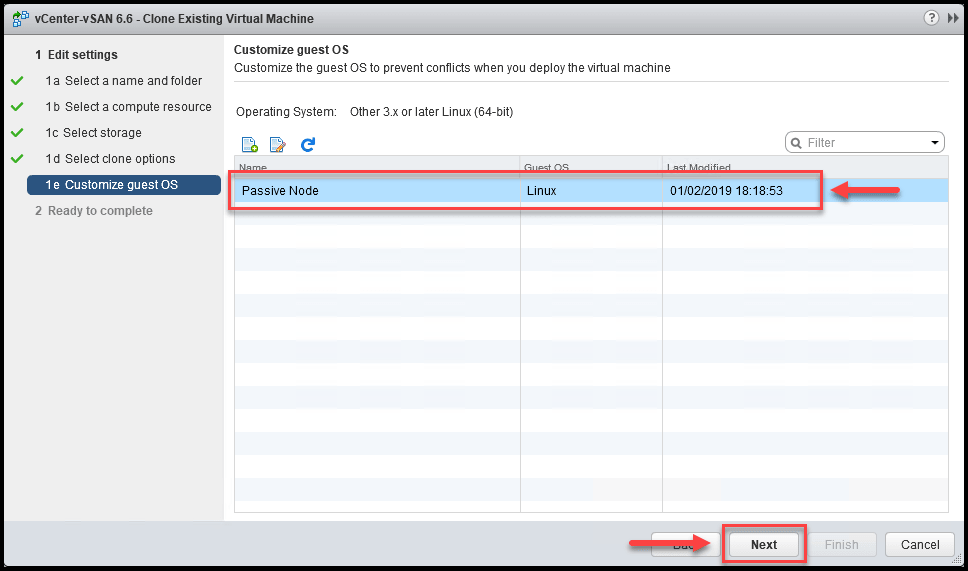
Review all the information and if everything is correct, click Finish to start the clone task.
You should see the clone task running in your Recent Tasks.

Clone Witness Node
The process to clone the second node (Witness Node), is similar to the above process. The only difference is the name for your appliance and the network settings.
Like in the previous clone you need to create a VM Guest customization for Witness Node also. In the customization process, these are the settings that are different from the above clone process.
The name chosen for this VM Guest customization is “Witness Node”.
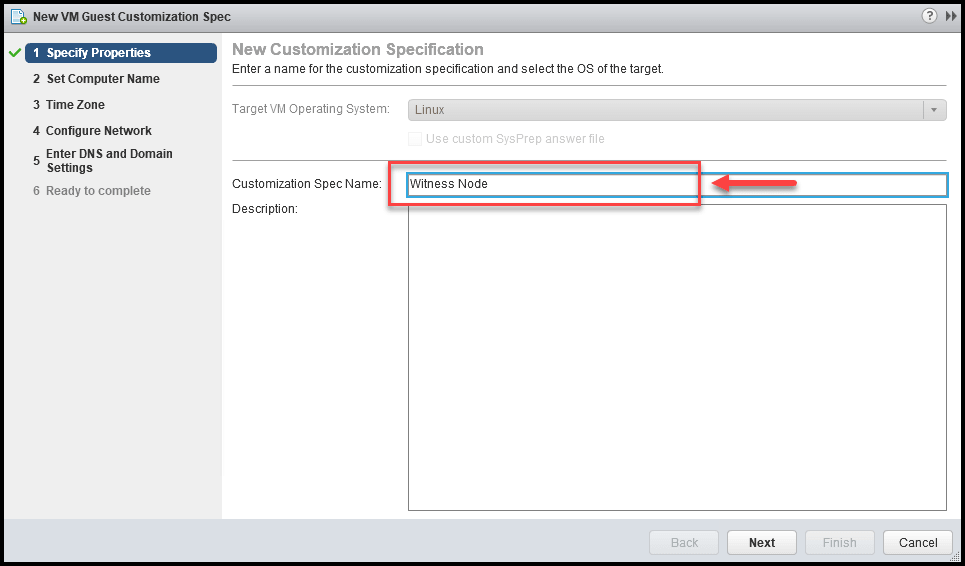
Don’t forget, the name for the Guest OS needs to be the same as is in vCenter and also like we created the Passive Node.
In the network settings, we only need to change the adapter NIC2. Click the button and add the IP address.
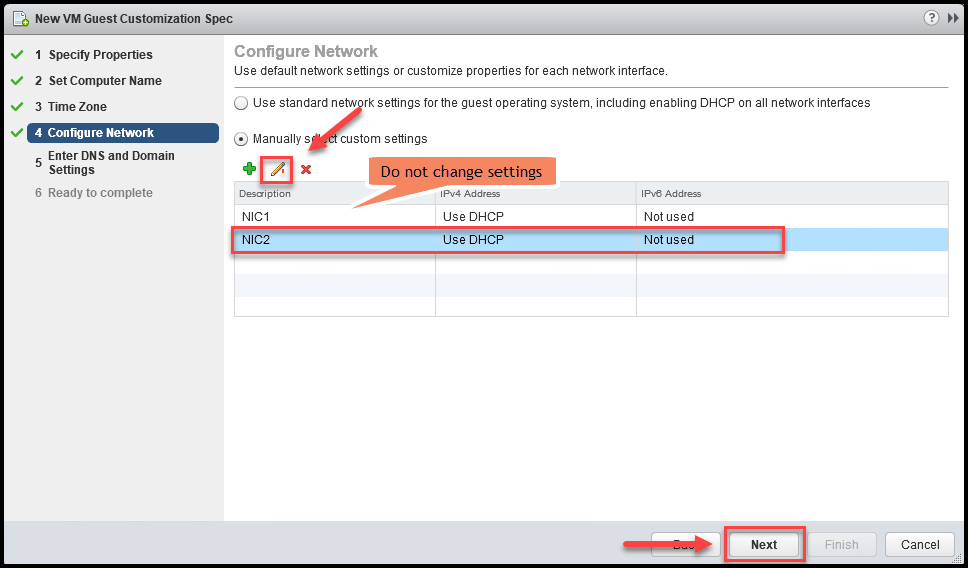
Again do not add a Gateway in these settings.
Select the VM Guest customization Witness Node in the cloning process and start the clone.
After this process is finished clone task starts.
Now go back to your vCenter HA Process (that we left in suspend and is still running in the vCenter that we are creating the vCenter HA).
After we have our clones created, we now can click finish and start the vCenter HA.
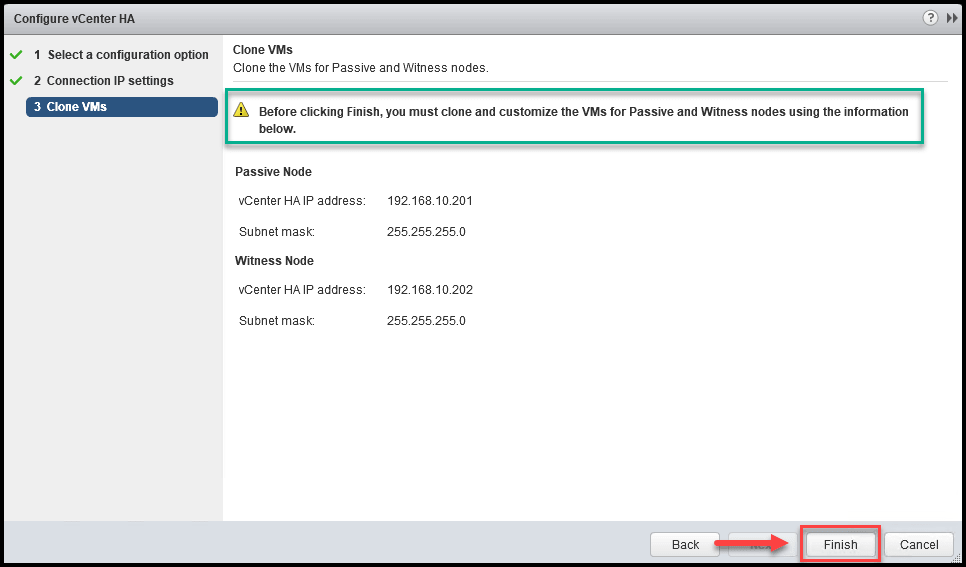
After you click finish the vCenter HA deployment and configuration starts. Depending on your environment, this takes a few minutes to finish.

After the vCenter HA deployment and is configured, you can check that all Nodes are green and up, but you still get information that is still replicating.
Replication between vCenter HA Nodes can take some minutes (depending the size of your environment and the vCenter DB).
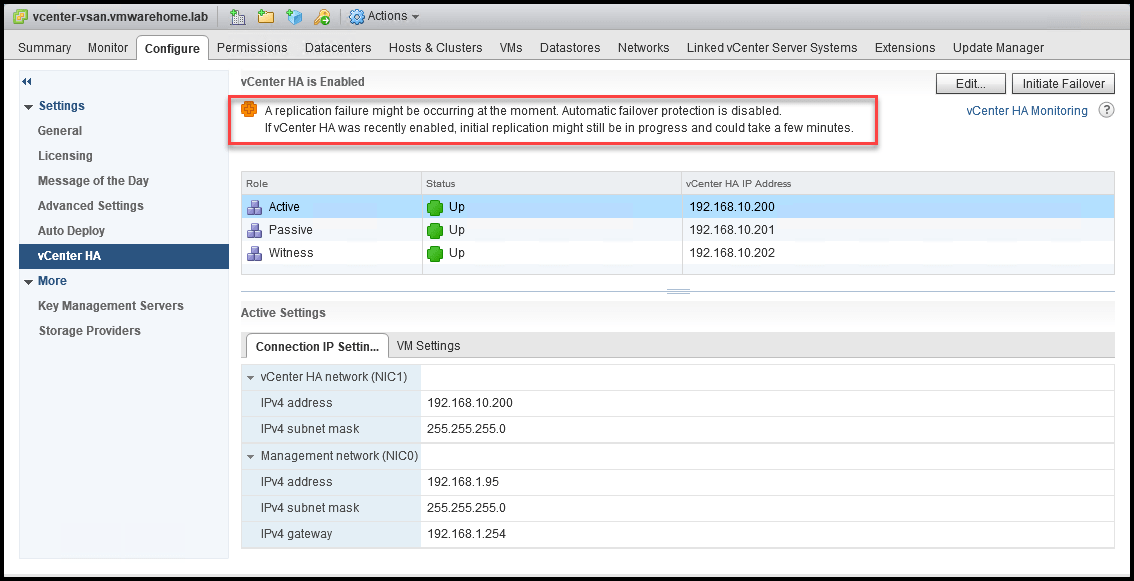
However, after the replication is finished, you should see all green.
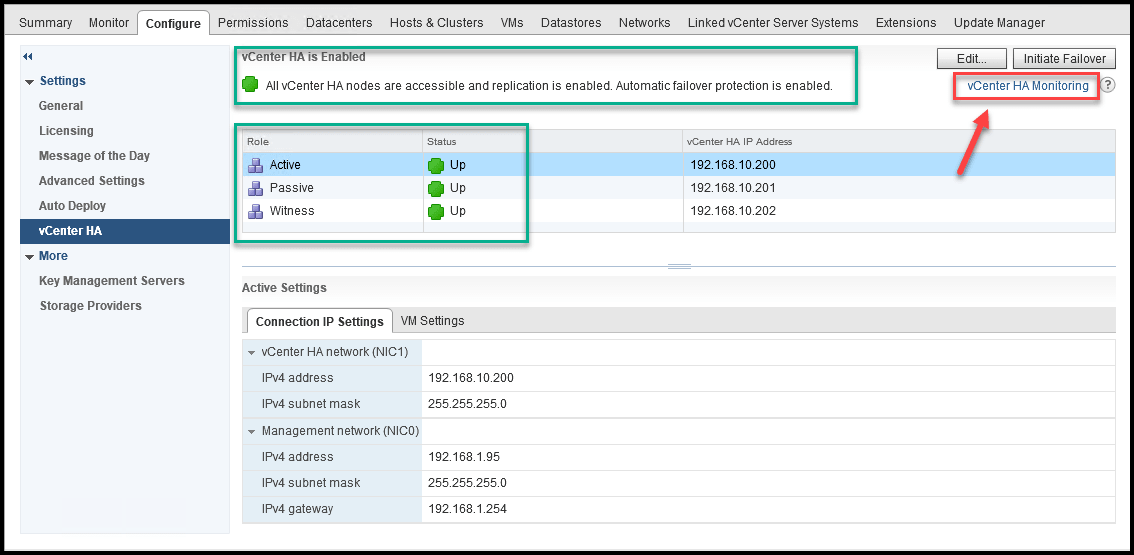
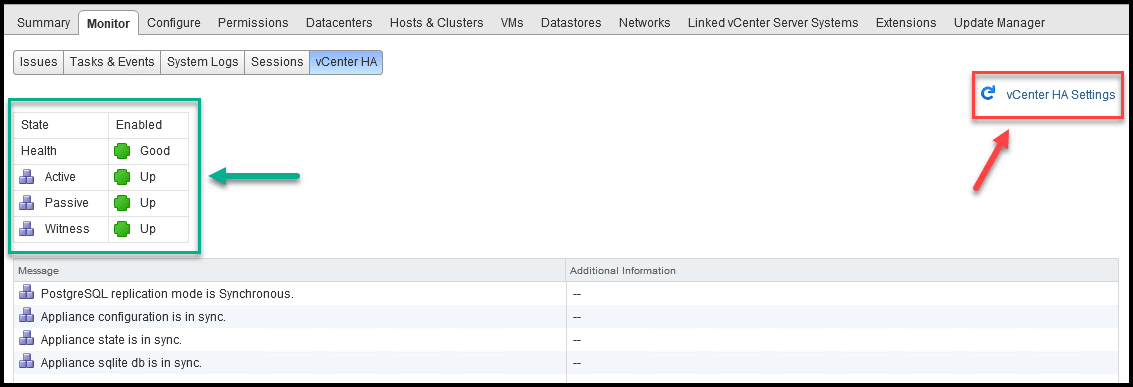
Next, go to vCenter HA Monitoring to check if all vCenter HA Nodes are running and all services are up. If you don’t see any warnings or red flags, then vCenter HA is implemented.
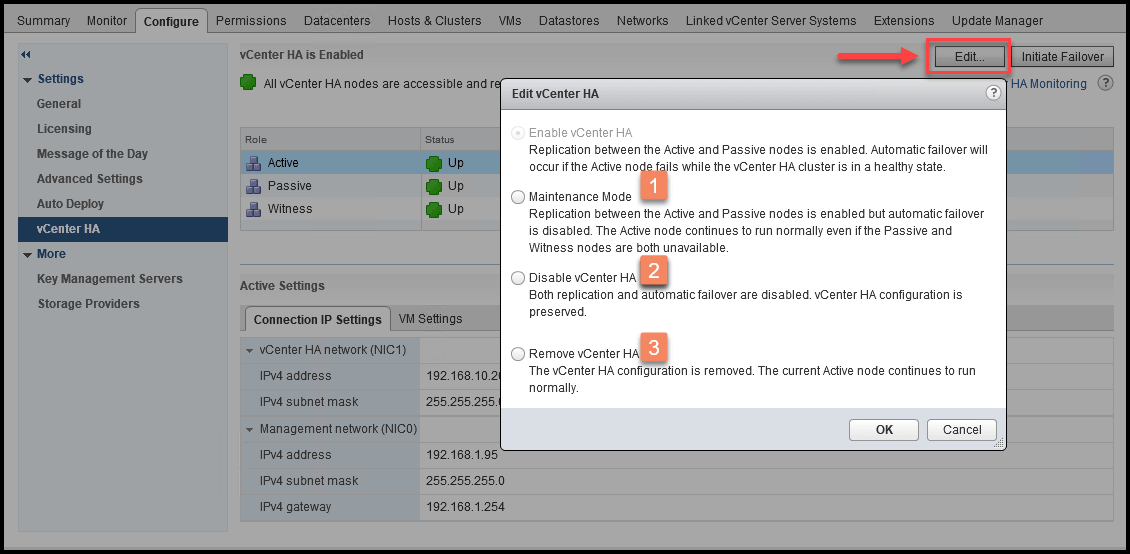
Go back to the vCenter HA Settings and edit your vCenter HA settings.
In this section, you can manage your vCenter HA state if you need to update the Nodes or do any other maintenance (1) in the vCenter HA.
You can also temporarily disable the vCenter HA(2). All services will be suspended (replication and failover) and only Active Node is working and enable.
If you want to remove all the vCenter HA(3) choose the option and vCenter will be destroyed.
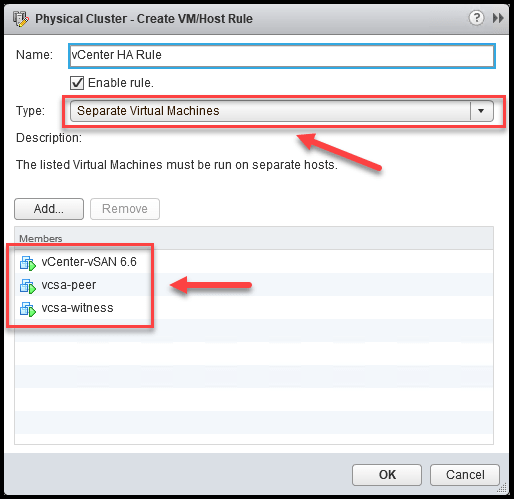
Go back to the vCenter, here this vCenter and all Nodes are stored and create a DRS rule so that all vCenter HA Nodes run in different hosts in case of any failure or the ESXi hosts.
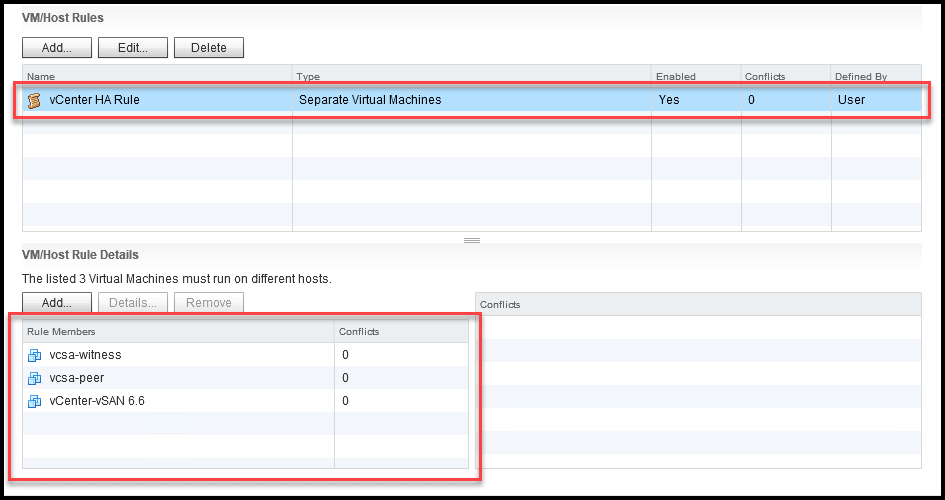
Check the DRS rules you created, and you are done.
After all these steps we finish Installing vCenter HA with an Advanced Install.
Note: If by any reason you cancel the vCenter HA, or delete the Clones without removing the vCenter HA properly you may get the Active Node (main vCenter) without network (loses connection on the first adapter). Alternatively, other issues may raise and you will not be able to recover the vCenter without removing the vCenter HA properly.
If this happens, you need to log in to vCenter Appliance shell and run the command: destroy-vcha
Reboot the vCenter Appliance, and your vCenter network should be back.
Final thoughts:
With this part two, we finish our article regarding vCenter HA.
In both articles, we use vCenter Appliance 6.5 because at the moment is the most used version by VMware customers. In version 6.7 the process is similar, but the implementation is a little bit different. We will come back with a vCenter HA 6.7 article.
Also, this is a standard vCenter HA advanced implementation — no need to route any networks or create individual network configurations.
In some cases, you would need to use the gateway in the vCenter HA IPs configuration. In other scenarios, you would need to create some routes in your vCenter HA Active and Passive appliances. However, again, those are particular configurations and unique scenarios (like L3) or vCenter in different locations. We are covering those type of scenarios in these two articles.
Regarding the vCenter HA feature, is a good alternative for high availability for your virtual environment. It will not protect your environment against all possible problems but gives us an excellent high availability tool.
Final note: vCenter HA is not supposed to be a backup of your vCenter. This feature doesn’t work as a backup, but only high availability. If you have a problem in your data in your vCenter DB, those issues will also be replicated to the Passive Node. So the only protection for this type of problems is a proper backup of your vCenter Appliances.
Follow our Twitter and Facebook feeds for new releases, updates, insightful posts and more.