
One of the really great things that can be done with Hyper-V guest operating systems is Guest Clustering.
Guest Clustering allows an application running on top of a hypervisor environment to have resiliency not only from a virtual machine level but also from an application standpoint. Guest Clustering means that you are running a cluster of virtual machines inside the hypervisor itself. If one of the VMs goes down the application availability is maintained by the guest clustered virtual machine. There is a new feature that was introduced with Windows Server 2012 R2 called Shared VHDX that greatly reduces the complexity of creating the shared virtual disks needed for guest clusters. The functionality of Shared VHDX was improved in Windows Server 2016 and a new feature was added called VHD Sets.
How do you make use of the Shared VHDX functionality as well as VHD Sets?
Let’s take a look at Windows Server 2016 Hyper-V Shared VHDX and VHD Sets and take a closer look at the functionality itself as well as the basics of how is configured.
Shared VHDX and VHD Sets Make Guest Clustering Easier
Historically in virtual machine environments running inside of Microsoft’s Hyper-V hypervisor, if you wanted to have a shared virtual disk assigned to guest operating systems, you had to attach a shared virtual disk inside the guest operating system by means of an iSCSI target or virtual Fibre Channel connection. This added a great deal of complexity to the environment having to provision, configure, manage, and maintain iSCSI or Fibre Channel connections inside the guest operating system.

As mentioned with Windows Server 2012 R2, the shared VHDX configuration removes the need to have to provision iSCSI or other connections inside the guest operating system. This also removes the potential security implications of exposing your storage fabric inside the guest operating system as well.
Shared VHDX Requirements
There are a few requirements to keep in mind when thinking about making use of the Shared VHDX functionality.
They include the following considerations:
- Requires at least Windows Server 2012 R2 Hyper-V or higher
- The guest operating system must be Windows Server 2012 or higher and be running the Integration services from Windows Server 2012 R2
- The disk type must be the VHDX type. VHD disks are not supported
- The functionality is not supported for operating system boot drives. Shared VHDX is only supported for data disks
- Cluster Shared Volume (CSV) or Scale-Out File Server (SoFS) backend storage is required for the shared VHDX to be functional
- NTFS does not contain the feature set to implement the Shared VHDX. If a non-CSV volume is used to force the attaching of a shared VHD filter driver it is only loaded until the disk is offlined
Now that we have considered the requirements for Shared VHDX, let’s see what steps are involved to configure the Shared VHDX functionality.
Configuring Shared VHDX
There are really only three steps involved with configuring the Shared VHDX functionality. They are the following:
- Install Failover-Clustering
- Apply the Shared VHDX filter driver to a volume
- Select Enable Virtual Hard Disk Sharing check box in the virtual disk properties
Installing Windows Failover Clustering
Perhaps the easiest way to install the Windows Failover Clustering Feature is to utilize PowerShell. To install the Failover Clustering feature, use the following cmdlet:
- Install-WindowsFeature Failover-Clustering
Installing the Shared VHDX Filter Driver
To install the filter driver attached to a specific volume, you need to run the following command:
- FLTMC.EXE attach svhdxflt
:
When the Shared VHDX is attached to a virtual machine, it is seen as a regular shared SAS disk and is utilized like any other storage. The great thing about the shared VHDX disk is the virtual machine is not aware of the storage fabric and configuration. The Shared VHDX configuration provides an abstraction layer of the storage to the virtual machine guest.
Shared VHDX does present a few limitations that need to be considered at the Windows Server 2012 R2 level:
- Backups of the VM at the Hyper-V host level
- Creating Checkpoints
- Storage migration is not possible for the shared VHDX
- Hyper-V replicas of the virtual machines connected to shared VHDX is not possible
What about Windows Server 2016?
There have been several advancements in the Shared VHDX functionality with Windows Server 2016 that makes this technology much more powerful:
- Ability to backup the shared VHDX at the Hyper-V host level
- Replication of a shared VHDX using Hyper-V replicas
- Dynamic resizing of a shared VHDX
Are there still limitations with Windows Server 2016 and Shared VHDX?
Yes, there are. Below are those remaining limitations:
- Storage Live Migration of VHDX
- Creating Checkpoints
There is, however, a new feature that removes the above limitations with regards to Shared VHDX.
Windows Server 2016 VHD Sets
What is a VHD Set that is found in Windows Server 2016?
VHD Sets are the next evolution for Shared VHDX. The main upgrades for the VHD Set feature, when compared to Shared VHDX, are the following:
- Dynamic Resizing
- Backup of the VHDX at the host level
- Ability to utilize Hyper-V replicas
What is the underlying architecture that allows the VHD Sets to be able to provide the features that are lacking with the Shared VHDX?
There is a new file type that has been introduced called the VDHS file. The way this works is a more old-fashioned way of diverting file locks as is typical with backup solutions that create snapshots and divert the data being written so the backup solution can copy the changed data. The VHDS file is only 260KB in size and has an automatically generated AVDHX file that holds the data of the VHD set. The VHD Set can be fixed or dynamic in size.
- VHDS file – This is the VHD Set file which is the file your virtual machines mount
- AVHDX file – This is the advanced VHDX file which is a checkpoint file where data is actually stored
Creating a VHD Set in Windows Server 2016 Hyper-V
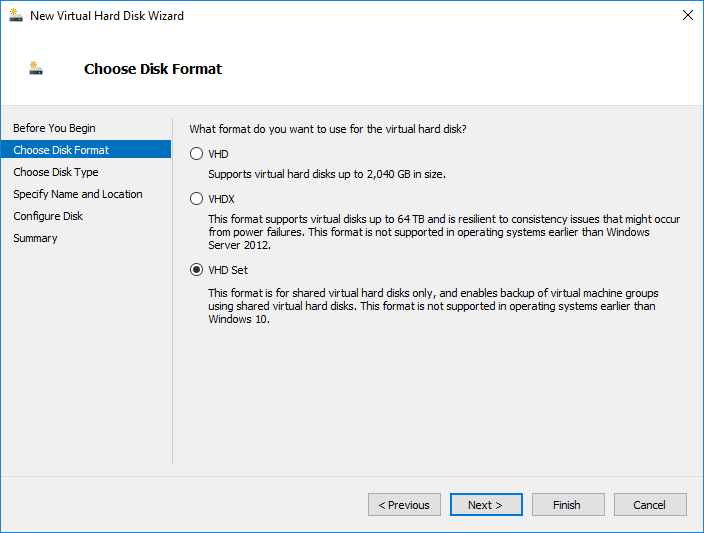
Let’s take a quick look at how to create a VHD Set in Windows Server 2016 Hyper-V. The process is very straightforward and can easily be done from the Hyper-V Manager console. Choose New >> Hard Disk.
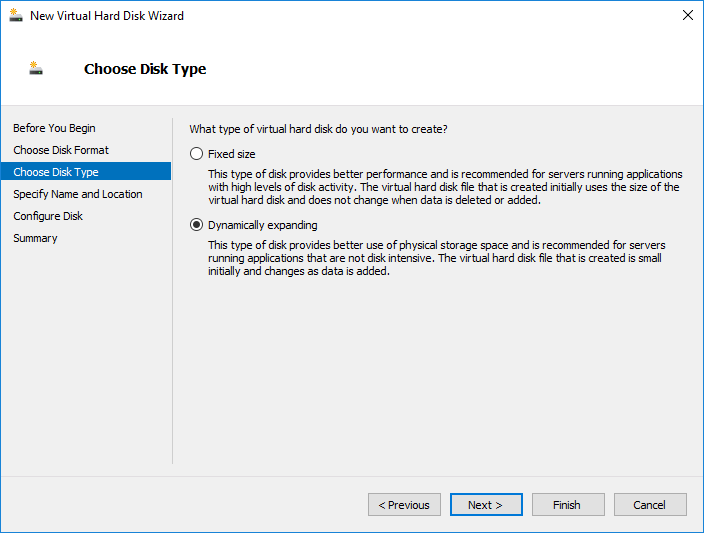
Next, we choose the Disk Type. Here we can select either Fixed size or Dynamically expanding for the disk type.
- Fixed size – provides better performance and is recommended for servers running applications with high levels of disk activity. The virtual hard disk file that is created initially uses the size of the virtual hard disk and does not change when data is deleted or added
- Dynamically expanding – This type of disk provides better use of physical storage space and is recommended for servers running applications that are not disk intensive. The virtual hard disk file is created small initially and changes as the data is added
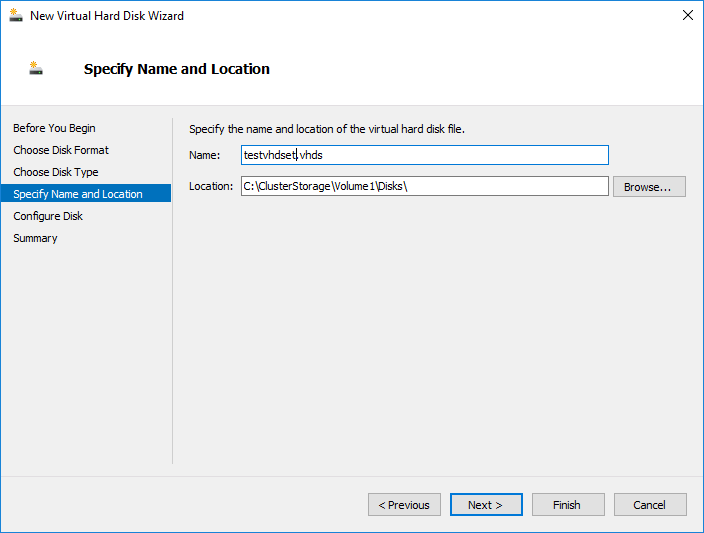
The next step allows naming the virtual disk and choosing the virtual disk location.
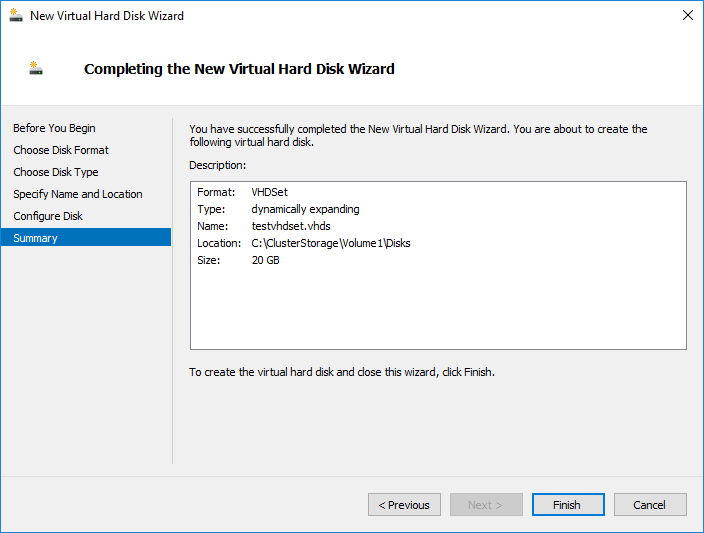
On the Configure Disk step, choose the size of the virtual VHD Set.
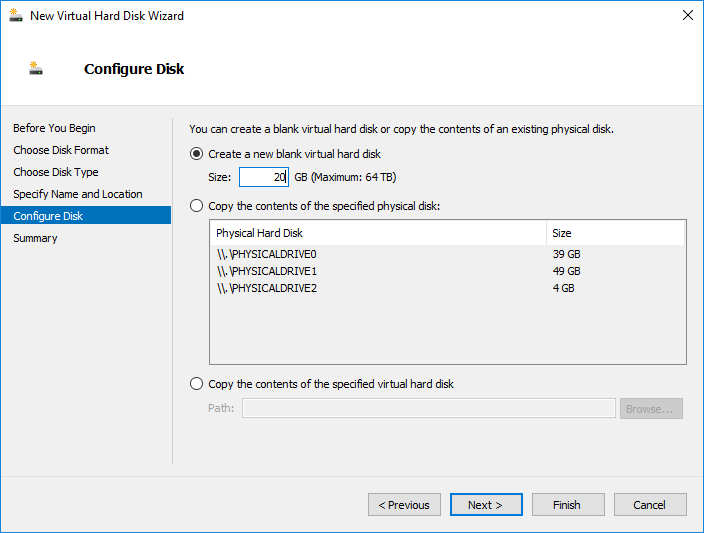
Finally, finish the New Virtual Hard Disk Wizard.
The process to add the VHD Set to a virtual machine is equally as easy. In the properties of the virtual machine, under the SCSI controller, add a hard disk and simply browse to the new VHD Set created in the above steps. Apply the virtual machine settings.
Converting from Shared VHDX to VHD Set
While there are many similarities in the technologies, there is no automatic conversion between Shared VHDX to VHD Set. If you upgrade from Windows Server 2012 R2 to Windows Server 2016, you will need to convert the shared VHDX manually to a VHD Set to enable the new features.
This is accomplished by the following steps:
- Power off the virtual machine
- Remove the shared VHDX
- Using the Convert-VHD command to convert the shared VHDX to a VHD Set
- Once the upgrade finishes, the VHD Set files can be added back to the virtual machine
Concluding Thoughts
There is a strong reason to utilize guest clustering in today’s high-demand environments that not only need high availability from a virtual machine level, but also from an application/service level.
By using guest clustering, even if a virtual machine fails, the application can still be made available. Guest clustering requires shared disks between the virtual machines. Previous to Windows Server 2012 R2, this was a fairly complicated and less than ideal process since you had to use iSCSI or virtual Fibre Channel to present the storage to the guest virtual machine.
With the introduction of Shared VHDX in Windows Server 2012 R2 and now with VHD Sets in Windows Server 2016, the process is much less complicated. VHD Sets even remove many of the restrictions with Shared VHDX. By using these technologies, organizations can much more effectively and easily use guest clustering to support business critical services.
Follow our Twitter and Facebook feeds for new releases, updates, insightful posts and more.