
Introduction
There might be a case where your existing mail service on G Suite or Microsoft Office 365 setup requires you to add an additional new domain to configure new email ids under the added domain. This type of scenario will happen when your company acquires another company, and to migrate their mail service along with the users under their domain.
In such cases, both G Suite and Microsoft Office 365 facilitate adding multiple domains to their mail services. In this how-to blog, we are providing those important steps for both G Suite and Office 365 separately.
- Adding a new domain
- Verifying the ownership of the new domain
- Configuring MX records for email delivery
Prerequisites
- A newly registered domain for setting up email delivery
- Authoritative access on your registrar control panel ( in our case Godaddy ) who can add MX records for the domain
- GSuite Administrator login access, to configure the new domain
- Microsoft Office 365 Administrator login access to configure the new domain
Setting up a new additional domain in Microsoft Office 365
Adding a new domain

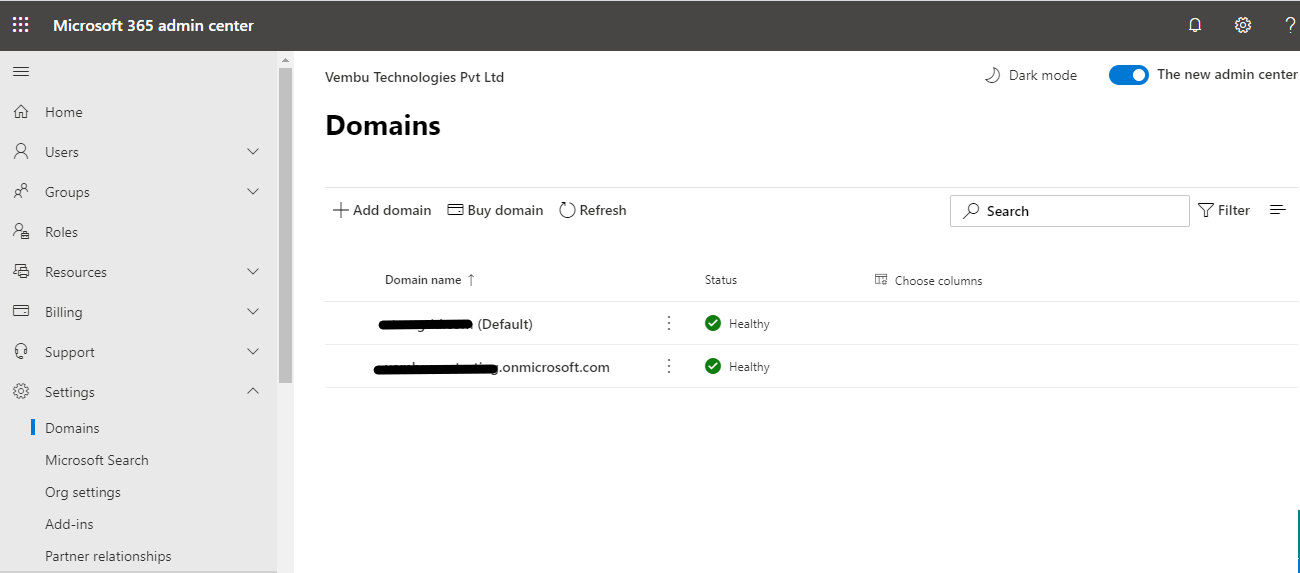
Login to Microsoft Exchange Admin Center with an administrative account. Select domain under settings.
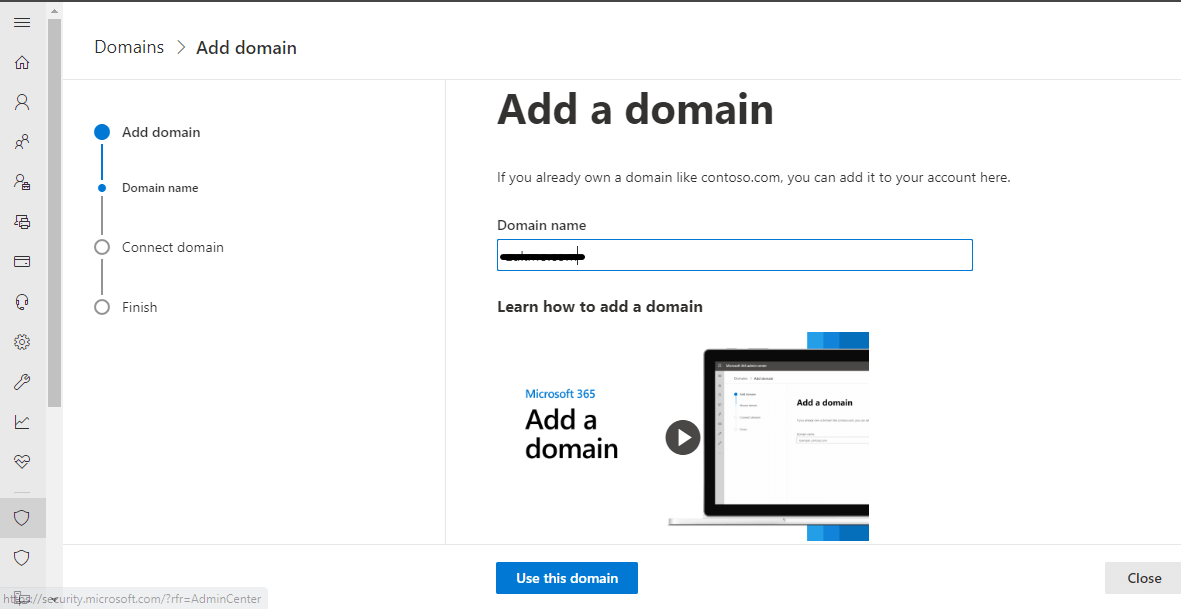
Select Add domain
Provide your new domain name in the domain name box and Click use this domain box
Verifying the ownership of the domain
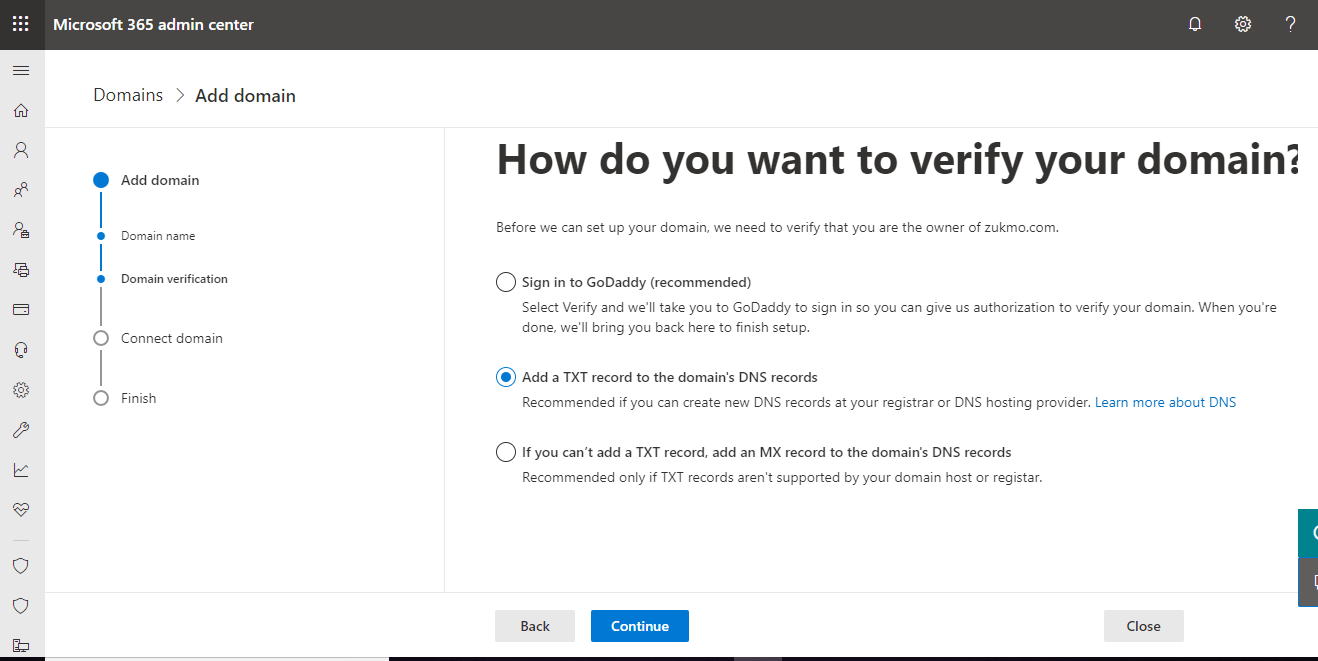
On the next step, you will be asked to verify your ownership of the domain by three different methods. If you are using Godaddy as your registrar, Microsoft will directly add the relevant records into the domain control panel after providing the Godaddy authorization. If you registered with a different registrar, and the common method of verifying your domain by creating a TXT record. So we are choosing the second option to create a TXT record on the domain’s DNS record. Click Continue to proceed
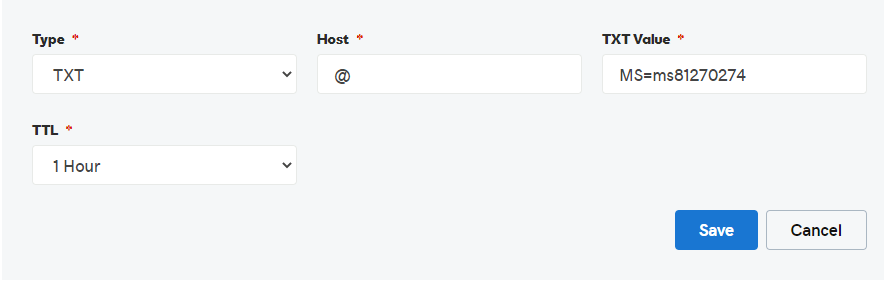
On the next step, you will be provided information for creating a TXT record on your register control panel. This information has TXT record values and TTL minutes. So the administrator should create a TXT record with below values on the registrar domain control panel and then click Verify here.
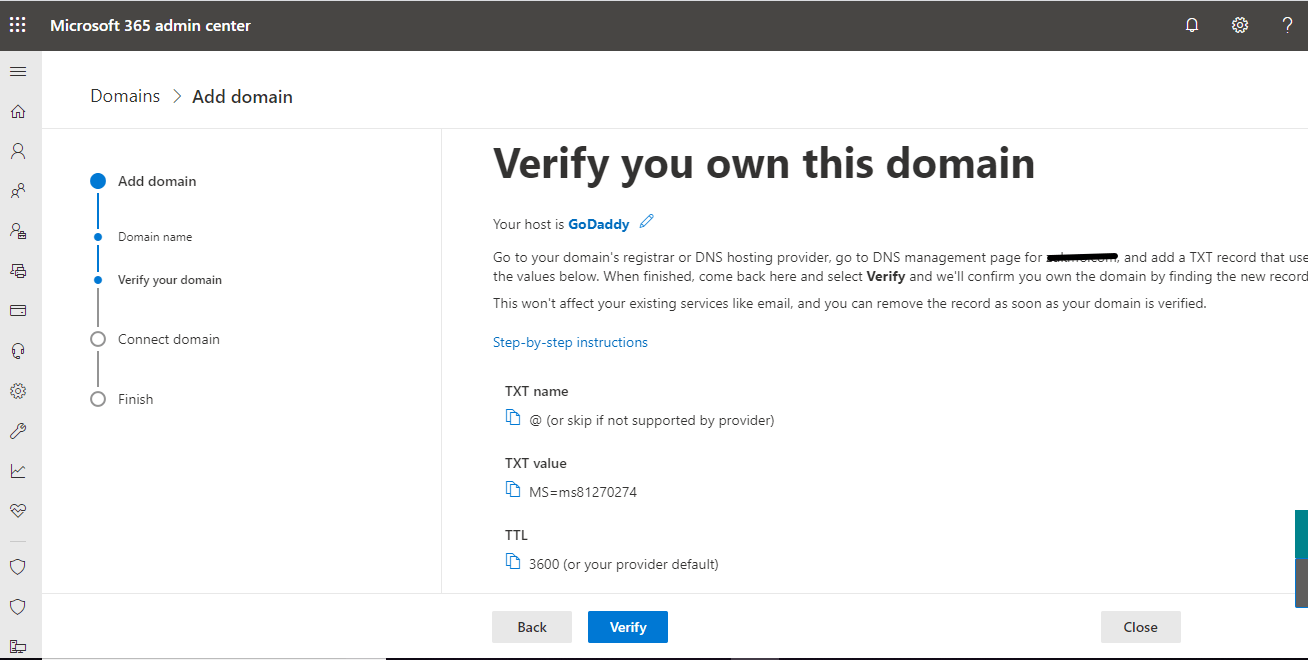
Login to your register control panel and open the DNS management for the selected domain. Add a TXT record with the provided value as below and click Save. Verify your created TXT record shown in your DNS management page correctly.
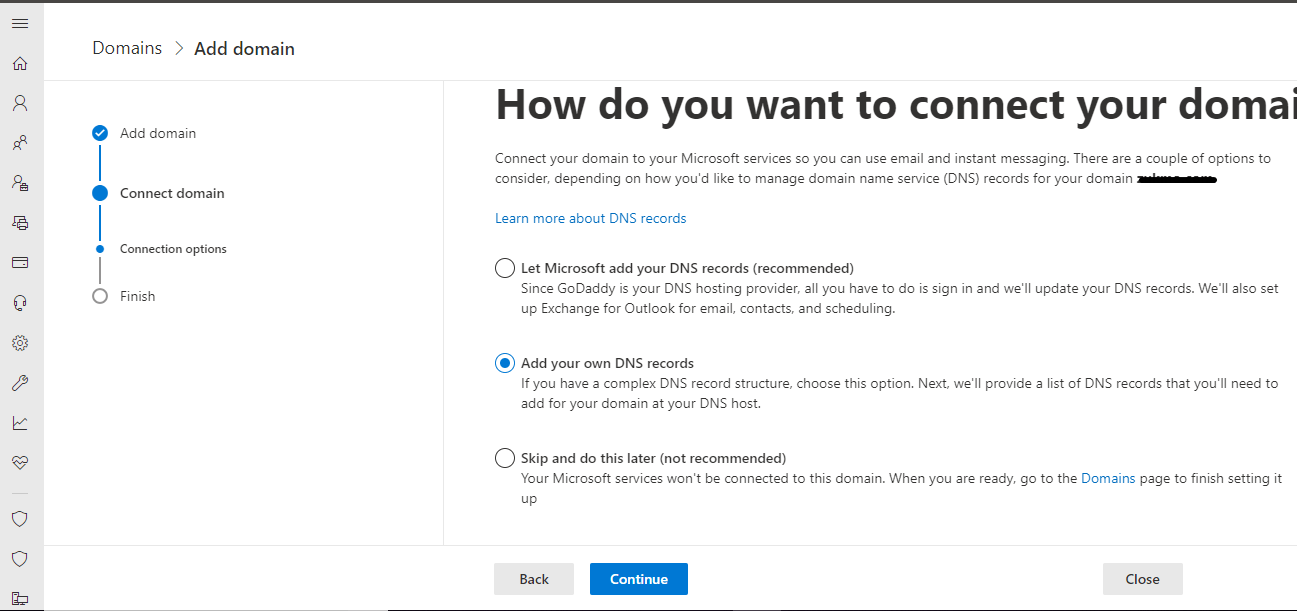
Now on the Microsoft 365, admin center verify domain page click Verify. After verification, you will be asked to connect your domain to add various DNS records to use Microsoft services such as email and instant messaging. Select “ Add your own DNS records “. Click Continue to proceed next step
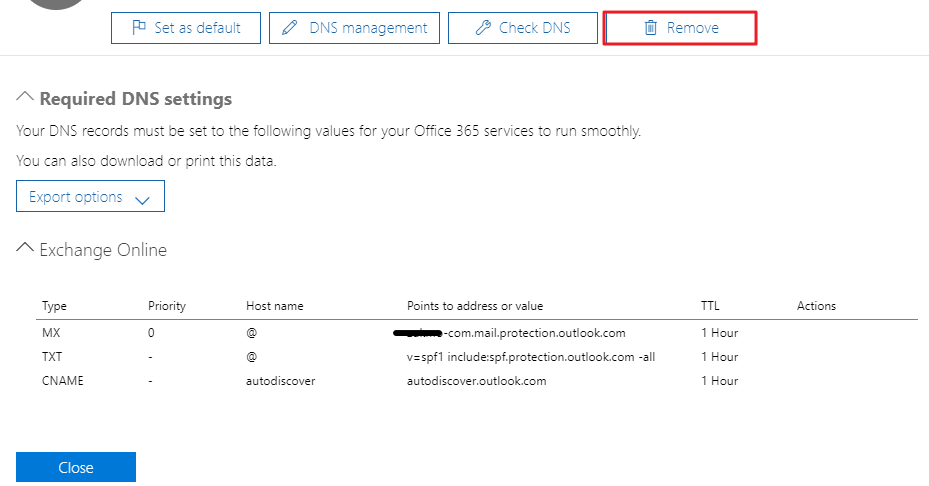
Configuring MX records for mail delivery
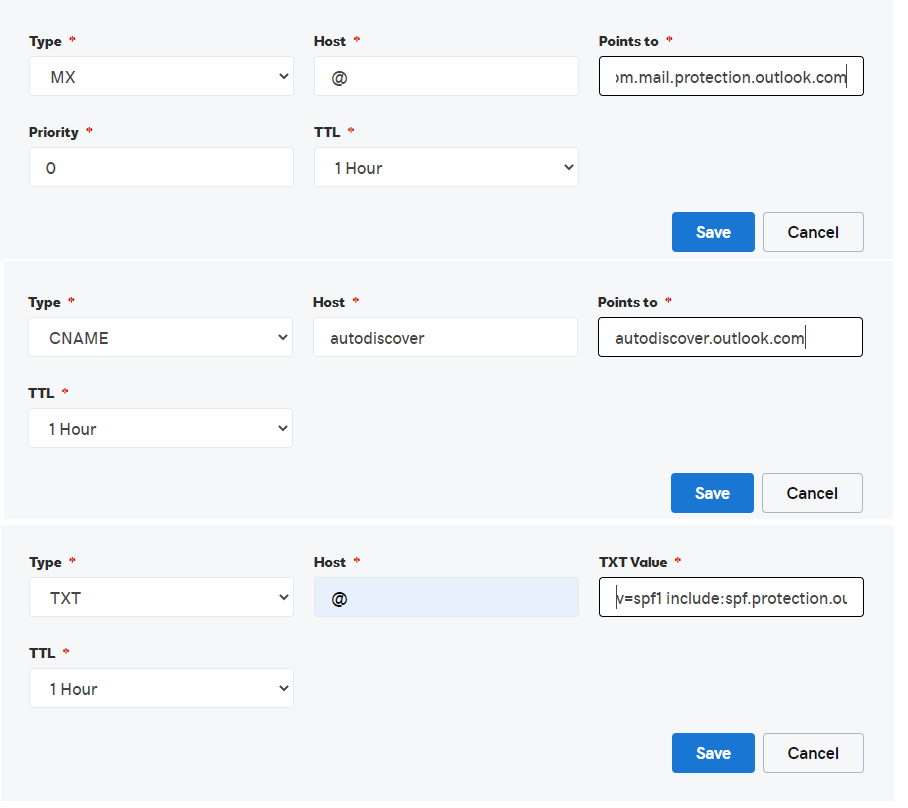
You will be asked to create three records viz one MX record, one CNAME record, and one TXT record as below. These records are added for Exchange Online and Exchange online protection services. MX record tells where to deliver email messages, a TXT record to prevent someone from spoofing your domain to send spam, and a CNAME record for client-side Autodiscover, helping mail clients to connect users. Below are the details to be added to your domain DNS Management section.
MX Record :
@ 3600 IN MX 0 domainname-com.mail.protection.outlook.com.
CNAME Record:
autodiscover 3600 IN CNAME autodiscover.outlook.com.
TXT Record :
@ 3600 IN TXT “v=spf1 include:spf.protection.outlook.com -all”
After adding these three records as suggested, click continue on domain add a page to finish
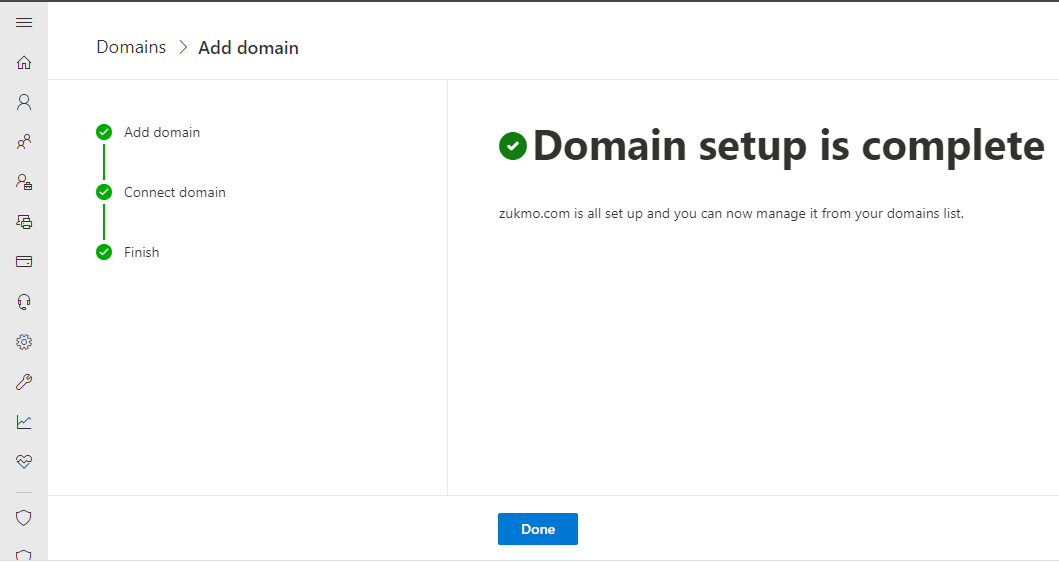
Click Done to finish the setup. Now your domain is ready for Microsoft Office 365 email service, and your domain is listed under Settings → Domain with status “Healthy”. Also in Users, → Active users → Add a user page, your domain is listed for creating a new user under the new domain name.
Removing the domain
You can also manage/check your DNS settings and remove your domain from Office 365 mail service, by double-clicking the selected domain listed under Settings → Domains.
Setting up a new additional domain in GSuite
Adding a new domain
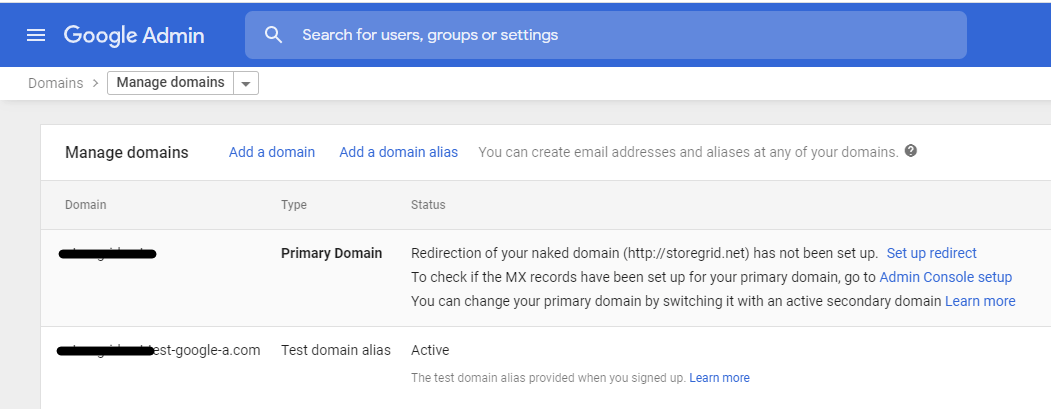
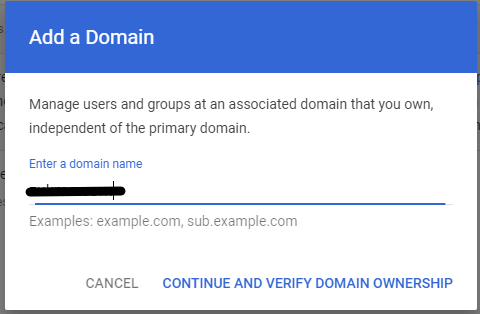
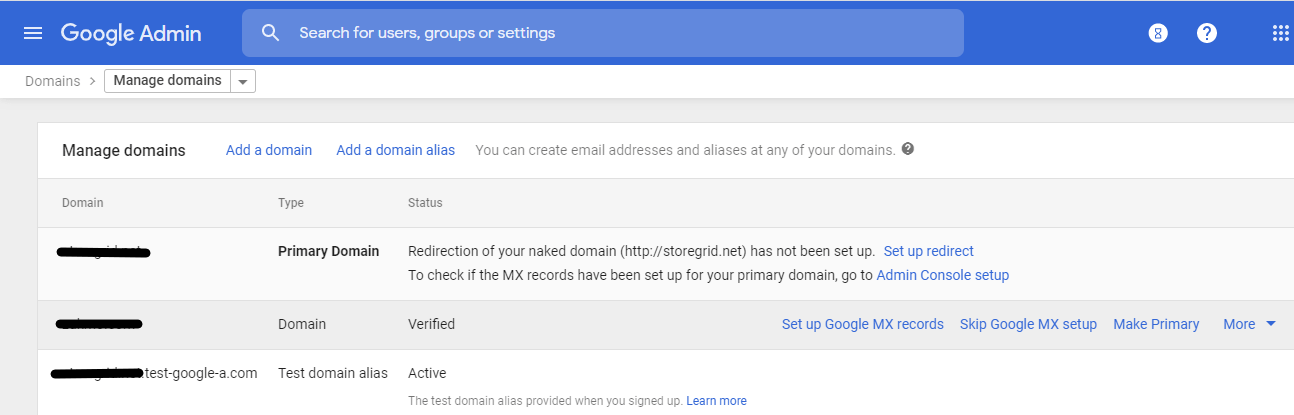
Login to Google Admin console and select Domains. Select Manage Domains. Here your primary domain will be listed. Click Add a domain for adding the additional new domain.
A new pop-up window will appear to add the domain name. Add the domain name and click “Continue and verify domain ownership”
Verifying ownership of the domain
This will provide instructions to verify ownership of your domain by creating a new TXT record with the site verification code value
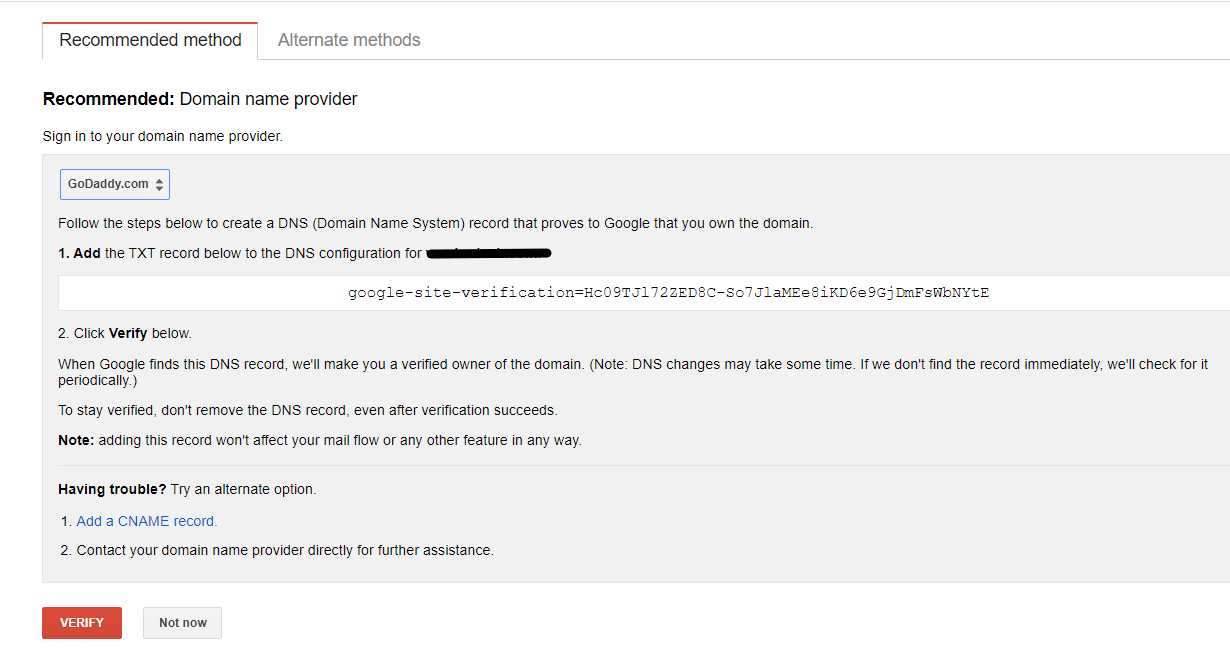
Login to your domain registrar control panel and create a TXT record and copy the above value and check your TXT record added correctly. Then click “Verify” on this page. After the verification process, your domain will be added in the list as below with status “Verified”
Configuring MX records for the domain
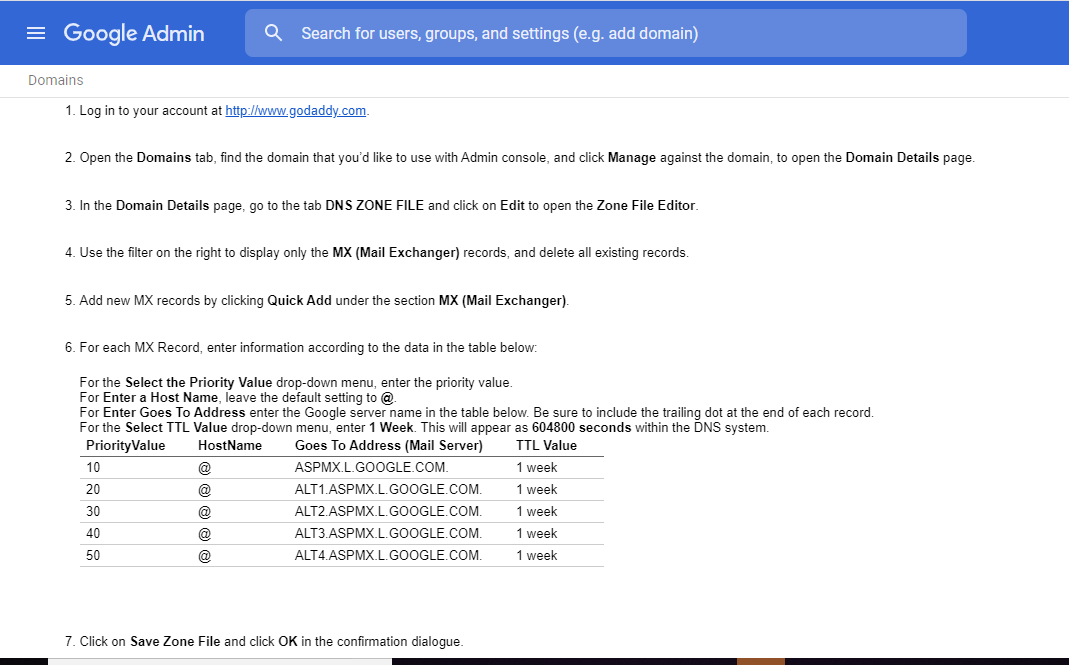
On the next step, we have to configure MX records for the domain to set up successful email delivery in GSuite. Click “Set up Google MX records”. A new page opens, shows the instructions to create MX records with priority values as below. Here we are providing instructions for the Godaddy registrar. So the menu may differ for different registrars. But MX record values are the same across all registrars.
- Log in to your account at http://www.godaddy.com.
- Open the Domains tab, find the domain that you’d like to use with the Admin console, and click Manage against the domain, to open the Domain Details page.
- In the Domain Details page, go to the tab DNS ZONE FILE and click on Edit to open the Zone File Editor.
- Use the filter on the right to display only the MX (Mail Exchanger) records, and delete all existing records.
- Add new MX records by clicking Quick Add under the section MX (Mail Exchanger).
- For each MX Record, enter information according to the data in the table below:
- For the Select, the Priority Value drop-down menu, enter the priority value.
- For Enter a Host Name, leave the default setting to @.
- For entering Goes To Address enter the Google server name in the table below. Be sure to include the trailing dot at the end of each record.
- For the Select TTL Value drop-down menu, enter 1 Week. This will appear as 604800 seconds within the DNS system.
- Click on Save Zone File and click OK in the confirmation dialogue.

When finished, click on “I have completed these steps” to have Google check your MX records.
Now your new additional domain is ready for mail deliveries. You can also verify in Directory → Users → Add users will show the newly added domain when creating a new user, and you can select the domain from the list.
Removing the domain
Login to Google Admin console, then select Accounts → Domains → Manage Domains
On the listed domains, click Remove, adjacent to the domain you wish to remove. To avoid any disruption to your email, be sure to change the MX records that have been set up for this domain so they no longer point to Google. You may consider changing your MX record before removing the domain. If you have configured sites, to avoid any disruption to your sites, move them to another domain before you remove this domain.
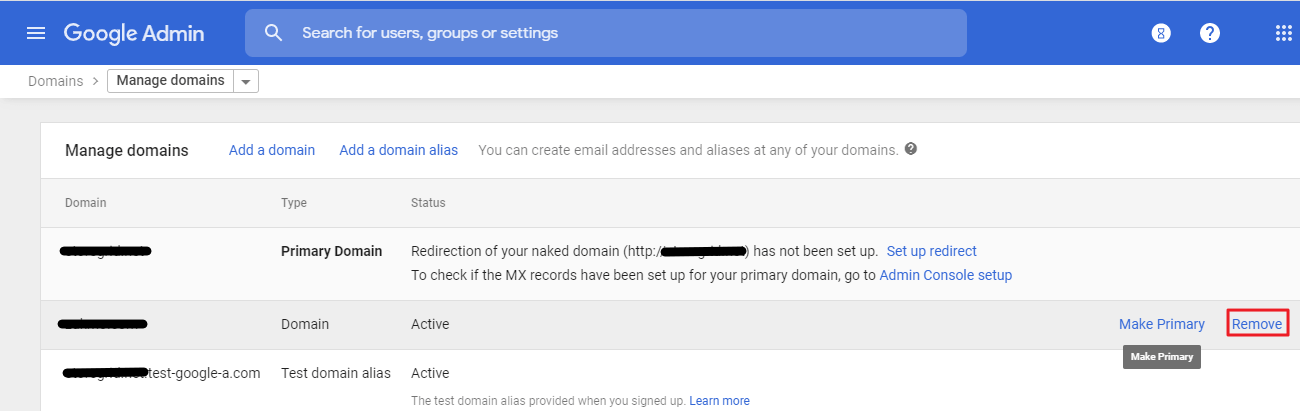
Click Remove, on the confirmation you can remove the domain.
Conclusion :
It is evident that from the above steps, configuring multiple domains for setting up email delivery is a simple and straight forward setup. Thus configured users under various domains can be managed from a single console that is always useful for mail administration. You can always enable trusted domains for these added domains, so that you don’t require to set up separate security policies to control spam, phishing emails, etc. when sending and receiving emails across these domains.
Download Vembu BDR Suite and Protect your Office 365 and G Suite Data!
Download the full-featured 30-day free trial of our latest version Vembu BDR Suite v4.2.0 and experience modern data protection for your Office 365 environment.
- Backup your Mails, Contacts, Calendars, and Drive items
- Recover data anywhere and anytime
- Restore domain or user-level data
- Store your data on-premise or in Vembu Cloud
Learn more and get started with Vembu Backup for Microsoft Office 365 here
Learn more about Vembu Backup for G Suite (beta) here
Follow our Twitter and Facebook feeds for new releases, updates, insightful posts and more.