
Introduction
In this How to blog, we are detailing a complete solution to restore a VMware VM from a Vembu BDR storage repository as an EC2 instance in your AWS account.
Here we are using AWS Import/Export utility to import the restored VMware VM into an Amazon AMI and using the AMI we are creating the AWS Instance of the restored VM.
Note: This blog is intended for those who are already using Vembu BDR Suite to protect their VMware VMs. If you have not been using Vembu BDR Suite, learn more about our VMware Backup & Replication and refer to this help document to deploy Vembu BDR Suite in your environment and configure backups.
Prerequisites
- A running Vembu BDR Backup Server with VMware backup
- An AWS account to store your VMDK file in AWS S3
- Knowledge on cost estimation running an AWS instance on the desired region
Steps involved

- Restoring a VMware VM locally as a VMDK file
- Importing the VMDK file to Amazon EC2
- Launching EC2 Instance using the created AMI
Step 1: Restoring VM locally as an image file (VMDK)
Login to the Vembu BDR Backup Server user interface with your login credentials. Then, click on the ‘Recovery’ menu, select restore for the desired VM to download it as a VMDK file.
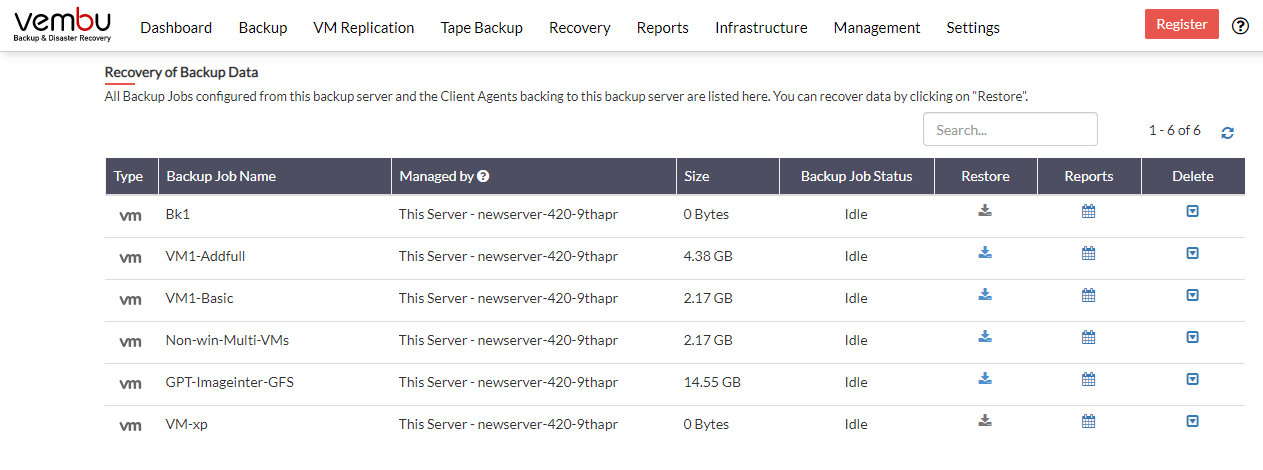
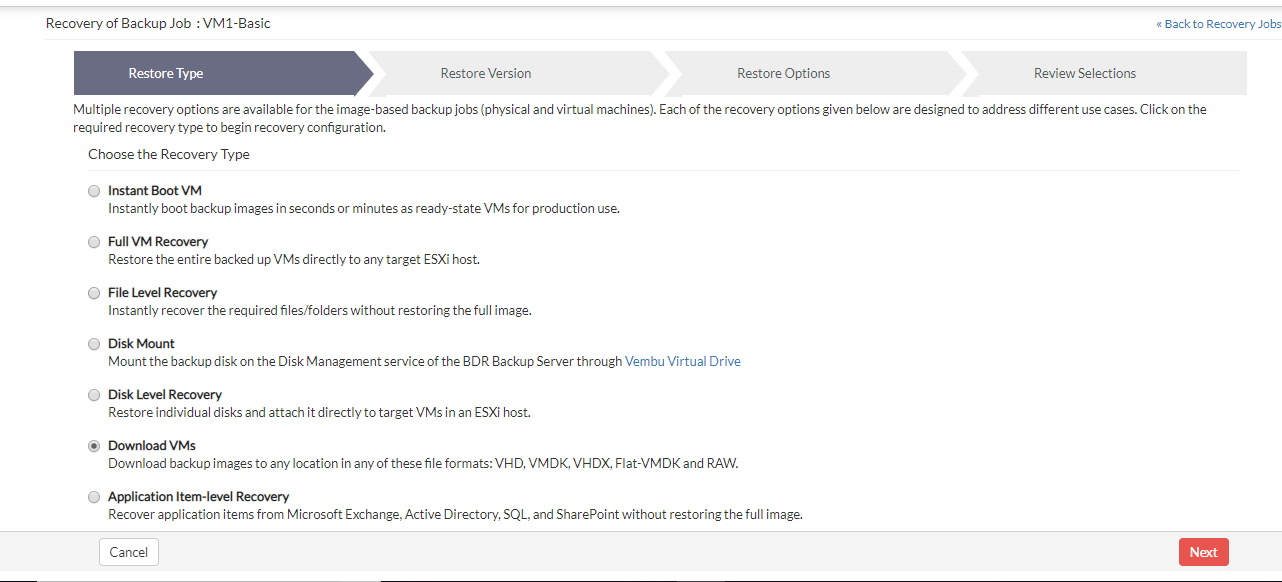
Here we are restoring the VM scheduled in the backup name VM-Basic, so click on restore corresponding to that backup job. On the next restore screen, we have various types of recovery options displayed each of them targeting different scenarios.
Choose the option Download VMs, this will allow you to download the entire VM as image on the local machine in any of these file formats VHD, VMDK, VHDX, Flat-VMDK and RAW. We are going to use VMDK format.
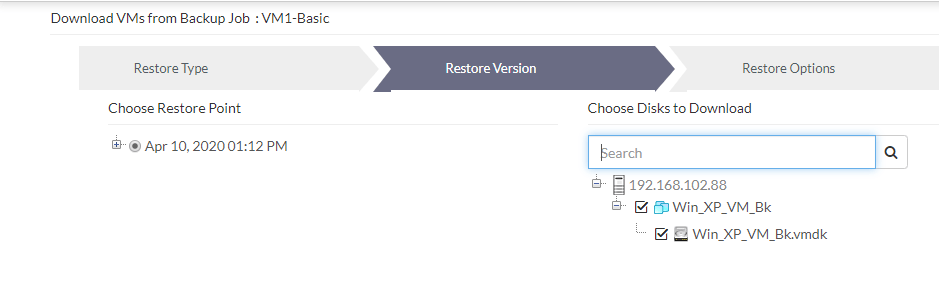
On clicking Next, we will select the latest restore point under “Choose Restore Point” and select the entire machine as in the picture.
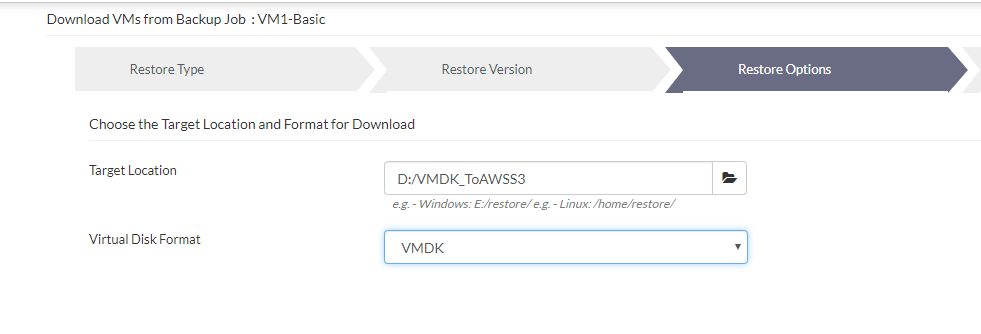
Click Next, choose the target location and the type of the format. Here we are selecting a local folder and virtual disk format as VMDK as in the picture.
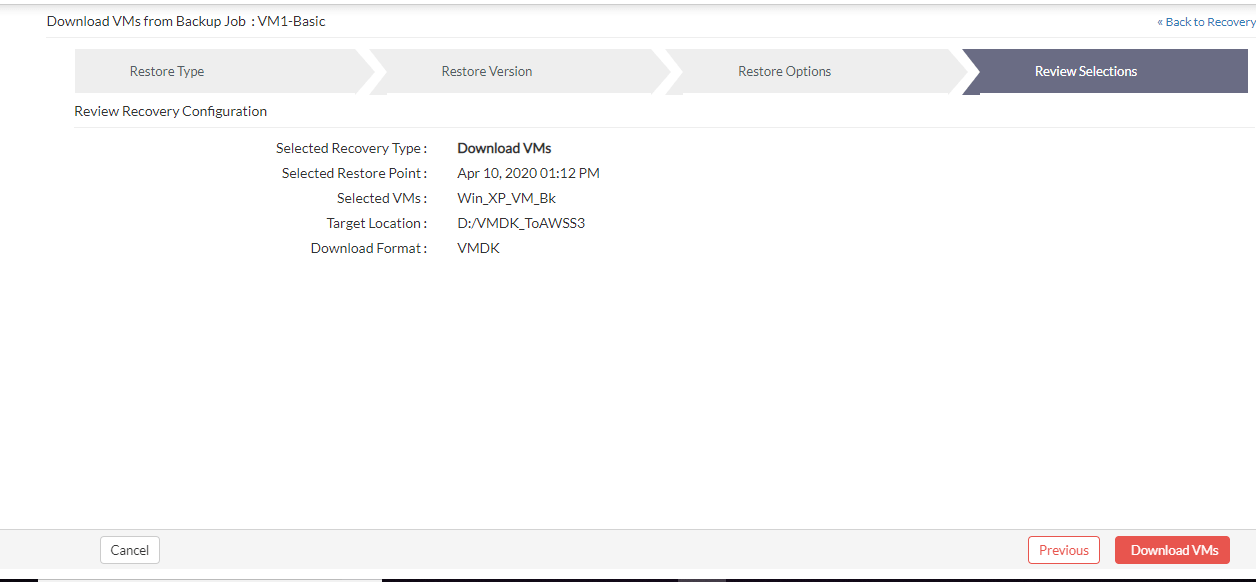
After a final view of Recovery configuration, click “Download VMs” to download the image.
This will ask you for final confirmation. Click OK to download the VMDK file. After downloading the file, verify the downloaded location on your computer.
Step 2: Importing to Amazon EC2
After downloading your VM from the Vembu BDR Backup Server, the next step is to import the file into Amazon EC2 account from your computer. And this involves four steps.
- A. Creating a new Amazon S3 bucket or use an existing S3 bucket
B. Create an IAM role named “vmimport”
C. Installing AWS CLI command tool on a computer, from where you upload the VMDK file
D. Uploading VMDK files into the newly created or existing S3 bucket
In this how-to, we are concentrating on these 4 steps, and the URLs given below will help you create a bucket, installing AWS CLI tools and uploading VMDK files.
https://docs.aws.amazon.com/AmazonS3/latest/user-guide/what-is-s3.html
https://docs.aws.amazon.com/cli/latest/userguide/cli-chap-welcome.html
https://docs.aws.amazon.com/AmazonS3/latest/user-guide/upload-objects.html
Here we are using import-image CLI command
aws ec2 import-image –description “My server disks” –disk-containers “file://C:\import\containers.json“
Create a new containers.json file which includes a description of each disk. In our case we are using the entire image as VMDK and it will have only one VMDK file. So the containers.json content will be as given below. Change your S3Bucket and S3Key values as per your environment
{
“Description”: “First disk”,
“Format”: “vmdk”,
“UserBucket”: {
“S3Bucket”: “my-import-bucket”,
“S3Key”: “disks/my-server-vm-disk1.vmdk”
}
},
]
You can also monitor your importing task using AWS CLI Command
aws ec2 describe-import-image-tasks –import-task-ids import-ami-1234567890abcdef0
Status value shows all the below stages, as on when the command executed, you may see any of the stages before completion.
- active — The import task is in progress.
- deleting — The import task is being canceled.
- deleted — The import task is canceled.
- updating — Import status is updating.
- validating — The imported image is being validated.
- validated — The imported image was validated.
- converting — The imported image is being converted into an AMI.
- completed — The import task is completed and the AMI is ready to use.
Note: For some operating systems, the device drivers for enhanced networking and NVMe block devices that are required by some instances are not installed automatically during import. To install these drivers manually check with AWS EC2 launch user guide
Once all these image processes are over, you will get an Amazon Machine Instance (AMI). Using this AMI you can launch an instance or copy this AMI to another AWS region.
Step 3: Launching a new Instance using the created AMI
To launch a new EC2 instance from an Amazon Machine Image (AMI), follow the below steps:
- 1. Open the EC2 console.
Note: Be sure to select the AWS region you want to launch the instance in.
2. From the navigation bar, choose AMIs.
3. Find the AMI you want to use to launch a new instance. To begin, open the menu next to the search bar, and then choose one of the following:
- a. If the AMI you want to use was created by you, select Owned by me.
b. If the AMI you’re using is a public AMI, select Public images.
c. If the AMI you’re using is a private image that someone else shared with you, select Private images.
Note: The search bar automatically provides filtering options, as well as automatically matching AMI IDs. In our case, we are selecting the first option Owned by me
4. Select the AMI, and then choose Launch.
5. Choose an instance type, and then choose Next: Configure Instance Details.
6. Review the Instance Details, and then choose Review and Launch.
7. Choose your preferred boot volume, choose Next, and then choose Launch.
8. Select an existing key pair or create a new key pair, select the acknowledge agreement box, and then choose Launch Instances.
9. Choose View Instances to check the status of your instance.
10. Start the instance, verify your applications running and configure the network settings in case users want to use the machine in public.
To learn more about launching EC2 instances for Windows and Linux, below user guide URLs will be useful.
https://docs.aws.amazon.com/AWSEC2/latest/WindowsGuide/launching-instance.html
https://docs.aws.amazon.com/AWSEC2/latest/UserGuide/launching-instance.html
Conclusion
Using moderate knowledge on AWS and Vembu BDR Suite, any system administrator of an organization can complete a DR process to AWS on time. Vembu BDR Suite and AWS provide the perfect combination of disaster recovery solution for any SMBs and MSPs.
Follow our Twitter and Facebook feeds for new releases, updates, insightful posts and more.