
Table of Contents
- Lookup service
- What is the Lookup Service?
- Display registered services
- vCenter certificate replacement
- Certificate-manager utility
- Platform Service Controller web UI
- If you run vCenter on Windows
- For both windows based vCenter and VCSA
- Conclusion
In this article we are going to talk about the following:
- A core SSO component of vCenter called the lookup service
- How the replacement of a vCenter certificate relates to it?
- The impact it can have on other services
Even though some may work, the procedures described below only concern vCenter 6.0 and 6.5 due to changes made in version 6.7.
Lookup service
What is the Lookup Service?
The Lookup Service is a component of the Single-Sign-On (SSO) ecosystem provided by the Platform Service Controller (PSC). It runs under the VMware component service (VMware-cm) in the PSC. In version 5.5 and earlier, the Lookup Service was running on port 7444 but now uses 443. The role of this service is to register the location of all the components connecting to vCenter to allow them to find one another and communicate securely.
During the installation of the PSC (embedded or not), the Lookup service is automatically installed. The vCenter services are then registered in the Lookup service so other services can find them. In earlier versions, after installing SSO, the installer of vCenter and the Inventory service actually asked for the Lookup service URL to register the components.

All the vCenter services are registered in Lookup Service as well as external solutions such as Site Recovery Manager. If you look into the registered services you will find various information used by them including solution user, URL, certificate…
Display registered services
To display the services registered in the Lookup Service, open a browser on this URL. Use the vCenter address if it is an embedded PSC. Note that this URL does not seem to work anymore in 6.7.
https://psc.example.com/lookupservice/mob?moid=ServiceRegistration&method=List
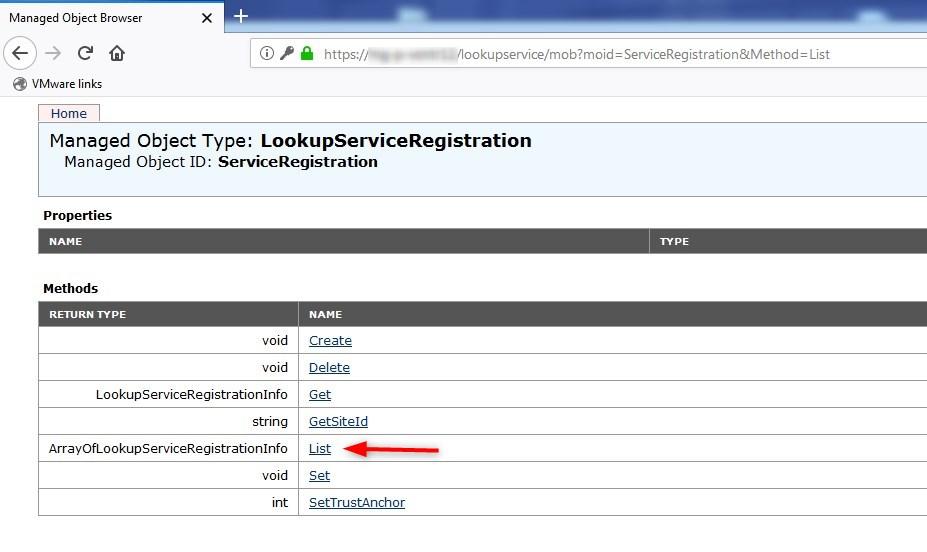
- Log in with the sso admin account (administrator@vsphere.local)
- Click on List next to ArrayOfLookupServiceRegistrationInfo
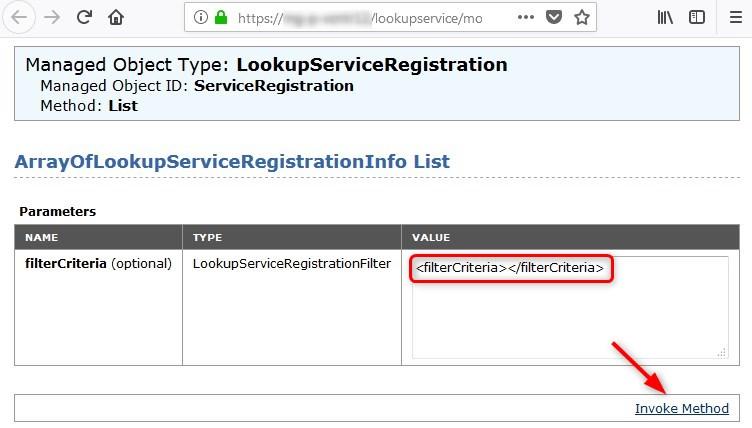
- Set the Value field to
and click Invoke Method
The output will display a long list of tables that are hardly readable by us mere humans but some useful information can be found in there. The most notable ones I would say will be:
- ownerId: Solution user.
- SSL Trust: Base 64 encoded certificate.
- URL: Url of the service.
An example below of the HealthStatus service. We can see that it uses the vpxd-extension-xxxxx solution user. We also see its url https://@vcenter:443/MBCS/HealthStatus and its certificate in base 64.

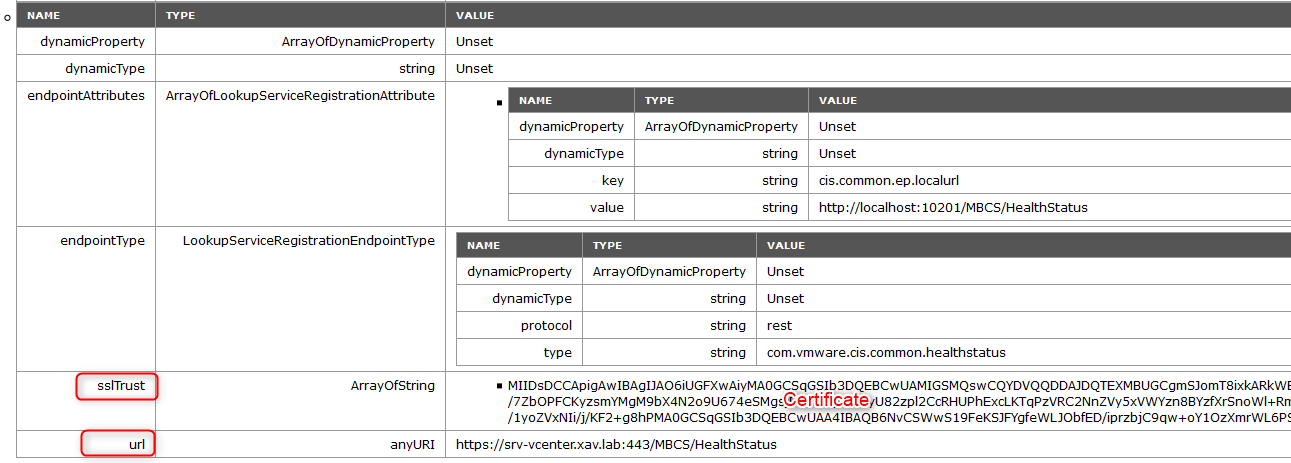
- Copy the content of the SSL Trust value in a notepad
- Place it between the Begin and End certificate markers like so:
—–BEGIN CERTIFICATE—–
MIIDizCCAnOgAwIBAgIBAjANBgkqhkiG9w0…..
—–END CERTIFICATE—–
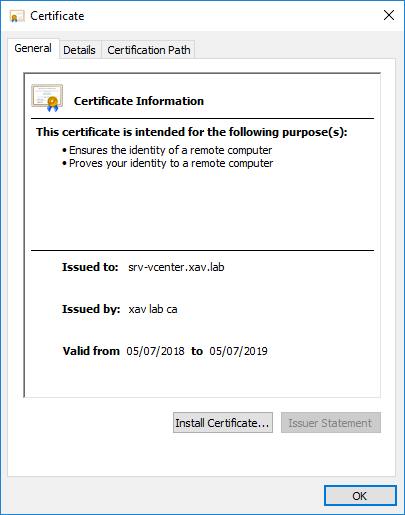
- Save it as xxx.crt and open it. You will see what certificate is configured for this service registration. The certificate depicted below represents the default self-signed certificate before replacement (right after deploying vCenter).
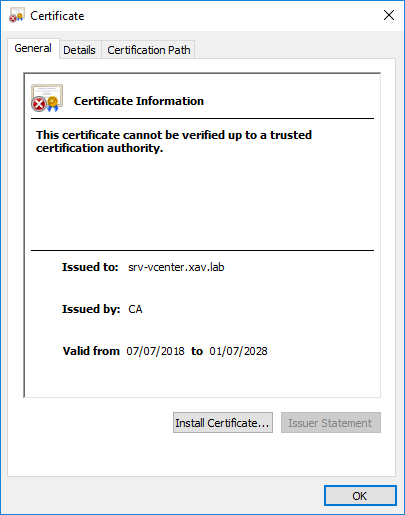
It will become relevant when we start talking about certificate replacement. We took the example of a service internal to vCenter server, but any external service using SSO will appear in the list like SRM or vROPS.
vCenter certificate replacement
We won’t go through the step-by-step procedure of replacing a vCenter certificate as it is out of the scope but we will talk about 2 different ways of doing it. You would think that both methods lead to the exact same end result but we will find out that it is not the case unfortunately. I took a snapshot of a freshly deployed vCenter so I can roll back to it after the first replacement.
Certificate-manager utility
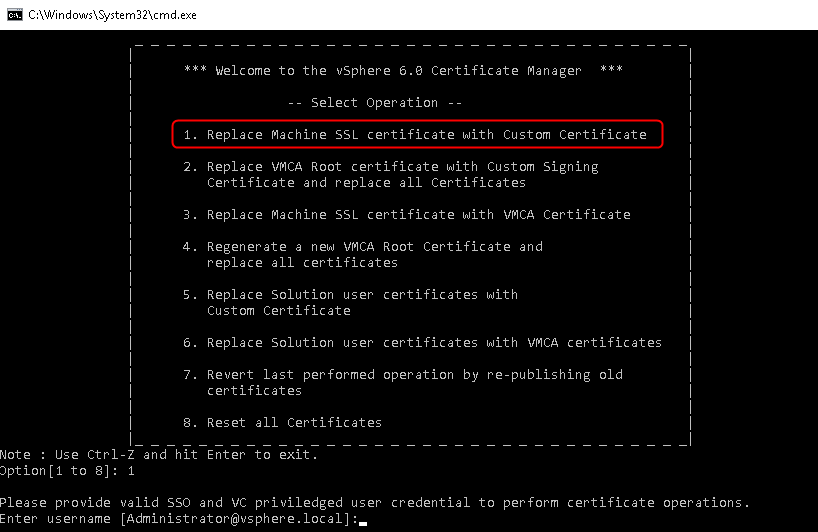
The certificate-manager is a tool embedded in vCenter in both Windows based and VCSA. It is basically a user friendly wrapper that provides workflows to properly interact with vecs and vmca. It takes care of replacing certificates, updating the services and restarting them. Using the script is very easy whether it is a Windows vCenter or a VCSA. We use option 1 of the script “Replace Machine SSL certificate with custom certificate” which can create a Custom Signing Request (CSR) and replace the certificate. I used a free tool called xca that acts as a lightweight and easy to use Certificate Authority, to create a signed certificate. Because I already created it we will skip the creation of the certificate request and just replace it.
More info about using the certificate manager tool in the VMware docs.
Update the services is the important piece of information here. The certificate-manager utility actually does a good job at replacing the certificate because it will also update the registered services in the lookup service. If you pay attention to the output during the certificate replacement you will notice at the end the number of services updated.

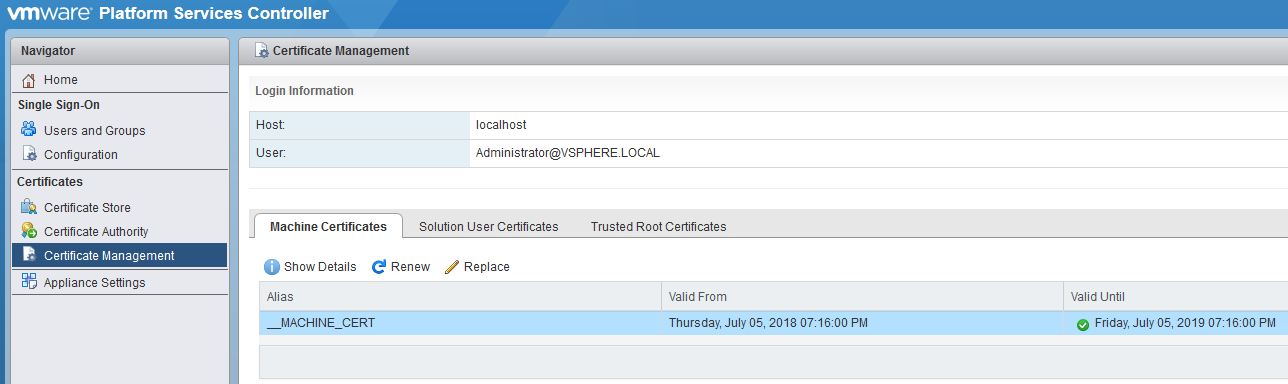
Once the certificate has been replaced, you will see it in the web client.

Let us now look at the certificate configured with the registered HealthStatus service in the Lookup service. Perform the same steps as we did earlier to display the Lookup service and look for the SSL Trust string.
Perfect, the certificate registered is indeed the new one. Exactly what you would expect right? It means that the certificate was changed everywhere. Now let’s have a look at the same procedure using the Platform Service Controller UI and see if there is any difference.
Certificate manager utility
PSC UI
I reverted my vCenter VM to the snapshot I took before replacing the certificate to get a fresh install. Note that in vCenter 6.7 the PSC UI no longer exists. It is now located under the Administration menu, Certificate management has its own tab and all other PSC management is under the configuration tab.
You can access the PSC UI in 6.5 by browsing to the following URL:
Log in using the SSO admin account (administrator@vsphere.local). From the Certificate Management pane, replace the machine certificate (chain) and add the certificate of the Root CA. Once this is done, I just restart the vCenter server as I am using an embedded PSC install.
More info about using the PSC UI in the VMware docs.
And that’s the certificate replaced. Just like before if you look at the certificate of the web client you will find that the new certificate is indeed being used, looking good.
It looks like an easier and more user friendly way to replace a certificate right?
Why would you even bother with the certificate manager utility?
Well, let’s fire up the Lookup service URL again and perform the same tasks we did before to display the certificates used.
I will keep using the HealthStatus service as an example.
Oh boy… This is not what should be happening. At this point with the certificate utility, the new certificate was being displayed. Here with the UI it is still showing the old one, Hmm.
Platform Service Controller web UI
Why does it matter?
All these certificates we found in the Lookup Service are here for a reason. As mentioned earlier, the Lookup service is used by external service to locate other services and communicate securely with them. If the wrong certificate is registered, the external services will encounter certificate errors. For instance, Site Recovery Manager will issue an error whenever you click on the site if the certificates are not up to date in the Lookup service.
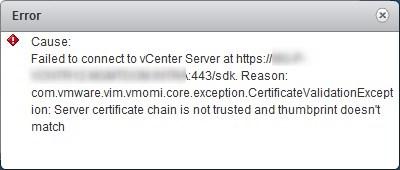
VMware’s KB2109074 lists certificate validation errors for external VMware solutions. Any of the listed solutions will most likely face a similar issue if you used the PSC UI. Fear not for there is a fix.
How to fix it?
It is not too late if you already replaced the certificate on your vCenter server using the PSC UI. VMware has a procedure in KB2121689 to update the certificate of all the services. The length of the KB may seem daunting but they actually over complicated it in my opinion. You can do all that pretty quickly.
The fix uses a python script call lstoolutil.py provided by VMware to replace the old certificate by the new one. In order to do so, we will provide the thumbprint of the old certificate and the actual new certificate file as parameters of the script which will take care of everything.
We are dealing with an embedded PSC installation here, read KB2121701 for special consideration if your PSC is external to the vCenter.
If you run vCenter on Windows
- Open KB2121689 and download the attached lstoolutil.zip at the very bottom of the page
- Back up the existing “%VMWARE_CIS_HOME%”\VMware Identity Services\lstool\scripts\lstoolutil.py file. By default, file is location at C:\Program Files\VMware\vCenter Server\VMware Identity Services\lstool\scripts\.
- Extract the lstoolutil.py file from the downloaded zip file in to “%VMWARE_CIS_HOME%”\VMware Identity Services\lstool\scripts\.

For both windows based vCenter and VCSA
- If you haven’t done yet, follow the procedure to log in the Lookup service web page and save the SSL Trust string as a .crt certificate file. Make sure this certificate is not the newly replaced one by opening it.
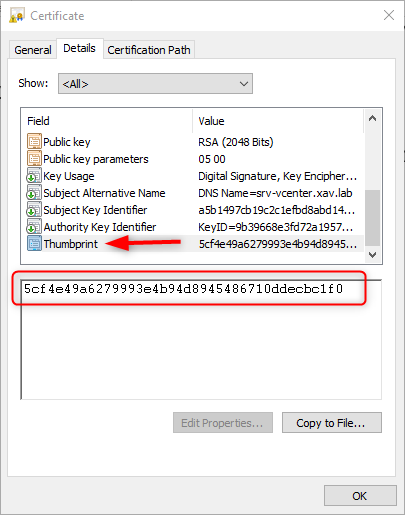
- Open the Details of the certificate and find the Thumbprint field.
- Copy the Thumbprint and keep it somewhere you can access later.
- Store the new certificate somewhere on the vCenter server. For the example we will use C:\Temp\Newcert.crt for Windows and /Temp/Newcert.crt for VCSA. This certificate is the one displayed in the vSphere web client in your browser.
- Connect to your vCenter (again, embedded PSC here) via whatever way works for you (RDP, SSH, …).
- Run the command to update the Lookup Service. Don’t forget to add a : every 2 characters in the thumbprint.
cd “C:\Program Files\VMware\vCenter Server\VMware Identity Services\lstool\scripts\”
“%VMWARE_PYTHON_BIN%” ls_update_certs.py –url https://psc.vmware.com/lookupservice/sdk –fingerprint 5C:F4:E4:9A:62:79:99:3E:B9:4D:89:45:48:67:10:DD:EC:C1:f0 –certfile C:\Temp\Newcert.crt –user Administrator@vsphere.local –password Password
cd /usr/lib/vmidentity/tools/scripts/
python ls_update_certs.py –url https://psc.vmware.com/lookupservice/sdk –fingerprint 5C:F4:E4:9A:62:79:99:3E:B9:4D:89:45:48:67:10:DD:EC:C1:f0 –certfile /Temp/Newcert.crt –user Administrator@vsphere.local –password ‘Password’
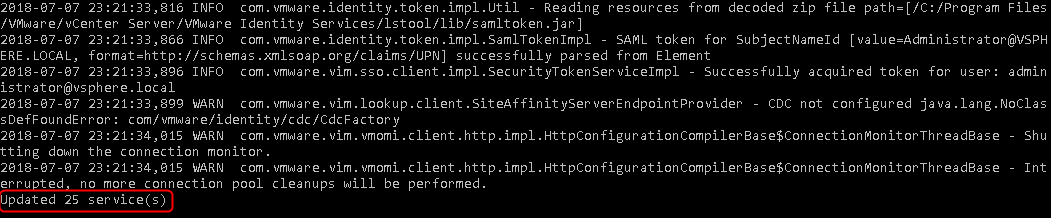
The execution of the command may take a few minutes and should complete successfully. It will mention the number of services updated like so. We can see below that 25 services were still using the old certificate.
If we go back to the Lookup service web page and look for our HealthStatus service certificate, we notice that the certificate used is now the new one instead of the old one. Job done!
Conclusion
These tests demonstrated that the two methods of replacing certificates in vCenter don’t perform the same operations in the background. This issue is a tricky one as you would think it would make no different, otherwise they wouldn’t offer it right? It may be a bit harsh to state “Don’t use the PSC UI for certificate replacement”, but if you thought you would use it because it is easier and shinier than the utility you will be disappointed. Using the utility is probably the best way to do it as it does everything for you straight away.
Follow our Twitter and Facebook feeds for new releases, updates, insightful posts and more.