
This article will help you to create different types of Virtual Switches in your Hyper-V host and configure VMs to use the newly created Virtual Switches as you per your requirement. The steps given in this article apply to Windows Server 2022, Windows Server 2019, Windows Server 2016.
What is VLAN?
A Virtual Local Area Network (VLAN) is a logical grouping of network devices that behave as if they are on the same physical network segment, regardless of their physical location. VLANs are used to segment networks and create isolated broadcast domains within a switched network.
Benefits of VLAN
1. Increased Security – VLANs are a great way to separate network segments and keep sensitive data secure. They allow you to control who has access to sensitive information and can also be used to isolate different departments or offices.
2. Network Management – VLANs allow you to more easily manage your network by assigning devices to different VLANs. This makes it easier to monitor and troubleshoot network issues.

3. Cost Savings – VLANs can help you save money by reducing the amount of cabling and equipment needed for your network. By using VLANs, you can reduce the number of physical switches and routers that are needed.
4. Improved Performance – VLANs can help improve network performance by reducing traffic on the network. By segmenting the network into different VLANs, you can reduce the amount of data that needs to be sent between different parts of the network. This can help improve response times and reduce latency.
What is Hyper-V Virtual Switch Manager?
Hyper-V Virtual Switch is a software-defined layer-2 ethernet network switch available as a part of Hyper-V Manager. A virtual switch allows virtual machines on Hyper-V hosts to communicate with each other and to the networks external to the Hyper-V host.
Hyper-V Virtual Switch supports connecting VMs to both virtual networks and physical networks. Furthermore, Hyper-V Virtual Switch enforces policies for security, isolation, and service levels.
Note:
The type of virtual switch most similar to Hyper-V virtual switch is a VMware vSwitch. A VMware vSwitch is a virtual bridge that allows virtual machines (VMs) on a host to communicate with each other and with the physical network.VMware vSwitches also provide better performance than Hyper-V virtual switches, as they are optimized for virtualization.
Types of Virtual Switch:
There are three types of virtual Switch (Network) you can create and use on a Hyper-V server.
- External Switch
- Internal Switch
- Private Switch
External Switch:
External Switch allows the virtual machines to communicate with other physical machines on your network through the physical network adapter on the Hyper-V server.

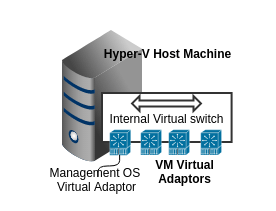
Internal Switch:
Internal switch allows communication between the virtual machines and the physical host machine on which Hyper-V is installed.
Private Switch:
Private Switch allows communication between virtual machines on the same Hyper-V server. A private network is isolated from all external network traffic on the Hyper-V server. This type of network is useful when you must create an isolated networking environment, like an isolated test domain.

Creating Virtual Switch using Hyper-V Manager:
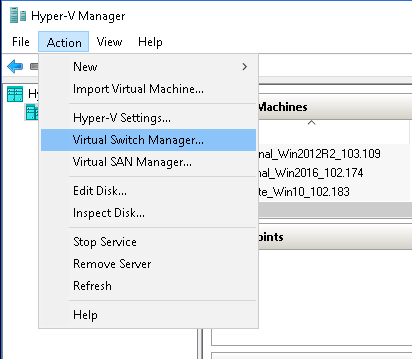
- To create Virtual Switch, go to Hyper-V Manager and click Action > Virtual Switch Manager
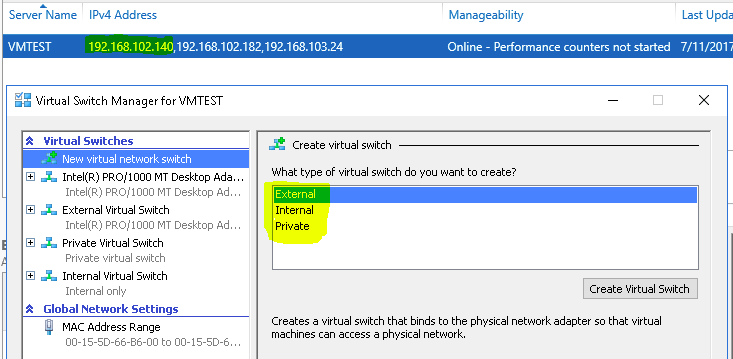
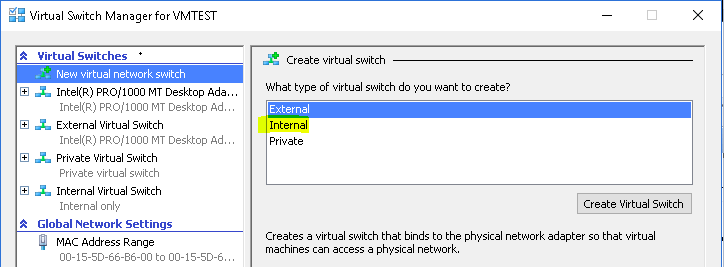
- Clicking on Virtual Switch Manager displays the types of switch you want to create. Select one of the Virtual Switch types based on your requirement, as displayed below
Note: Hyper-V Virtual Switch only supports Ethernet, and does not support any other wired local area network (LAN).
Creating External Virtual Switch
External Virtual Switch allows Virtual Machines on the host to access other systems on a traditional VLAN or standard switched network. We will look in to steps in creating External virtual switch network on the Hyper Host of Windows 2016 Server below,
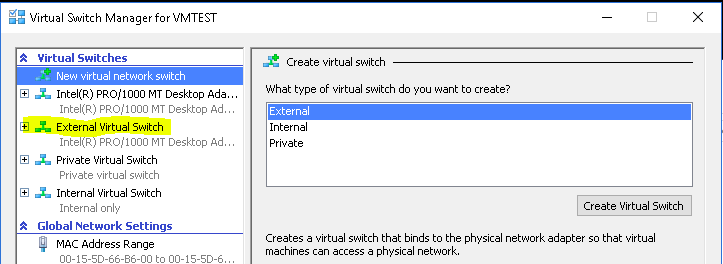
- On your Hyper-V Manager, click Action > Virtual Switch Manager. Select External as the virtual switch type and click on Create Virtual Switch
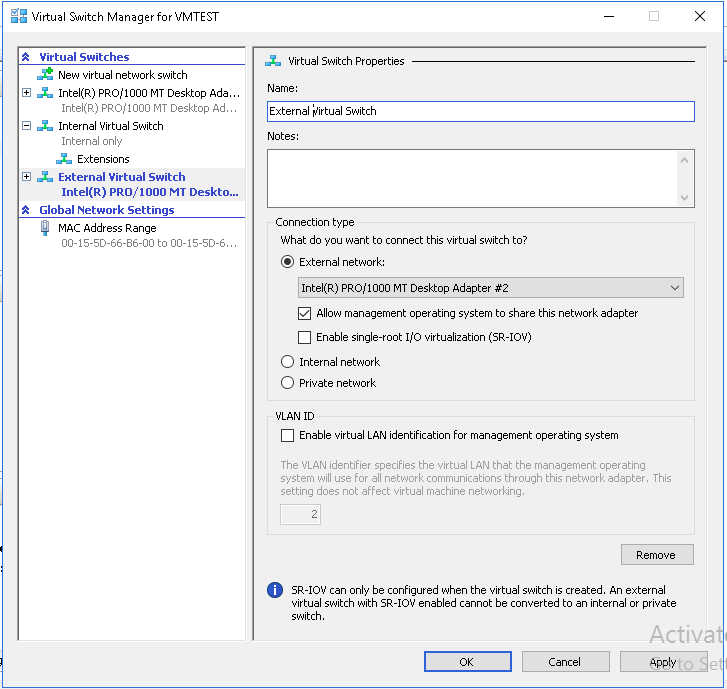
- Next screen is the virtual switch property page that lets you change the Name of Virtual Switch, add notes and choose the connection type. Select one of the Network Adapters and Click Ok to proceed further
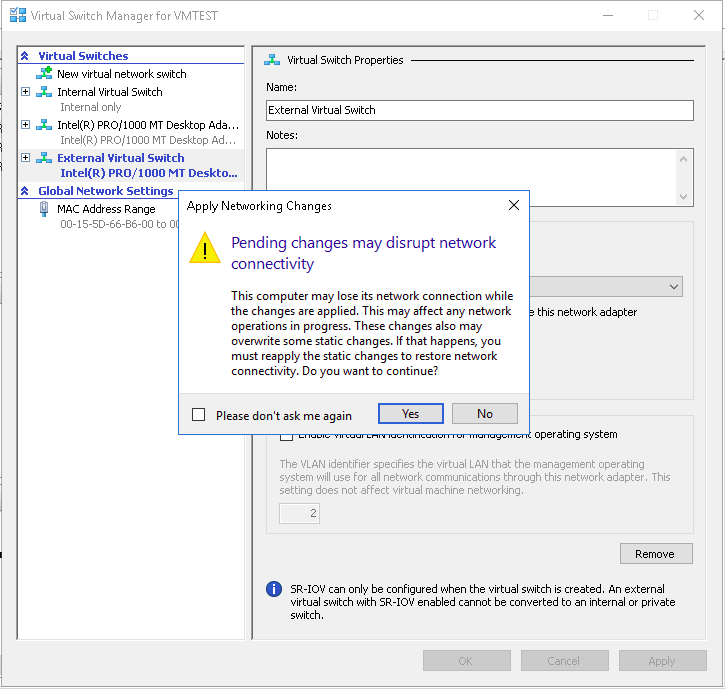
- Now you will get the alert message on disruption of Network connectivity on saving the new virtual switch, click Yes to create a new external virtual Switch
- You can see a new virtual switch created under the Virtual Switches section. You can click on the available virtual switches and check its properties

Note: To create an External Switch you must have one dedicated physical Network card in the Host machine.
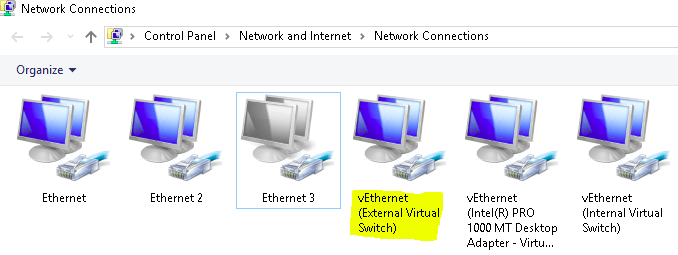
After creating the External Switch, you can see a new virtual adapter created in the Network Connections of your Control Panel.
Configure VM to use External Virtual Switch
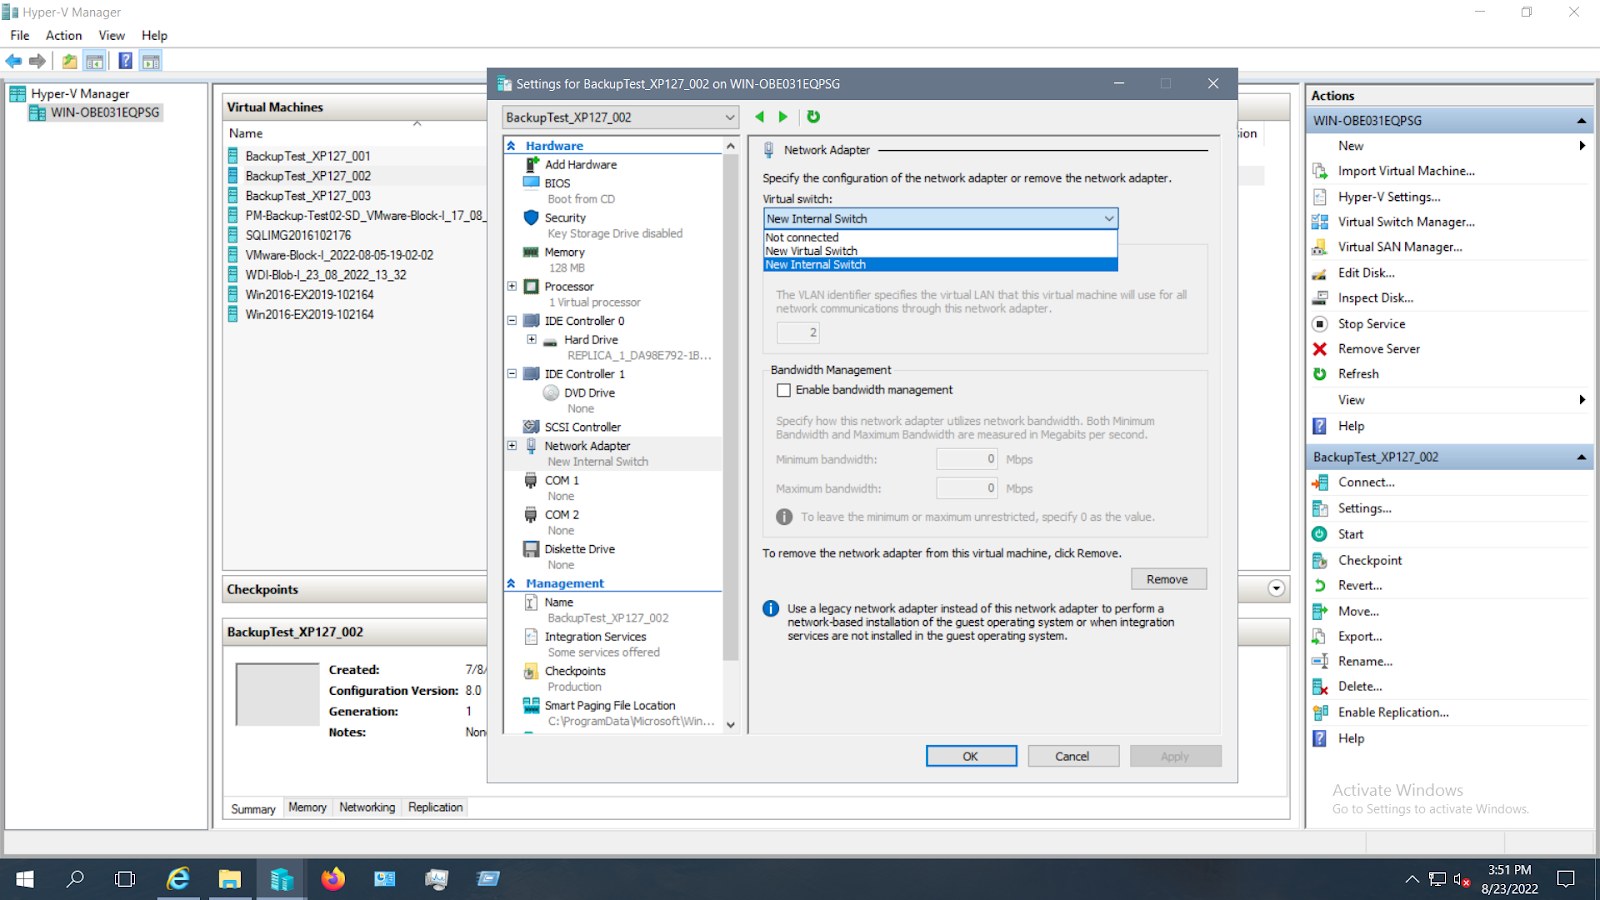
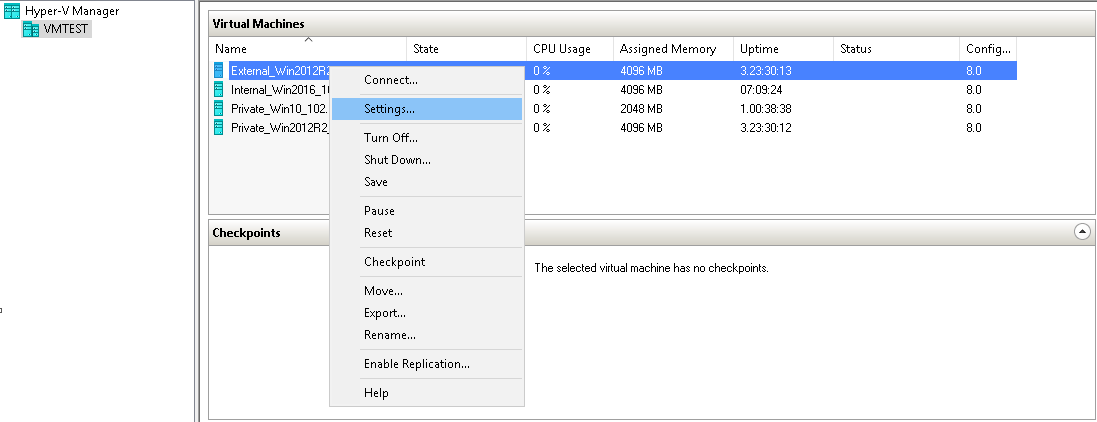
- Go to Hyper-V Manager and right click on the VM to which you want to update the network connection and click on Settings
- In the settings page, click on Network Adapter in the Hardware list (left pane). You can see the newly created external virtual switch in the drop down of the Virtual Switch
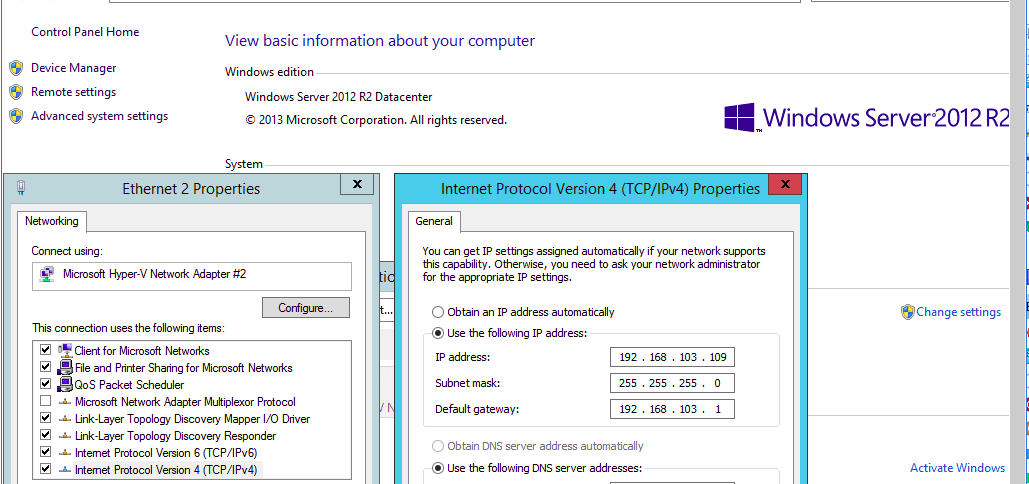
- Now connect to your virtual machine & configure ip address. In our example, the physical machine IP address is set to 192.168.102.XXX and the VM IP address 192.168.103.XXX
- Now you can be able to ping an external ip address from our VM


Creating Internal Virtual Switch
- On your Hyper-V Manager and click Action > Virtual Switch Manager. Select Internal as the virtual switch type and click on Create Virtual Switch
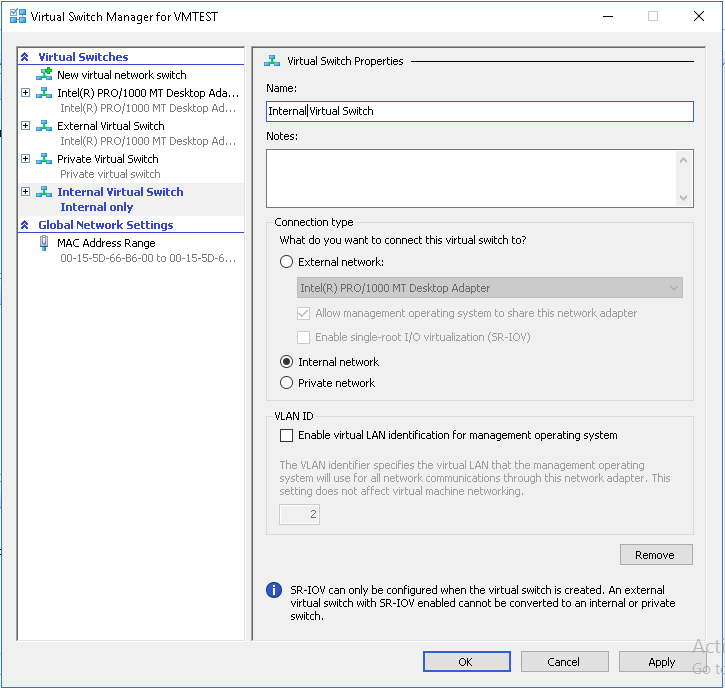
- In the virtual switch property page, you can change the Name of the virtual switch, add notes and choose the connection type. Click Ok to create a new internal virtual Switch
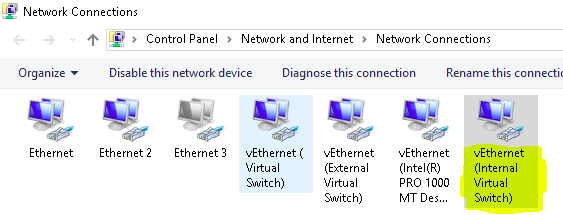
- Once you have created the Internal switch, you can see the new virtual adapter in Network Connections of your physical machines control panel as below
Configure VM to use Internal Virtual Switch
- Go to Hyper-V Manager and right click on the VM to which you want to update the network connection and click on Settings
- In the settings page, click on Network Adapter in the Hardware list (left pane). You can see the newly created internal virtual switch in the drop down of the Virtual Switch
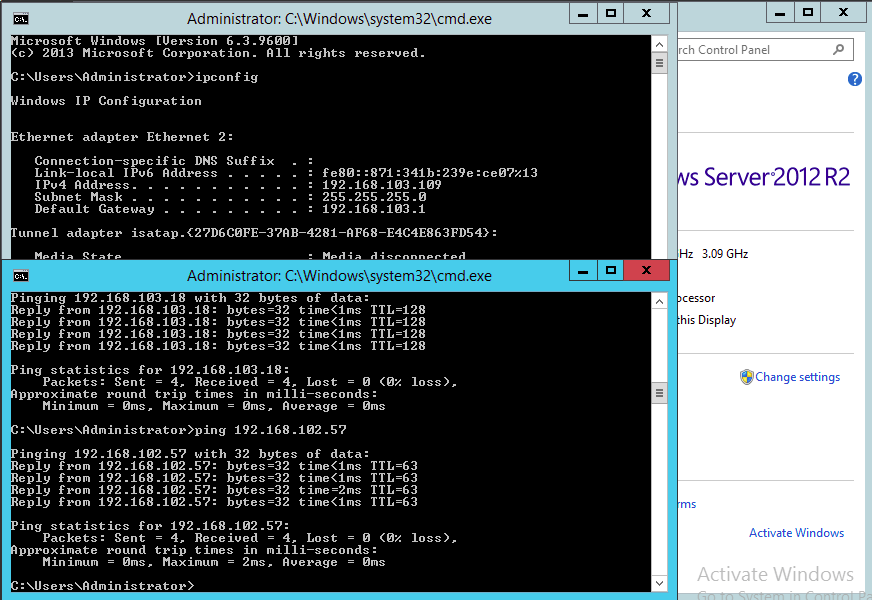
- For Internal Switch, the IP address of the physical machine’s Network Adapter and VM Network Adapter must be in the same series. In the below example, the IP of the physical machine is 192.168.102.182, and the IP of VM is 192.168.102.174
- In the below screenshot, we are able to ping the VM from Physical Host

Creating Private Virtual Switch:
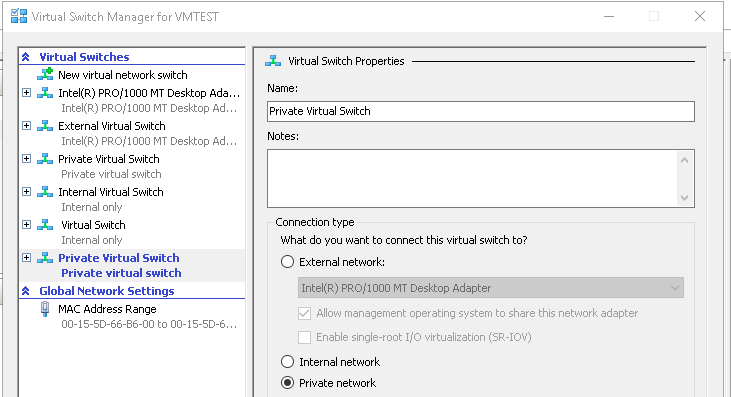
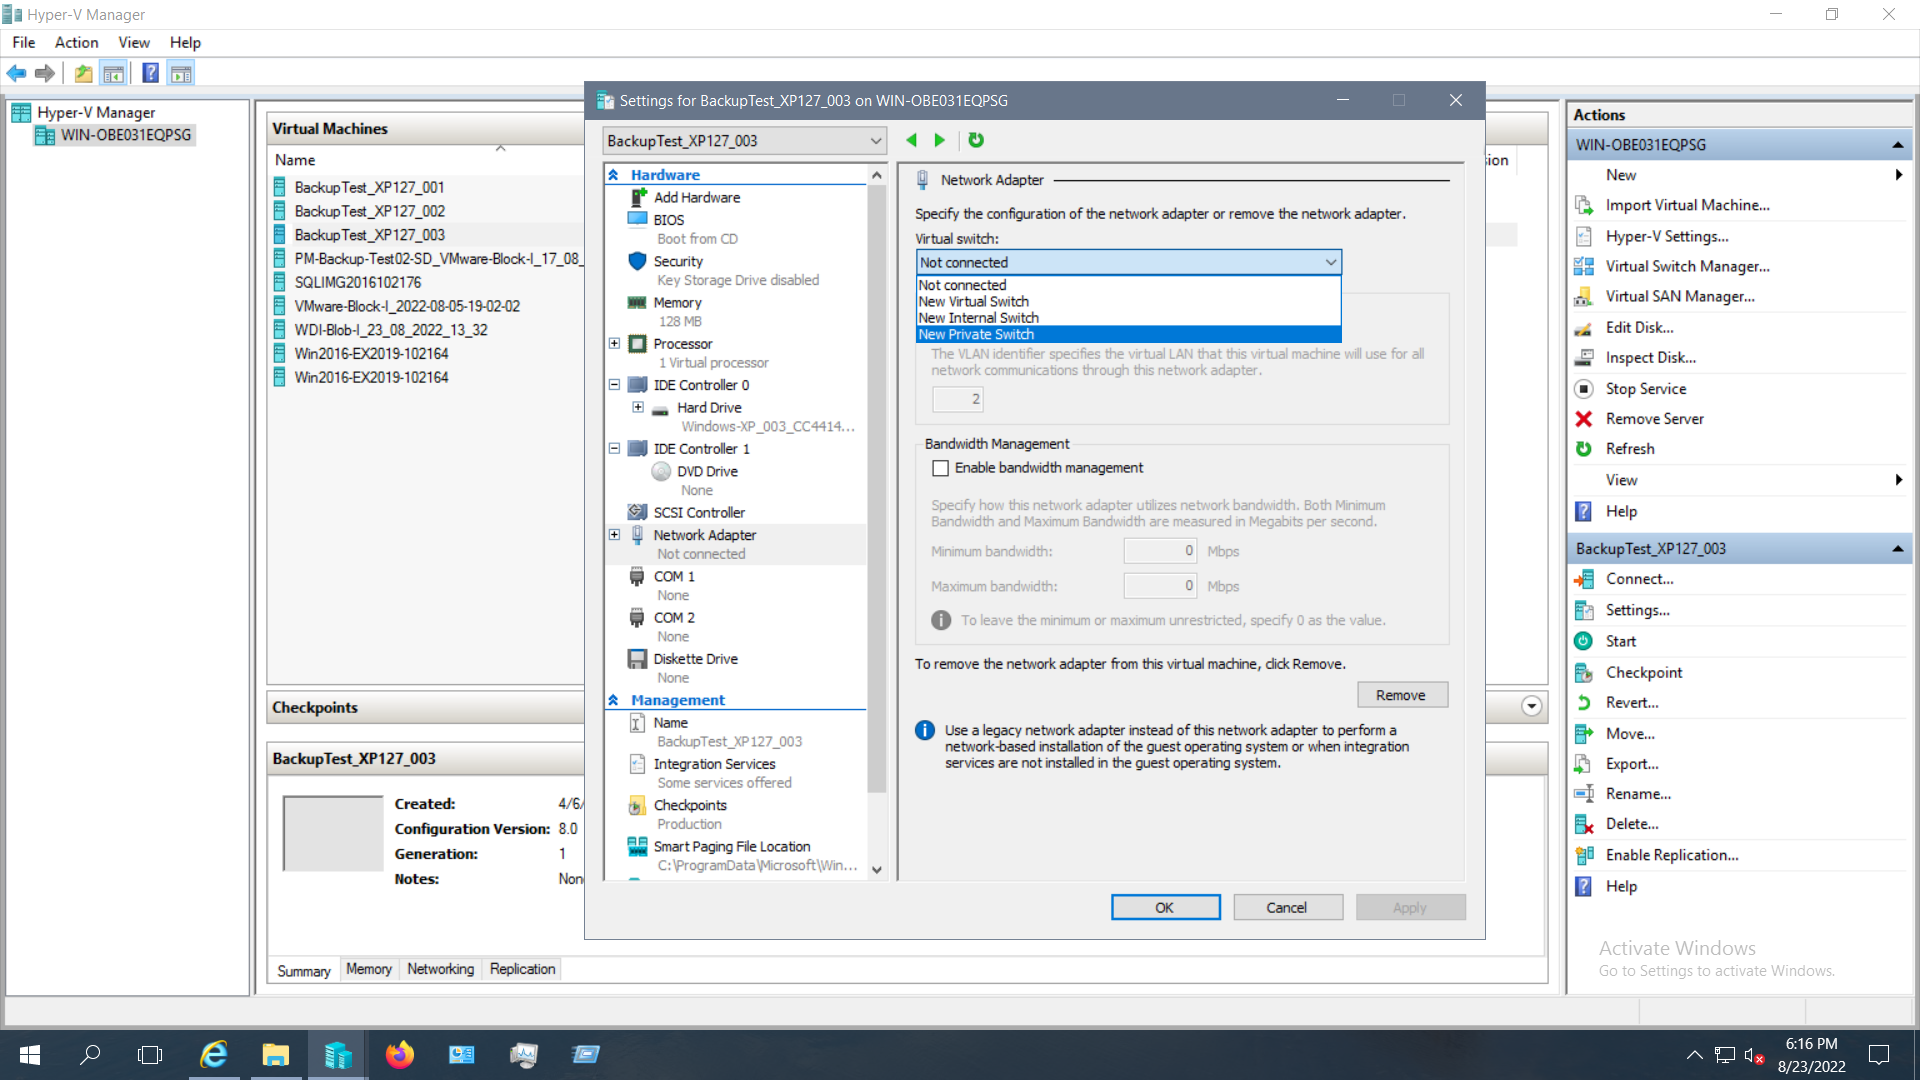
- On your Hyper-V Manager and click Action > Virtual Switch Manager.Select Private as the virtual switch type and click on Create Virtual Switch
- In the virtual switch property page, you can change the Name of the virtual switch, add notes and choose the connection type. Click Ok to create a new private virtual Switch

Configure VMs to use Private Switch
- Go to Hyper-V Manager and right click on the VM to which you want to update the network connection and click on Settings
- In the settings page, click on Network Adapter in the Hardware list (left pane). You can see the newly created private virtual switch in the drop down of the Virtual Switch
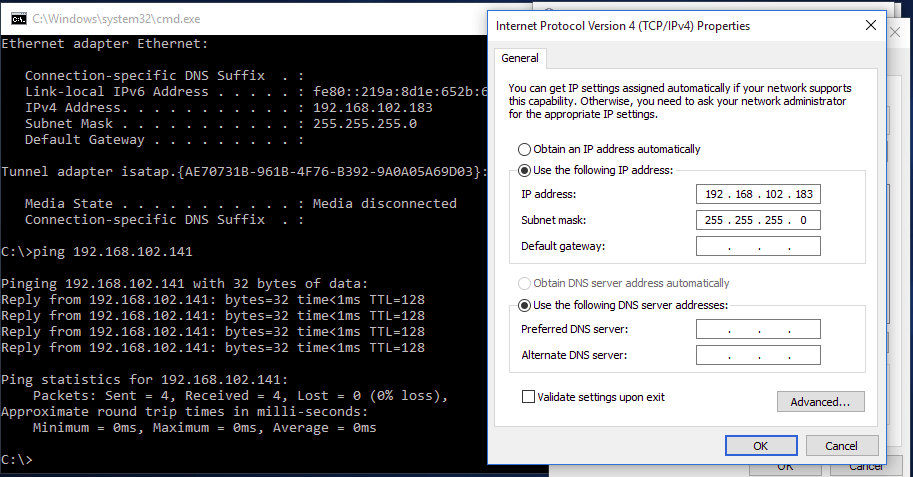
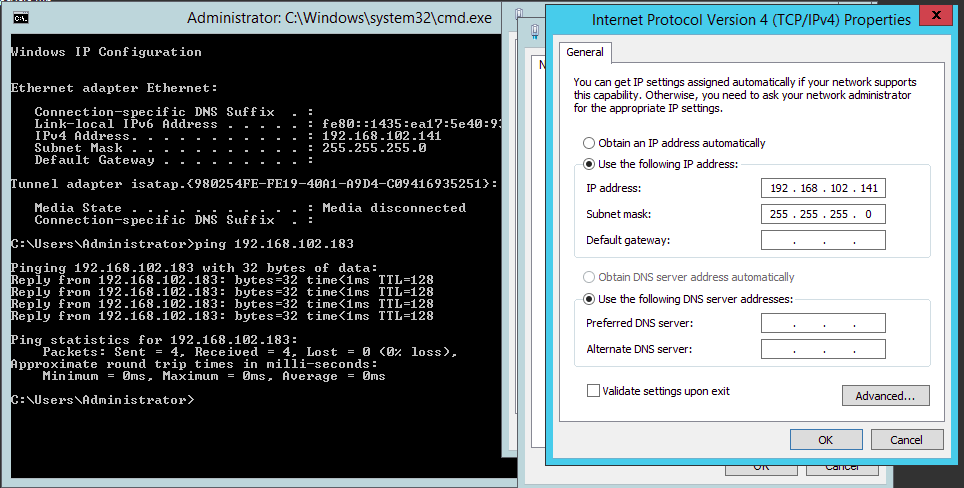
- Here we have created two Virtual machines to demonstrate the Private Switch configuration.
VM1 IP address: 192.168.102.183
VM 2 IP address: 192.168.102.141
As it is a private Switch configuration, DNS is not required - Once IP addresses are assigned, you are able to ping the IP address of one VMs from another
- In the below screenshot, we are able to ping VM1 from VM2
- In the below screenshot, we are able to ping VM2 from VM1


Empower your critical data with the magic of secure and seamless Hyper-V backup, forging an unbreakable shield of protection. Awaken the true potential of your virtual realm, preserving your invaluable information with unwavering confidence. This thrilling opportunity awaits — step into the realm of limitless possibilities and safeguard your data with a free trial today!
Ready to embark on this captivating adventure? Download BDRSuite now and take the first stride towards securing your Hyper-V environment. Embrace tranquility and immerse yourself in the realm of unparalleled Hyper-V backup excellence!
Want to explore more? Unravel the secrets of Hyper-V backup with BDRSuite and discover the power of seamless data protection!
Wrapping up
It is very simple to configure a Hyper-V Virtual switch. There are three operational modes for the Hyper-V virtual switch and you can choose the Virtual Switch based on your needs. You can change your switch interface VLAN tagging based on your Subnet/IP address range.
Follow our Twitter and Facebook feeds for new releases, updates, insightful posts and more.