
In today’s blog, we are going to discuss about migrating VM from VMware infra to well-known public cloud AWS using AWS Connector, this is completely automated process.
Following diagram illustrates how this topology looks like, when user requests for a migration – we will create a conversion task and after the successful completion of the conversion you will see the imported instance available at your AWS cloud.

Stage 1: Creating the Required AWS Accounts and Users
- If your organization doesn’t have an AWS account already, please signup for new one,
Open https://aws.amazon.com/resources/create-account/, and then choose “Signup Now
- Create AWS authenticator provider account, this is an IAM user which is used by connector to assume a trust role and authenticate users
- Open the IAM console
- In the left navigation pane, click “Users”
- Choose “Add User” button at the top
- Provide a “User Name” and choose “Programmatic Access” and “AWS Management Console Access” options
- Click “Next” and choose “Attach Existing Policy”
- Search for “AWSconnector” policy and attach it to the user which is created
Important: Make sure you have copied Access Key and Secret Key and keep it safe. You’ll need them to complete the connector setup process.

Stage 2: Setting Up the Trust Relationship:
- Open the AWS Management Portal for vCenter setup console
- Click “Get Started Now” button
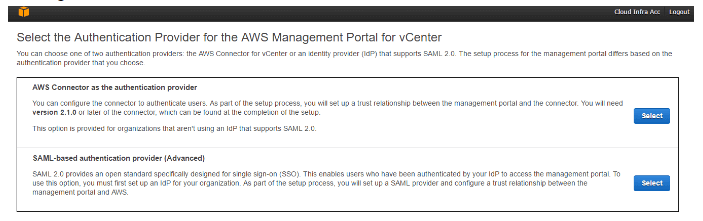
- Choose “AWS Connector as the authentication provider” as your “Authentication Provider” and click “Select” to proceed
- In the “Configure the Trust Relationship” wizard, Select the IAM User which is created in the Stage 1
- Choose “I agree” and proceed to save the configuration made
- In the “Add Administrators” wizard, provide your vCenter credentials
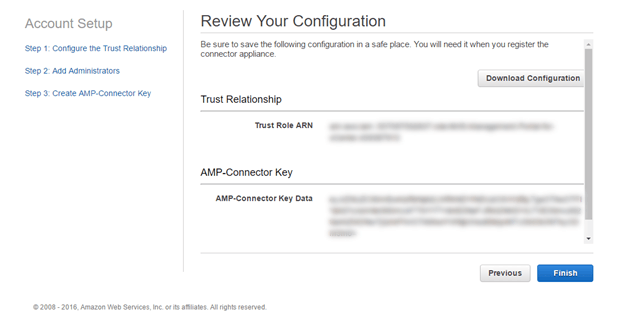
- In the “Create AMP-Connector Key” choose “Create a new AMP-Connector key” and provide a user friendly key name
- Under “Review Your Configuration” page, please select “Download Configuration” button and keep the download key aside
https://amp.aws.amazon.com/VCPlugin.html#first_time
Note : If you wish to change authentication providers, Click “Reset Trust” by going to the summary page and Reset Trust Relationship
Important: User name provided here is case sensitive, so please make sure its same like what you can see at your vCenter, click “Save and Continue”
Stage 3: Deploying the Connector Virtual Appliance
- Login into your vCenter as a VMware administrator
- Launch connector appliance using “Deploy OVF Template”
Download URL : https://s3.amazonaws.com/aws-connector/AWS-Connector.ova - On the disk wizard page, its recommended to choose “Thick Provision Eager Zeroed” as the disk type for the best performance
- Launch the VM once all the necessary customization is made to it
- Now, Power on the VM
- Once the VM up and running, choose “Open Console” to connect it
- When the VM prompt for the login user name and password, proceed with the default credentials
UserName : ec2-user
Password : ec2pass - After the successful login, invoke the below command
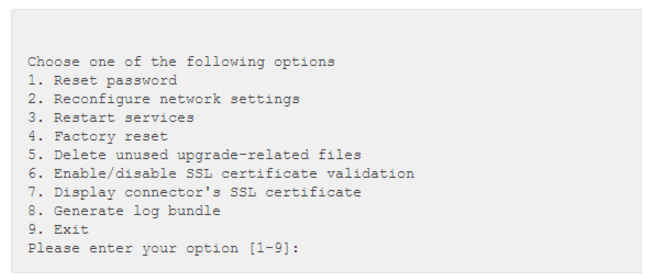
sudo setup.rb - Then you can see the following wizard,
- Type 2, and then press Enter. The command displays the following menu:
- Proceed to setup your static ip
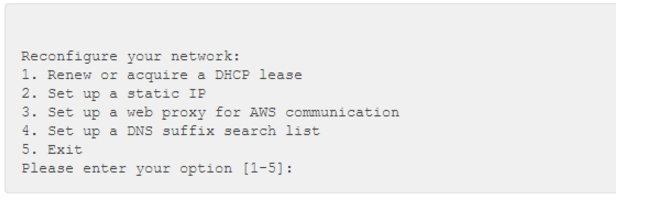
Note: For demo purpose, I am disabling SSL Certificate Validation, which you can do by choosing the option “Enable/disable SSL certificate validation” and type in “Disable”.
Stage 4: Configuring Connector
- From your web browser, go to https://ip_address/, where ip_address is the static IP address of your connector appliance
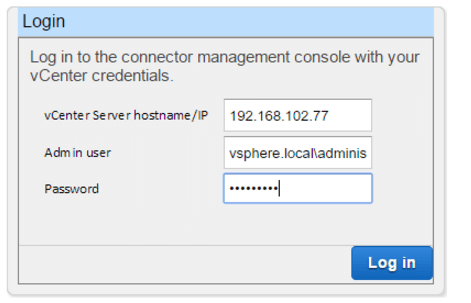
- Log in to Connector dialog box, type in your VCenter server IP address and the administrator credentials for the same
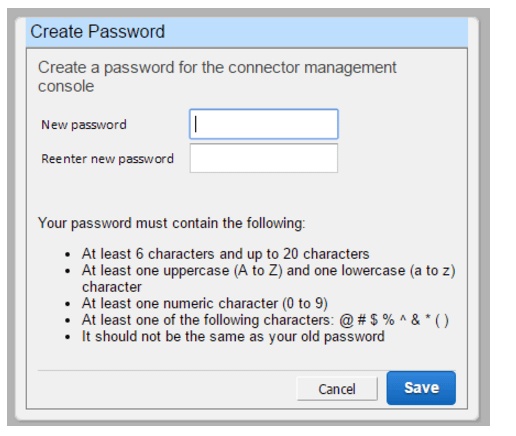
- When it is prompted to create a password, choose a password – This is your log on password for the Connector Management Console
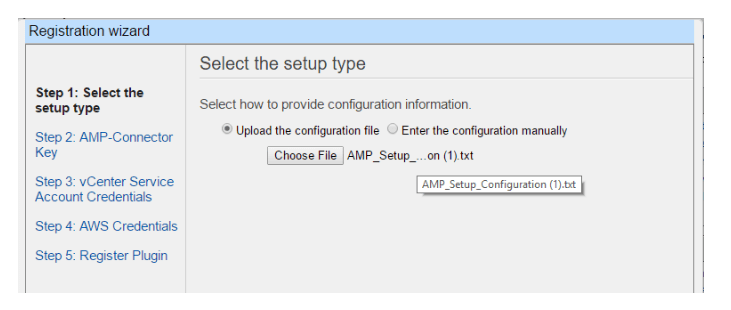
- Click Upload the configuration file, select the configuration file which you have downloaded it from section 2, and then click Next
- On the VCenter Service Account credential page, provide your vCenter user name and password
- On the “AWS Credentials” page, provide access key and secret access key which you downloaded and get it from section 1
- On the “Register plugin” page, after you make sure your settings were intact, click “Register” button to proceed
- On successful plugin registration, you can see a “Health Status” getting updated at “Connector Management Console” page
Stage 5: VCenter Configuration
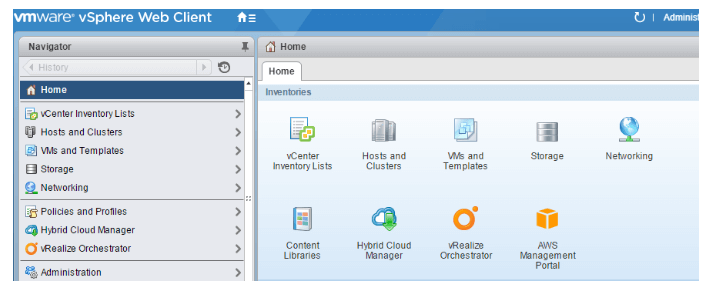
- After the successful connector plugin registration, please logout and login in back to your VCenter, to see “AWS Management Portal” plugin icon at the “Home” screen
- Choosing that will take you to a separate wizard, requesting to choose “Region Preferences”, please choose the required AWS region to which you wish to migrate your VM machine
- Now it’s time to migrate your VM to AWS account,
- Simply right click the VM which you wish to migrate it to cloud and choose Migrate VM to AWS
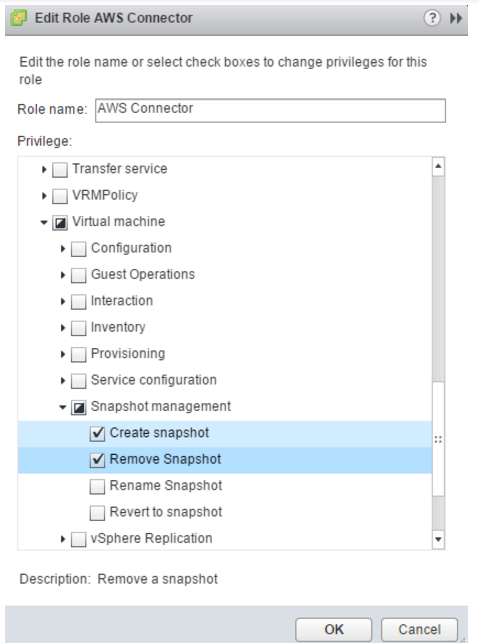
Important: You need to enable “Create Snapshot” and “Remove Snapshot” options for role “AWS Connector” , which you can do it by choosing to Roles at the left pane and select AWS Connector, edit – > Choose Virtual Machine – > Snapshot Management.
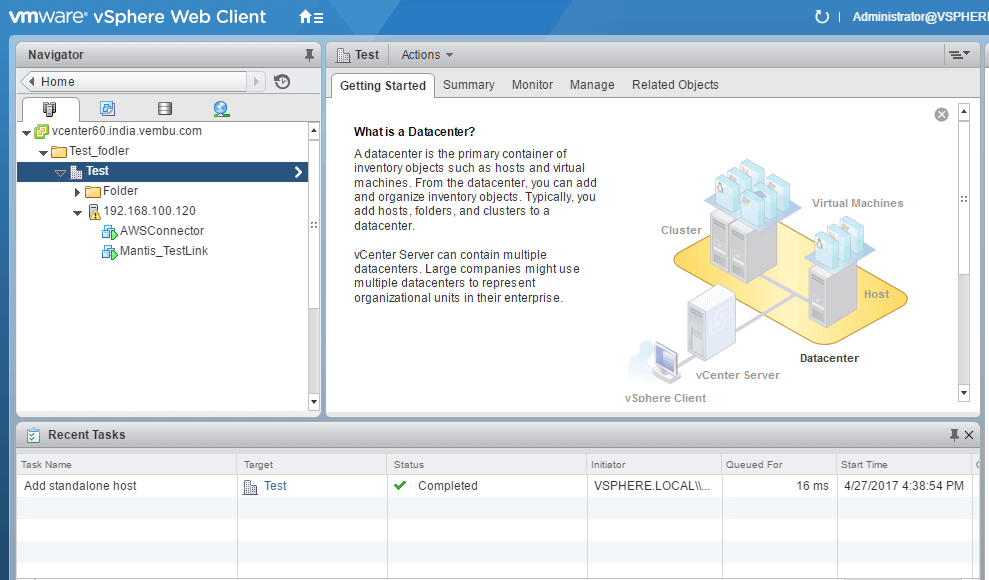
We are going to migrate “Mantis_TestLink” machine to AWS. You can verify in next image.
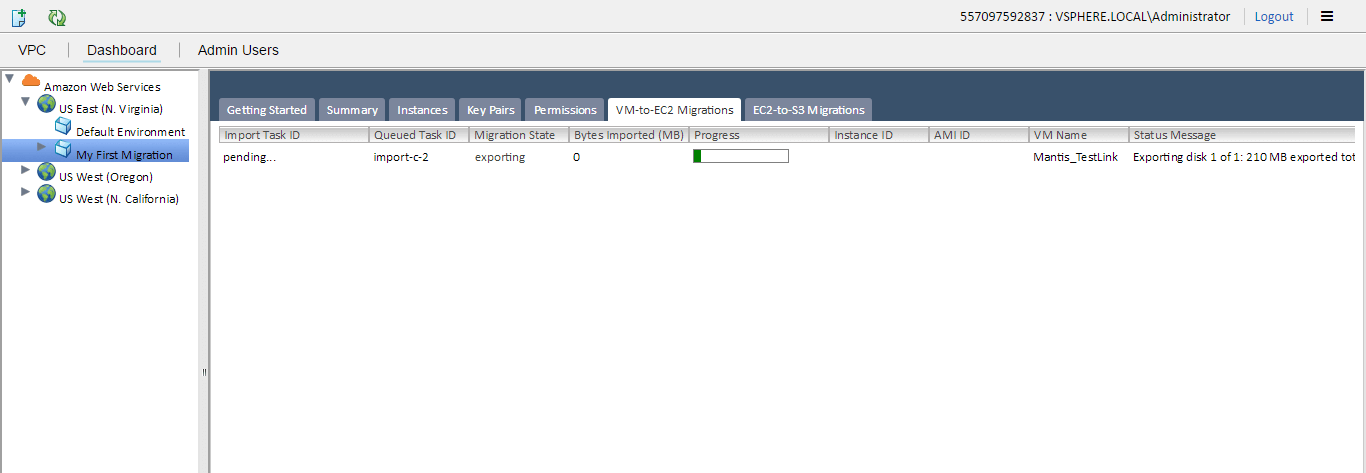
This image shows migration process in AWS.
Conclusion:
it’s very safe and secure to migrate your on-premise machines through vCenter to AWS. You can use vCenter version 6.0 because as of now version 6.5 is not supported.
Follow our Twitter and Facebook feeds for new releases, updates, insightful posts and more.