
To backup Microsoft 365 domain data, such as Mails, OneDrive, Calendars, Contacts, SharePointOnline, Teams, and Groups, a user needs to register BDRSuite Backup for Microsoft 365 as an application on Microsoft Azure Cloud and generate the application ID and secret key.
In our Latest version BDRSuite v5.1.0, we have simplified the steps to register BDRSuite Backup for Microsoft 365 in the Azure Cloud.
The registration can be done via 2 Methods,
- Method 1: Using Azure AD Application
- Adding permission using JSON
- Adding permission individually
- Method 2: Using PowerShell Scripts
Let us have a detailed look at each step in this blog.
Prerequisites To Add Microsoft 365 Organization

To add Microsoft 365 Organization(s) on the BDRSuite Backup Server, you can use any one of the following methods:
Method 1: Using Azure AD Application
In this method, BDRSuite Backup for Microsoft 365 uses an Azure AD application to connect your Microsoft 365 Organizations for Backup and Recovery.
- Create a new application in Azure Active Directory and generate the Application ID and Application Password
- Then, enable the specified Microsoft Graph API permissions which are required for performing Microsoft 365 Backup & Recovery
Method 2: Using PowerShell Scripts
- In this method, Microsoft 365 Organization will be added to the BDRSuite Backup Server through PowerShell Scripts where you are required to provide the organization’s admin credential: username and password
- This will automatically create an AD application, enable the required API permissions and save the organization to the BDR Backup Server
Note: Enable SharePoint REST API permissions only if you want to backup & restore the SharePoint – List Attachments and Site Pages.
Method 1: Using Azure AD Application
Generate Application ID
1. Sign in to the Azure Portal using your Microsoft admin account.

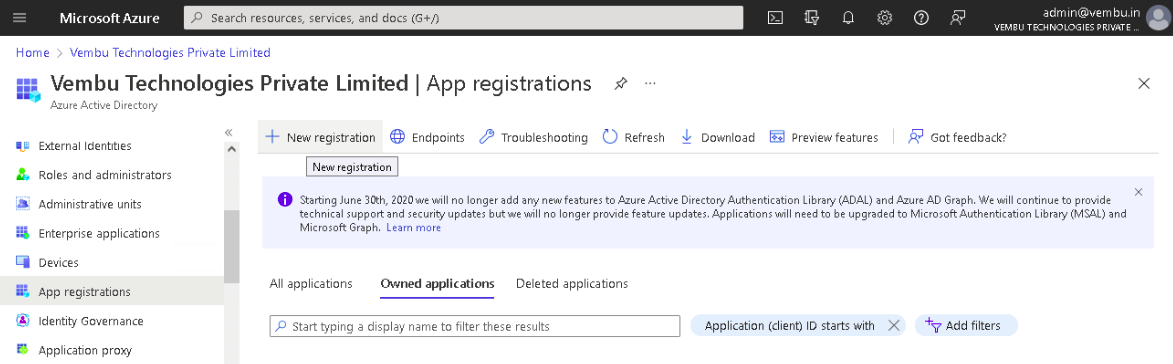
2. Search and locate the Azure Active Directory. On the Active Directory page, select App registrations under Manage on the left pane and click on New registration.
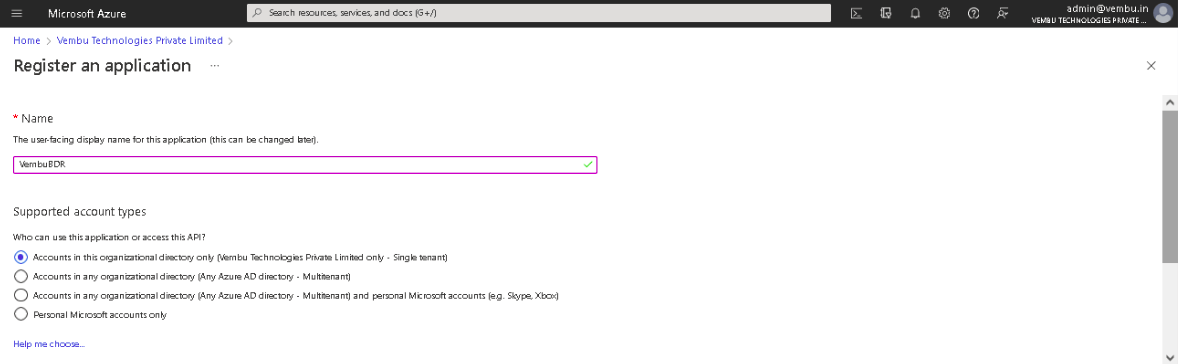
3. Then ‘Register an application’ page will appear and enter the following details to register your application.
- Name – Enter a display name for the application
- Supported account types – Choose the option “Accounts in this organizational directory only”
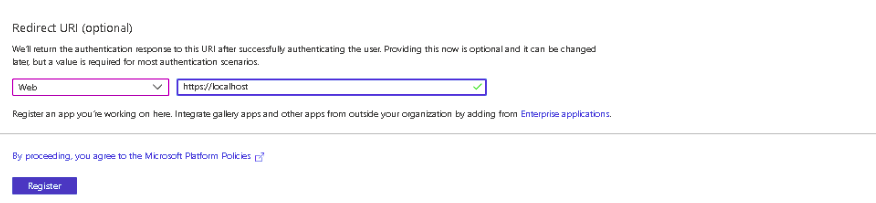
- Redirect URI – Select Web for the type of application and enter the redirect URI as https://localhost
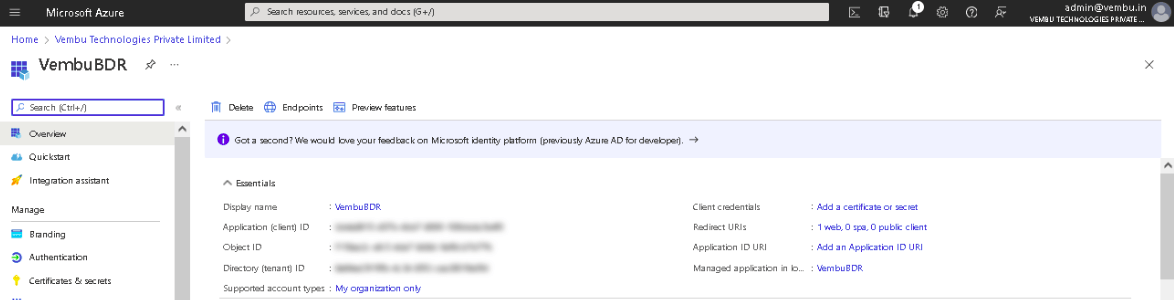
4. Finally, click on the Register button. The Azure AD assigns a unique Application (client) ID, which is shown on the Overview page to which you will be redirected.
Generate Application Password
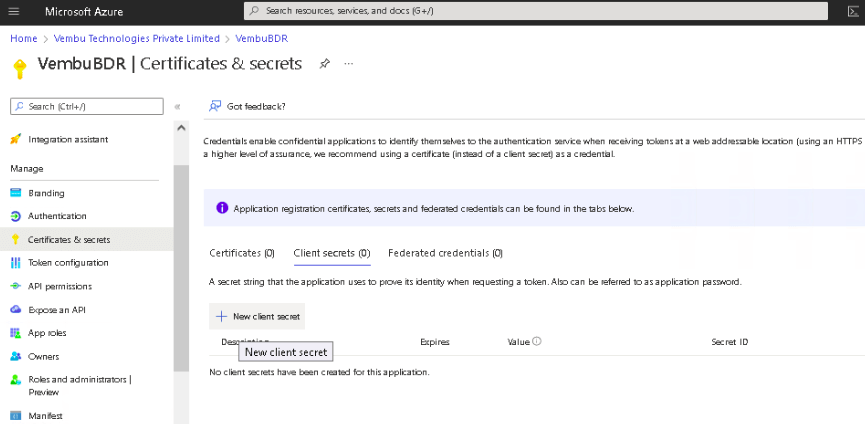
- Select Certificates & secrets under Manage on the left pane
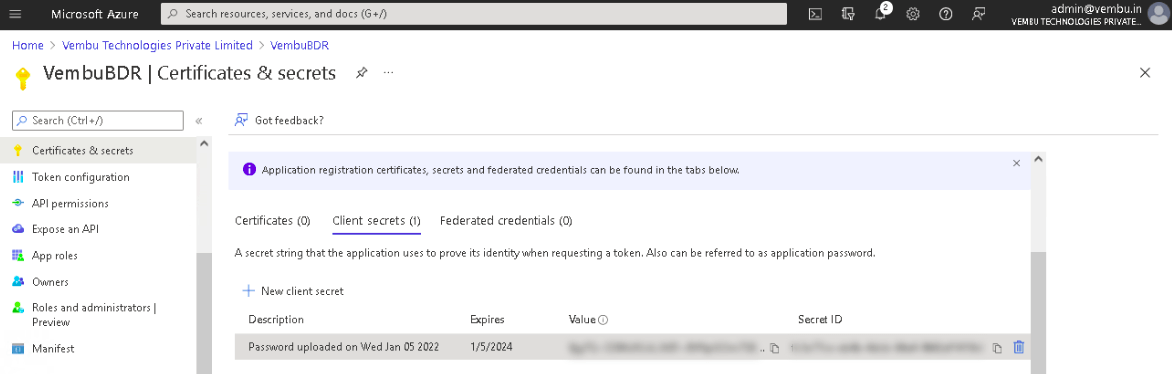
- Click on New client secret which opens a separate section: Add a client secret. On this page, choose 24 months from the Expires option and click Add. This will generate and display the application password (under the ‘Value’ column)
Note:
- Make sure you copy the application password (Value) as the portal will display it only once. (You can use the copy to clipboard icon to copy the password)
- Once the generated application password has expired, create a new client secret and update it on the BDRSuite Backup Server. If the expired password is not updated, backups will fail
Add Permissions for Microsoft Graph API
- Adding Permissions to the Microsoft Graph API can be done using any of the following options:
- OPTION 1 – Using JSON to Add Permissions
- OPTION 2 – Add Permissions Individually
- These permissions are needed to access Microsoft 365 Mails, Contacts, Calendars, OneDrive, Groups, SharePoint, and Teams data
OPTION 1 – Using JSON to Add Permissions
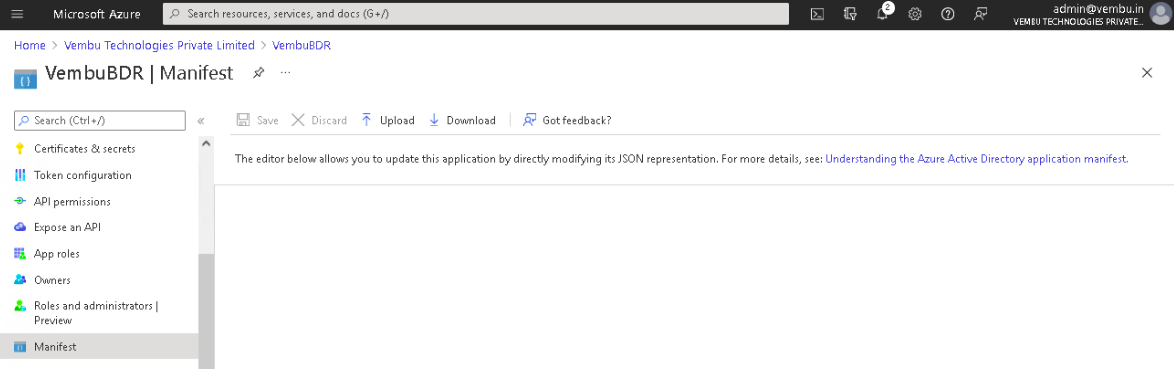
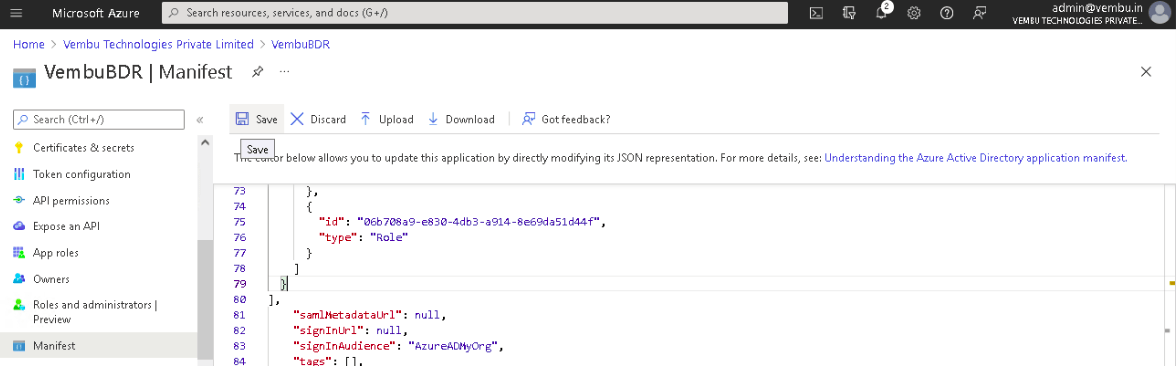
1. Select Manifest option under Manage on the left pane and the JSON corresponding to the created application will be shown on the right side.
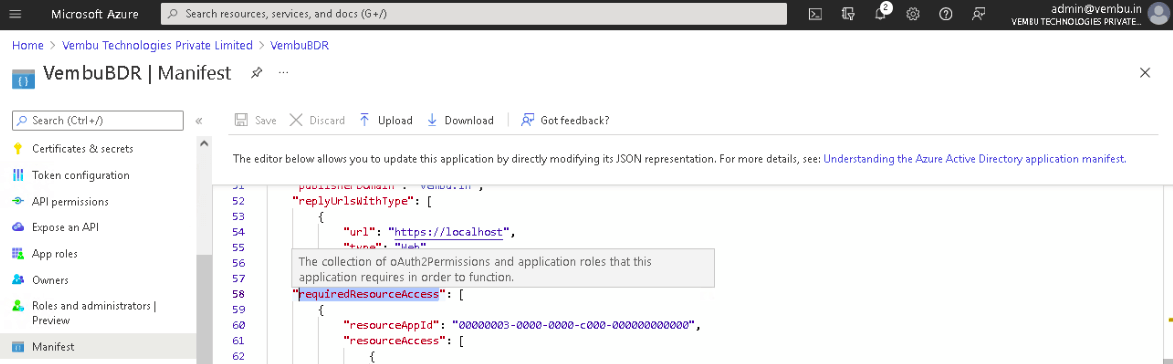
2. Search for ‘requiredResourceAccess’ key in the JSON and replace the existing values with the exact content
Note: API permission values will automatically enable all the API permissions required for backup.
3. After replacing the values, click the Save icon on top of the page.
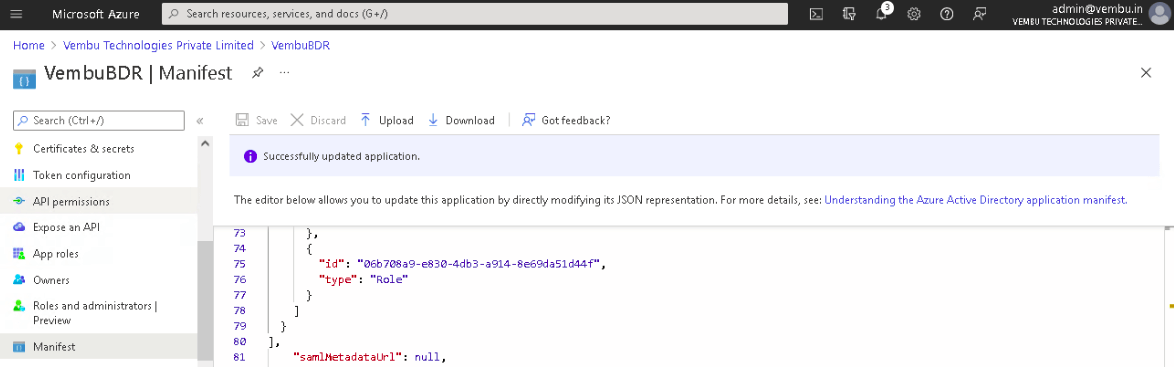
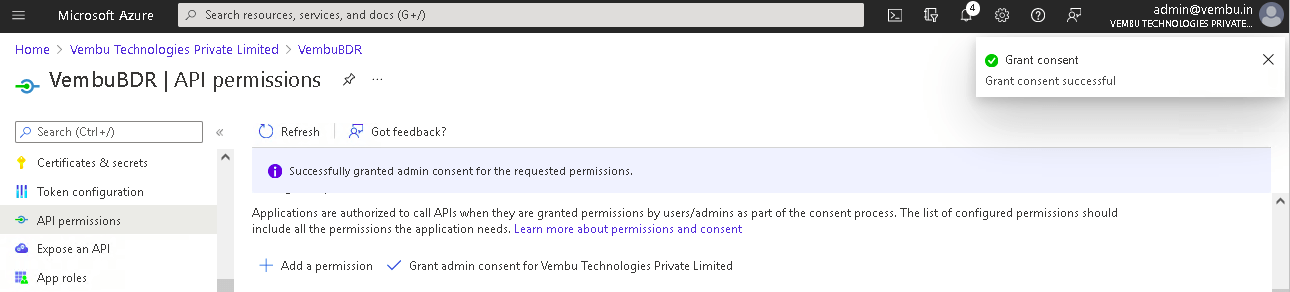
4. Finally, Select API Permissions under Manage on the left pane. Click the option – Grant admin consent for {your tenant} shown on the right side and click Yes to confirm the admin consent action.
API Permission Values
[
{
“resourceAppId”: “00000003-0000-0000-c000-000000000000”,
“resourceAccess”: [
{
“id”: “19dbc75e-c2e2-444c-a770-ec69d8559fc7”,
“type”: “Role”
},
{
“id”: “1bfefb4e-e0b5-418b-a88f-73c46d2cc8e9”,
“type”: “Role”
},
{
“id”: “18a4783c-866b-4cc7-a460-3d5e5662c884”,
“type”: “Role”
},
{
“id”: “06b708a9-e830-4db3-a914-8e69da51d44f”,
“type”: “Role”
}
]
}
]
OPTION 2 – Add Permissions Individually
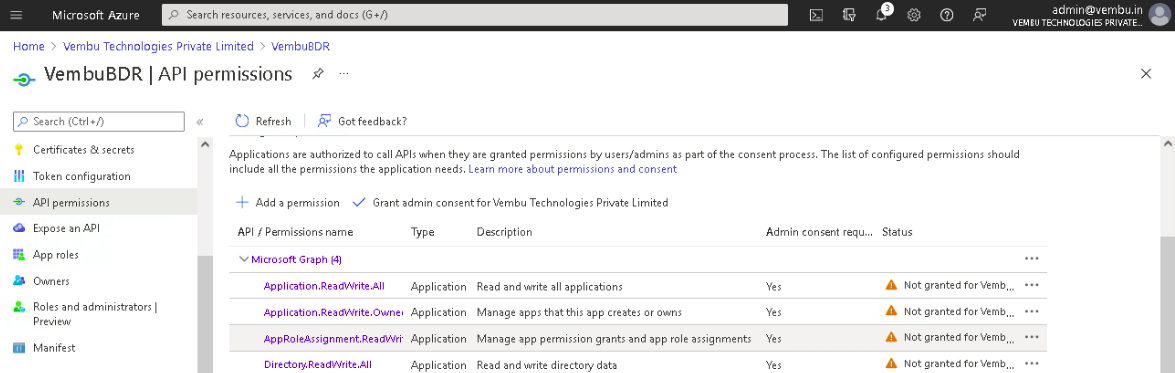
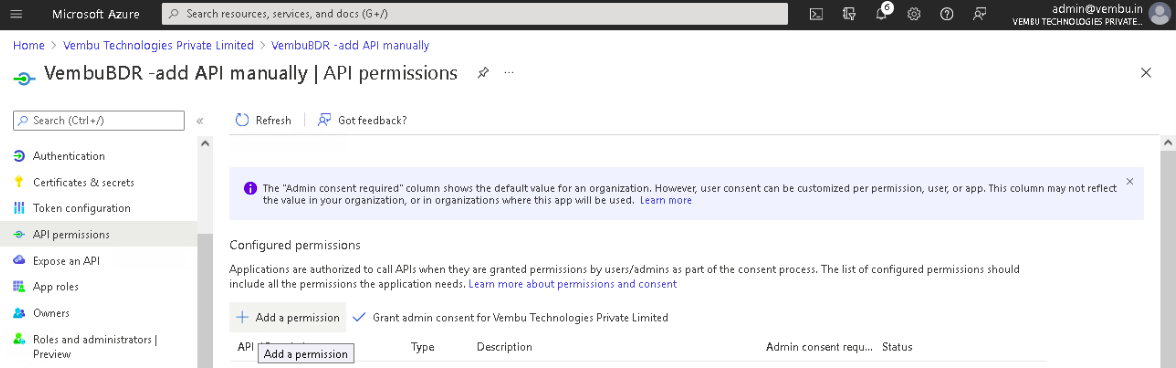
1. Select API Permissions under Manage on the left pane.
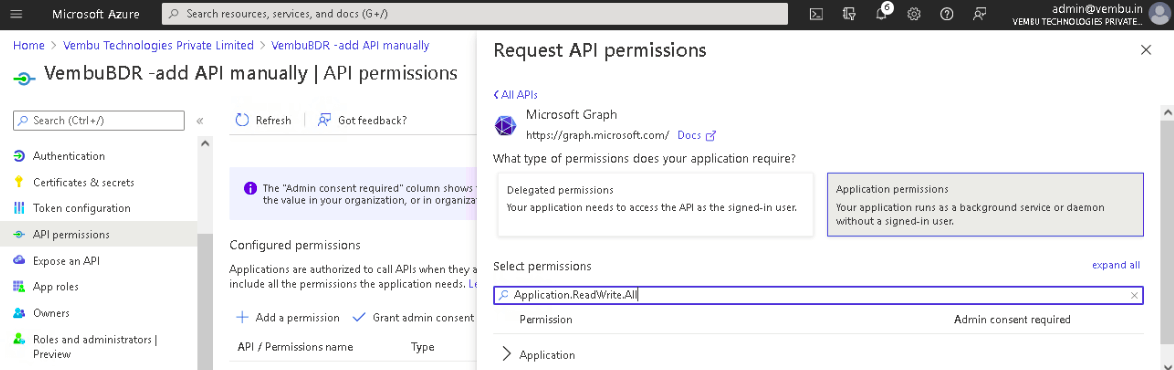
2. On the API permissions page, click on Add a permission option which will open the Request API Permissions page.
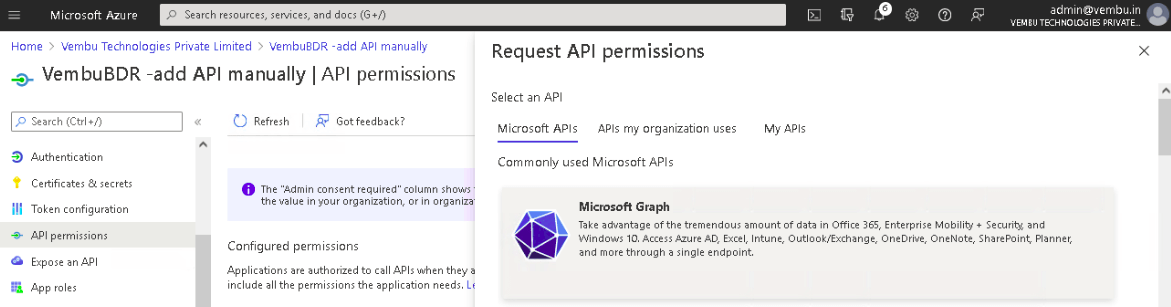
3. On the tab – Microsoft APIs, click on the Microsoft Graph option listed under commonly used Microsoft APIs.
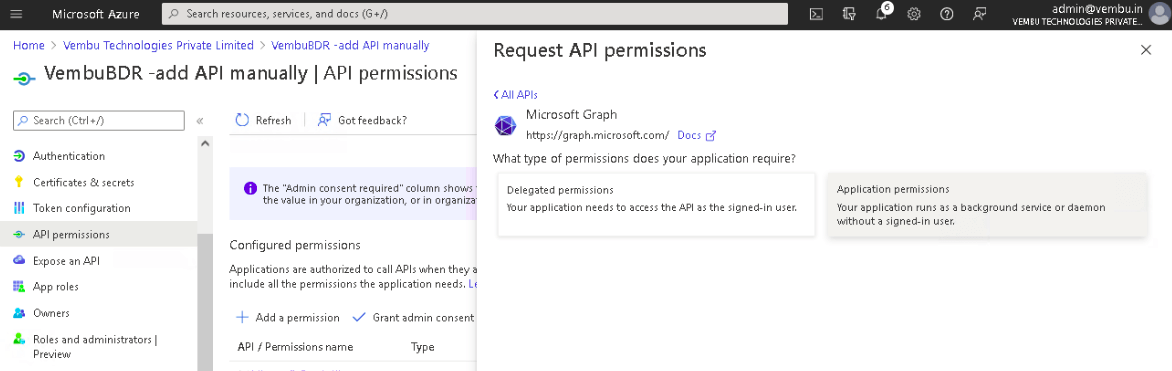
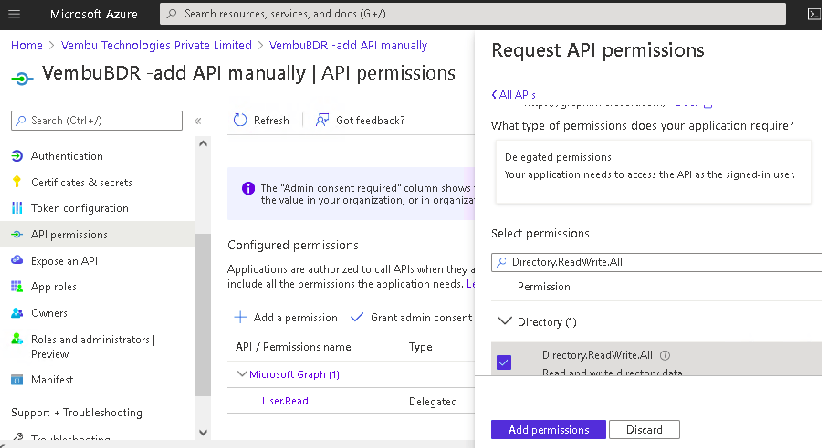
4. Select the Application permissions option and use the search bar to find the below-listed permissions and enable their checkbox.
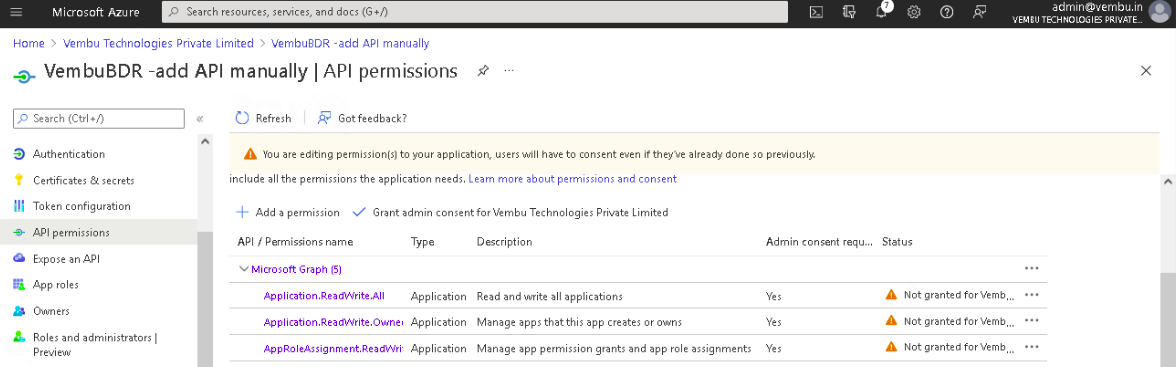
- Application.ReadWrite.All
- Application.ReadWrite.OwnedBy
- AppRoleAssignment.ReadWrite.All
- Directory.ReadWrite.All
Note: These permissions will automatically enable the other API permissions required for backup.
5. Click on the Add Permissions button to complete the process.
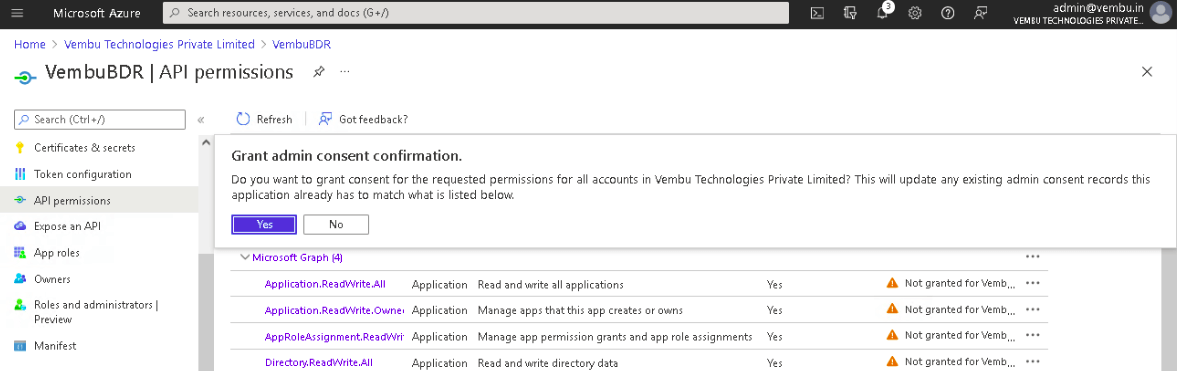
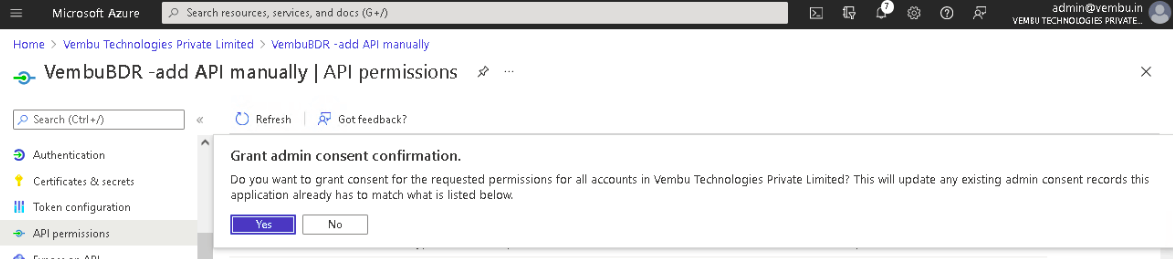
6. Lastly, click on the Grant admin consent for {your tenant} option and click Yes to confirm the admin consent action.
7. Now, you have generated both Application ID and Application Password with all the required API Permissions enabled.
Note: To add the Microsoft 365 Organization on the BDR Backup Server, you need the following:
- Application Password – Generated & copied to clipboard
- Application ID and Tenant ID – These details are displayed on the Overview page on the Azure Portal
Method 2: Using PowerShell Scripts
Prerequisites
Make sure the following services are installed on the BDRSuite Backup Server machine to execute the PowerShell commands:
1) PowerShell – up to version 6 is supported.
Note: To check the PowerShell version, use the command: $PSVersionTable and see the PSVersion field.
2) .NET 4.7.2 and above is required.
3) For Windows Server 2012 R2: Windows Management Framework 5.1 and above is required.
4)PowerShell Repository is required.
- To register PSGallery repository use the command: Register-PSRepository -Default -Verbose
- To view the available repositories, use the command: Get-PSRepository
5) From services.msc, make sure the status of the services below is ‘Running’:
- Vembu BDR Backup Server for Virtual Physical Workloads
- Vembu BDR Backup Server for Microsoft 365
Steps To Add Microsoft 365 Organization
On the BDRSuite Backup Server machine, perform the following steps:
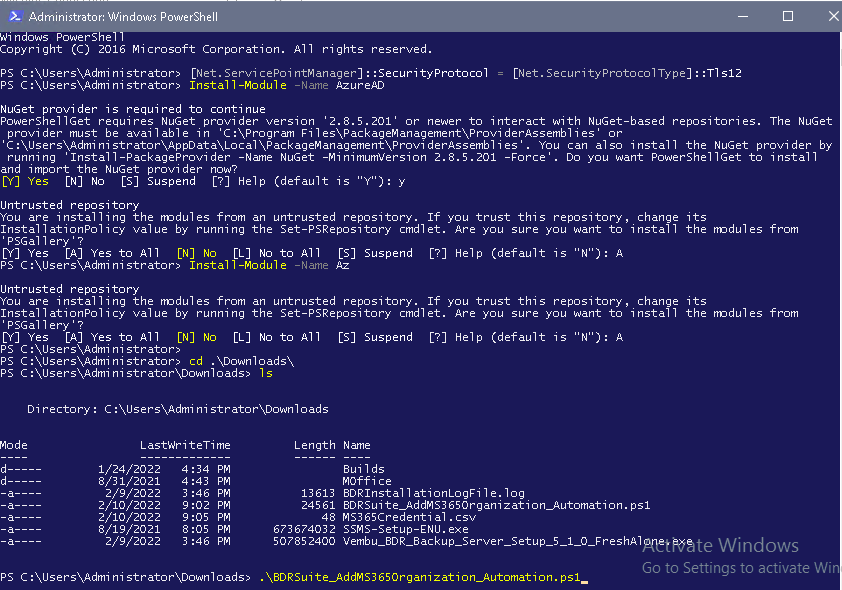
- Click to Download the Script file: BDRSuite_AddMS365Organization_Automation.ps1
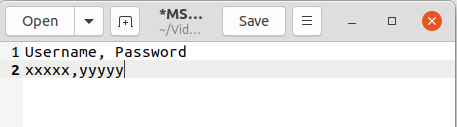
- Create a new .csv file and add the organization’s admin credentials: username and password in the below format. The first entry should be the text: username, password. This shows the below-paired values are username, password pairs. Save the file with the name: MS365Credential.csv. The credentials of one or more organizations for which backup has to be configured can be added to the file
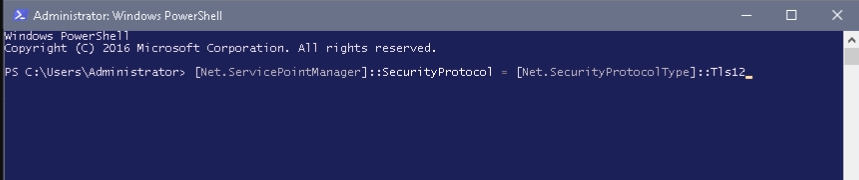
- Open PowerShell as Administrator and execute the following command: [Net.ServicePointManager]::SecurityProtocol = [Net.SecurityProtocolType]::Tls12
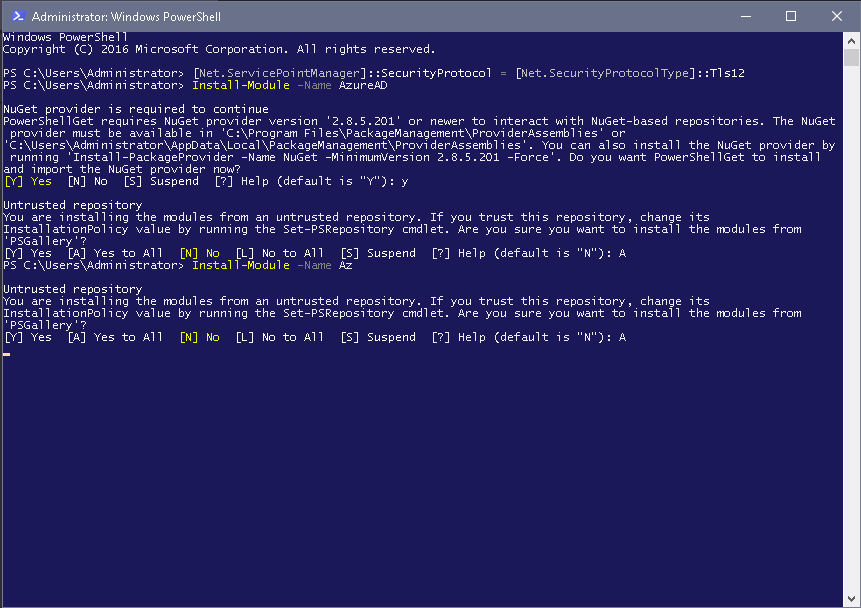
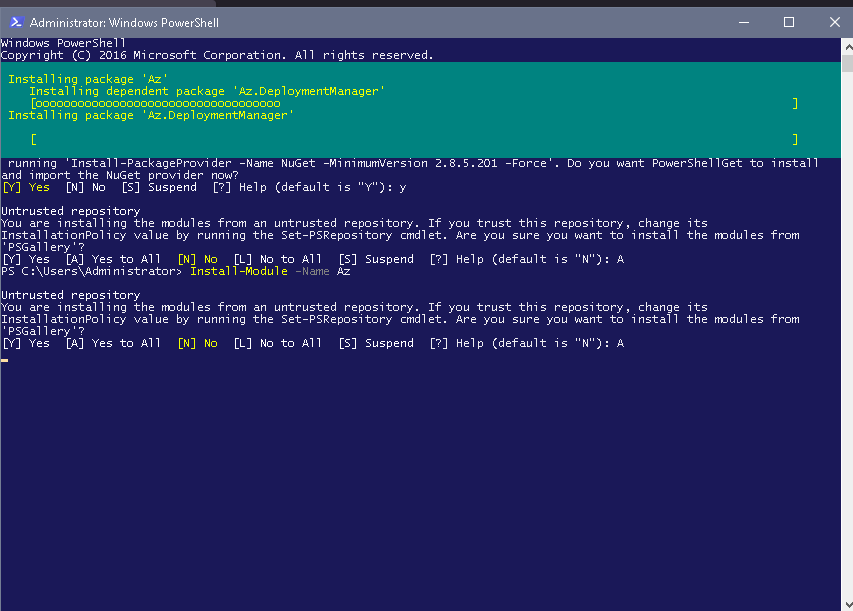
- Then, execute the below commands to install the Azure AD and Az modules that are required to run the script:
- Install-Module -Name AzureAD
- Install-Module -Name Az
- Navigate to the directory where the script file is located. Example: cd < script file location >
- Run the script file using: .\BDRSuite_AddMS365Organization_Automation.ps1
- Once the script is executed, the organization(s) will be added successfully. You can view the added organizations under the ‘Data Sources’ menu on the BDR Backup Server.
Example:
Username, Password
Username1, Password1
Username2, Password2
Note: The Script file (BDRSuite_AddMS365Organization_Automation.ps1) and the file with organization credentials (MS365Credential.csv) should be in the same location.
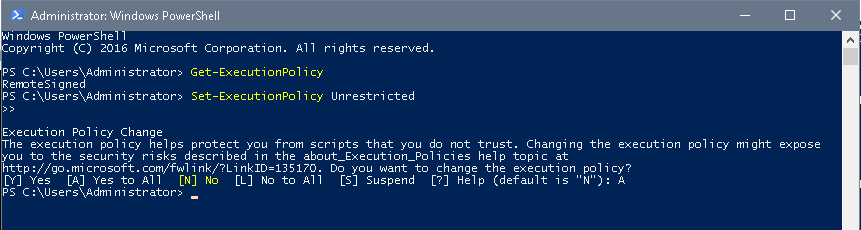
Note: To run the script file, the PowerShell Execution Policy should be set to ‘Unrestricted’. Use the command: Set-ExecutionPolicy Unrestricted
Make a note of your current execution policy so you can revert to it once you have run the script. To check the current execution policy, use the command: Get-ExecutionPolicy
Note: You can view the Azure AD Application: BDRSuite-MS365App, created for Vembu Backup for Microsoft 365 on the Azure Portal.
Enable Permissions for SharePoint REST API
Note: Follow these steps only if you want to configure backup and restore for SharePoint List Attachments & Site Pages.
1) To Backup & Restore the List Attachments, perform the following steps:
- Navigate to appinv.aspx page from your tenant admin site using the URL: https://< your tenant >-admin.sharepoint.com/_layouts/15/appinv.aspx
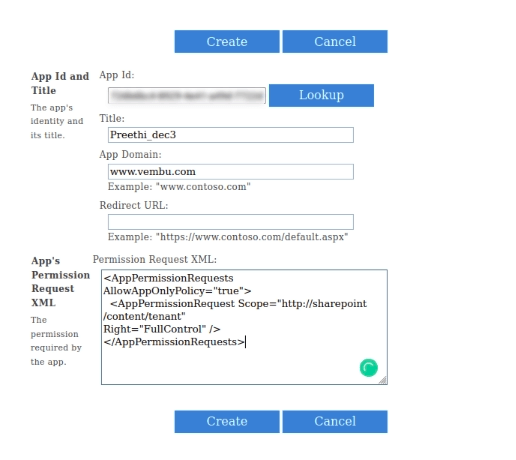
- Once the page is loaded, enter the Application (client) ID generated from the Azure application and click on the Lookup button which will auto-fill the other fields
- On the App’s Permission Request XML field, enter the following:
< AppPermissionRequests AllowAppOnlyPolicy="true" >
< AppPermissionRequest Scope="http://sharepoint/content/tenant" Right="FullControl" />
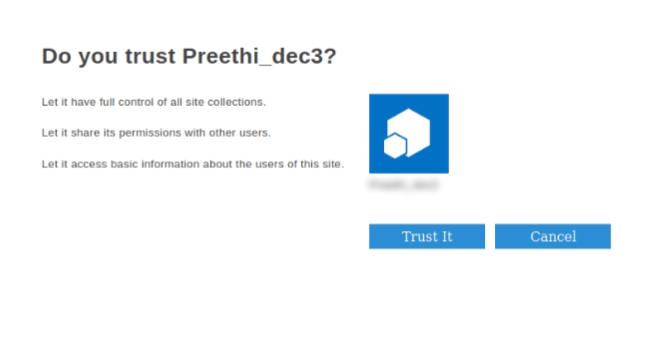
< /AppPermissionRequests > - Lastly, click Create which will show a permission consent dialog. On that page, click on the Trust It button
2) To perform the restore of site pages, perform the following steps:
Step 1: Download and Install the setup file of Sharepoint Patterns and Practices (PnP) PowerShell cmdlets.
You can download using the following link https://github.com/pnp/PnP-PowerShell/releases/download/3.9.1905.3/SharePointPnPPowerShellOnline.msi
Step 2: After installing the SharePoint PnP PowerShell cmdlets, execute the following PowerShell commands individually for each site you want to restore.
Parameters to be replaced in the commands:
TenantUrl = https://< your tenant >-admin.sharepoint.com/
SiteUrl = https://< your tenant >.sharepoint.com/sites/
Your Client ID = Enter your Application (client) ID displayed on the Overview pane
Your Client Secret = Enter the Application Password that you have generated & copied on the clipboard
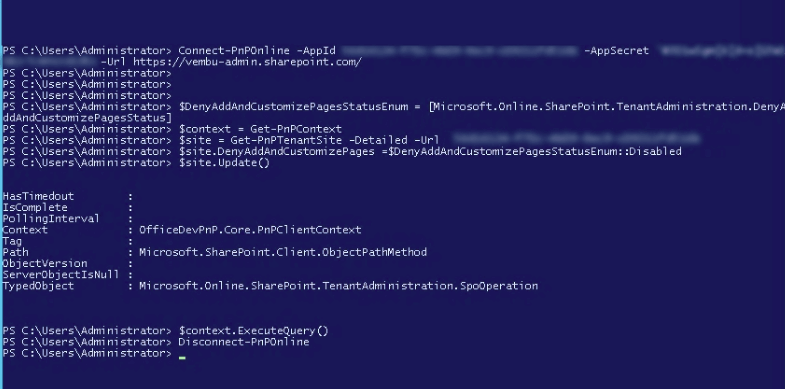
PowerShell Commands to be executed:
Connect-PnPOnline -AppId Your Client ID -AppSecret ‘Your Client Secret‘ -Url TenantUrl
$DenyAddAndCustomizePagesStatusEnum = [Microsoft.Online.SharePoint.TenantAdministration.DenyAddAndCustomizePagesStatus]
$context = Get-PnPContext
$site = Get-PnPTenantSite -Detailed -Url SiteUrl
$site.DenyAddAndCustomizePages = $DenyAddAndCustomizePagesStatusEnum::Disabled
$site.Update()
$context.ExecuteQuery()
Disconnect-PnPOnline
Download to try our 30-day free trial!
Protect your Microsoft 365 data with BDRSuite!
Download the full-featured 30-day free trial of our latest version BDR Suite v5.0 and experience modern data protection for your Microsoft 365 environment.
Learn about BDRSuite Backup for Microsoft 365.