
System Center Virtual Machine Manager, also known as System Center VMM or simply SCVMM, is a management tool developed by Microsoft to efficiently manage your Hyper-V infrastructure. System Center Virtual Machine Manager specifically facilitates configuring and managing virtualization host, networking and storage resources used in deploying virtual machines and services. If you work in a mixed environment, you also can manage your VMware vCenter infrastructure.
More information about Virtual Machine Manager:
https://www.bdrsuite.com/blog/system-center-virtual-machine-manager-2016-installation-overview/
For those of you who work with Azure, or want to migrate some Virtual Machines in the Azure platform, then you can use SCVMM to manage your Azure Virtual Machine side-by-side with your On-Premises Virtual Machines.
What do you need?
- You must have a valid Azure subscription
- The computer on which you install the feature must be able to connect to the Azure subscription (Be careful about the Firewall rules)
- You need to be at least a service administrator for the subscription
- You must install the Virtual Machine Manager 1801 version or higher
Getting Started
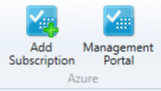
From the Virtual Machine Manager Console, you will notice the following section named “Azure” with two buttons:

- Add Subscription: You will be able to connect your SCVMM infrastructure with your Azure subscription
- Management Portal: You will be redirected to the Azure Portal
Before connecting your SCVMM infrastructure, you must configure some prerequisites in your Azure subscription.
Retrieving Azure Subscription
First, you must retrieve your Azure Subscription ID from the Azure Portal. You can get this information using the Azure PowerShell module. Open a PowerShell console or directly from the Azure Portal, and run the following command:
The output will be similar to the following:
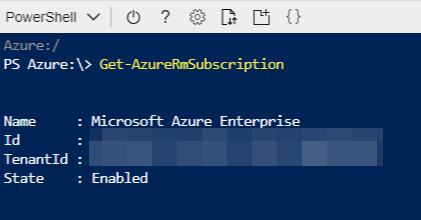
Copy and paste the subscription ID because it will be required later.
Configuring App Registrations
In this case, we will need to register an Azure Application to connect the SCVMM console to Azure. Registering the application means that you can use Azure AD to authenticate request access to Azure resources. Here, the SCVMM console will request access to Resource Groups and Virtual Machines. Sometimes, the meaning of the term “application” can be misunderstood. When you register an Azure AD application in the Azure portal, two objects are created in your Azure AD tenant:
- An application object
- A service principal object
Registering your app establishes a unique application ID and other values that your app uses to authenticate with Azure AD and get tokens.
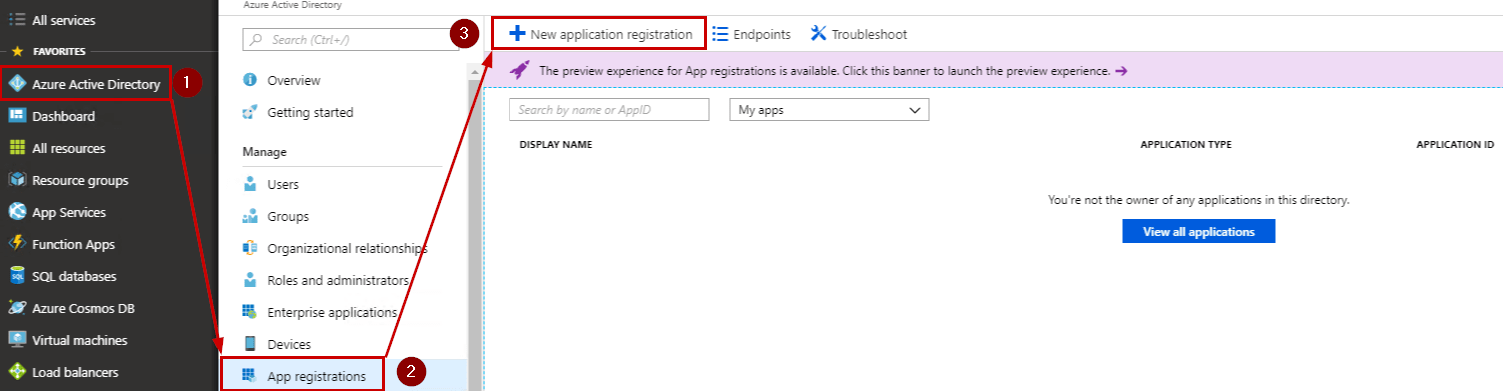
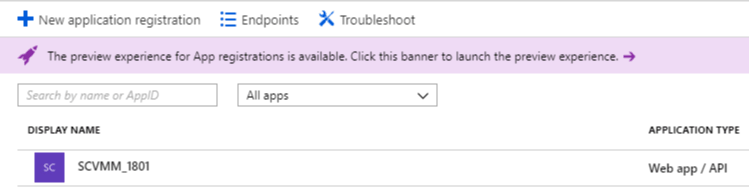
To create the application, open the Azure Portal, and navigate to the Azure Active Directory Blade, and click “App Registrations”. Then, click “+ New Application Registration”.
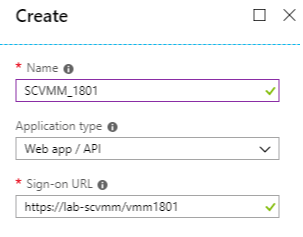
To configure your App, you must enter the following information:
- Name: It is the friendly name of your Application
- Application type: Choose “Web app / API” to add an application that represents a web application, a web API, or both
- Sign-On URL: The URL where a user can sign in and use your app. You can change this URL later. This URL is not very important in this case, so you can enter whatever you want but your URL must be in a valid URL format, begin with http:// or https://
Click “Create”, and refresh the list to confirm that the newly Application appears:
Open the Application to configure the Azure Keys. Azure Key is similar to a password in order to use your Application from the Virtual Machine Manager Console.
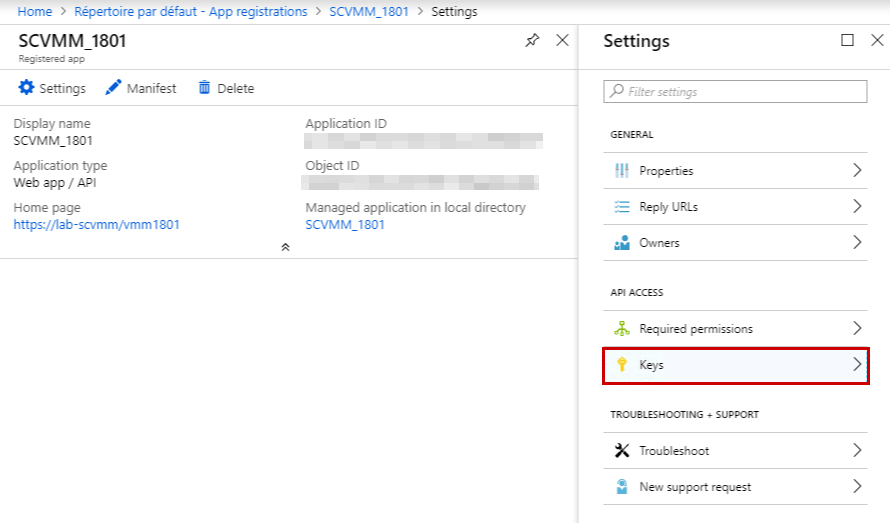
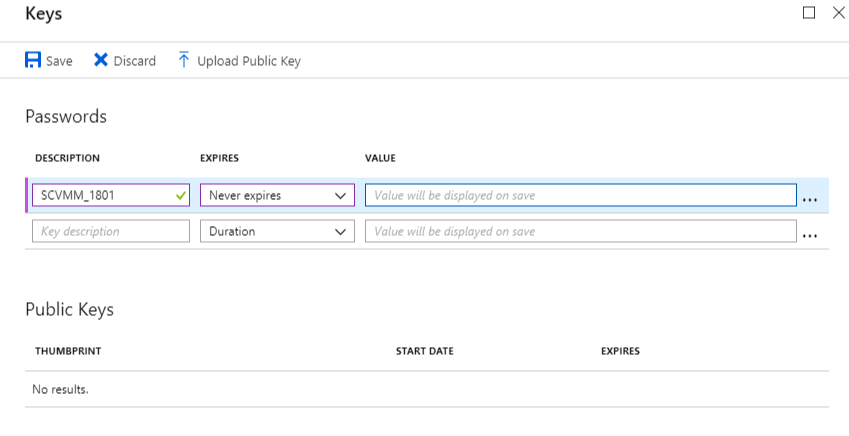
Click “Settings” and click “Keys” to enter the following information:
- Description: It is the friendly name of the key. It is not very important but it will help you to remember the purpose of this key
- Expires: You can configure a duration or not. It can be useful but in our case, we must set “Never Expires” to be able to contact our Azure subscription from the SCVMM Console at any time
- Value: If you leave this field blank, then a random key will be generated. Note that you can also add your own value
Click “Save” to generate the random key. Be careful, before closing the Window, you must copy and paste the value.
Configuring Azure Active Directory Permissions
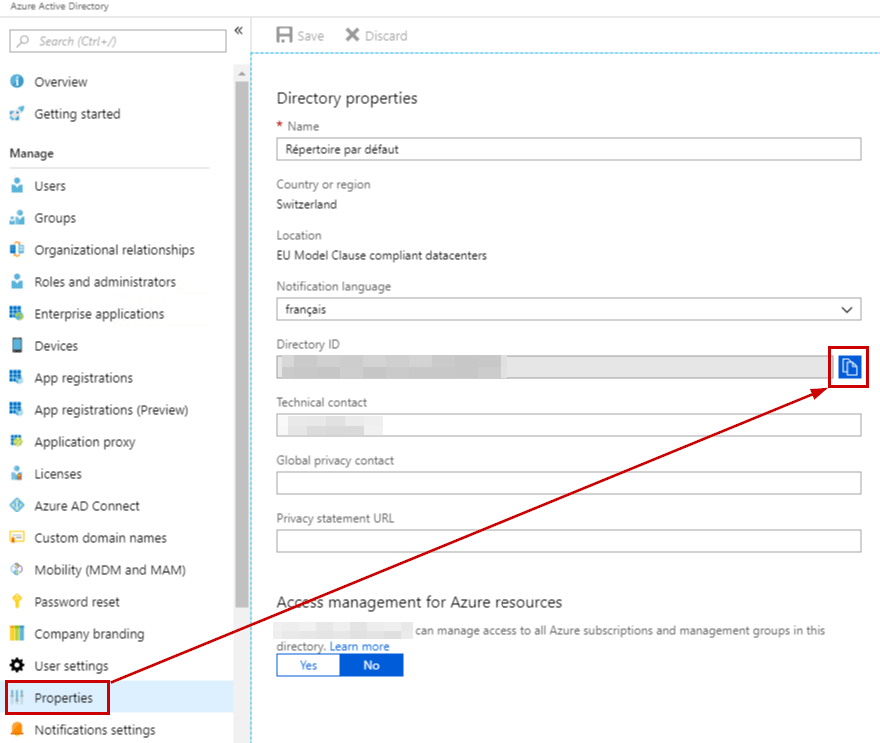
Now, we will retrieve the Directory ID. Navigate to the Azure Active Directory Blade, and go to “Properties”.
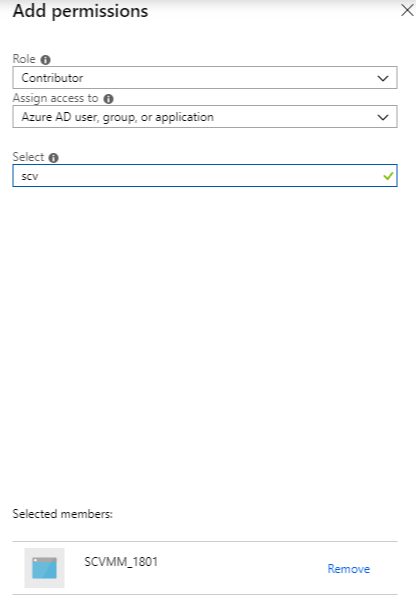
Next, we need to go to the Access Control Blade in order to add permissions for the Azure Application called “SCVMM_1801”.
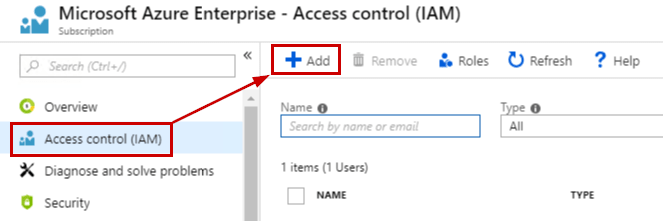
Click “Add” and select the role to add and select an assignment type. To finish with the permissions, select the user by entering the name.
Configuring SCVMM Console
Go back to the Virtual Machine Manager Console to add the subscription.

At this step, you can copy and paste the following information:
- Display name: It is a friendly name to manage your subscription in the VMM console
- Azure Cloud: Choose either public Azure or region-specific subscription as appropriate
- Directory ID: It is the ID of your Azure Active Directory
- Application ID: It is the ID of your Application Object
- Key: It is the value that has been generated randomly
Then click Finish to validate the connection.

Repeat the same steps to add another subscription if needed. Verify that new subscription has been added. Please note that if you work with Classic VMs, you will be able to list these Virtual Machines using Azure AD Authentication. However, if you work with ARM-Based Virtual Machines, then you will not be able to list these VMs using the management certificate. It is by design, so I advise you to configure the subscription using Azure AD Authentication instead of using a certificate to be able to manage both VMs.
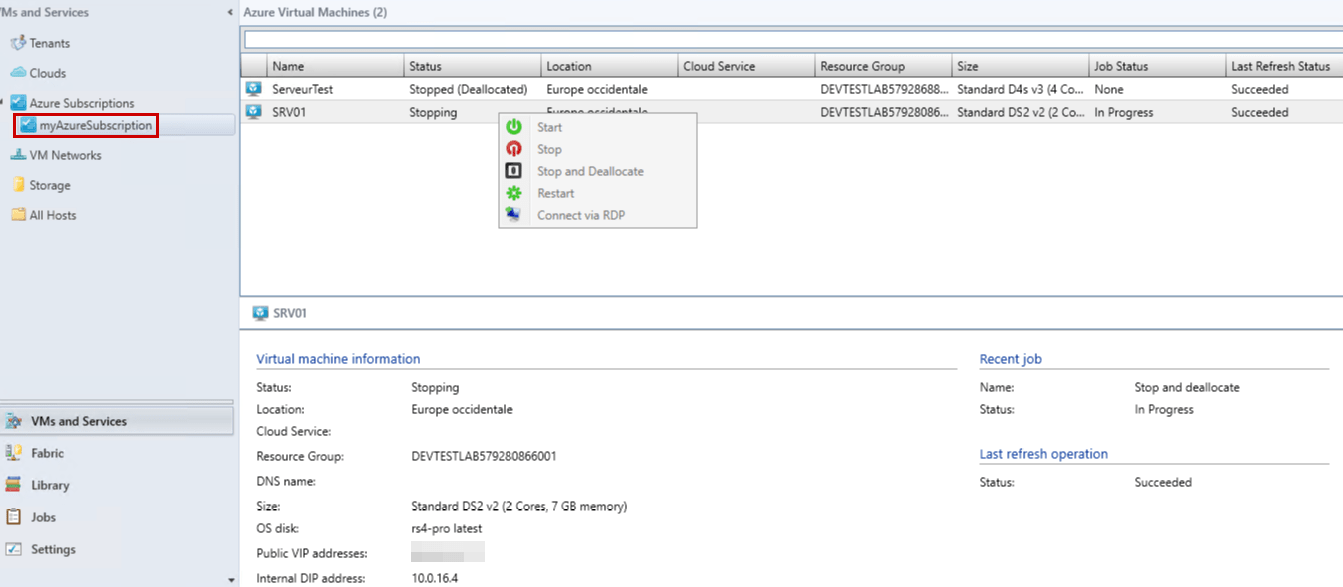
Once the subscription is added, it will appear in the Azure Subscription list. Note that inside the subscription, you can click on VM’s and perform some basic tasks including start, stop, shutdown, restart and connect via RDP. If you select a Virtual Machine, you will get information about this instance such as:
- Status
- Location
- Resource Group
- Size
- OS Disk
- Public IP
- Private IP
- Job history
For those of you who thought that it could be possible to manage completely your Azure subscription through the SCVMM console, well I am sorry but it is not possible! This feature is not designed to provide feature parity with the Azure portal. It provides a small subset of the features to simplify management.
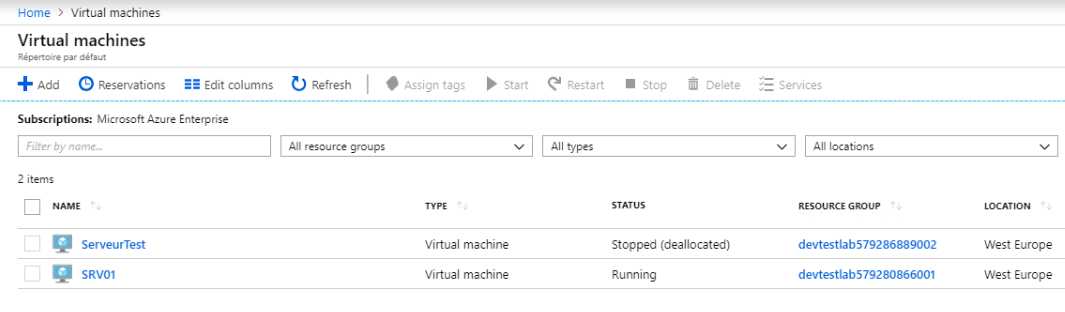
If I go back to the Azure Portal, I can confirm that Virtual Machines in the SCVMM Console are also visible to the Azure Portal.
Conclusion
With the System Center Virtual Machine Manager Console, you can now manage your ARM-Based Virtual Machines and Classic VMs in a single On-Premises console. However, it is very important to note that you cannot manage the Azure subscription, deploy instances, manage Azure storage and networks, migrate on-premises VMs to Azure, or view the dashboard and performance monitoring summaries.
This feature is interesting if you need basic information about your Virtual Machines, or if you want to perform some basic tasks such as “Start” and “Stop” a Virtual Machine. You can also deploy the SCVMM Console including this feature to your Helpdesk Operators in order to limit access to your Azure Subscription. Helpdesk Operators will be able to restart a Virtual Machine if needed without using the Azure Portal.
Follow our Twitter and Facebook feeds for new releases, updates, insightful posts and more.