
Table of Contents
- Windows Server Desktop Experience(GUI) vs Server Core
- What is Windows Server 2019 Desktop Experience(GUI)?
- What is Windows Server 2019 Core?
- Download Windows Server 2019
- Installation of Windows Server 2019
- Installation of Hyper-V in Windows Server 2019 Desktop Experience (GUI)
- Creating Virtual Machines using Hyper-V Manager
- Install Hyper-V Role using PowerShell commands
- Installation of Windows Server 2019 Core
- Connect remotely to Hyper-V using Hyper-V Manager
- Protect your Hyper-V Environment with BDRSuite
- What type of Windows Server 2019 should you use?
- Final thoughts
Microsoft Hyper-V hypervisor – was initially launched in the Windows Server 2008 and its 1.0 VM configuration version release.
In the next releases, Microsoft added Hyper-V add-on not only for Windows Servers but also for Windows Workstations – Windows 8.1 & Windows 10.
With Hyper-V, it is possible to create multiple Virtual Machines running different Operating Systems on a physical Windows Server. The hardware resources and computing option of hypervisor isolate the VM Guest OS from the Hypervisor OS.
There are two different Hyper-V versions:
- Microsoft Hyper-V Server-A stand-alone server that contains only the Windows Hypervisor (Hyper-V)
- Windows Server with Hyper-V Role -A stand-alone machine running a Windows Server OS on which the Hyper-V role is enabled
The Microsoft Hyper-V Server and Windows Server with Hyper-V role enabled are type-1 hypervisors that are used for different implementations

Difference between the two versions of Hyper-V:
|
|
Windows Server Desktop Experience(GUI) vs Server Core
In this section, we will discuss two forms of installations of Windows Server 2019. One being Windows Server 2019 Desktop Experience, also known as the Graphical User Interface (GUI) and the other is the Windows Server 2019 Core.
You can enable Hyper-V 2019 through the GUI of Windows Server 2019 or through Windows Server 2019 Core version and also from the Hyper-V Server 2019 ISO that can be downloaded from the Microsoft evaluation page.
Versions of Windows Server 2019:
- Windows Server 2019 Standard
- Windows Server 2019 Standard with Desktop Experience
- Windows Server 2019 Datacenter
- Windows Server 2019 Datacenter with Desktop Experience
Installation of Windows Server (Semi-Annual Channel), has the following options:
- Windows Server 2019 Standard
- Windows Server 2019 Datacenter
What is Windows Server 2019 Desktop Experience(GUI)?
Windows Server 2019 GUI is a Graphical User Interface Operating System, which means that all setting changes in the operating system are mainly done using GUI tools.
Advantages of Windows Server 2019 Desktop Experience:
- Presence of GUI makes it more user-friendly
- Easy to manage either remotely or locally
- Loaded with features and tools
Disadvantages of Windows Server 2019 Desktop Experience:
- Windows Server OS consumes more disk space and CPU/Memory resources since a number of features, applications, and service roles are installed by default
What is Windows Server 2019 Core?
The Windows Server 2019 Core has no user interface and all are managed through command line tools i.e. there is no GUI; the Windows Server Core is simply a Server Shell Package. It was first released in Windows Server 2008.
Advantages of Windows Server 2019 Desktop Experience:
- It is lightweight and ideally suited for large data centers and cloud environments
- Occupies less disk space and CPU/Memory since it is a non-graphical System Operation (similar to a Unix/Linux without Gnome Desktop or GUI)
Dis-advantages of Windows Server 2019 Desktop Experience:
- No GUI makes it less user friendly
- Limited Management tools, makes it hard to manage
- The non availability of some important features, drivers and roles make the initial setup process more difficult
Windows Server 2019 Core is mostly built to be managed by remote management tools, like the new Admin Center or even Hyper-V Manager. Both tools can be installed and used in Windows Servers, and also in Windows 8.1 and Windows 10.
Microsoft expects Windows Server Core to be the future server model that could be easily deployed in large data centers and also for the cloud.
Roles and Services that are not included in the Windows Server 2019 Core.
|
|
Check Microsoft page for the full Roles and Services Features that are not included in Windows Server Core.
It’s possible to add more services and features to your Windows Server Core by using Feature on Demand (FOD).
Download Windows Server 2019
Before we start the Windows Server and Hyper-V implementation, we need to download the Windows Server 2019 ISO.
The ISO can be found here on the Microsoft evaluation page.
Users will have a free 180-day evaluation period after downloading the Windows Server 2019 Standard or Datacenter via Microsoft Evaluation Center.
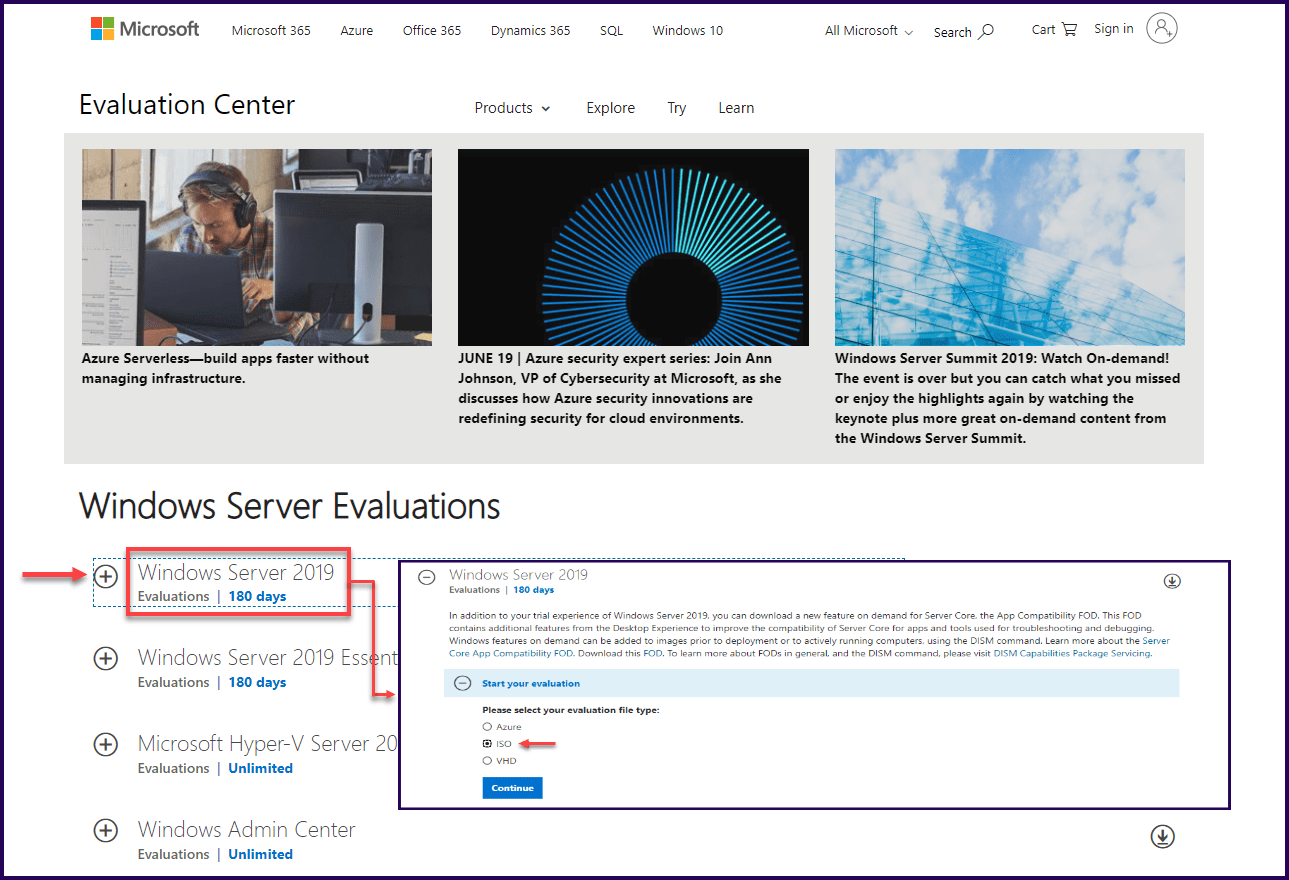
As we can see in the above image, we can download an ISO image, but also an Azure (for Azure deployments) and a VHD (for Hyper-V VM deployments).
We will use the ISO for a standard Windows Server 2019 Installation.
Installation of Windows Server 2019
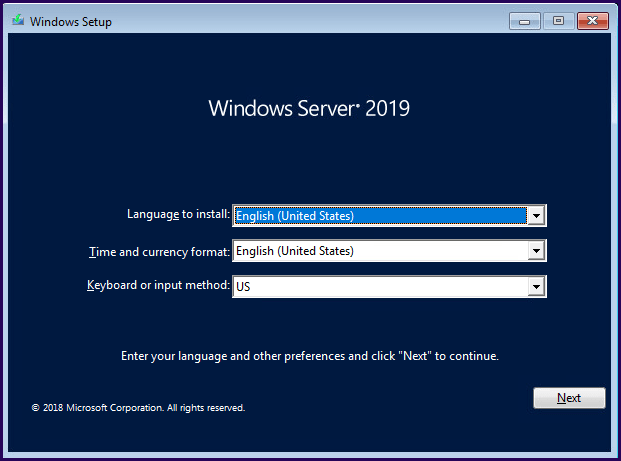
Initially, there are no differences in the installation process while installing Windows Server 2019 GUI or Core.
Since the process to install Windows Server is the same from previous releases, I’ll show only a few steps in the next section.
First, select your Windows language, local time and currency, and your keyboard language.
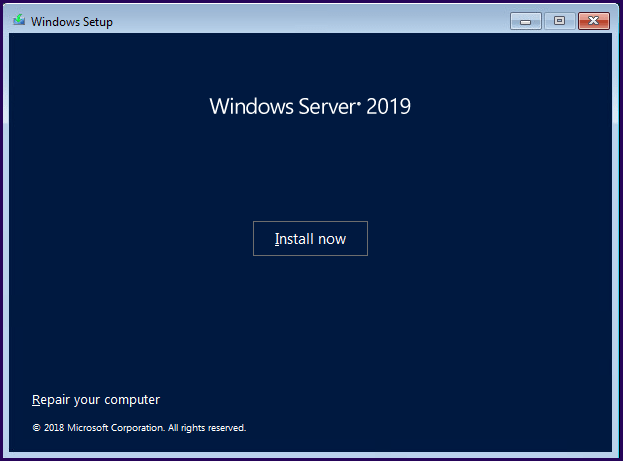
Next click Install Now.
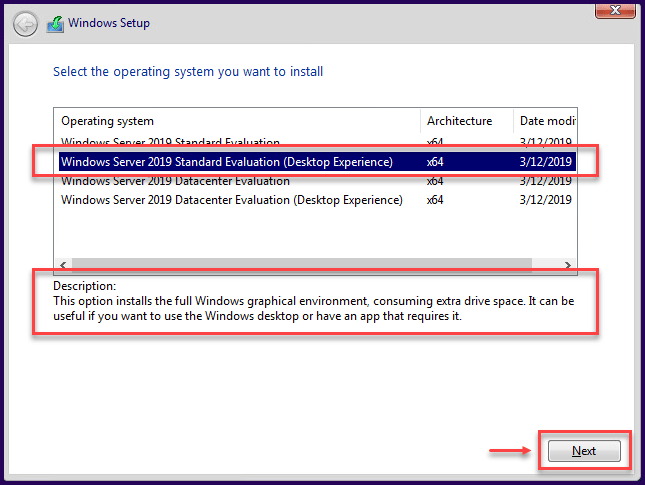
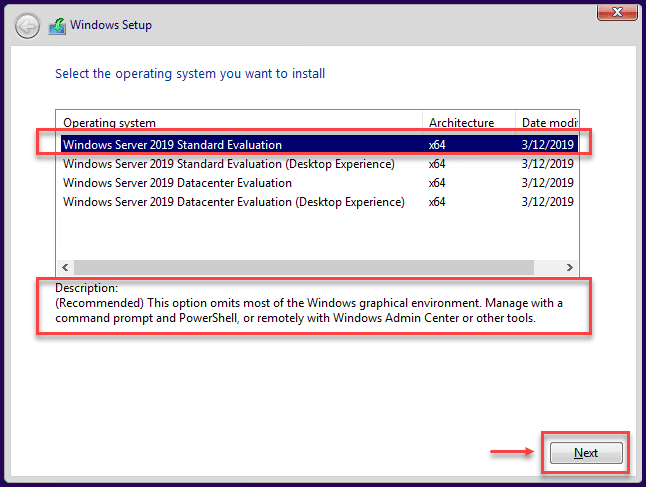
Then, select what type of Windows Server needs to be installed. Not only the edition (Standard or Datacenter) but also the type of Windows Server (Desktop Experience – GUI or Core).
For Windows Server 2019 Desktop Experience Install
For Windows Server 2019 Core Install
Note: After you select to install Windows Server Core, it is not possible to convert to a Windows Server 2019 Desktop Experience. It needs a fresh install and cannot use the previous Windows Server Core installation. This was possible in previous releases.
You only need to select the type of Windows Server 2019, and the installation process is the same for both.
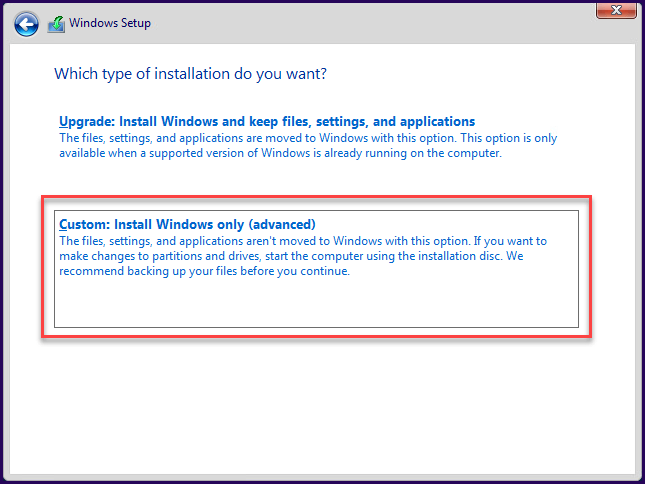
Since this is a fresh install, we will use the “Custom” option.
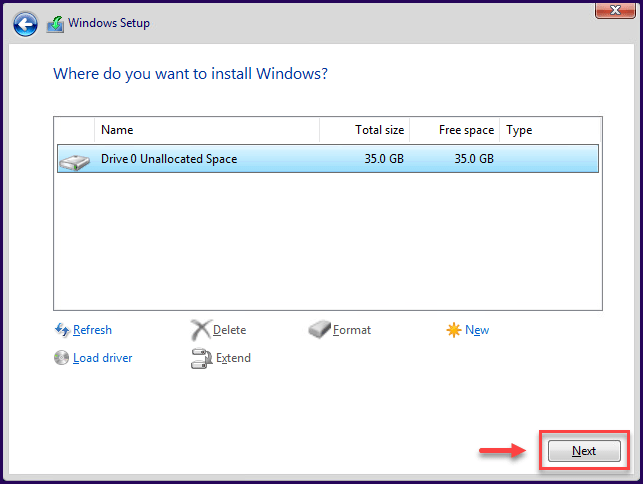
Choose the location to install Windows and click Next.
After the installation, the post configuration is different since one option has a GUI and the other has a command console to do all the changes and settings in the system operation like installing Hyper-V role.
Important Note: Before you install Hyper-V, run Windows Update so that you can get the latest updates and fixes.
Installation of Hyper-V in Windows Server 2019 Desktop Experience (GUI)
After the installation of the Operating System, login to your new Windows Server 2019, and install the Hyper-V role.
Install Hyper-V Role using Server Manager
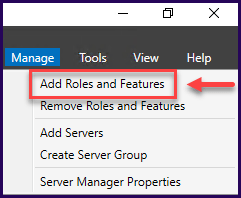
Open Server Manager and in the top right corner select Manage tab
Under the Manage tab select Add Roles and Features and click “Next”
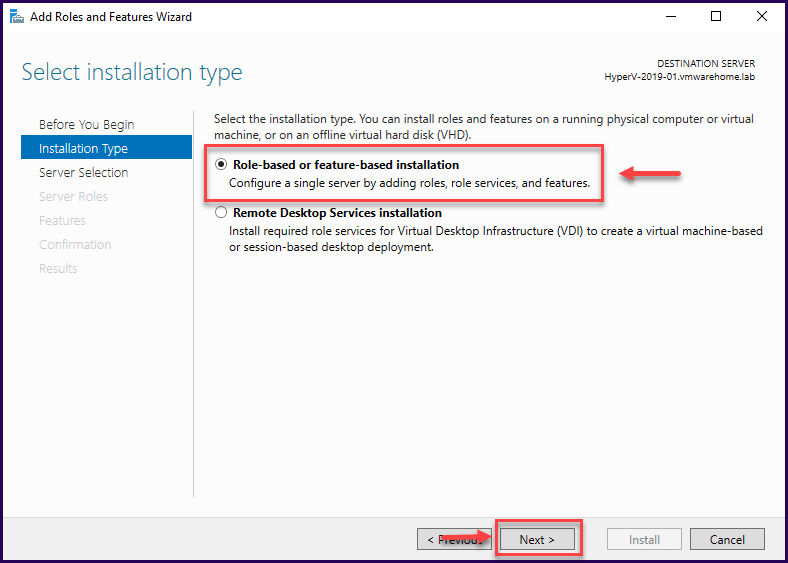
After clicking “Next” in the previous screen, in the Installation type select “Role-based or feature-based installation” and click “Next”.
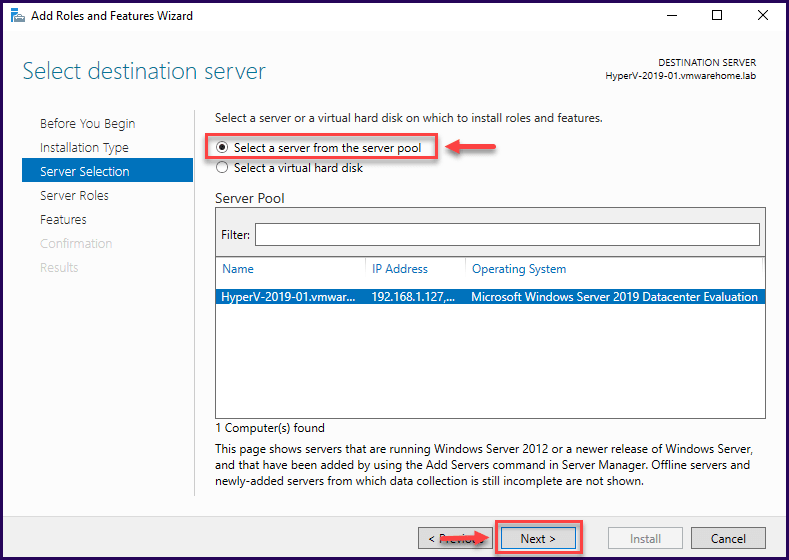
Select the Destination Server. If this is a local role installation or a remote role installation (another server), leave the default “Select a server from the server pool” and click “Next”.
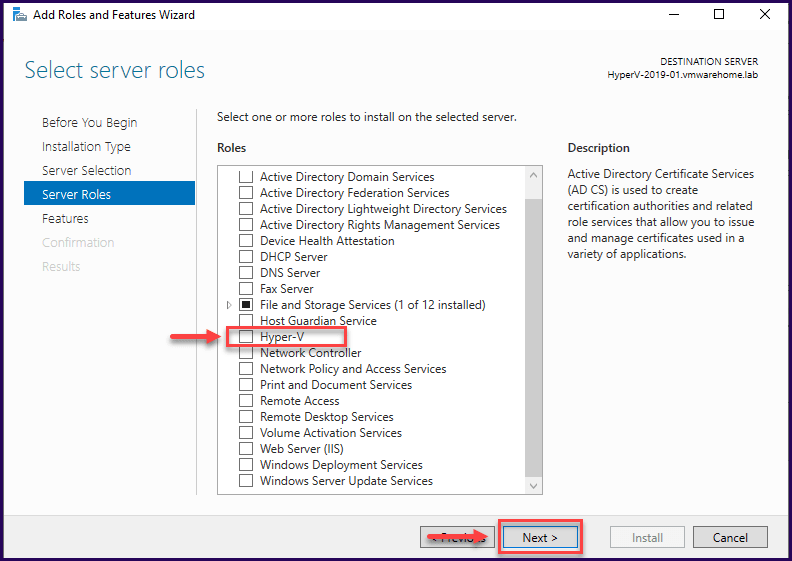
Select the Server Role that you plan to install, in this case, It’s the Hyper-V.
In the next screen, it is important to check if the option “Include management tools” is enabled.
Note: By default, the Hyper-V role installs the management tools, but double-check if it is enabled – since this tool is necessary to manage your Hyper-V Server.
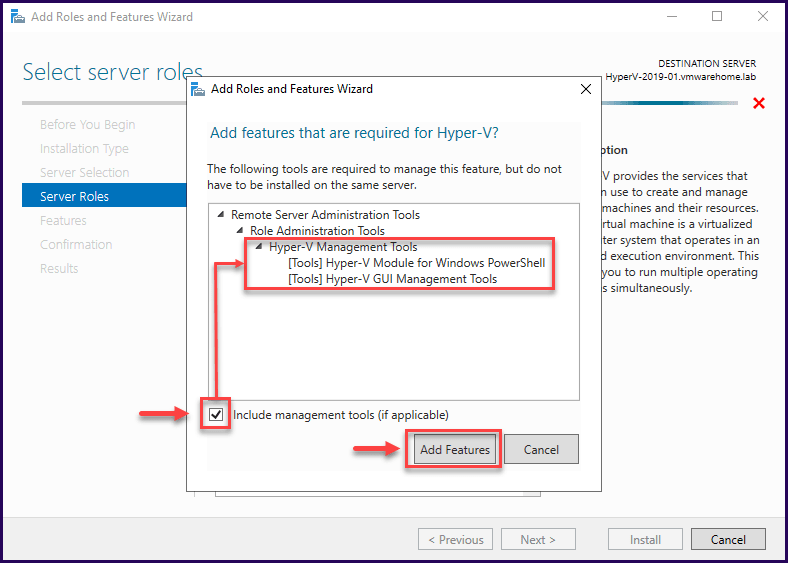
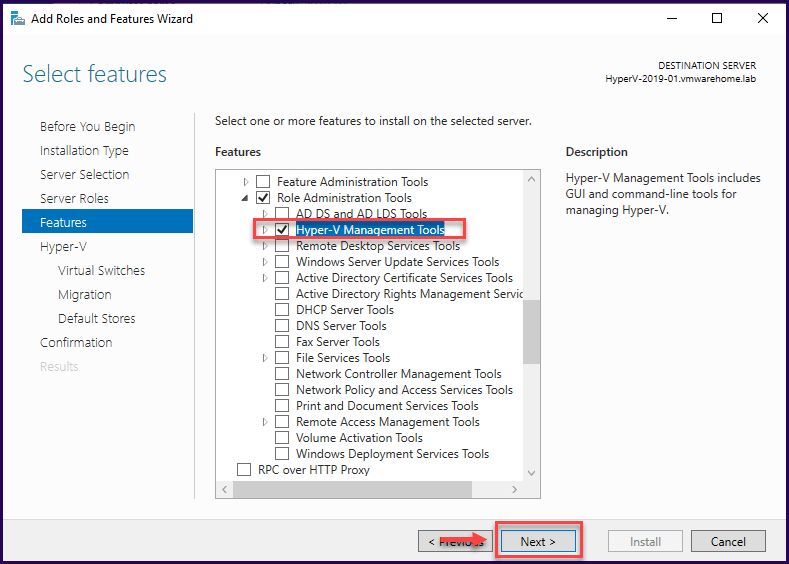
In the next screen, check if the Hyper-V Management Tools is set to install and then click “Next”.
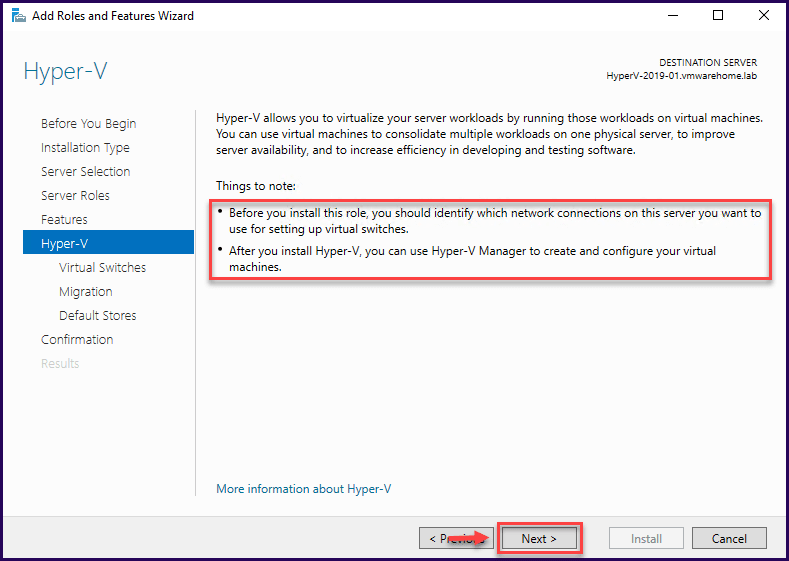
You get some information about your Hyper-V that you are planning to install, click “Next” to do some changes in your Hyper-V settings.654345r5t
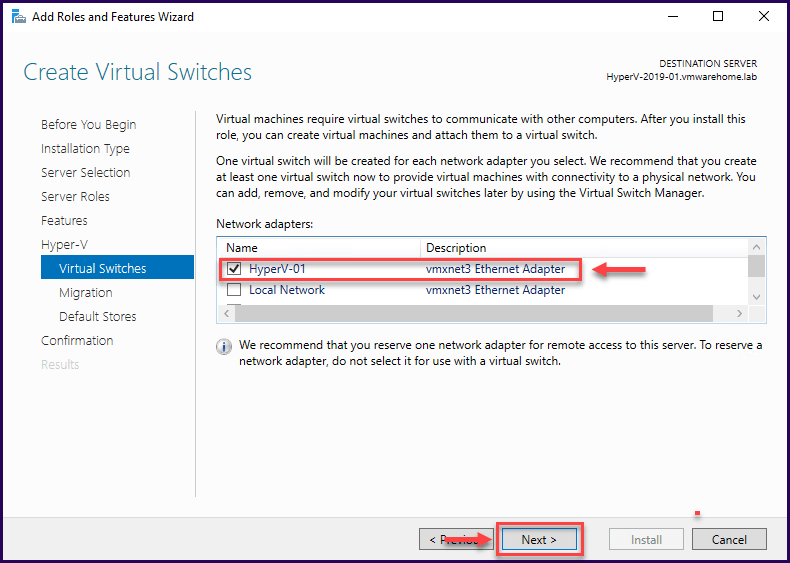
Create a Virtual Switch wizard that appears where you can reserve a network adapter to provide network connectivity for your VMs created. You can skip this section and configure later, or if you already know the Network adapter, select one.
Since I have pre-configured the Network adapter for Hyper-V, I’ve selected one – (Hyper-V-01).
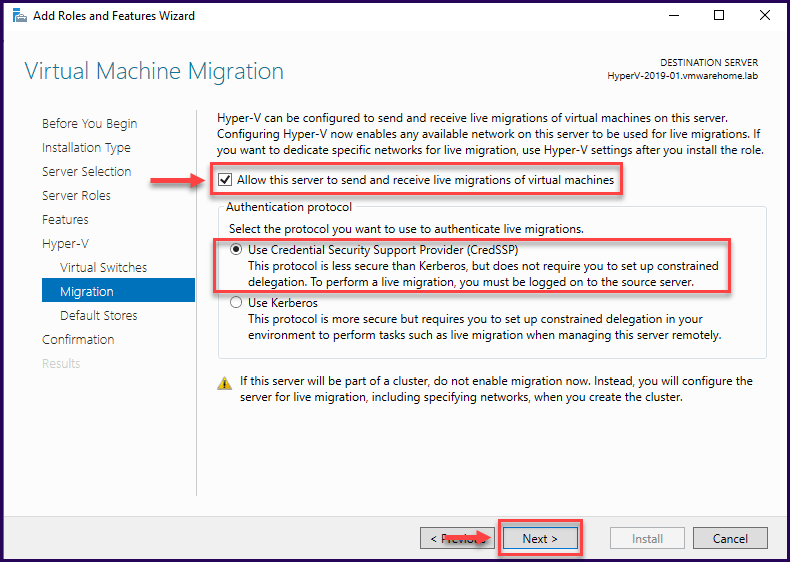
The next section is Virtual Machine Migration.
Enable the first checkbox “send and receive live migrations of Virtual Machines”, if you want this server to send and receive live migrations of Virtual Machines. This option is not a clustered Live Migration, but instead using Distributed File System (DFS).
This is not mandatory to be enabled; however, if you do not have implemented a Hyper-V Cluster, you should use it.
For the authentication protocol, CredSSP is easier to use since it doesn’t need to configure constrained delegations, but is required to sign in the source server.
However, using the Kerberos authentication protocol avoids signing into the server but requires constrained delegation set up.
In this case, we will use CredSSP authentication protocol.
Click “Next” to proceed with the settings.
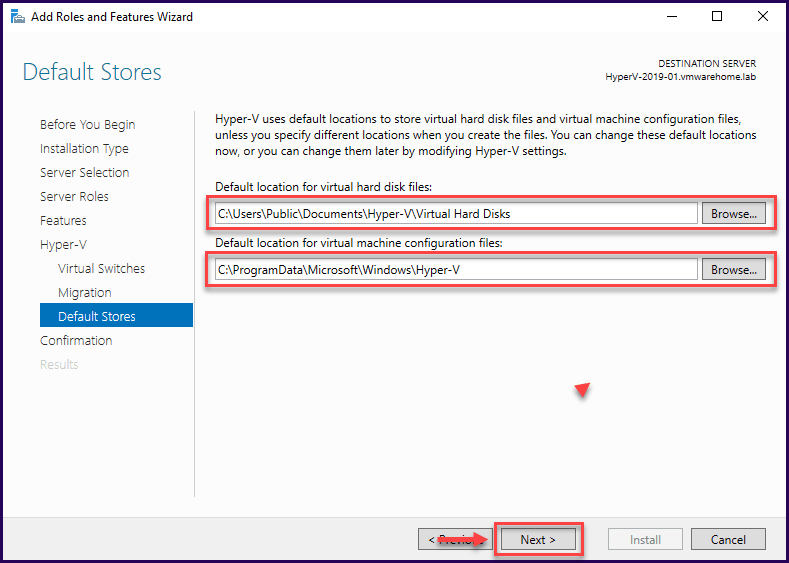
The next section is where you need to select the location to allocate the Virtual Machines, Virtual Disks, and Configuration Files.
For better management, both locations should be different, and if you are using Storage Volume, you should create one for each option and separate the files.
In this case, we will use local Storage and the default path.
Now, all the settings are done, click the “Install” button to begin the installation process of Hyper-V role in our Windows Server 2019.
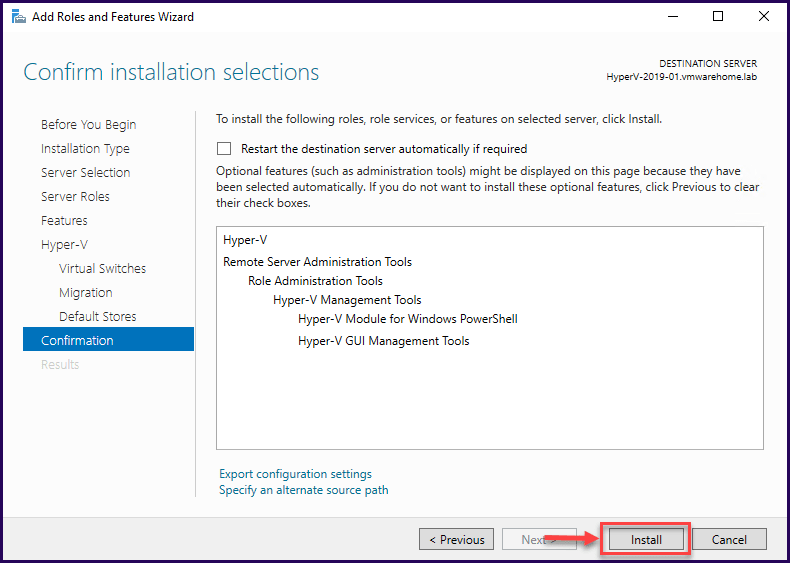
Note: We did not enable the checkbox “Restart the destination server automatically if required”, however, Windows Server needs a reboot after the installation, i.e, before it is ready to use. Reboot when it is possible.
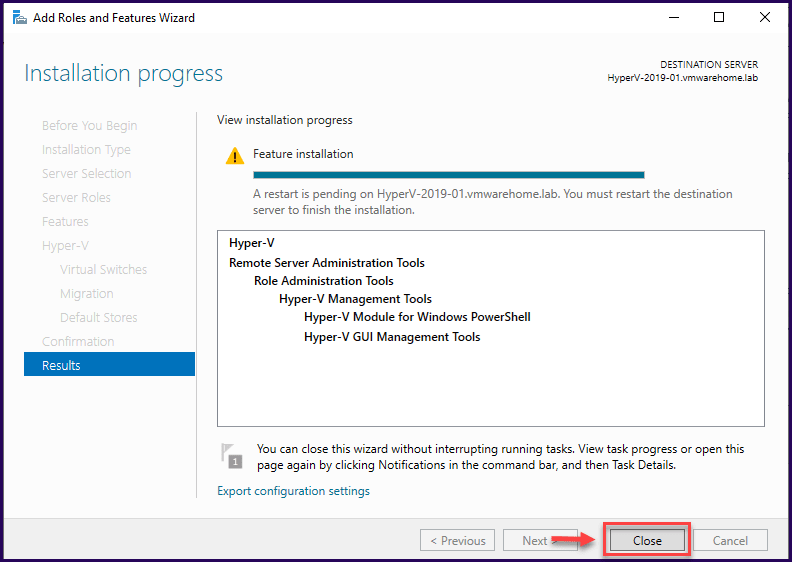
After you reboot your Windows Server 2019, your Hyper-V is ready to be used, and you can start creating Virtual Machines using Hyper-V Manager for GUI installation or with PowerShell commands for both GUI and Server Core installations.
Creating Virtual Machines using Hyper-V Manager
After installing the Hyper-V role in Windows Server 2019, we will use Hyper-V Manager to connect to Hyper-V and check Network Settings(Virtual Switch) and other configurations.
To create Virtual Machines and other Hyper-V tasks, we need to use the Hyper-V Manager.
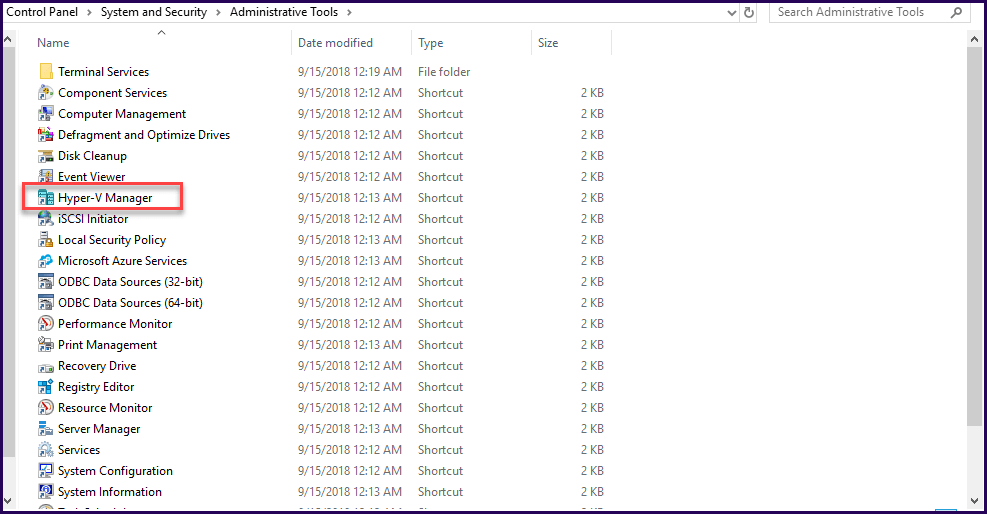
Click “Start” and click on “Administrator Tools”, then click on the Hyper-V Manager icon.
Next, connect to your local Hyper-V.
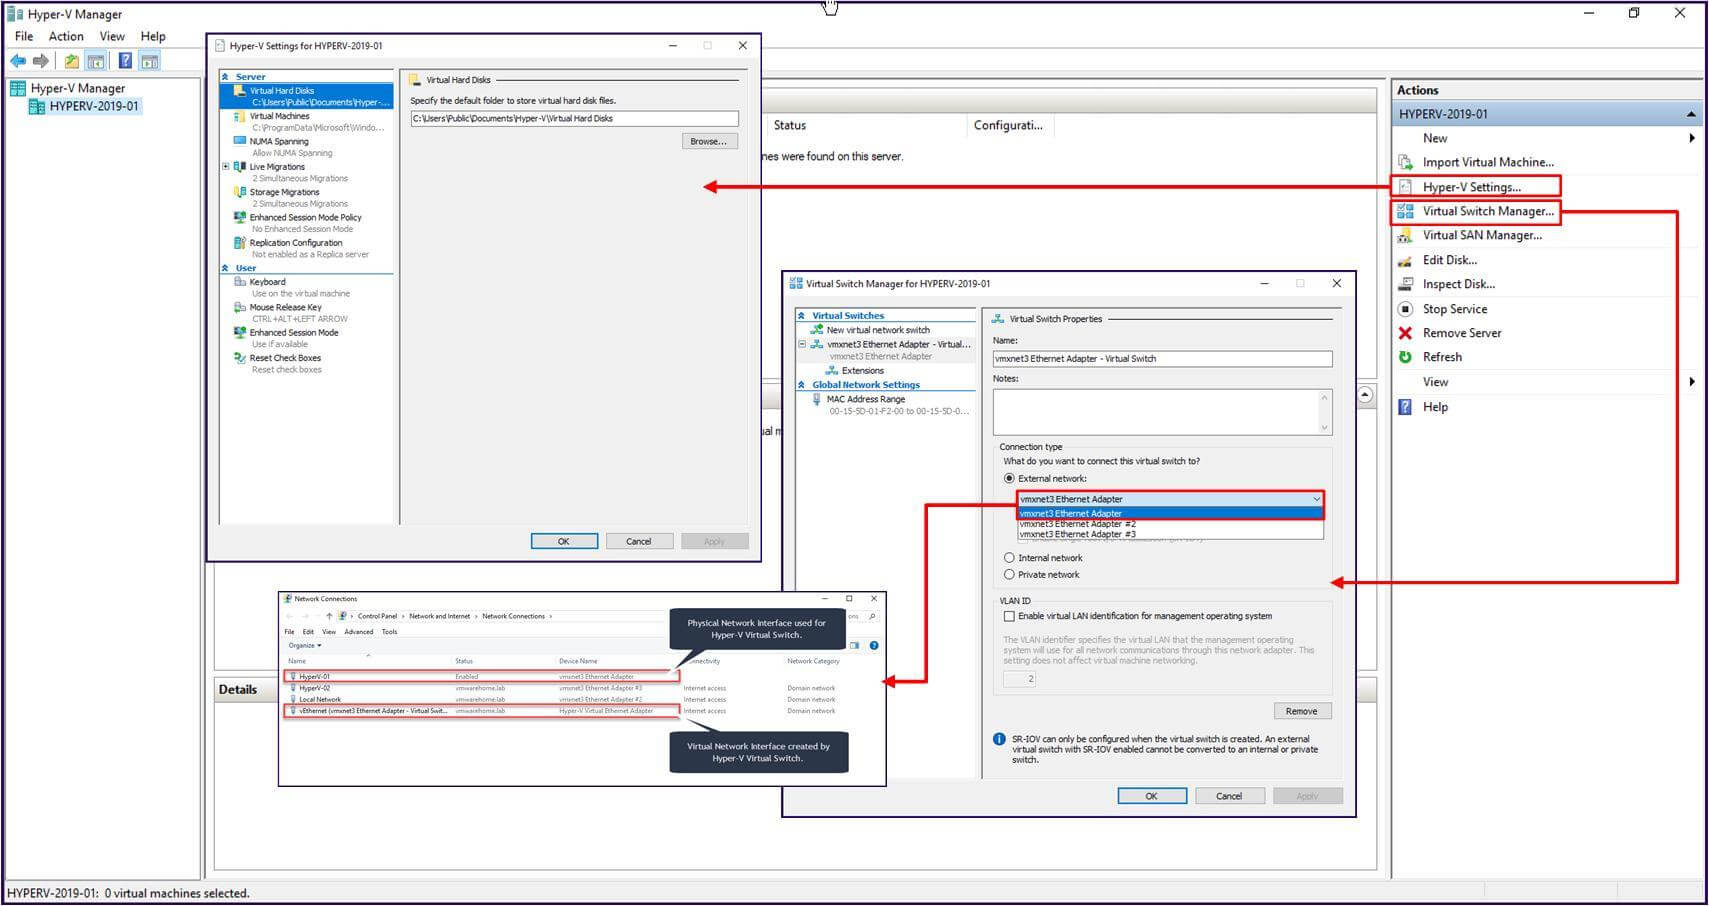
In the next image, we can see the Hyper-V Manager with some of the options.
1. Hyper-V Settings, where it is possible to change the settings for the Hyper-V (the ones used when we were installing Hyper-V Role).
2. Virtual Switch Manager, with the Network Adapters that are used for this Virtual Switch (the physical and the virtual adapter).
Note: To know more about Hyper-V Manager check the following article “What is Hyper-V Manager and how does it work”.
Install Hyper-V Role using PowerShell commands
Installing the Hyper-V role using PowerShell command in Windows Server 2019 is no different from previous versions and is very straight forward.
For the GUI version, Run PowerShell as Administrator and run the following command.
Cmd: Install-windows feature -Name Hyper-V -IncludeManagementTools
The above command installs the Hyper-V Role and also installs the Hyper-V Management Tools.
You can add –Restart to reboot your server after Hyper-V is installed automatically.
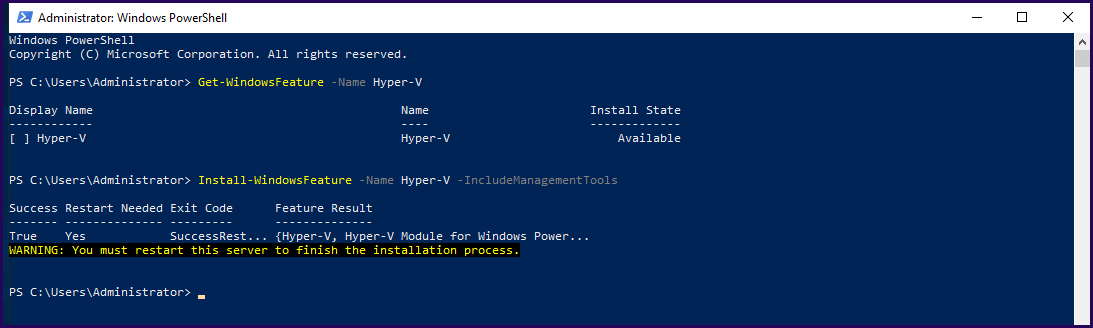
In the above picture, you can notice that we have also run the following command:
Cmd: Get-WindowsFeature -Name Hyper-V
This command shows us if Hyper-V is available to install on this server.
If Hyper-V is installed you can now manually restart your server if you did not add the option to restart automatically after the install.
Note: Installing Hyper-V Role with PowerShell is the same for Windows Server 2019 GUI or Windows Server 2019 Core. Both use the existing PowerShell in the OS, and the command is the same for both.
In Windows Server Core there is no Powershell shell icon to run, so we need to run the command to enter the PowerShell and run the commands.

In the above example, we used the automatic –Restart after the role is installed.
Installation of Windows Server 2019 Core
After installing Windows Server 2019 Core, we need to do some additional configuration to manage and connect to the server remotely.
Note: Installation of Windows Server Core is similar to the installation of Windows Server GUI
At first, the system asks to change the password.


Next, log in to Windows Server Core and do the remaining changes.
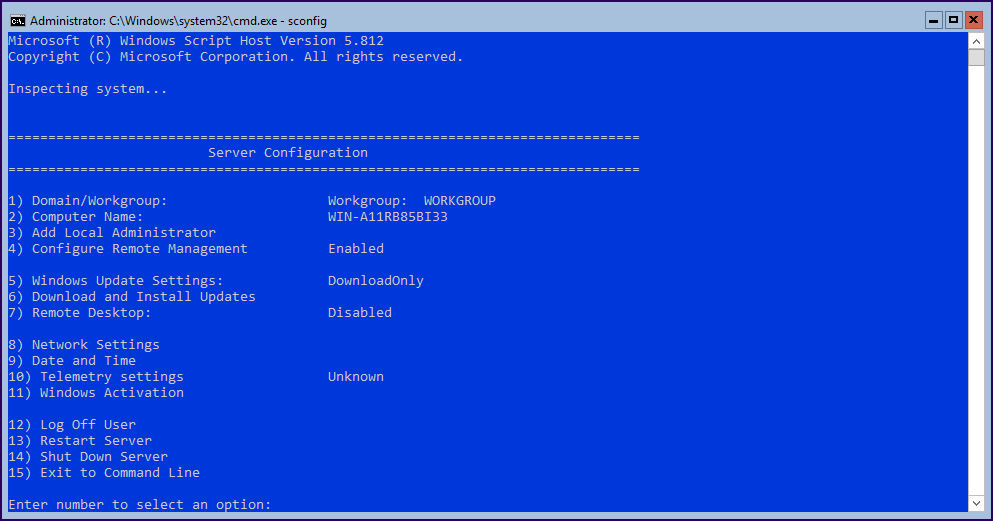
For the next change, we will use a Windows Server Core tool -sconfig. With this small tool, we can do many changes in our system:
- Domain/Workgroup
- Computer Name
- Add Local Administrator
- Configure Remote Management
- Windows Update Settings
- Download and Install Updates
- Remote Desktop
- Network Settings
- Date and Time
- Telemetry settings
- Windows Activation
- Log Off User
- Restart Server
- Shut Down Server
For this example, we will only do the next changes.
- Change Computer Name
- Add Computer to the domain
- Change Network Settings
- Enable Remote Desktop connections
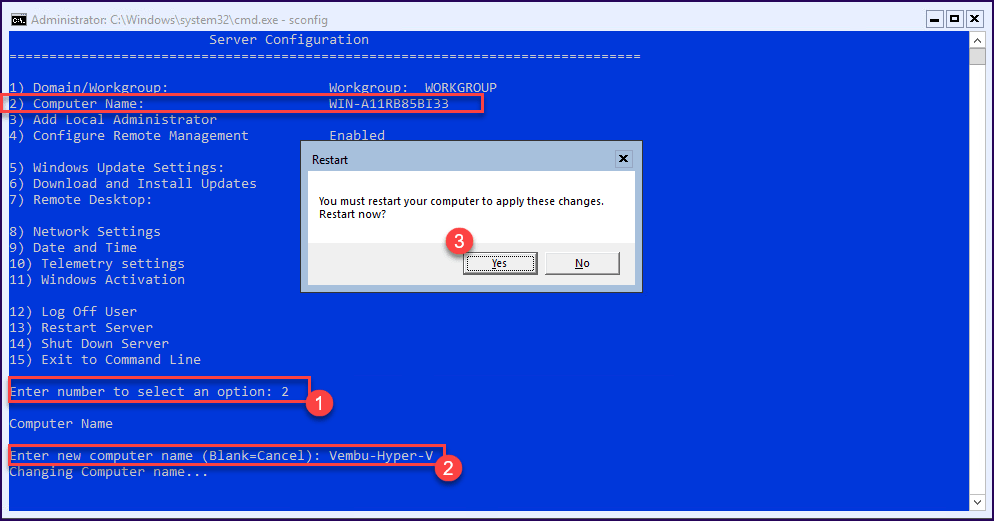
- In the Core-shell console run “sconfig”
1 – Change Computer Name – Select option 2 and write the new hostname.
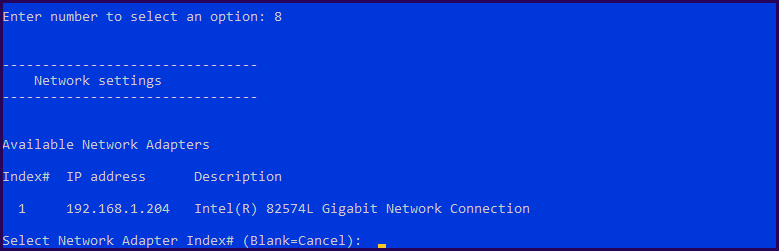
2 – Change Network Settings
Next, change the IP address from DHCP to Static and add DNS Gateway, etc.
Select option 8 “Network Settings” and select the “Network Adapter” that you want to change.
In this case, there is only one, so select option 1.
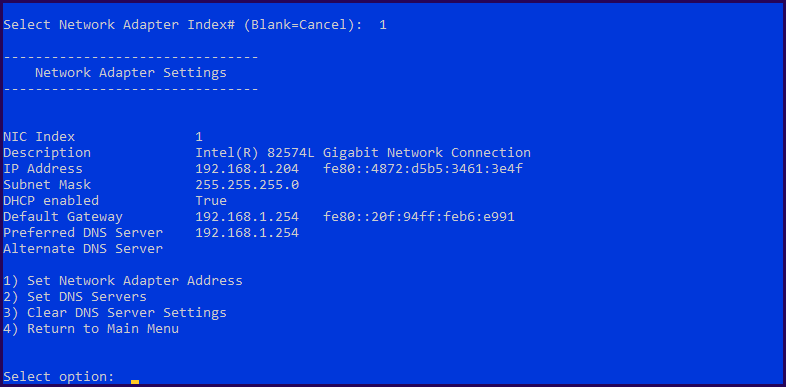
Next, we can change the settings for the IP Address and DNS.
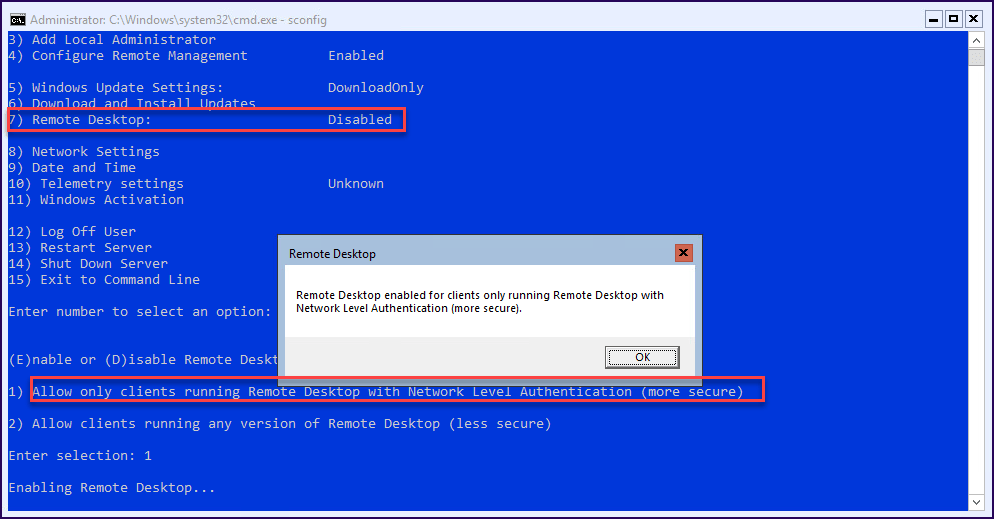
3 – Enable Remote Desktop connections
Next, enable Remote Desktop so that we can connect to this Windows Server Core.
Select option 7 “Remote Desktop”, and then type “E” and for better security, the option 1 “Allow only Clients running Remote Desktop with Network Level Authentication”.
Finish the change in the sconfig, and with all settings done, now connect to the Windows Server 2019 Core using Remote Desktop.
To start using Hyper-V and to be able to connect to this server, we will connect remotely to this Hyper-V using a third server using Hyper-V Manager or Admin Center.
Connect remotely to Hyper-V using Hyper-V Manager
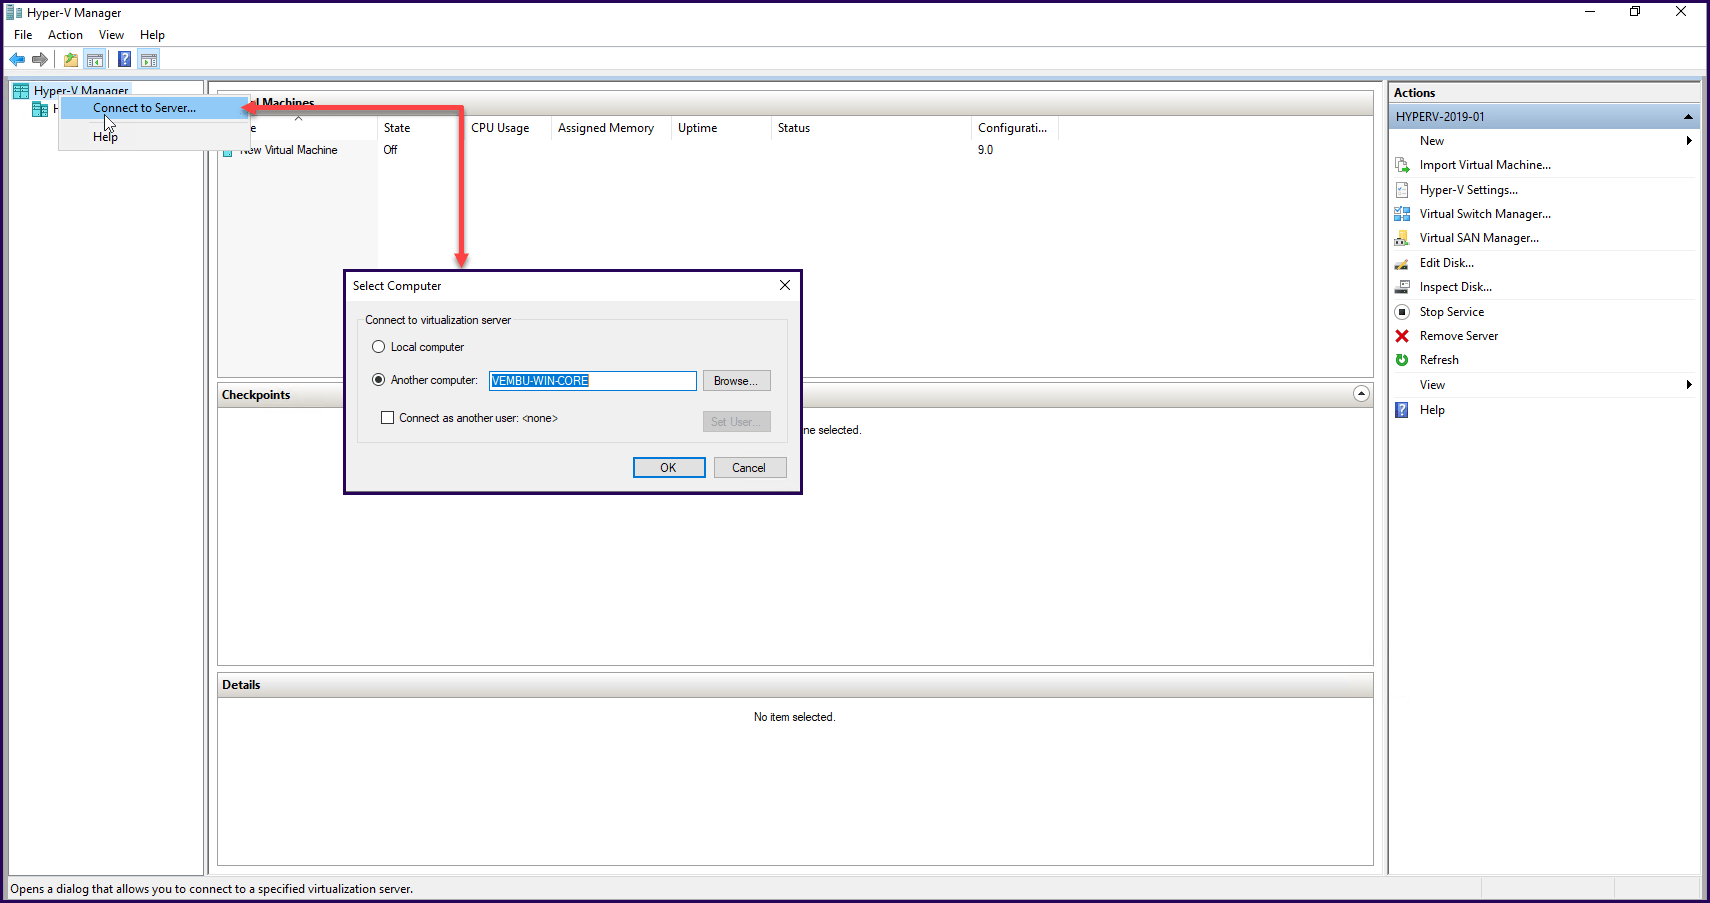
Using another Windows Server, or a Windows 10/8.1 where Hyper-V is installed, select “Connect to a server”.
Next, add your Windows Server Core name and click “OK”.
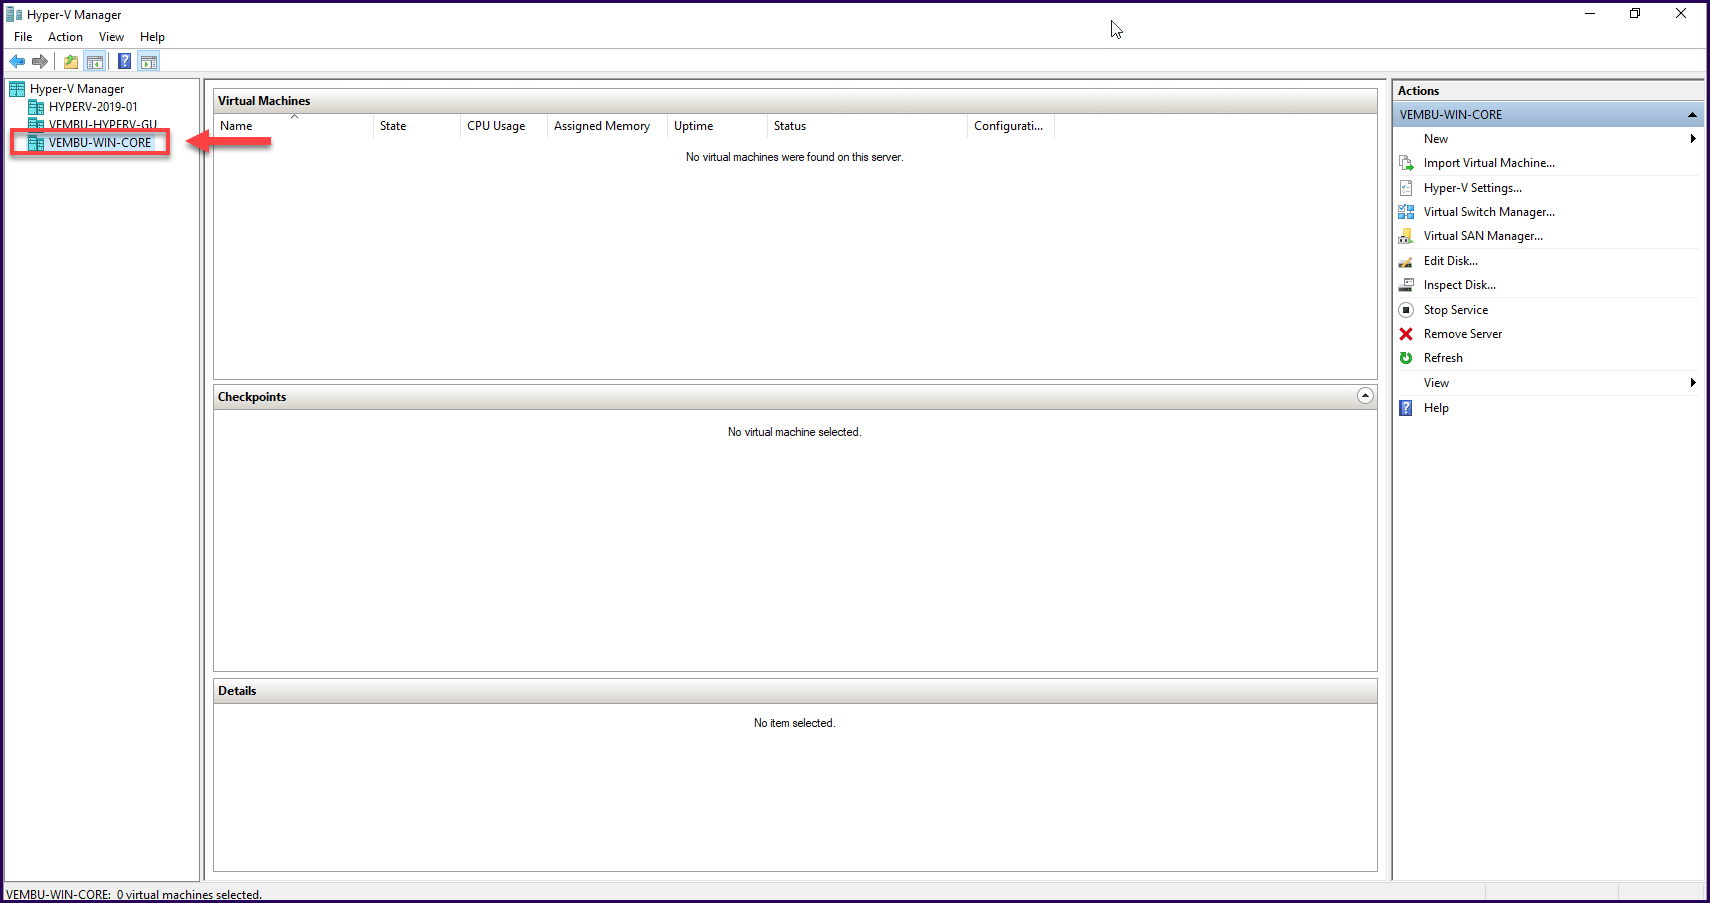
Next Windows Server 2019 Core shows up in the server list, and now we can manage our Hyper-V installed in a Windows Server 2019 Core.
Note: It is also possible to install the new tool Admin Center in Windows Server 2019 Core.
It’s a local install and then from a browser, we enter the IP address from the Windows Server 2019 Core, and we can manage the server with the Admin Center.
More information about Windows Server 2019 Core version can be found on the Windows Server Core page.
Protect your Hyper-V Environment with BDRSuite
Although Hyper-V includes platform-built mechanisms that enable production snapshots and replication of virtual machines into recovery environments, Hyper-V still lacks the native features and capabilities that facilitate organizations to have a comprehensive, single pane glass data protection solution that enables them to safeguard Hyper-V production workloads with confidence.
BDRSuite for Microsoft Hyper-V is the single solution to data protection that organizations need for today’s Hyper-V environments, that supports all aspects of high-availability for Hyper-V data, including support for the Hyper-V Cluster and SMB hosts, host and VM-level backups, high-performance changed block tracking and many other features with RPO & RTO less than 15 minutes.
Note: Know more on BDRSuite for Microsoft Hyper-V
What type of Windows Server 2019 should you use?
It depends on what is the purpose of your Server, and also depends on how you plan to manage the same Windows Server and Hyper-V.
If you like more graphical environments, then GUI is the best option. If you are more a Linux type of administrator and like a shell console and a more lightweight server, then Core is the best option.
Of course, security is also something to bear in mind when deciding which version to install.
Both options have pros and cons. Install the option that fits your environment.
Final thoughts
Windows Server 2019 and Hyper-V 2019 can be installed with the versions Desktop Experience and Core.
In both options, it is possible to enable the Hyper-V role using PowerShell commands and still use the same management tools to connect and manage Hyper-V (local or remotely).
Elevate the protection of your Hyper-V world effortlessly by acquiring BDRSuite: Download BDRSuite
Uncover the remarkable potential of Hyper-V backup with BDRSuite and witness its effectiveness firsthand: Hyper-V Backup with BDRSuite
Follow our Twitter and Facebook feeds for new releases, updates, insightful posts and more.