
Introduction
In this How-to blog, we are detailing how an Oracle Virtualbox VM imported into OCI to create similar OCI Instances using the imported custom image. This involves three steps:
- Preparing a Oracle Virtualbox VM for importing
- Importing a Oracle Virtualbox VM to OCI as an image
- Creating instances using imported image
Table of Contents
- Prerequisites
- Preparing Oracle Virtualbox for importing
- List of Windows OSes for OCI import Support
- List of Linux OSes for OCI import
- Preparing a Linux OS VM to import to OCI
- Adding KVM Paravirtualised drivers
- Preparing a Windows OS VM to import to OCI
- Importing Custom Image into OCI
- Import Custom image from OCI bucket for launching instance
- Conclusion
Prerequisites
- A valid Oracle account with properly configured OCI Bucket & OCI Virtual Cloud Network (VCN)
- A running VM either Linux or Windows on Oracle VM Virtualbox with all updates
- Properly configured Oracle VM Virtualbox with a valid Cloud profile in Cloud Profile Manager
- An established OpenSSL security environment between OCI & Oracle VM Virtualbox – application running on a server with preconfigured Private / Public key generation steps & Fingerprint generation on OCI steps
Preparing Oracle Virtualbox for importing
OCI provides the option to import Linux and Windows Oracle Virtualbox VM into a custom image. Currently, all Linux and Windows versions are not supported, and only a few are supported in para-virtualized or emulated launch mode

List of Windows OSes for OCI import Support
- Windows Server 2012 Standard, Datacenter
- Windows Server 2012 R2 Standard, Datacenter
- Windows Server 2016 Standard, Datacenter
- Windows Server 2019 Standard, Datacenter
List of Linux OSes for OCI import
- CentOS 7 or later in Paravirtualized & lower versions are supported in emulation mode
- Debian 8 or later in Paravirtualized & lower versions are supported in emulation mode
- FreeBSD 12 or later in Paravirtualized & lower versions are supported in emulation mode
- Oracle Linux 7 or later in Paravirtualized & lower versions are supported in emulation mode
- RHEL 7 or later in Paravirtualized & lower versions are supported in emulation mode
- SUSE 12.2 or later in Paravirtualized & 11 and 12.2 versions are supported in emulation mode
- Ubuntu 13.04 or later in Paravirtualized & 12.04 in emulation mode
Preparing a Linux OS VM to import to OCI
According to Oracle documentation, the Linux VM should meet the following requirements
- Under 300 GiB of disk size
- Include a master boot record (MBR)
- Configured to use BIOS (not UEFI)
- A single disk, additional disks can be added in OCI separately
- A VMDK or QCOW2 file
Note: Ensure that the instance has security settings appropriate for the cloud, such as enabling its firewall and allowing only SSH logins that use private key identifiers. Also, perform the following tasks:
- Add a serial console interface to troubleshoot the instance later, if required
- Add the KVM para-virtualized drivers
- Configure the primary NIC for DHCP
Enabling the serial console interface will be done using the following commands in these steps one by one
- Edit the /etc/default/grub file to update the following values:
- Remove resume= from the kernel parameters; it slows down boot time significantly.
- Replace GRUB_TERMINAL=”gfxterm” with GRUB_TERMINAL=”console serial” to use the serial console instead of graphics.
- Add GRUB_SERIAL_COMMAND=”serial –unit=0 –speed=115200″ to configure grub’s serial connection.
- Replace GRUB_CMDLINE_LINUX=”” with GRUB_CMDLINE_LINUX=”console=tty0 console=ttyS0,115200″ to add the serial console to the Linux kernel boot parameters.
- Regenerate initramfs as follows:
- grub2-mkconfig -o /boot/grub2/grub.cfg
- To verify, reboot the machine, and then run dmesg and look for the updated kernel parameters.
- dmesg | grep console=ttyS0
Adding KVM Paravirtualised drivers
By adding virtio drivers into VM’s initrd, we are enabling KVM Paravirtualized drivers into the linux os. Also this works only kernel version 3.4 and later, so check with uname -a command to find your kernel version.
Rebuild initrd with the dracut tool, telling it to add the qemu module using the below command
dracut –logfile /var/log/dracut.log –force –add qemu
And then check lsintrd to verify that virtio drivers are added.
Also check if the primary NIC is configured as a DHCP client. If any static IP is assigned, clear the settings and change to use DHCP IP. This will facilitate the use of the new DHCP scope IP when the instance is moved to the new VM instance.
Power off the VM before importing.
Preparing a Windows OS VM to import to OCI
As per current Oracle documentation, custom windows images must meet the following basic requirements and considerations
- The maximum Image size of the Windows OS is 400Gb
- The image must be setup up for booting from BIOS
- Only one disk is supported during migration, so it must be the boot drive with a valid master boot recorder (MBR) and boot loader. If the machine has more than one drive, you can migrate the additional drive and attach it later on to the VM instance separately.
- The disk image cannot be encrypted
- The disk image must be a VMDK or QCOW2 file
- Machine Network Interface must use DHCP IP, and could not assign a static IP
- The network configuration must not be hardcoded with any MAC address to its Network interface
- Operating System & installed applications should have the latest security updates
Enable firewall, and configure needed rules - Disable unnecessary user accounts & secure accounts with a strong password
- Enable RDP in a secured way, and allow access in Windows Firewall for both Private and Public networks, so that after import you can access the VM from public
- Download and install Windows VirtIO drivers
- Stop the Oracle VM Virtualbox Windows VM before import
Importing Custom Image into OCI
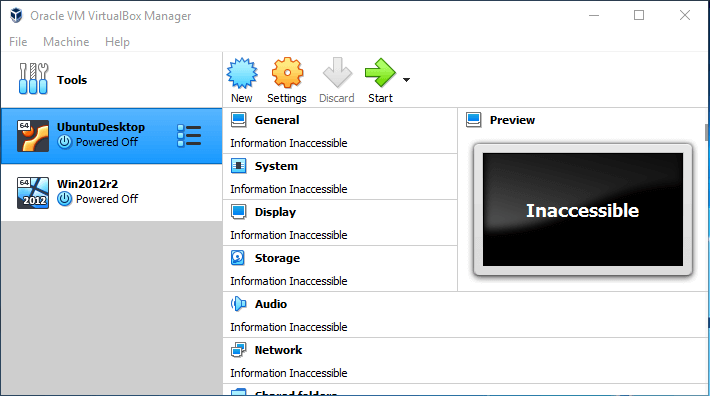
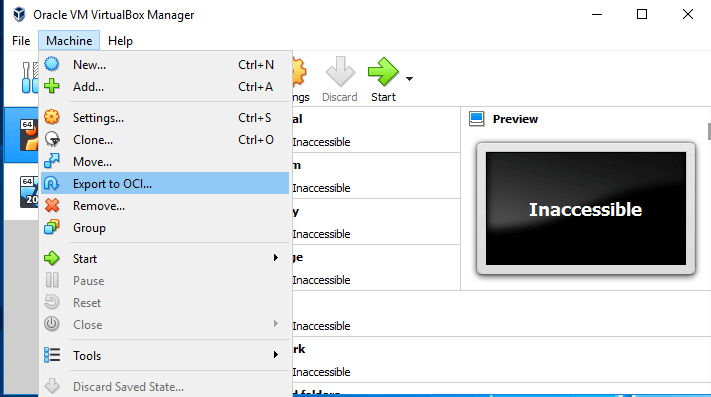
Open Oracle VM Virtualbox Manager, select the VM to be exported to OCI in a Powered Off condition
Select Machine → Export to OCI.
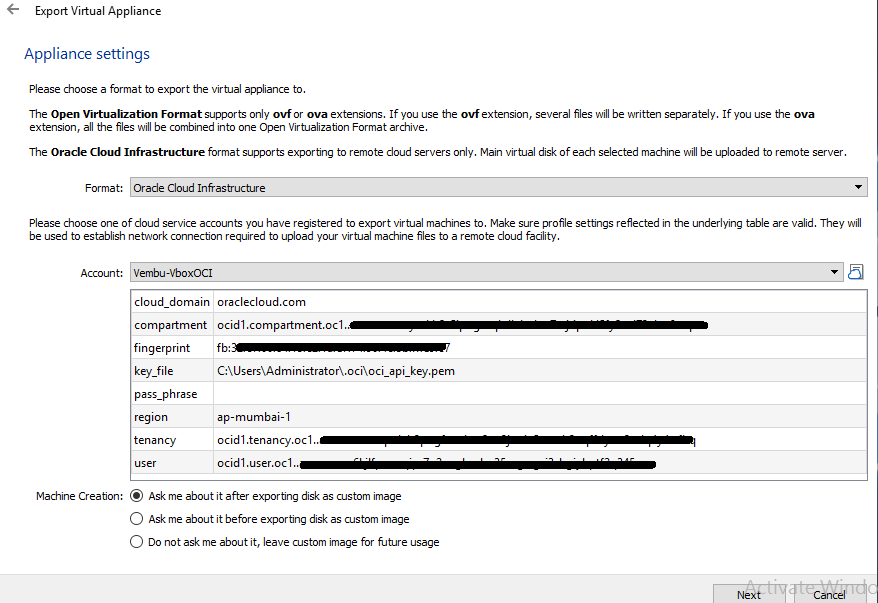
This will open Appliance settings.
Select Oracle Cloud Infrastructure in Format section & choose Account from Cloud profile manager, and select the created new profile. In our case, the new profile name is “Vembu-VboxOCI”
Choose to Ask me about it after exporting the disk as a custom image in the Machine Creation option as shown in the below image and click Next.
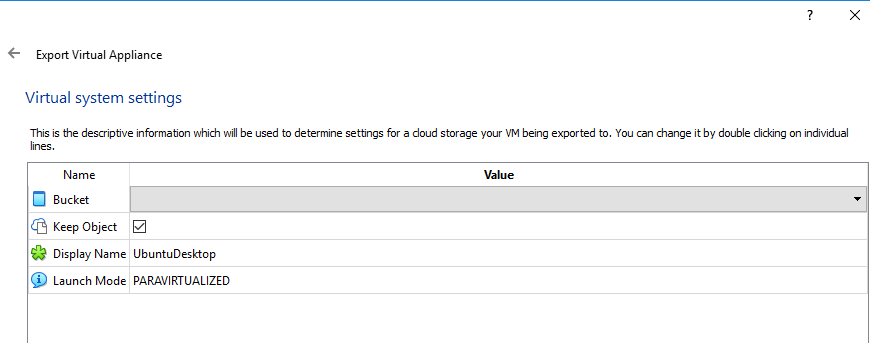
Descriptive information that will be used to determine settings for the cloud storage our VM is being exported to will be shown.
Using the cloud profile, the Oracle VM Virtualbox connects to OCI and fetches the details of Bucket information you created previously.
- In Bucket section, select the created bucket
- Enable Keep Object
- Display Name – Retain the same name given to the VM, if required you can change the name by double-clicking the corresponding field
- Launch mode – Paravirtualized. By default, Emulation mode is selected. But if your kernel and OS version will support, you can change to Paravirtualized mode
And Click Export and uploading disk image to OCI starts.

Once the upload is completed, you can verify it in your OCI Bucket under the root compartment, created in earlier stages.
Import Custom image from OCI bucket for launching instance
On the final step, you should import a Custom image from the OCI bucket uploaded from on-premise Oracle VM Virtualbox machine.
Login to OCI Console, under core infrastructure select, Compute → Custom Images
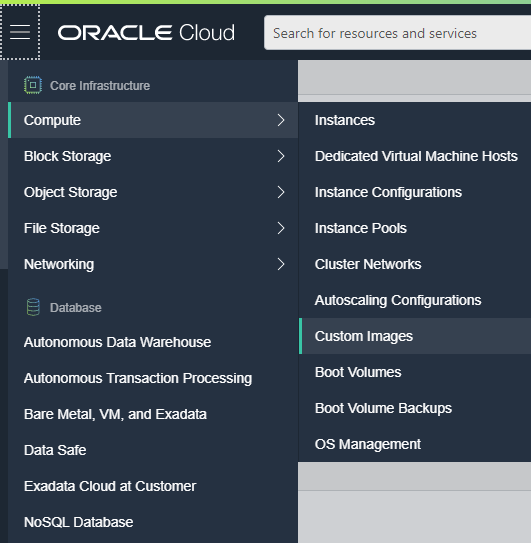
It will open a new window,
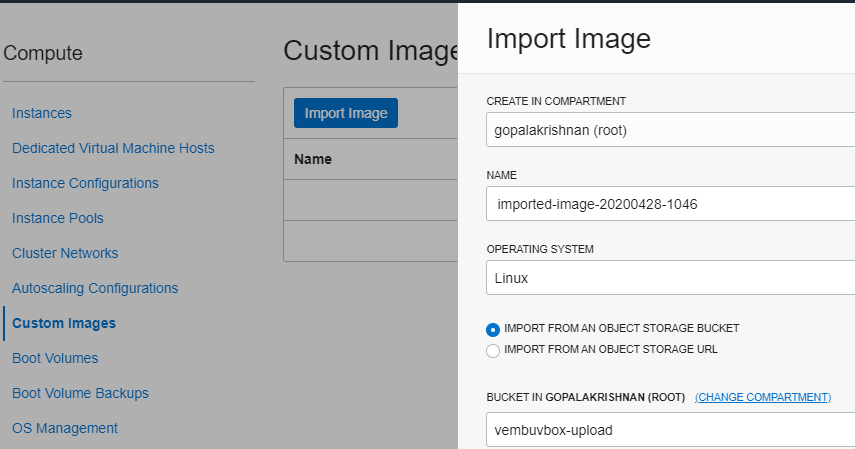
- Click Import Image, and the web page shows Compartment name, Name for the Image, and
- Operating System choice.
- Select the option “Import from an Object Storage Bucket”
- And it will show the bucket name automatically as shown in the image below.
Provide a name for the Image & Choose Linux / Windows depending on the OS you imported.
On further scroll down,
- Provide Image type as VMDK
- Select Paravirtualized mode under Launch mode, as our Linux image kernel version supported para-virtualized mode
- Finally, click the Import image
Conclusion
This How-to guide provided the steps for preparing a VM to support booting in OCI infrastructure by provisioning the VM and uploaded to OCI Bucket in a detailed manner. Any system administrator or DevOps administrator can easily deploy his on-premise VM into an OCI instance by following these steps.
Explore the capabilities of our robust backup software, thoughtfully crafted to boost your data security. It’s free to try out.
Download BDRSuite today to reinforce your system and enjoy added peace of mind.
Follow our Twitter and Facebook feeds for new releases, updates, insightful posts and more.