
Organizations are increasingly migrating their on-premise workloads to Cloud to utilize the highly scalable infrastructure. Considering that our flagship product – BDRSuite from Vembu, offers options for performing seamless migration between platforms or hypervisors in addition to Data Backup & Recovery.
BDRSuite – #1 Robust & Cost-Effective Backup & Disaster Recovery Solution
“BDRSuite is designed to protect data across Data Centers/Private Cloud (VMware, Hyper-V, Windows, Linux, Applications & Databases), Public Cloud (AWS), SaaS (Microsoft 365, Google Workspace), and Endpoints (Windows, Mac) ”.
You can migrate your on-premises workloads – VMware VMs, Hyper-V VMs, and physical Windows Serves/Workstations to the Microsoft Azure environment using BDRSuite.
In the post, we will look into the step-by-step instructions for migrating your VMware and Hyper-V VMs to Azure using BDRSuite.
Prerequisites:
- Download and install the BDRSuite Backup Server. Refer to the BDRSuite Installation Steps here
- Active Azure account with a valid subscription
Process:
- Configure Backup for VMware & Hyper-V Workloads
- Create BDR Proxy VMs in Azure which is mandatory for the recovery/migration process
- Migrate (or) Restore the backed up VMs/Physical machines from BDRSuite Server to Microsoft Azure
Migrate VMware and Hyper-V Workloads to Azure – Step by Step
Step 1: Log in to the BDRSuite Backup Server. Add your VMware/Hyper-V hosts under the Data Sources menu.

Step 2: Configure Agentless, image-level & application consistent backup for the virtual workloads (VMware/Hyper-V VMs) that you want to migrate to Azure.
The backup configuration is simple, straightforward, and similar for both VMware and Hyper-V VMs. All you have to do is – select Virtual Machines, enable Application-Aware if you have any VSS-aware applications (Exchange, SQL, AD, etc), Set Backup Scheduling, and additionally configure Retention Policies and Custom Encryption as per your requirement.
Check out the detailed backup configuration here.
Once the backup run is successful, you can initiate the migration process to Azure
Step 3: To begin the migration to Azure, you need to first launch a BDR Proxy VM in Azure from BDRSuite Server.
BDR Proxy VM is used as a data shipper service to receive your backed-up on-premise machine data from the BDRSuite Server to your Azure cloud environment and do the required preprocessing to successfully spin the on-premise workload as an Azure instance in the Azure cloud environment.
Creating BDR Proxy VM in Azure:
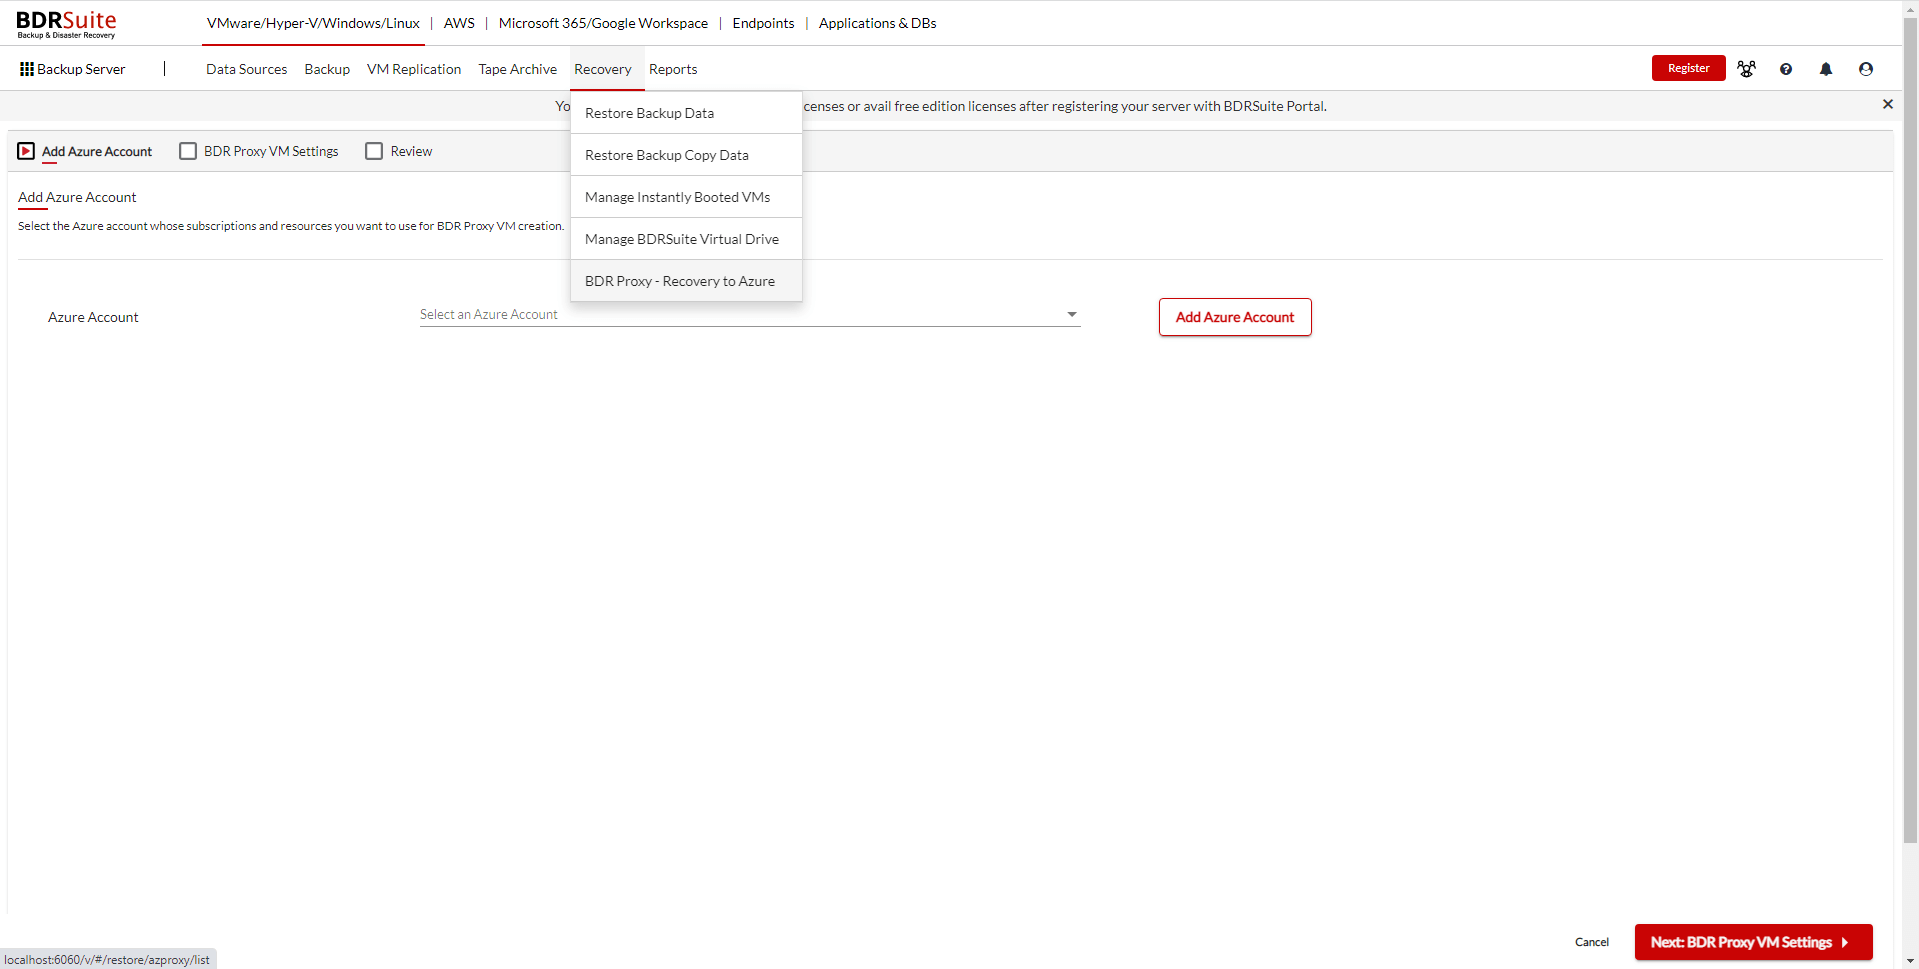
- Navigate to Recovery -> BDR Proxy – Recovery to Azure page. Click the button ‘Create BDR Proxy’
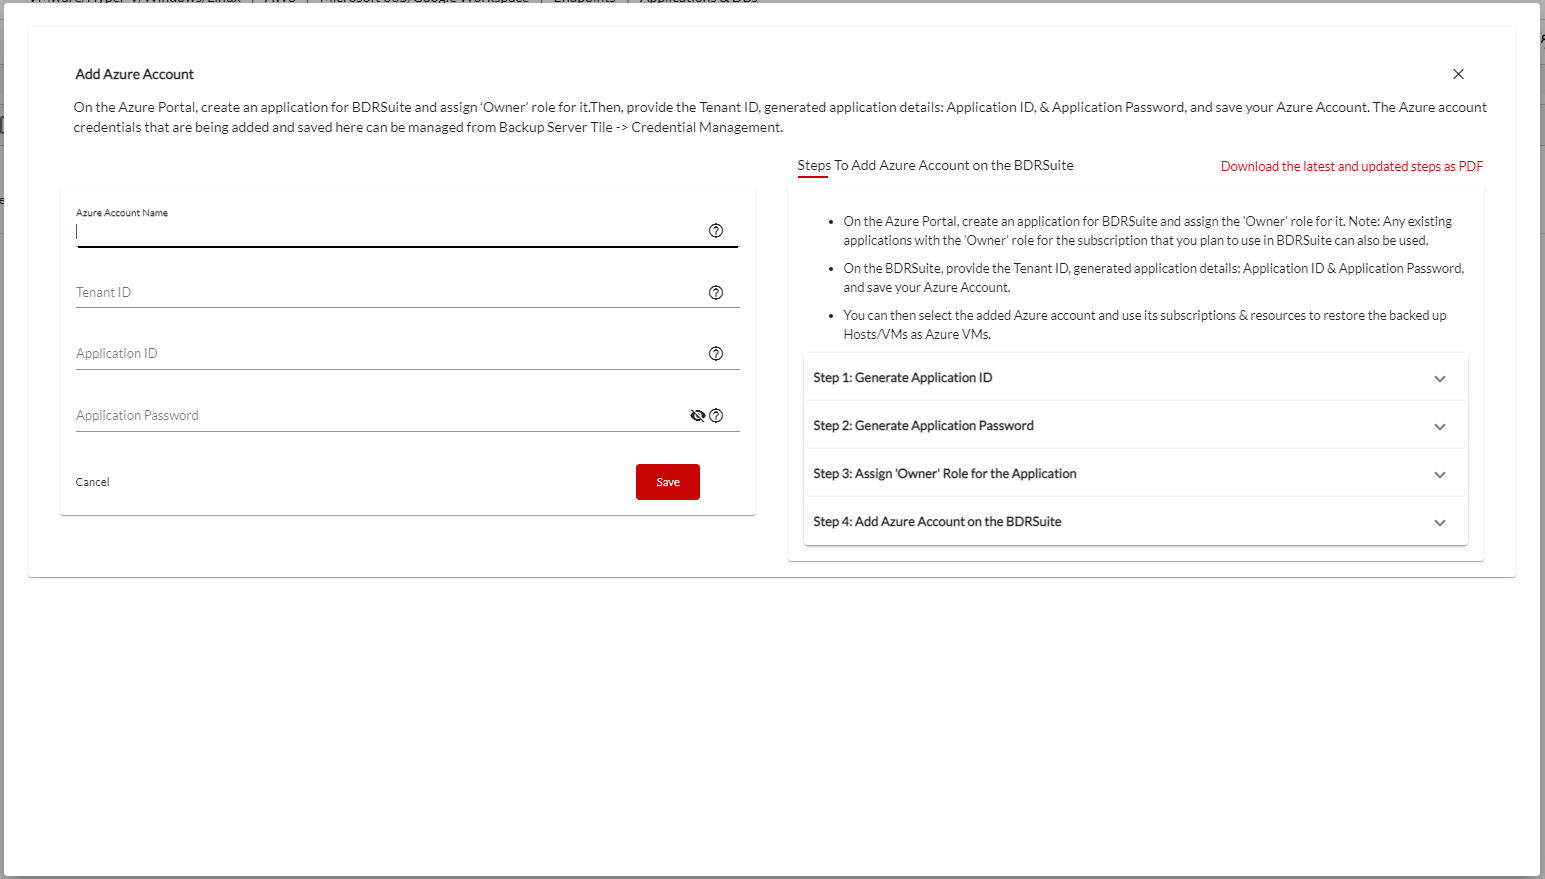
- On the BDR Proxy creation wizard, Select Azure Account from the dropdown (if already added) or Add your Azure Account on the BDRSuite Server. Refer to the Steps To Add Azure Account on the BDRSuite
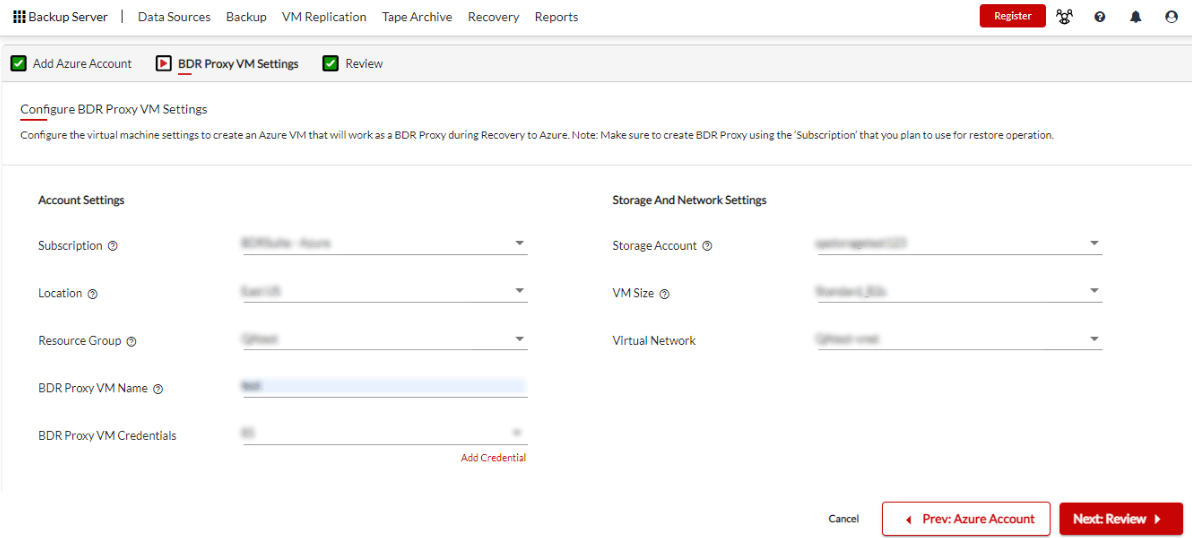
- Then, you need to select the appropriate azure configuration to launch the BDR proxy:
Section 1: Account Settings
- Azure Subscription
- Location (Region where you want to launch the BDR proxy)
- Resource Group
Section 2: BDR Proxy VM Information
- Enter a name for the BDR Proxy VM
- Provide the credentials for the BDR Proxy VM
Section 3: Storage and Network Settings.
- Then, select the Storage account, VM size, and Virtual network
Note: we suggest going by default values if you are not sure about the values.
- Review the settings and then initiate the proxy creation. Once the proxy is created successfully, we can start the restore/migration process
Step 4: Now, your backed-up physical/virtual machines are ready to be migrated to the Azure environment.
Migrating VMware/Hyper-V Workloads to Azure:
- Navigate to Recovery->Restore Backup Data page
- Click the restore button alongside the backup job in which you have configured backup for the workloads to be migrated
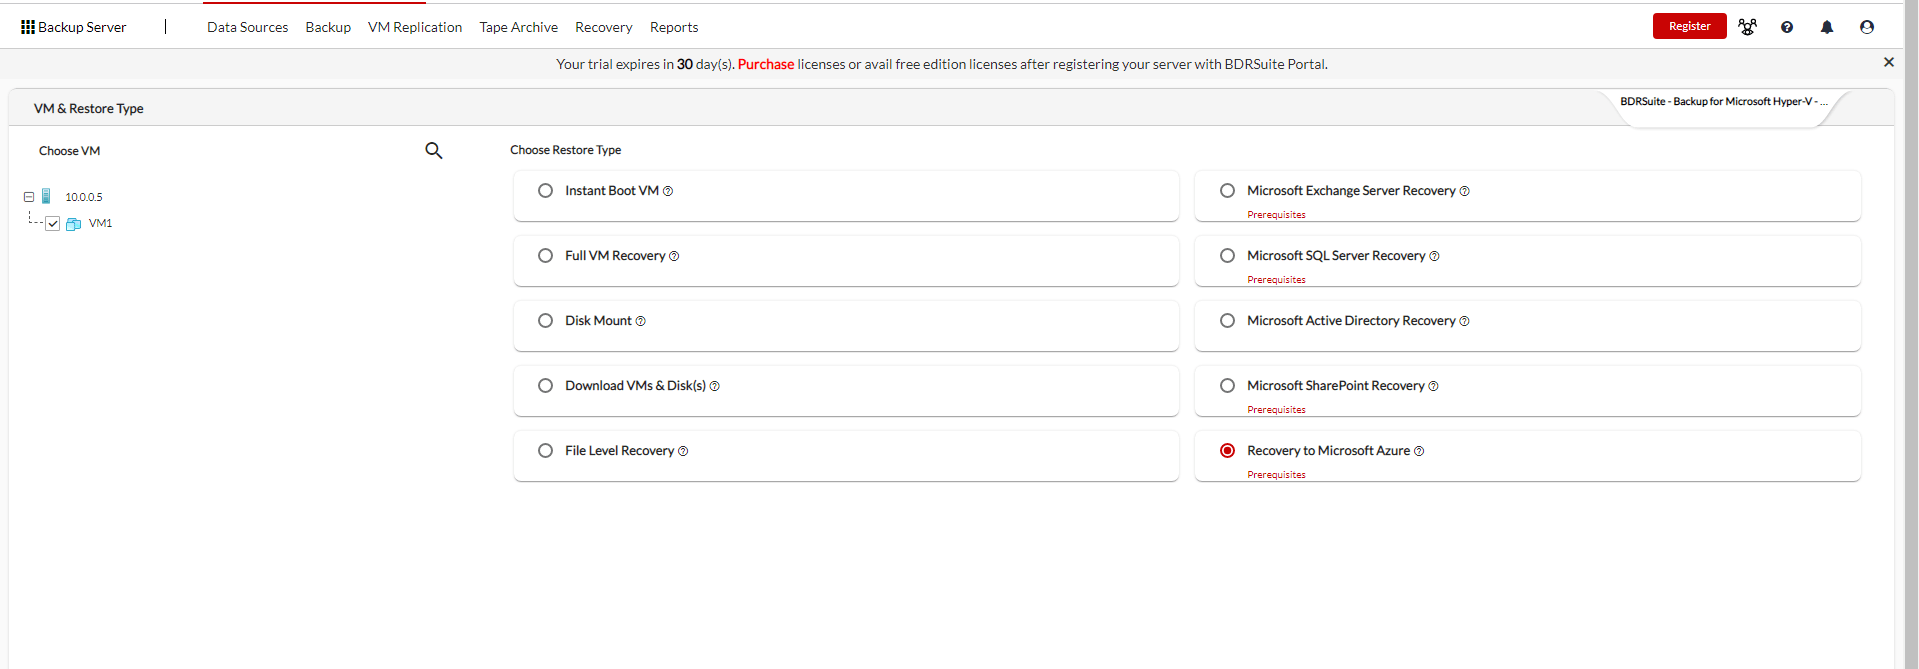
- Select the VMware or Hyper-V VM(s) that you plan to migrate
- Then, choose the restore type: Recovery to Microsoft Azure and click next
- On the next page, select the Restore version. You can select the latest timestamp to migrate the workload’s latest version
- On the next page, select the Azure Account details and Target VM settings. In this section, you need to configure the VM settings your on-premise workload needs to have after being migrated as an Azure Instance
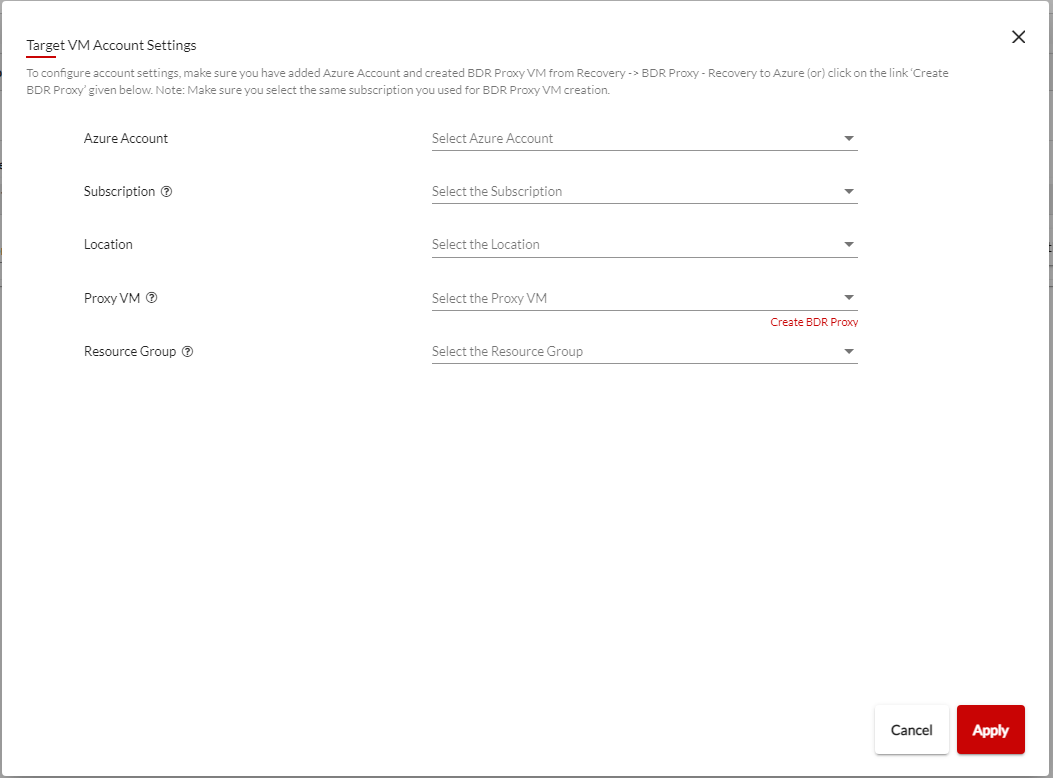
- Configure the Target VM Account Settings:
- Provide a name for the target VM on Azure.
- Select the Azure Account and Subscription. Make sure to select the same subscription which we used to launch the BDR proxy.
- Select the location where the BDR proxy is running and then select the BDR Proxy which needs to be used for the migration/recovery process.
- Finally, select the Resource group and click apply
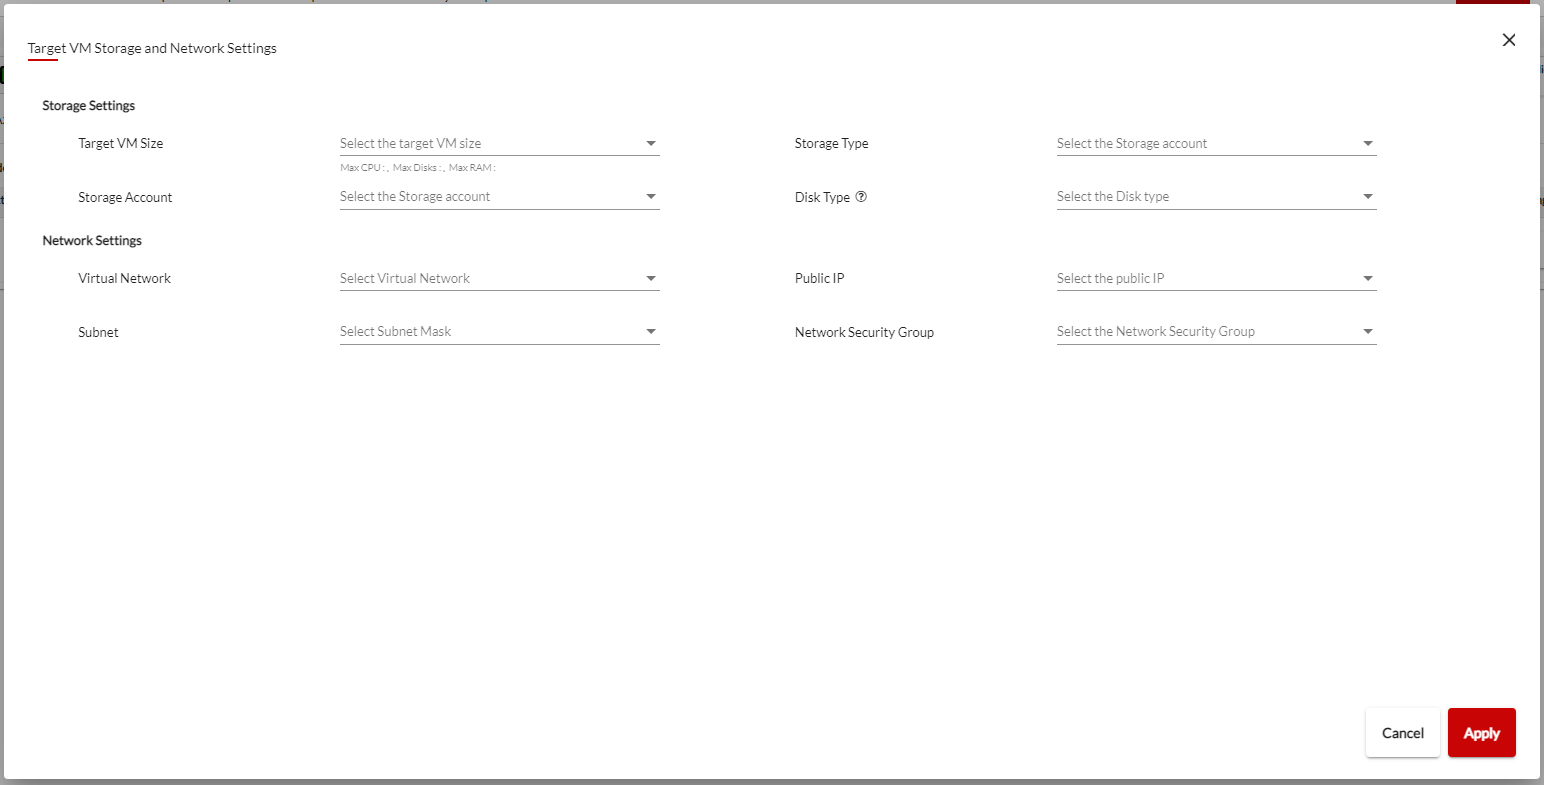
- Configure the Target VM Storage and Network Settings listed below:
- Target VM size – You need to specify the VM Size for the migrated workload
- Storage account
- Virtual network and subnet
- Storage type – SSD or HDD or Premium SSD.
- Storage disk type
- Public IP -You can choose to assign the restored/migrated VM with a Public IP or else only private IP will be assigned.
- Network security group
- Finally, review the restore configuration and initiate the restore. The on-premise workload – VMware/Hyper-V/Physical Windows Servers & Workstations will be successfully migrated to Azure Cloud Environment and will be running as an Azure Instance


Wrapping Up:
Once the VM Migration/Restore is complete, you can see a virtual instance created under the provided name at your Azure Cloud Infrastructure. From then, you can start the migrated cloud virtual instance and manage it from your azure cloud infrastructure.
Be sure to download and explore BDRSuite in your environment with our fully-functional 30-day free trial version
Follow our Twitter and Facebook feeds for new releases, updates, insightful posts and more.