
What is Windows Admin Center?
Windows Admin Center in Azure portal is a remote management tool to manage the Windows Server operating system inside an Azure VM. You can manage the operating system functions from the Azure portal as well as work with files in the VM without using Remote Desktop or PowerShell.
In this blog, we are providing an overview of the functionality provided, requirements, and how to install Windows Admin Center and how to use it to manage a single VM.
Management tools that supported by Windows Admin Center for an Azure VM
Windows Admin Center in the Azure portal provides the essential set of management tools for managing Windows Server in a single Azure VM. These are listed below.
- Certificates
- Devices
- Events
- Files and file sharing
- Firewall
- Installed apps
- Local users and groups
- Performance Monitor
- PowerShell
- Processes
- Registry
- Remote Desktop
- Roles and features
- Scheduled tasks
- Services
- Storage and
- Updates
Azure VM requirements for installing Windows Admin Center
To use Windows Admin Center in the Azure portal, Microsoft will install the Windows Admin Center extension package in each Azure VM that users want to use to manage. The Azure VM has the following minimum requirements:
- Windows Server 2022, Windows Server 2019, or Windows Server 2016
- At least 3 GB of memory
- Be in any region of an Azure public cloud (except Azure China)
The VM also satisfy the following network requirements

- Outbound internet access or an outbound port rule allowing HTTPS traffic to the Windows Admin Center service tag
- An inbound port rule if using a public IP address to connect to the VM
The management PC or any other system that users use to connect to the Azure portal has the following requirements:
- The Microsoft Edge or Google Chrome web browser
- Access to the virtual network that’s connected to the VM
Installing the Windows Admin Center extension package in the Azure VM through the Azure portal
Users must install the Windows Admin Center package in the Azure VM before it can be used to manage in Windows Admin Center. For that,
Open the VM in the Azure portal. Choose Home → Virtual Machines → Name of the Virtual machine. Choose Windows Admin Center under the settings group.
If the VM has all outbound internet traffic blocked, create an outbound port rule to connect to the Windows Admin Center service. For that, select the check box “Open an outbound port for Windows Admin Center to install” as shown below in the screenshot.
To optionally provide access to your VM over the public internet from any IP address (convenient for testing but exposes the VM to attack from any host on the internet), you can select the checkbox “Open this port for me” too as shown in the screenshot.
Here destination port 6516 will be opened on the virtual machine to connect to Windows Admin Center
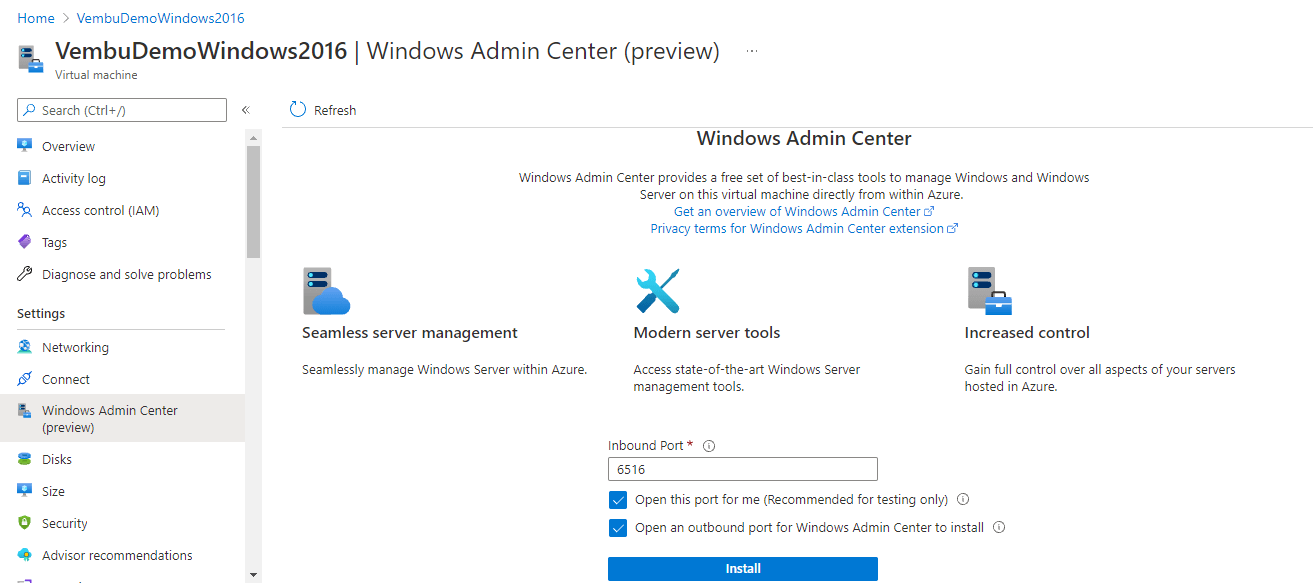
Click Install. Installing takes a few minutes. If you selected Open this port for me or manually created an inbound port rule in the last couple of minutes, it might take another couple of minutes before you can connect with Windows Admin Center. During installation, you might see the notification that installation takes 5 minutes and ask to check back later.
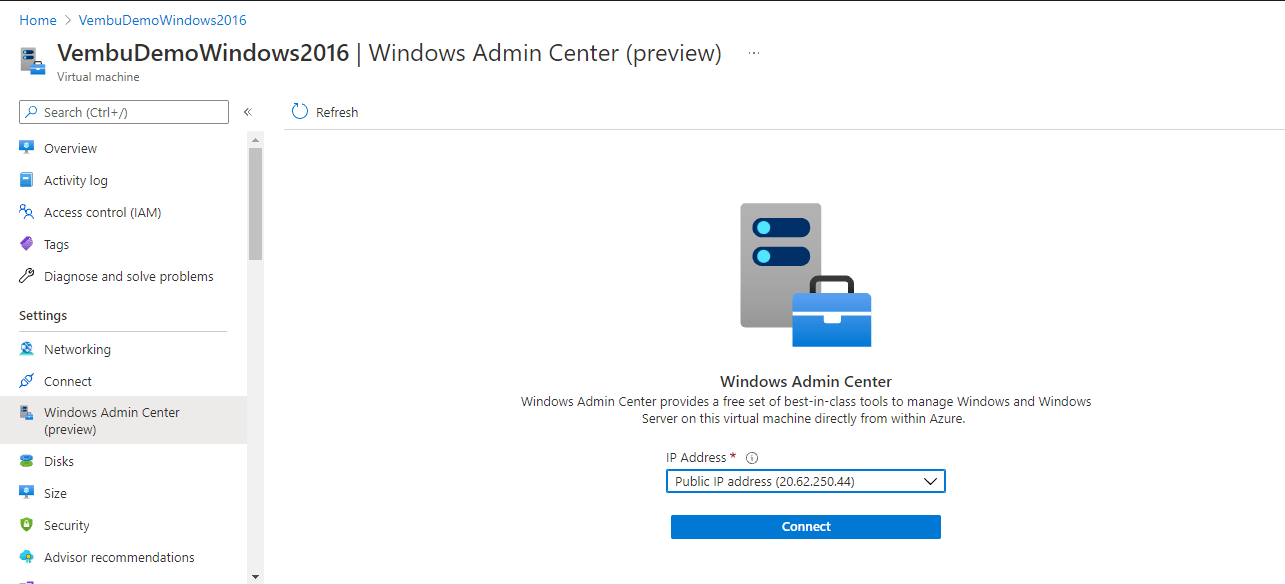
After successful installation, the windows admin center screen shows the connect wizard with public IP and private IP of the VM to choose, to connect as shown in the screenshot below. Since we choose the option “ Open this port for me” before installation, the wizard shows both the public and private IP of the VM. Here we are choosing the public IP address and choosing to connect.
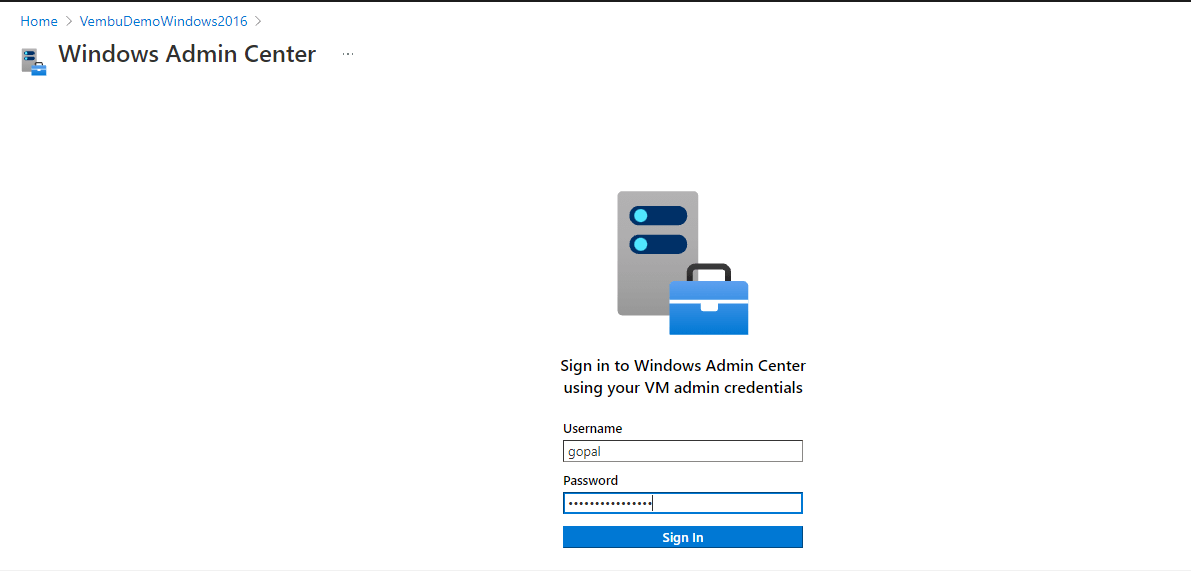
On the next screen, the wizard asks you the admin user credentials of the VM. The below screenshot shows this sign-in page. Provide the admin username and password to sign in.
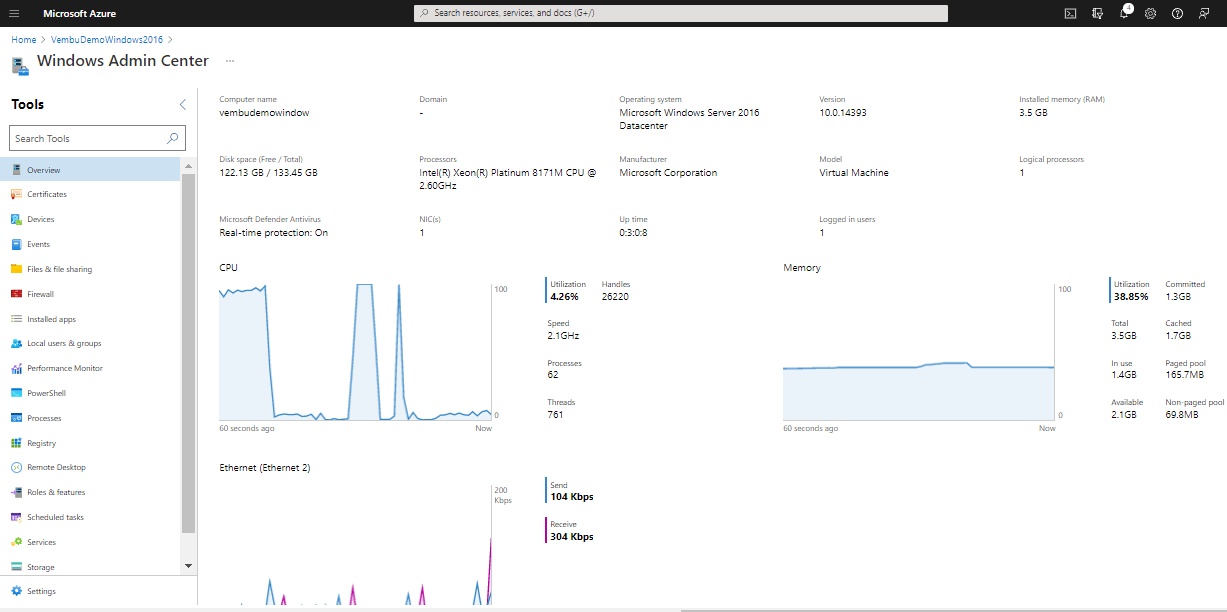
Now, your VM is connected to the Windows Admin Center, and you can view various management tools on the left side. On clicking each tool, you will get the relevant details on the right side. Some of the screenshots shown below are given for example.
Overview – This page shows the complete details of the OS such as OS version, Installed RAM, Available Disk space, Processor details, CPU Utilization, Memory usage, and Ethernet activity. The below screenshot shows these parameters.
Certificates – This details all the installed certificates in the VM OS.
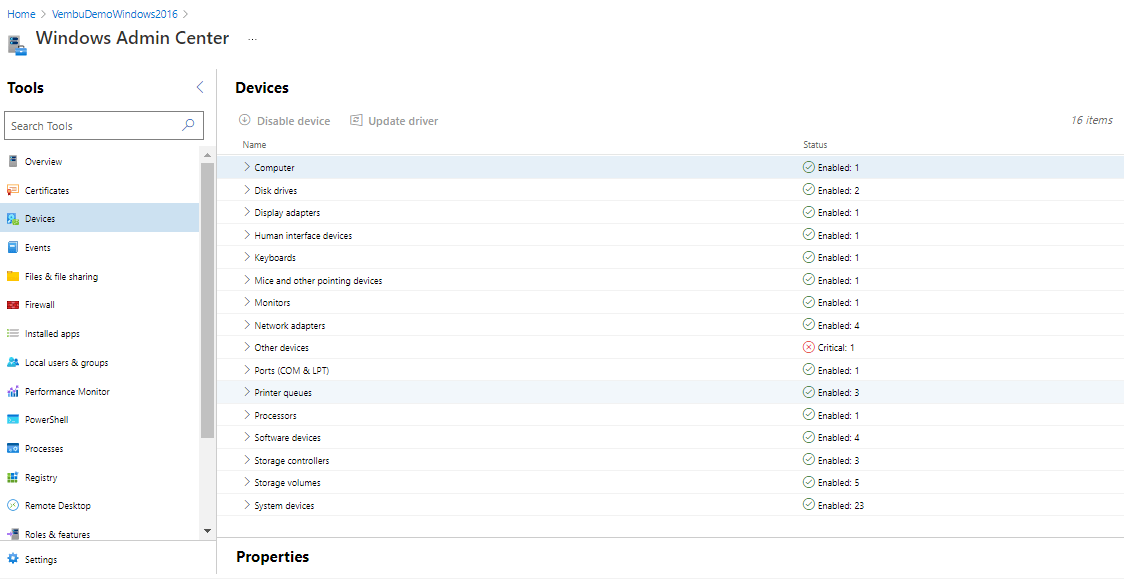
Devices – Shows details of all the devices available in the VM. You can disable or update the driver of these devices from the Windows Admin center portal itself. You can expand each component and get the detailed properties of each device.
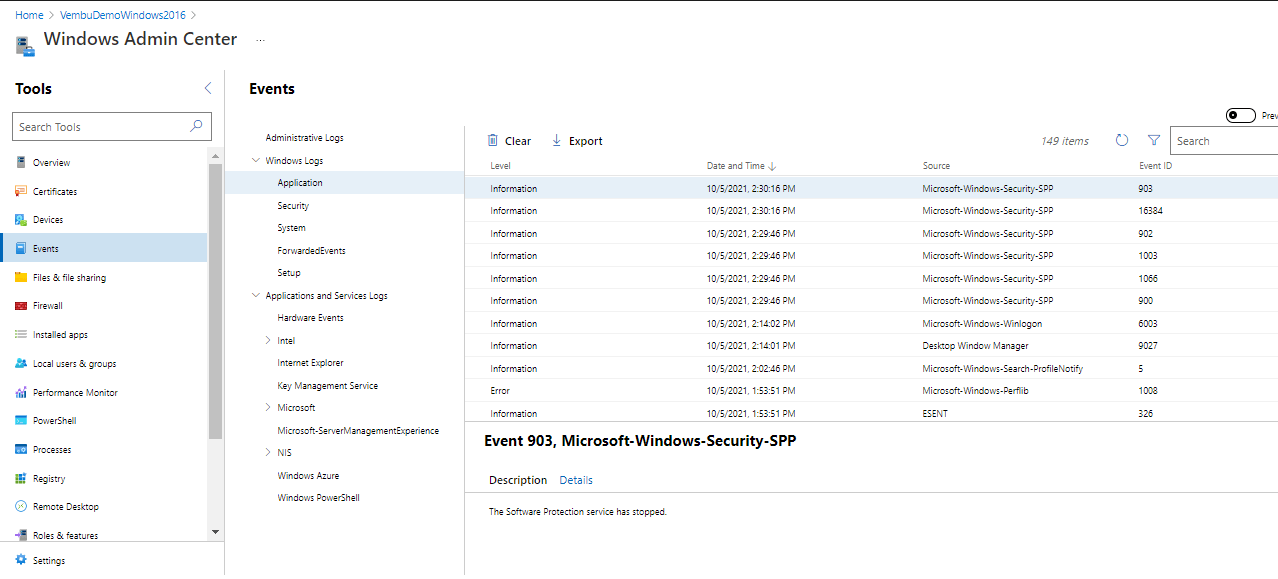
Events – You can view the events generated by the Windows log & the Application and services log. You can choose each event and get a detailed description of the event. The below screenshot provides a sample event with a description.
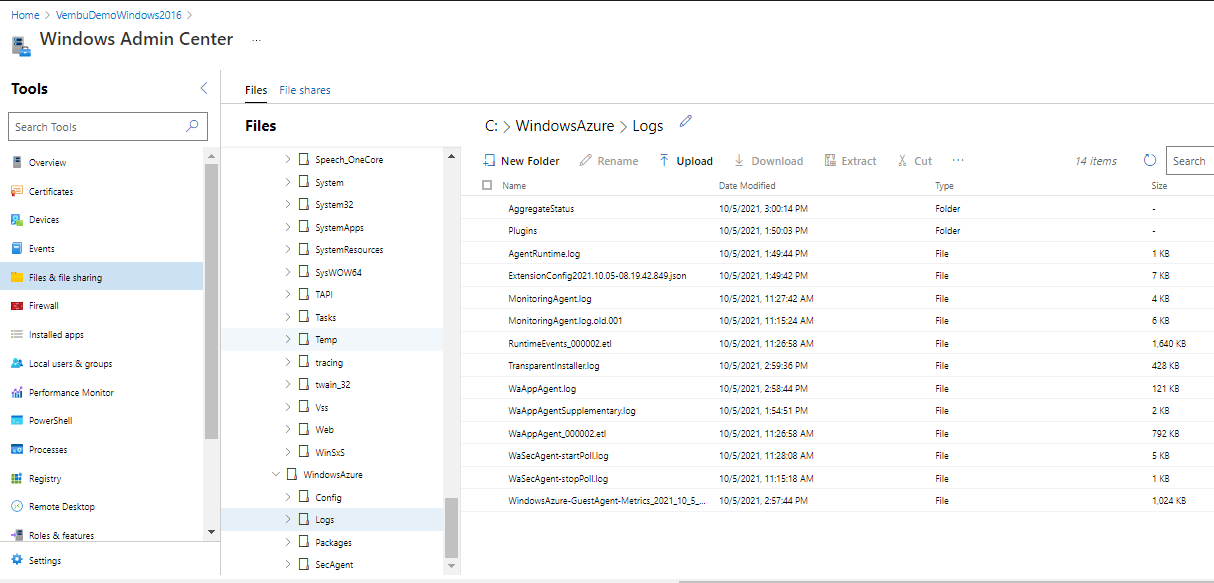
File & File sharing – Users can view directories and files under each drive. Users can do all the file activities similar to File Explorer in Windows OS. They can also do all the file-sharing activities under the File sharing tab. They can create a new share, delete a share and edit the share properties.
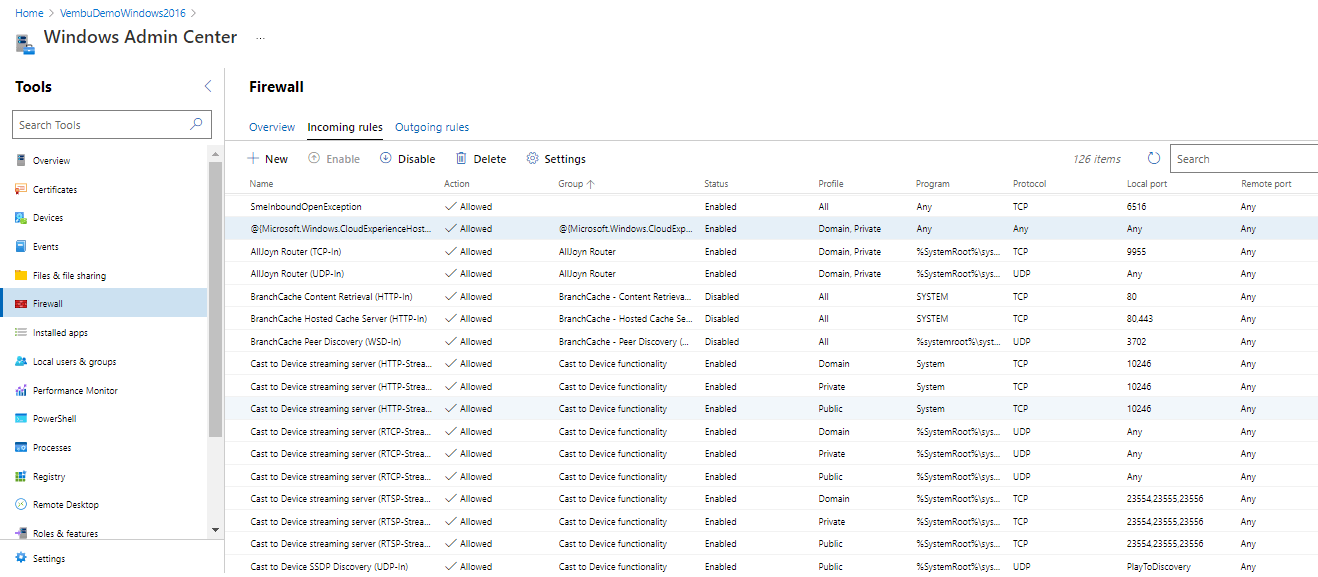
Firewall – Users can set Incoming & Outgoing firewall rules for the Windows OS from this section. Users can enable, disable or modify the firewall rule from here by selecting each of the Incoming and Outgoing rules.
Installed apps – This tab shows complete details of the installed application on the Windows OS. You can uninstall or remove the application from the OS here itself.
Local Users and Groups – This will list all the available users (built-in and created users ) of the OS and the built-in groups. Here you can create a new user or group. Can edit or remove the user or group and can change the password for a particular user.
Performance Monitor – Users can view and compare performance counters for the operating system, apps, or devices in real-time.
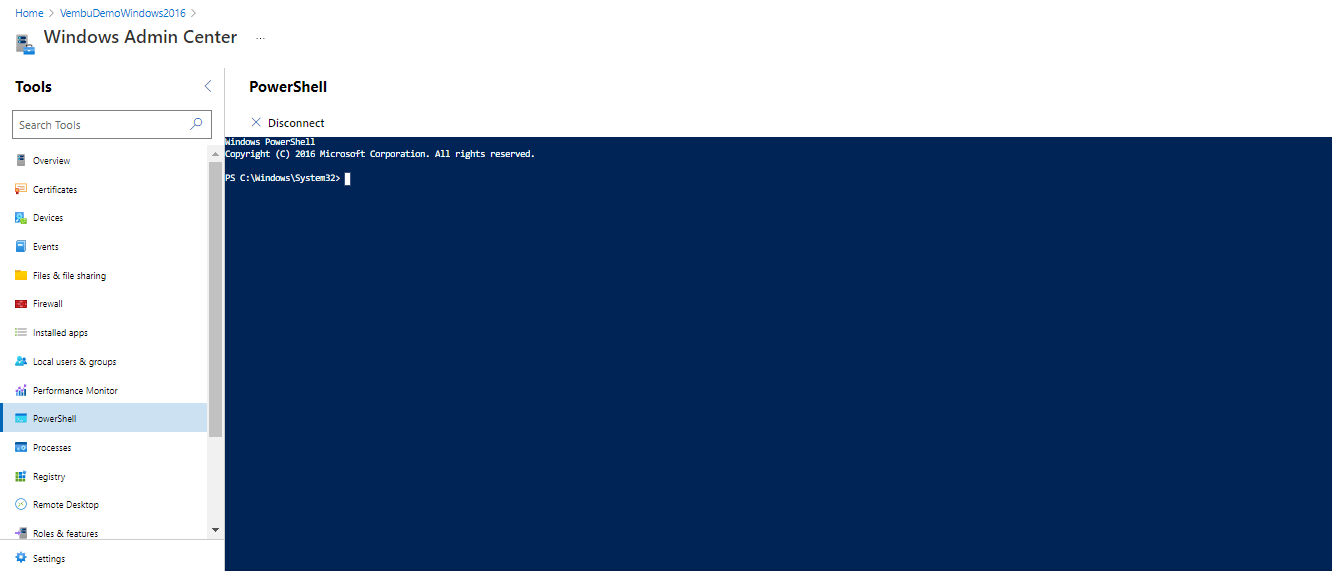
Powershell – Using this, you can connect the Powershell window of the Windows OS directly, and can execute any PowerShell cmdlets on the VM
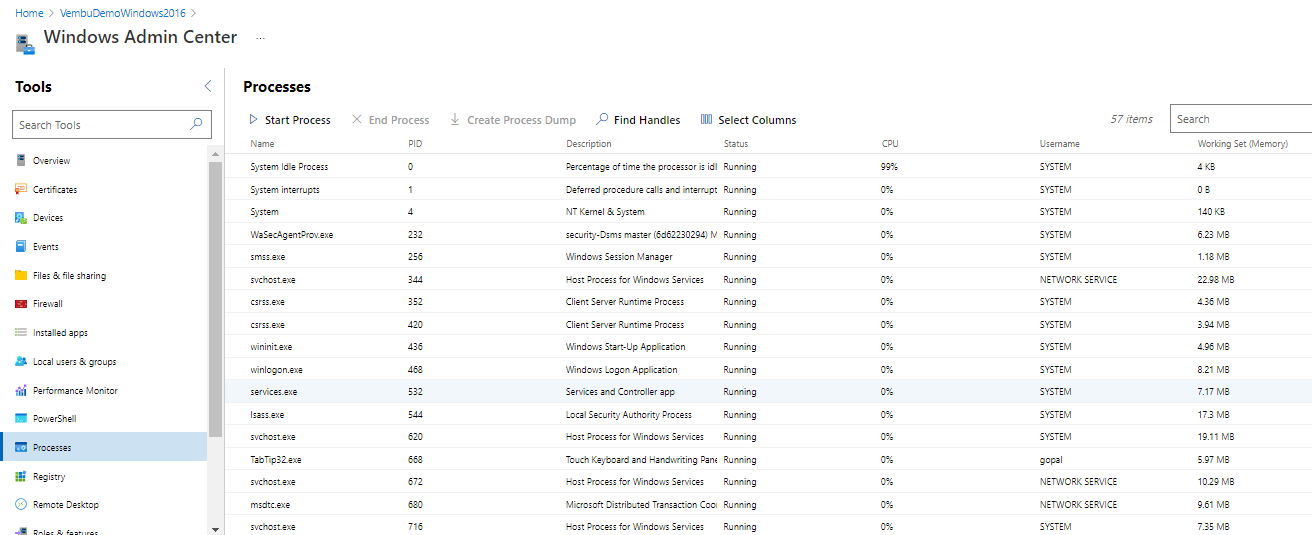
Processes – Similar to task managers, you can view the running processes of the OS. You can start and end processes & find handles of each process.
Registry – Similar to the Regedit tool in windows, here you can traverse all the registry keys and can update the registry key value.
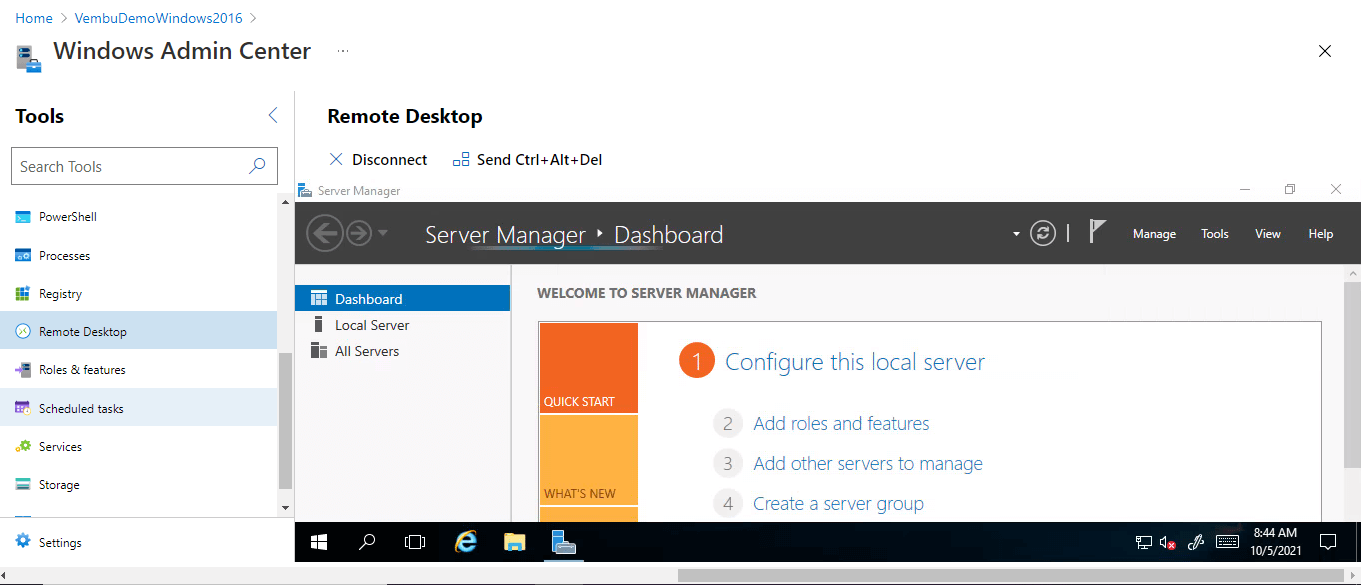
Remote Desktop – Users can directly connect the server using RDP protocol after providing the admin user credentials.
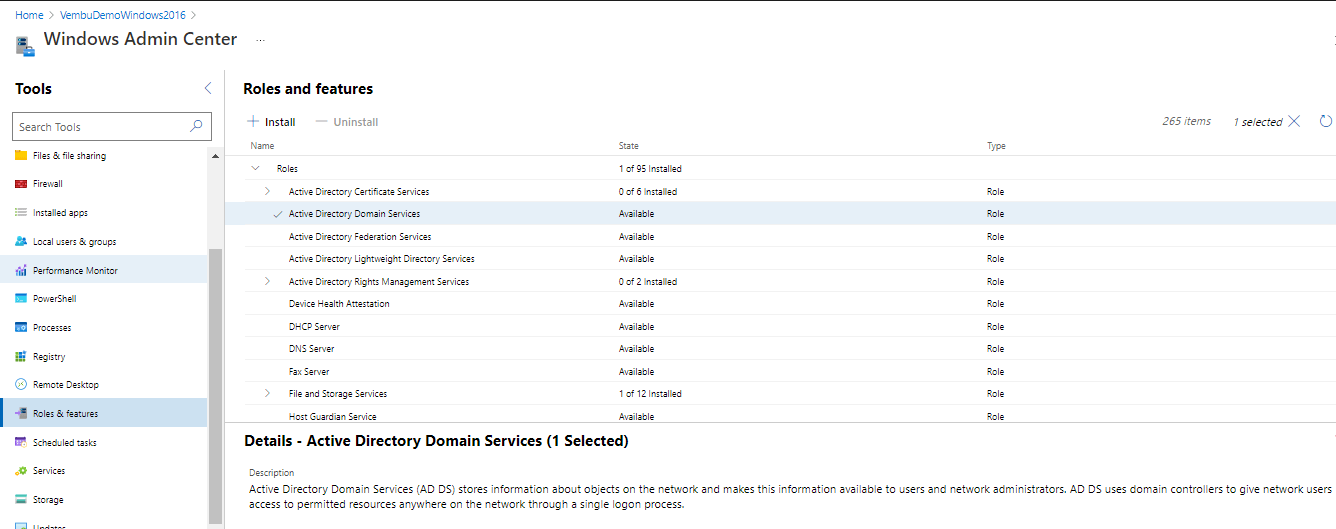
Roles and features – Users can install & uninstall roles and features for the OS.
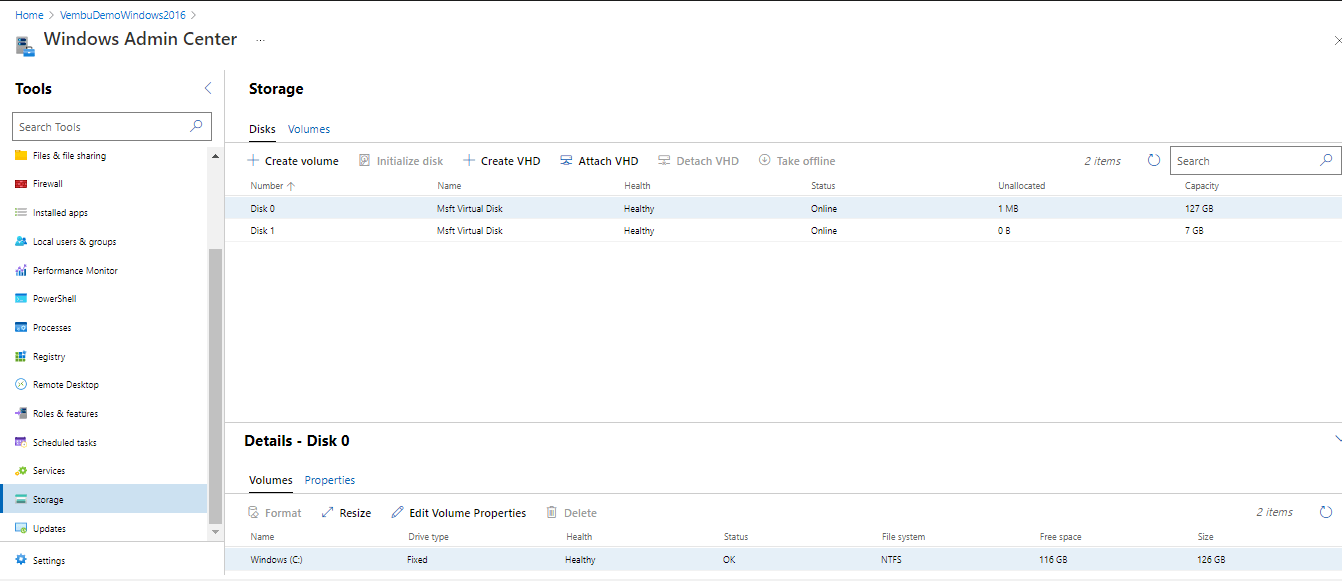
Storage – Users can perform all the disk and storage operations. One can create volume, create, attach and detach VHD, can format and resize the disk volumes, etc.
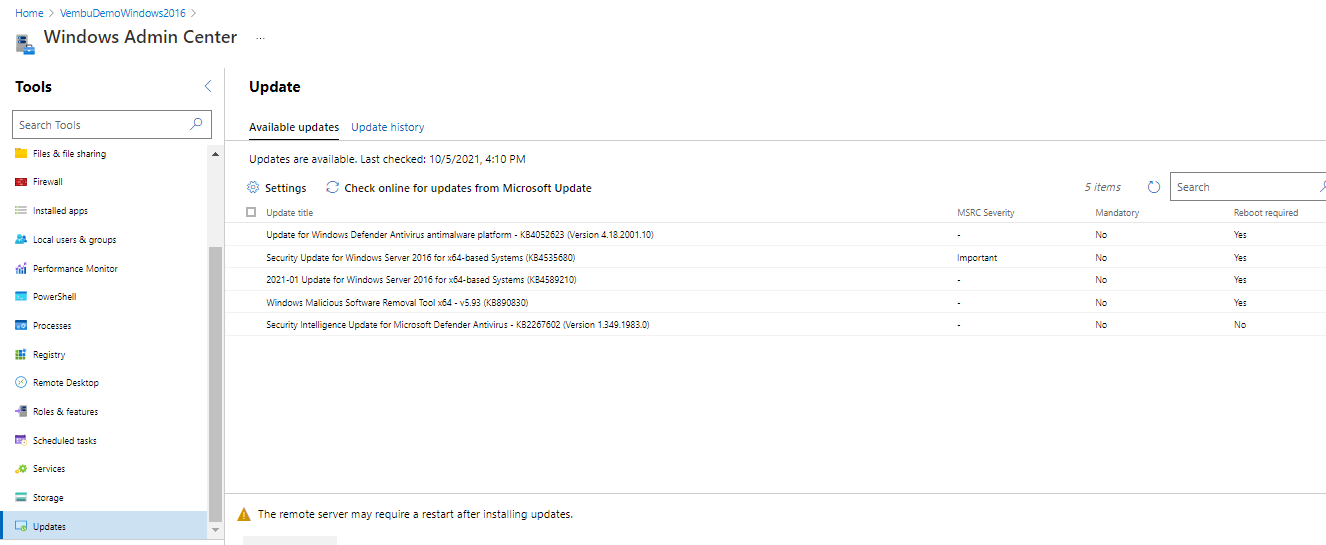
Updates – Shows available updates and updated history. Users can initiate installing Windows security updates and patches from here.
Settings – Here users can configure file share SMB server, Environment variables, and Power configuration for the Windows OS.
In December 2022, Microsoft released their latest version of Windows Admin Center 2211. It includes support for 400% zoom and WDAC-enabled infrastructure, improvements to Azure Stack HCI management features, as well as bug fixes and updates in several extensions.
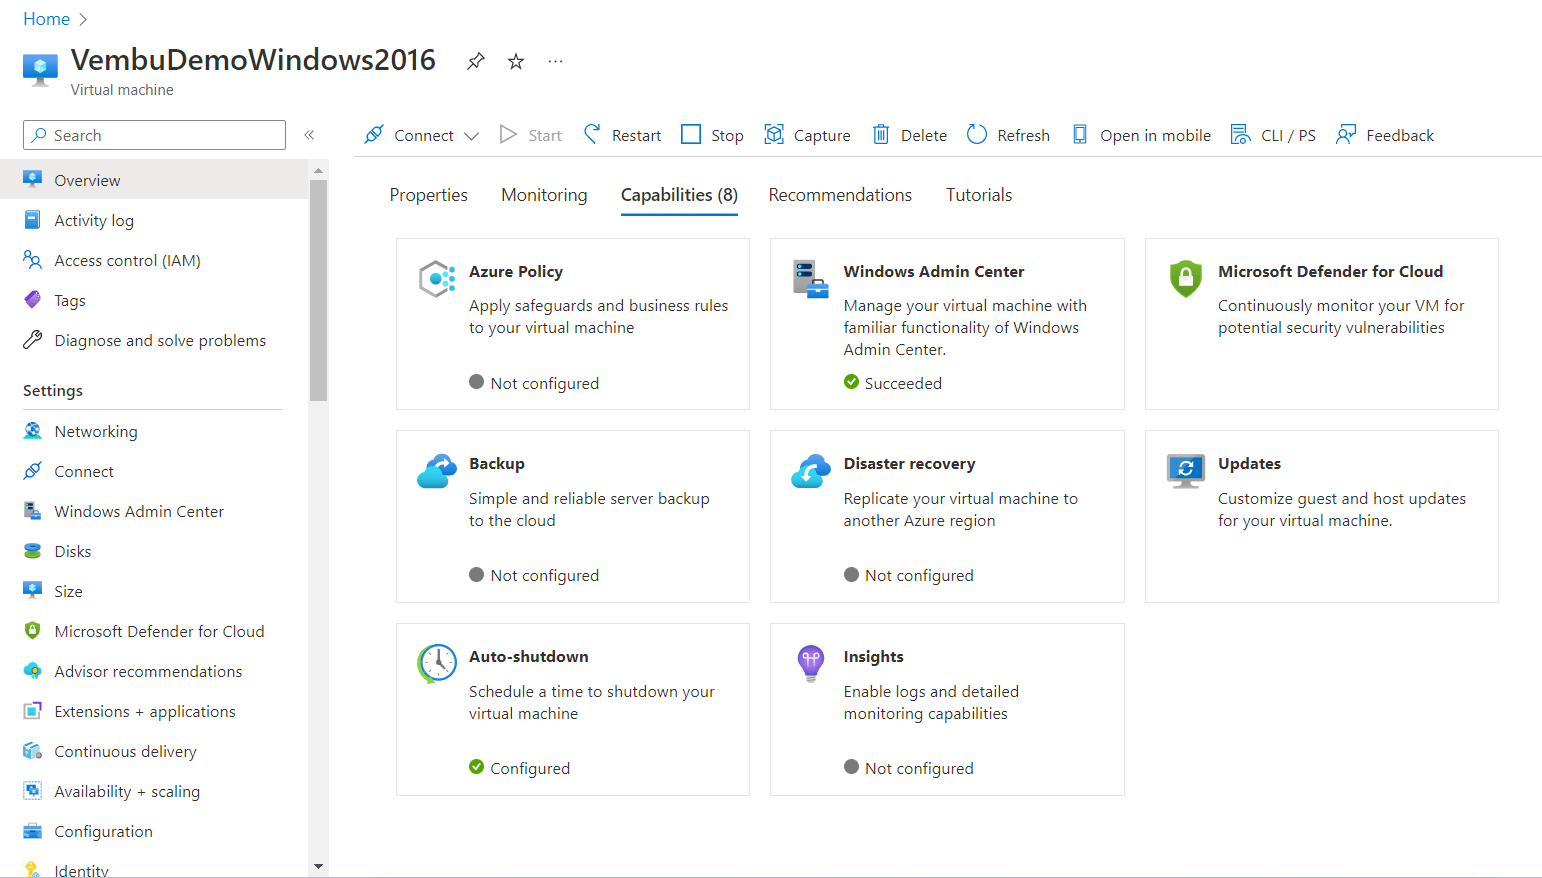
Additionally you can safeguard your running VM, by enabling or configuring additional features under “Capabilities” section listed below:
a) Azure policy – Apply safeguards and business rules to your virtual machine.
b) Microsoft Defender for Cloud – Defender for Cloud continuously monitors the configuration of your virtual machines to identify potential security vulnerabilities and recommends actions to mitigate them. You can include your Azure VM by configuring the Microsoft Defender for Cloud.
c) Backup – Simple and reliable server backup to the cloud. You can enable backup for the VM to Recovery Services Vault. Recovery Services vault holds the backup copies and you can monitor backup using this vault.
d) Disaster Recovery – You can replicate your virtual machines to another Azure region for business continuity and disaster recovery needs. Here you need to provide the target region and the recovery services vault service.
e) Updates – Customize how and when you receive guest and host updates for your virtual machine
f) Auto-shutdown – Schedule a time to shutdown your VM automatically
g) Insights – You can get more visibility into the health and performance of your virtual machine. Enabling additional monitoring capabilities provides insights into the performance and dependencies for your virtual machines.You will be billed based on the amount of data ingested and your data retention settings. It can take between 5-10 minutes to configure the virtual machine and the monitoring data to appear.
Below screenshot shows these features, and user can click each item and can configure those capabilities.
Conclusion :
Windows Admin Center in Azure unlocks incredible capabilities for the Azure portal by providing the user with an interface to manage Windows Server virtual machines. By default, the Azure portal provides a singular view for virtual machine management and the essential elements to manage the infrastructure. With the addition of Windows Admin Center in Azure, we have supplemented this great management experience with additional opportunities such as an enhanced view of virtual machine usage, performance monitoring, viewing of events, and much more. Also, it is pretty much easy to install the Windows Admin Center extender package on Azure Windows VMs and can manage the resources instantly.
Follow our Twitter and Facebook feeds for new releases, updates, insightful posts and more.