
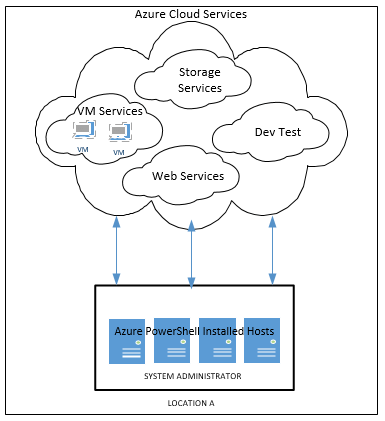
Azure PowerShell is an extension of Windows PowerShell. We had already discussed about Windows PowerShell Direct and it’s utility to System Administrator to Manage and maintain remotely connected Virtual Machines from Host Machine itself. Same way Administrator can now manage and maintain Azure Virtual Machines and Azure Cloud Services from the local Computer using Azure PowerShell.
Azure PowerShell provides a set of cmdlets that are used for Managing Azure resources. This Azure PowerShell cmdlets help the System Administrator to create, install, manage and maintain Azure Virtual machines, Azure resources, and launching Web applications.
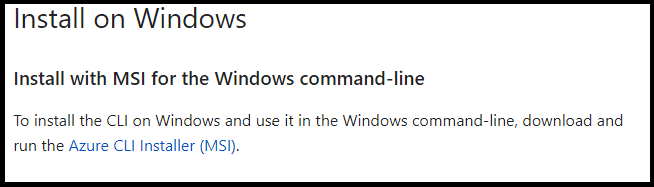
Azure PowerShell cmdlets can be used in your local Machine browser with Azure Cloud Shell, or you can install Azure CLI on your local machine and use it in any PowerShell session. Download and Install Azure CLI installer from Microsoft download page and install it in your local machine.
Azure CLI Installation:

https://azure.microsoft.com/en-us/downloads/
Once CLI installation is completed, you can login to the Azure Machine/Services where you will be able to manage and maintain the Azure Cloud resources. Let us see few Azure powerShell commands in the screen shots below.
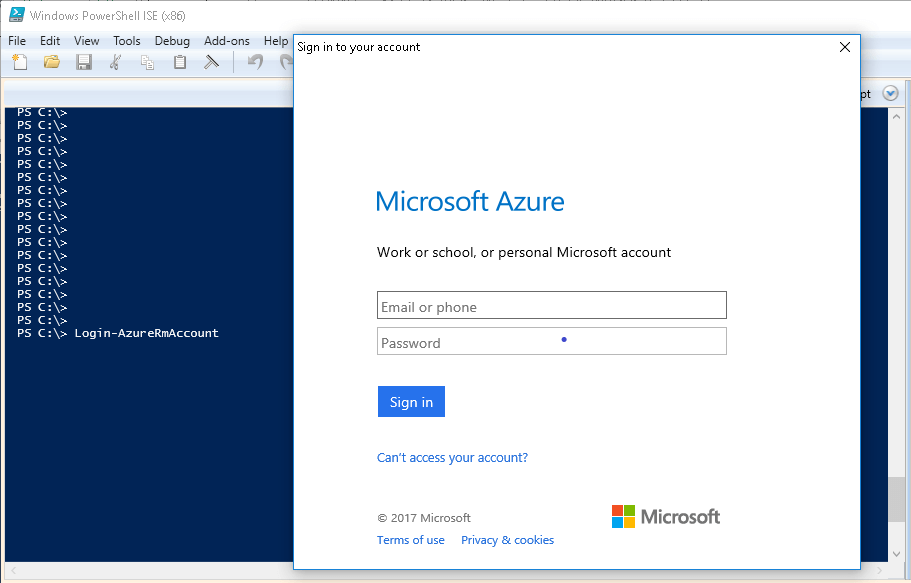
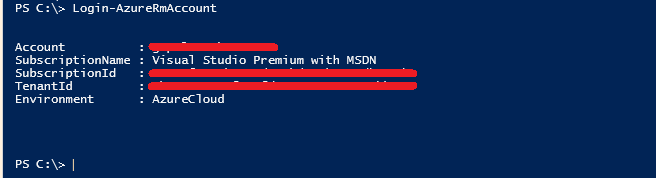
First you login to your Azure account through local machine windows PowerShell. The following command will help you to login to Azure Cloud. Give your credentials and press Enter.
#Login-AzureRmAccount
After providing login details, the verification of the credentials will take place after which your account details will be displayed.
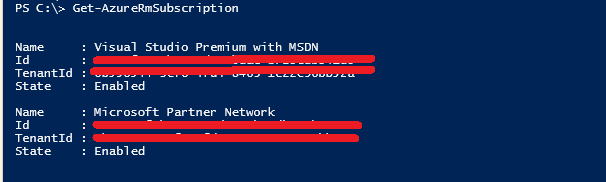
The following command will display your Azure Cloud Subscription details.
#Get-AzureRmSubscription
Following command is used to display PowerShell Version and its installation path:
#PS C:\> Get-Module PowerShellGet -list | Select-Object Name,Version,Path

The command below is used to display the Azure user details.
#PS C:\> Get-AzureRmADUser

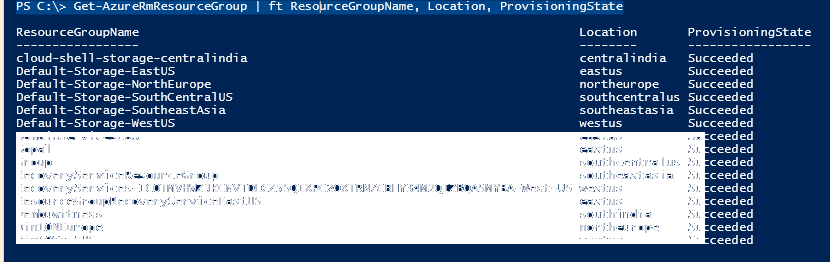
The command shown below gets Azure resource groups in the current subscription.
PS C:\> Get-AzureRmResourceGroup | ft ResourceGroupName, Location, ProvisioningState
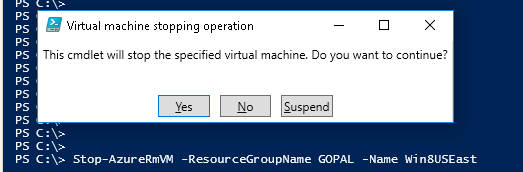
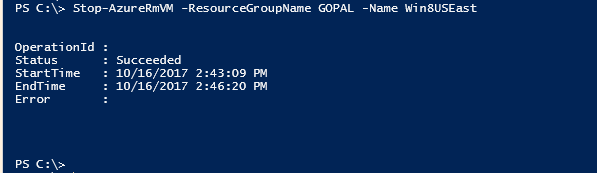
The command shown below helps to stop the Azure Virtual Machines from local computer power shell itself.
#PS C:\> Stop-AzureRmVM -ResourceGroupName GOPAL -Name Win8USEast
Now type the command and press enter after which it will ask for confirmation. Press yes and then continue. To stop the process refer below screenshots.
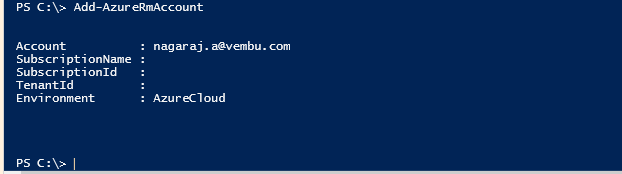
The command below will help to add the Azure account to Windows PowerShell. Once entered the command it will ask you for your login credentials.
#PS C:\> Add-AzureRmAccount
It will check the login credentials. After successful verification, it will be connected to Azure cloud and the login details will be displayed.
Now we are connected to Azure Cloud and you can check the virtual Machine associated with the subscription. After checking the details we can disconnect from the Azure login.
Conclusion:
Microsoft Azure PowerShell is very easy to install, manage, and maintain Azure Virtual Machines from a local computer. These commands used to create configuring cloud services. Later this Blog will be updated with more Azure PowerShell commands.
Experience modern data protection with this latest Vembu BDR Suite v.3.8.0 FREE edition. Try the 30 days free trial here: https://www.bdrsuite.com/vembu-bdr-suite-download/
Got questions? Email us at: vembu-support@vembu.com for answers.
Follow our Twitter and Facebook feeds for new releases, updates, insightful posts and more.