
If you’ve decided to make the move to Azure, that’s a good idea because Azure can help you save time, effort and money. Getting started with Azure can seem to be somewhat complicated but it is not! One of the first task you will have to perform is deploying a new Virtual Machine. Whether you are a developer, Sysadmin or DevOps, deploying Azure Resources can be achieved very simply in many ways such as using:
- Azure portal
- Azure CLI
- Azure PowerShell
You can create Virtual Machines using your own VHDs or by leveraging VHD offerings in the Azure VHD gallery. VHDs for multiple configurations and editions of Microsoft applications such as SharePoint Server, SQL Server and many third-party applications and Windows Server, Linux servers, is provided by Azure. So let’s take a look at how to deploy Azure Virtual Machine.
Azure Portal
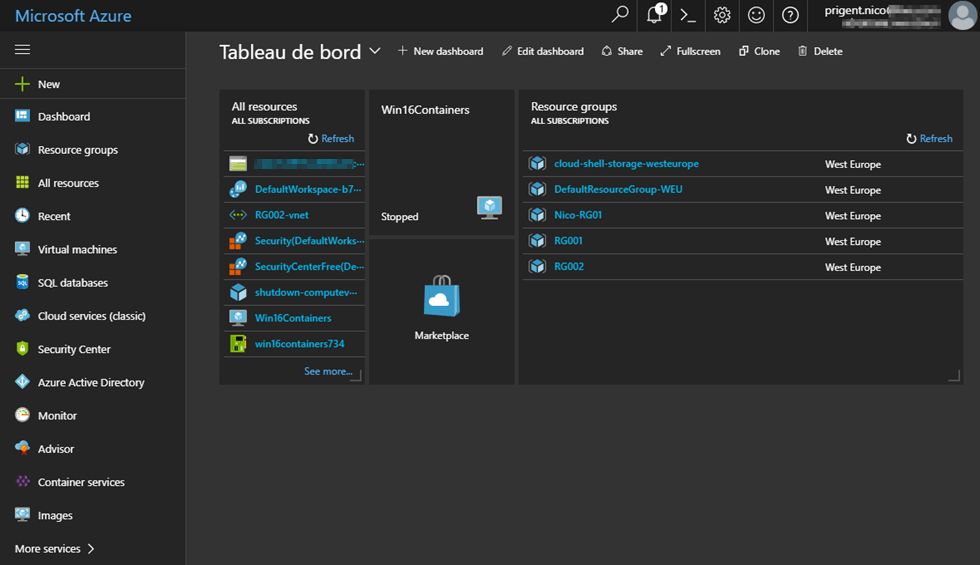
Azure Virtual Machines can be created through the Azure portal. This method provides a browser-based user interface for creating and configuring VM and all related resources. For those who are new with Azure, you must go to https://portal.azure.com. Below is a screenshot of the Azure Portal:

If you are not familiar with or if you don’t have scripting language skills like PowerShell or Azure CLI, then it becomes a problem as anybody who works with Azure must know a scripting language in order to automate tasks. But it’s not required here and you can use the Azure Portal to perform your day-to-day tasks.
Let’s take a look at how to create a Virtual Machine with the GUI. First, select “Virtual Machines” and click “Add”. Now there is a gallery of hundreds preconfigured VMs for everything you can imagine: WordPress, Barracuda, F5, SharePoint, Linux VM and so on. You can also search a specific image, or click “More” in order to display more results.

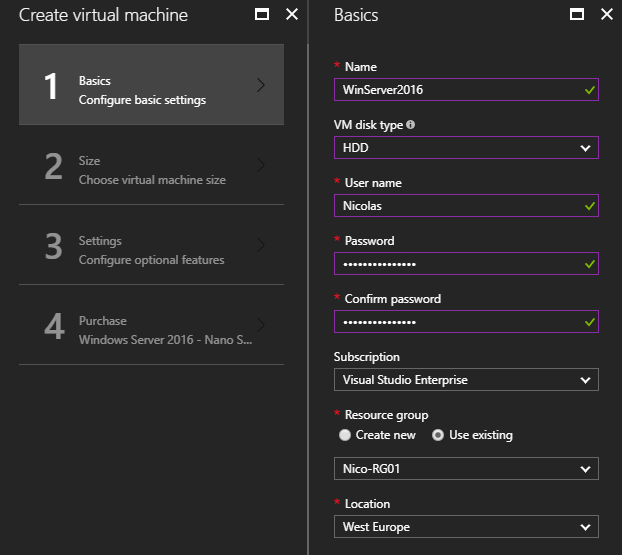
For this article, I will create a simple Windows Server Virtual Machine. After selecting the image, a new panel appears and I have lots of different versions to choose from.

Now, let’s go through the following settings before creating the VM and choose the size of your VM.
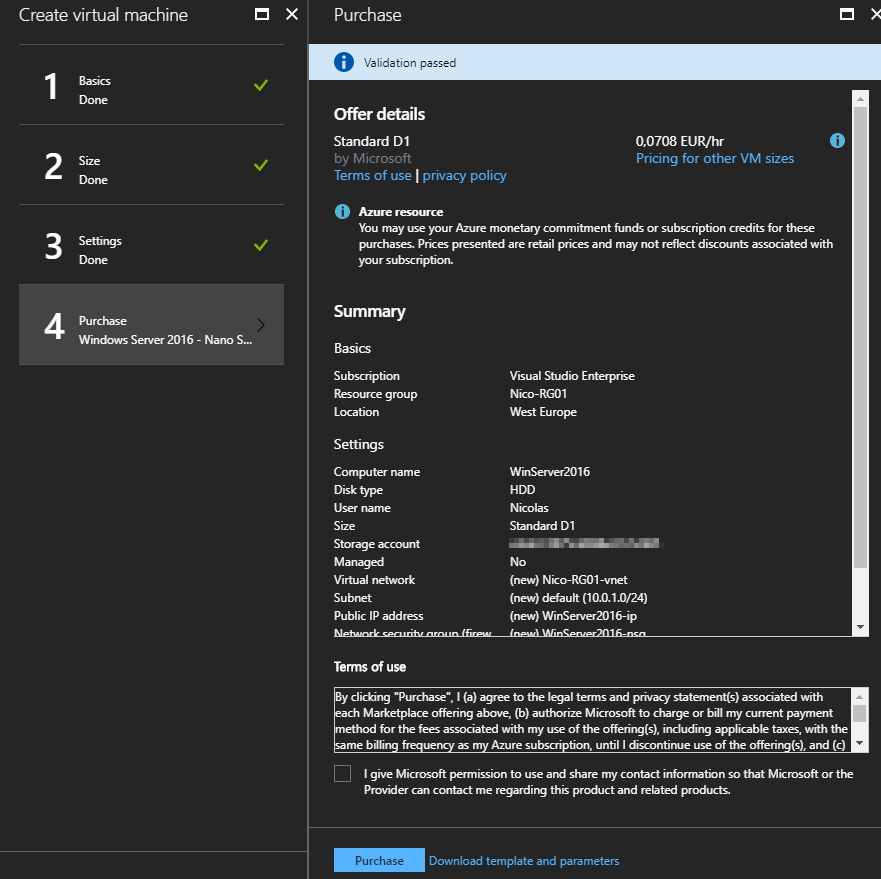
Finally, you will get a summary of the VM that will be created.
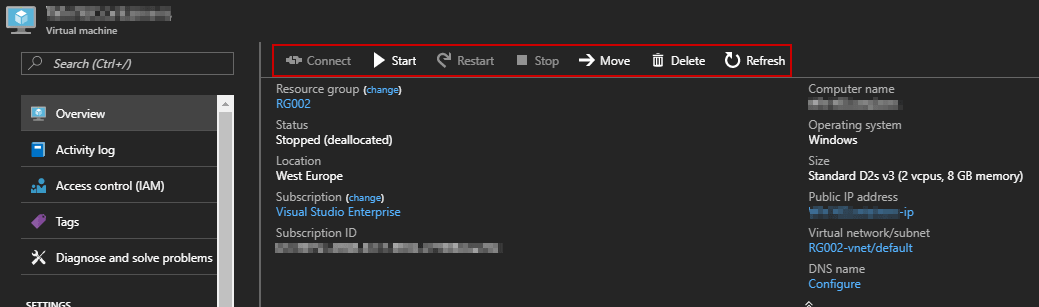
Once you have created, you can manage your VM easily from the Azure Portal:
Azure CLI
As you can see, creating a Virtual Machine in Azure is very easy with the GUI. If you are in a lab/test environment, you can use this method but if you want to deploy multiple VMs every day, you cannot.
That’s the reason why Microsoft introduced the Azure CLI. The Azure CLI is the cross-platform, command-line tool for managing resources in Microsoft Azure. You can install Azure CLI on your workstation by downloading the MSI from: https://aka.ms/InstallAzureCliWindows or just use it from the Azure Cloud Shell. The Azure Cloud Shell is a free Bash shell that you can run directly within the Azure portal. It has the Azure CLI pre-installed and configured to use with your account. Click on the following icon:

Ok, now I will create a Virtual Machine using Azure CLI. Note that Azure CLI commands start with “az”. Let’s see some examples:
Create a simple Ubuntu VM

An RSA key file or key value must be supplied to SSH Key Value. If you don’t have SSH Key, you can use –generate-ssh-keys parameter to let CLI generate one for you.
The following example creates a Windows Server 2016 VM named “myVM”:

More information about “az vm create”: https://docs.microsoft.com/en-us/cli/azure/vm?view=azure-cli-latest#az_vm_create
When the Virtual Machine has been created, you can connect to the VM using the following command with Remote Desktop Session:
mstsc /v:Public IP Address
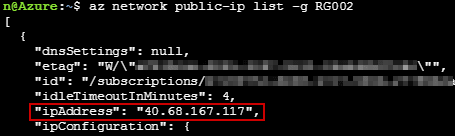
You can list all public IPs in a resource group:
Azure PowerShell
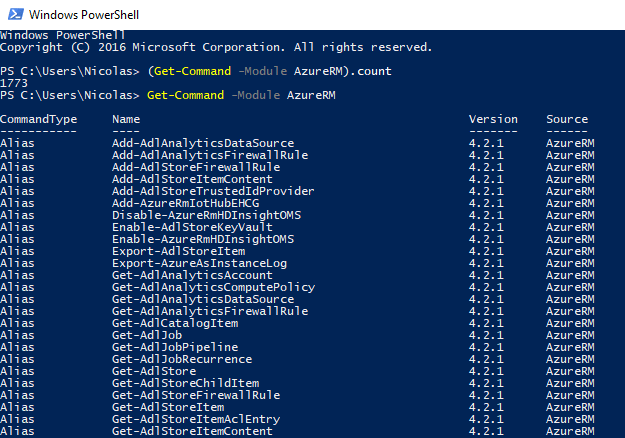
Installing Azure PowerShell can be done from the PowerShell Gallery. Ensure that you have WMF 5.0 installed on your workstation before installing Azure PowerShell.

Wait for few minutes while the modules are downloaded and installed.

Once the module is installed, we run the following command in order to list the commands. There are 1773 commands at your disposal which is great. Most of tasks that you are doing using Azure portal, can be managed using PowerShell as well.
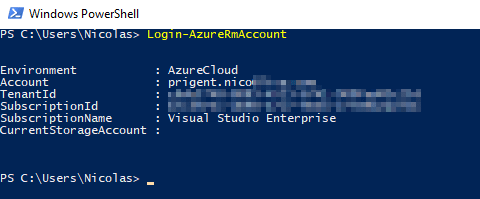
Now, you must login to your Azure subscription using PowerShell. The following command will open a page to enter the account and password. You can see some details about your Azure subscription:
Let’s see if there are some Virtual Machines already deployed in my Azure subscription:

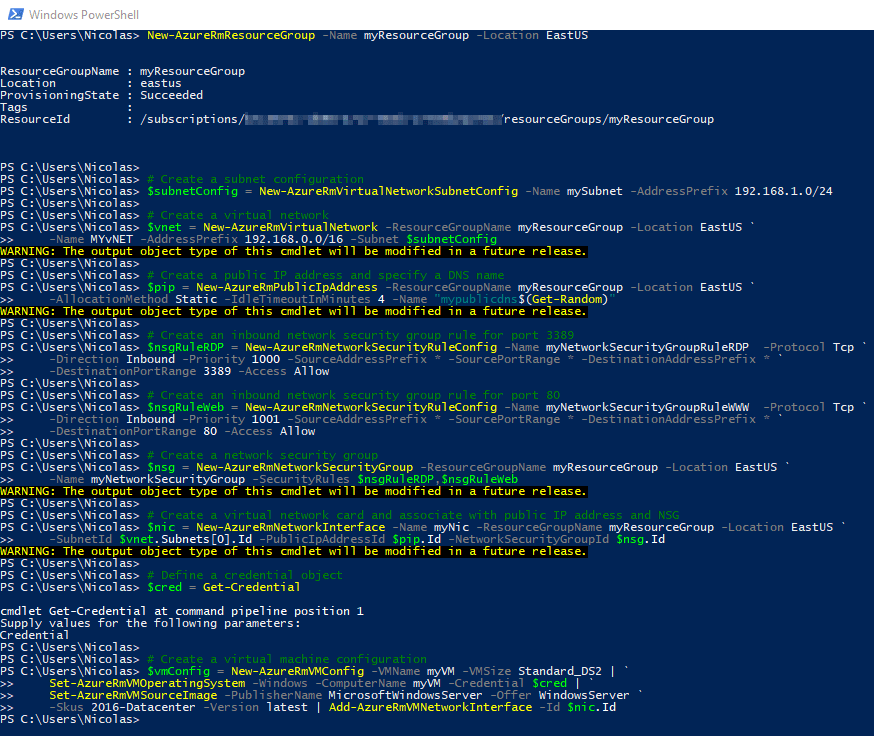
Now, I want to create a new Windows Server 2016 Datacenter VM. Below is the full script with some comments. You can get the following script from this page: https://docs.microsoft.com/fr-fr/azure/virtual-machines/scripts/virtual-machines-windows-powershell-sample-create-vm
Conclusion
Deploying a Virtual Machine in Azure can be performed easily with the GUI, or with Azure CLI / PowerShell if you have some scripting language skills. Command-Line tools can help you to save time and efforts in order to automate your tasks.
Follow our Twitter and Facebook feeds for new releases, updates, insightful posts and more.