
Backing up all your ESXi(s) of your business critical data centers are always important. This blog will help you learn on how to configure backup for any vm machine that is running on a free ESXi host. Begin with installing the Vembu BDR Suite v3.8.0 on any one of your servers.
Vembu BDR Suite v3.8.0 works fine even after the trial period and does not require license purchase. To be able to configure backup for a free ESXi server, you’ve got to install the Vembu Image backup agent in your virtual machine. There are two choices to configure free ESXi backups. Configuring backups for the ESXi using Vembu BDR Server, does not require an agent to be installed on the virtual machine to be backed up. But you will be able to configure backup jobs only for machines that run using Windows Servers. Thus running backups by physically installing an agent on the machine that should be backed up using Vembu ImageBackup is always useful since you will be able configure backups for servers that using Windows, or other operating systems as well.
Now let’s get started to know on how to backup an ESXi server as free without any license requirement using Vembu ImageBackup Client.
Summary of ESXi server free backup
- Download Vembu BDR Suite
- Supported platforms for Vembu ImageBackup
- ESXi supporting platforms for Vembu ImageBackup
- How to download Vembu ImageBackup?
- How to Backup ESXi server using Vembu ImageBackup?
- How to Restore a virtual machine from Vembu BDR server?
- How to mount restored virtual machine?
Follow the steps to learn more on its configuration procedure.

1. Download Vembu BDR Suite
Use this link to download Vembu BDR
https://www.bdrsuite.com/vembu-bdr-suite-download/
Verify this link to install Vembu BDR Suite
https://www.bdrsuite.com/guide/evaluators-guide-for-vmware-backup/getting-started.html?SupportedPlatform1.html
Make sure your server fulfills the below requirements.
2.Vembu ImageBackup Supported platforms
- Windows server 2016
- Windows Server 2012 R2
- Windows Server 2012
- Windows Server 2008 R2
- Windows Server 2008
- Windows Server 2003 R2
- Windows 10/8.1/8/7
- Windows Vista and Windows XP
3. ESXi supporting platforms for Vembu ImageBackup
- VMware ESXi 6.5
- VMware ESXi 6.0
- VMware ESXi 5.5
- VMware ESXi 5.0
- VMware ESXi 4.5
- VMware ESXi 4.0
4. How to download Vembu ImageBackup?
Click this link to download the Vembu ImageBackup client
https://www.bdrsuite.com/vembu-bdr-suite-download/
Refer this User guidelines link on Vembu ImageBackup
https://www.bdrsuite.com/guide/vembu-imagebackup-user-guide/getting-started.html
5. How to Backup Esxi server using Vembu ImageBackup?
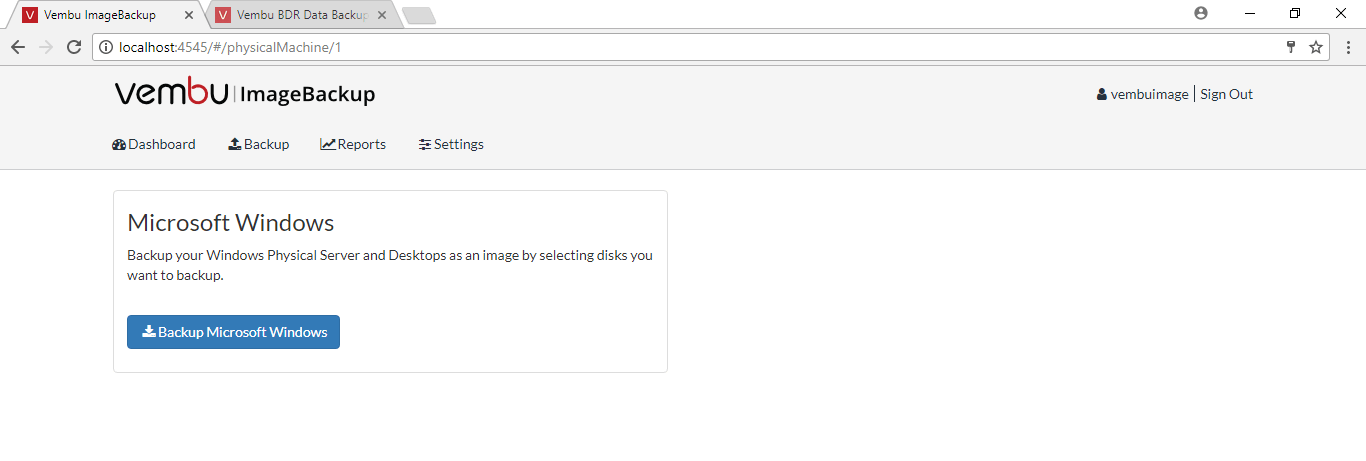
- Login Vembu ImageBackup
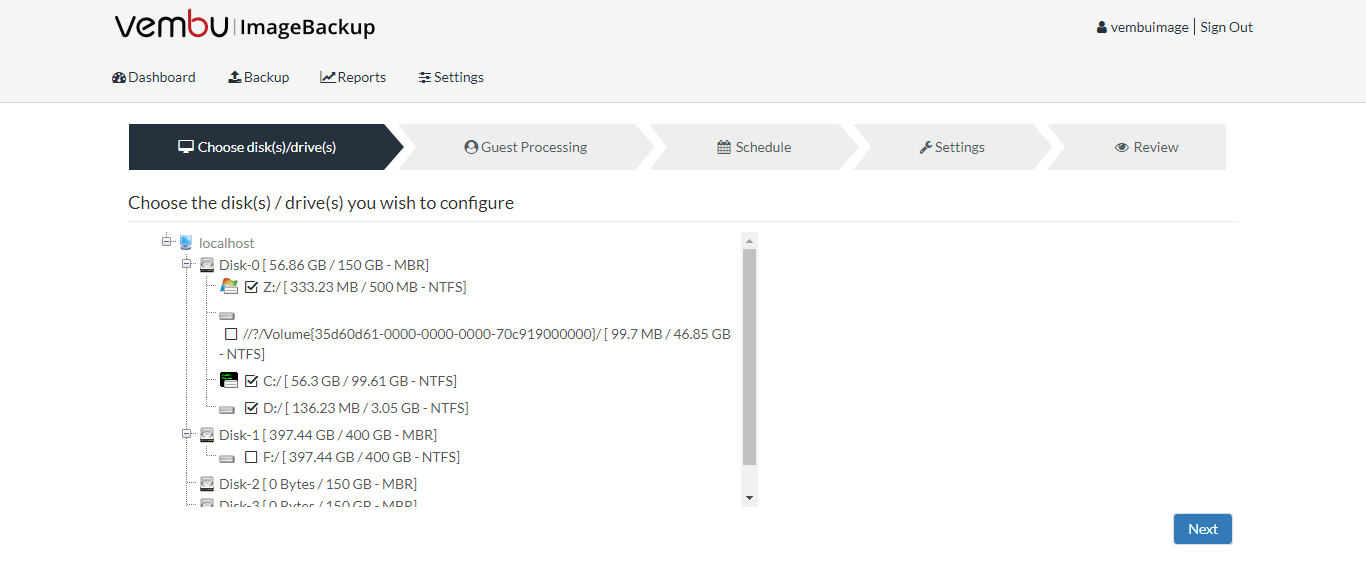
- Choose Backup->Microsoft windows->Choose Disk/ Drive which you wish to configure and click next
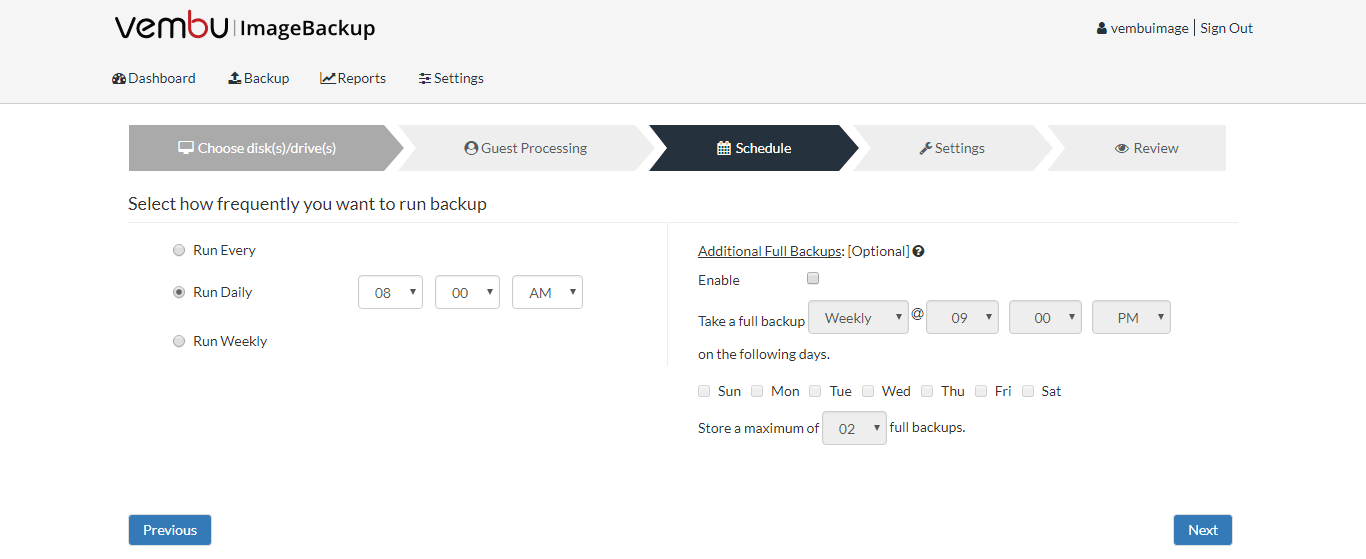
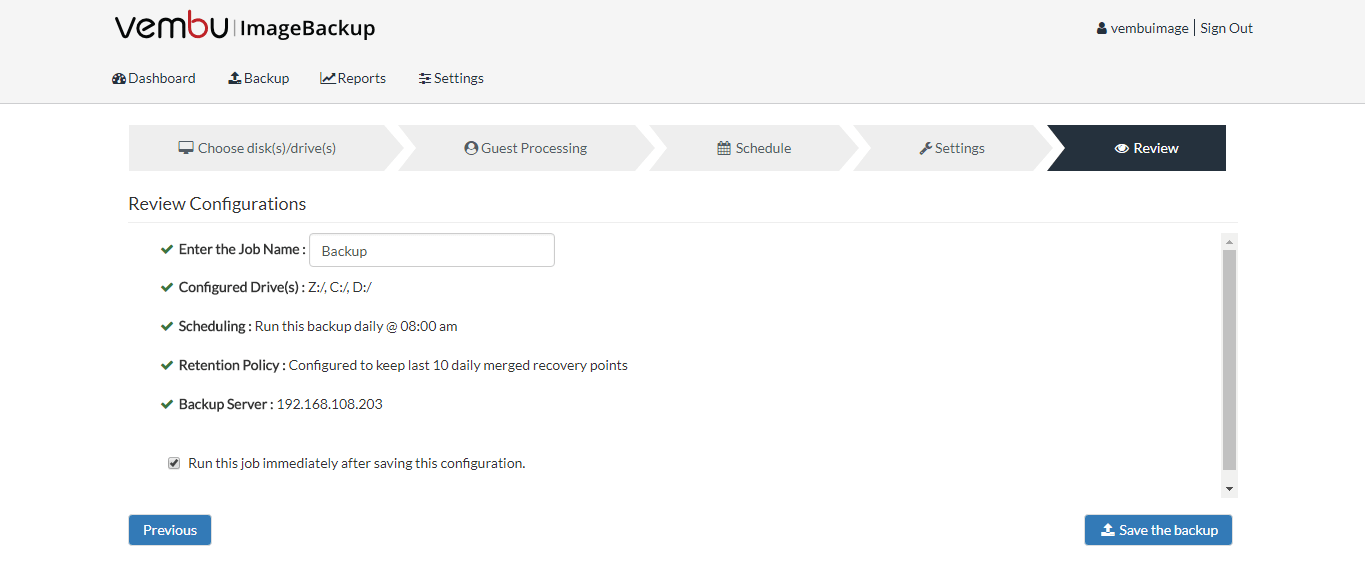
Configure Scheduling
User can configure their backup schedule based on their requirement. Here, user can choose their backup schedule as Run Every/Daily/Weekly.
Run Every– Once full backup is completed, it will run incremental backup as per user schedule
Run Daily– This option will run incremental backup once in a day
Run Weekly– This option will run incremental backup once in a week. Users can select the week’s day and time on which the incremental backup should run.
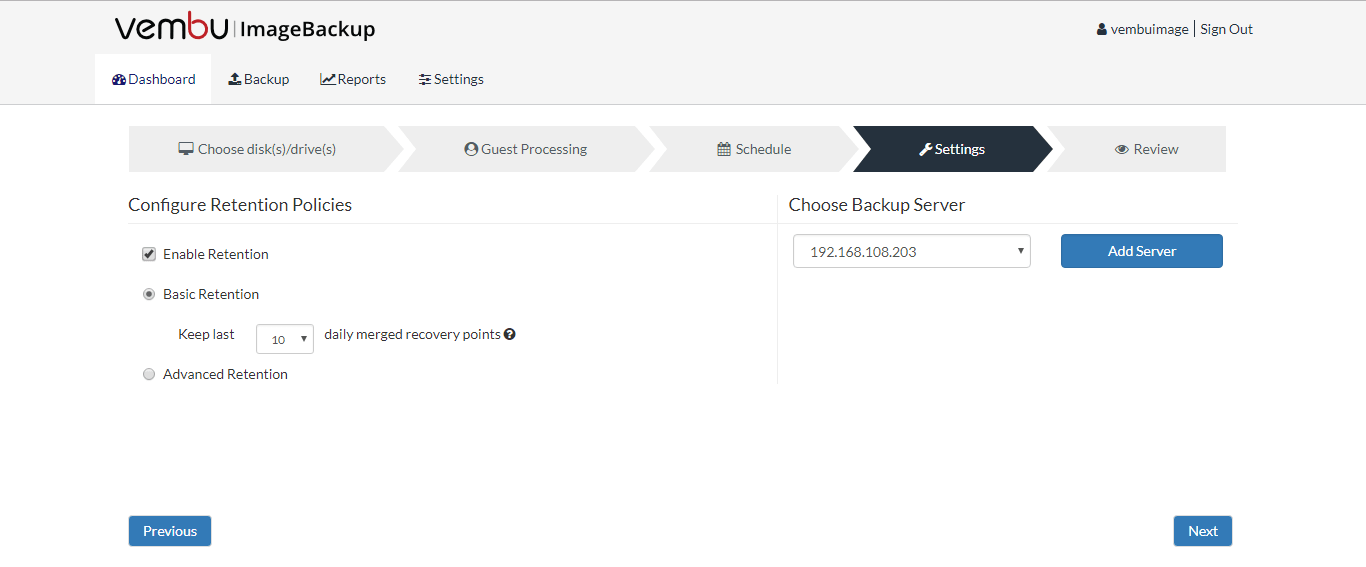
Configuring Retention Policy
Vembu VMBackup provides forever incremental backup, where a user can have ‘n’ number of incrementals. When retention count reaches the limit, old incrementals are automatically purged to the latest incremental as per the user’s configuration.
Review your backup configuration settings once and save the backup
After configuring the backup job, Vembu ImageBackup launches Microsoft VSS to take snapshot of the selected disks or full machine. Then, it transfers the blocks containing data to the Vembu BDR backup server. Blocks will be compressed and encrypted before it leaving from the source machine and also backup data will be further compressed before storing it in the storage repositories. Vembu ImageBackup agent installs a driver to track changes after full backup schedule. As per incremental scheduling frequency, modifications will also be transferred to the storage repositories.
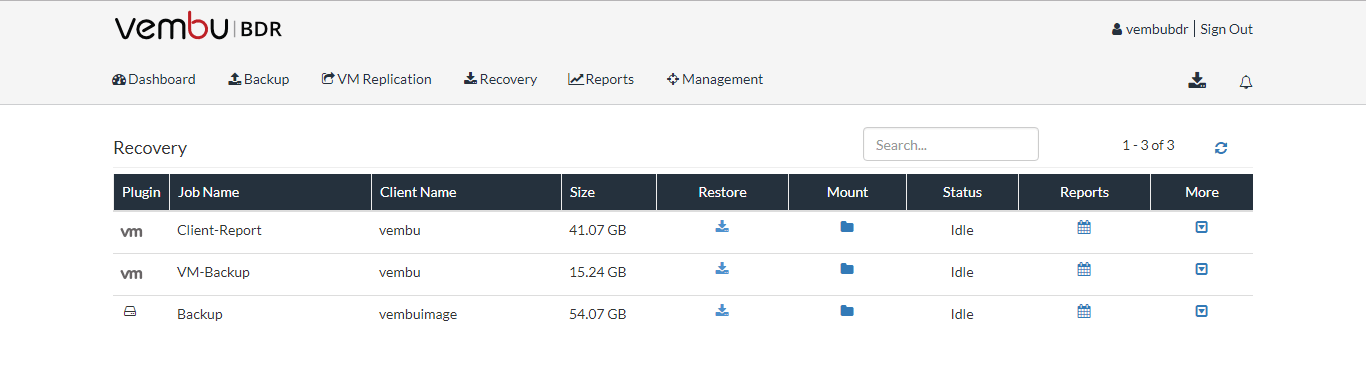
6. How to Restore a virtual machine from Vembu BDR Server?
- Login Vembu BDR server
- Goto Recovery -> Choose the backup job to perform restore
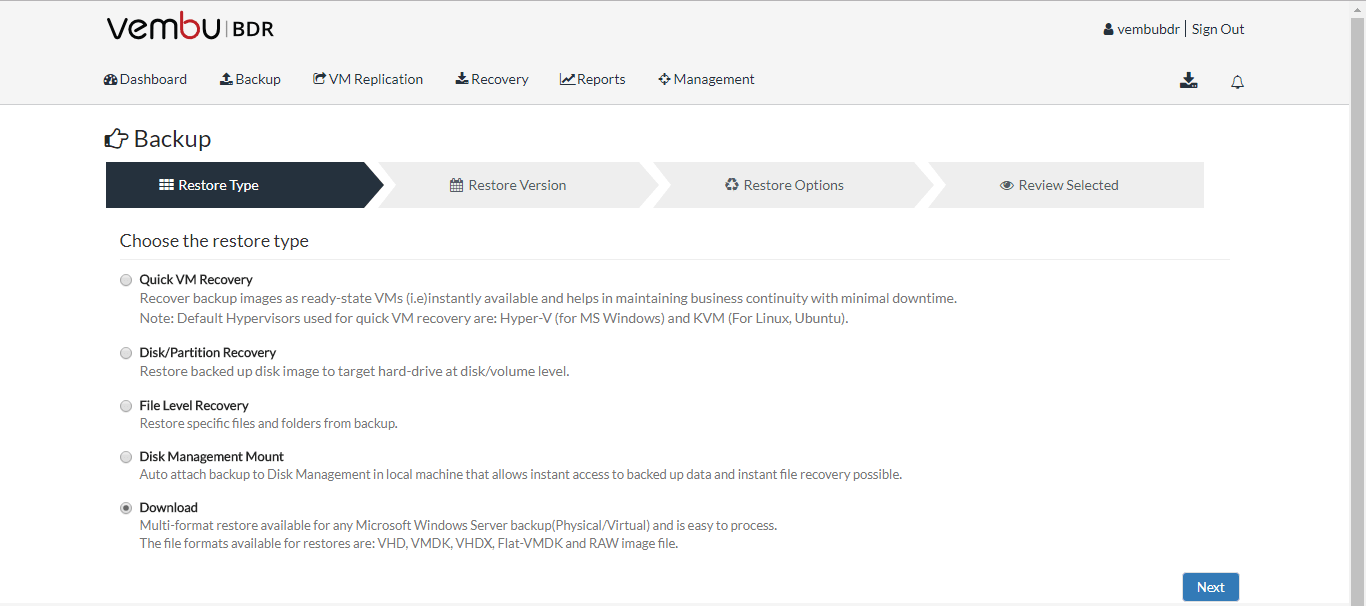
- Choose any one of the recovery options and proceed to click restore
- Quick VM Recovery – This option helps to instantly restore the backed up virtual machine
- Disk/Partition recovery – This option helps you to restore backed up machines at Disk/Partition level
- File Level Recovery – This option helps you to restore your individual files and folders present in the Virtual machine
- Disk Management Mount-This option lets you instantly attach backed up data virtually to the Vembu virtual drive as a VHD/VHDX file and proceed with restore process
- Download – This option is preferred, when a user wants to download the backed up VM in any one of the different file formats- VHD, VMDK, VHDX, VMDK-Flat and RAW to recover the VM on a different hypervisor
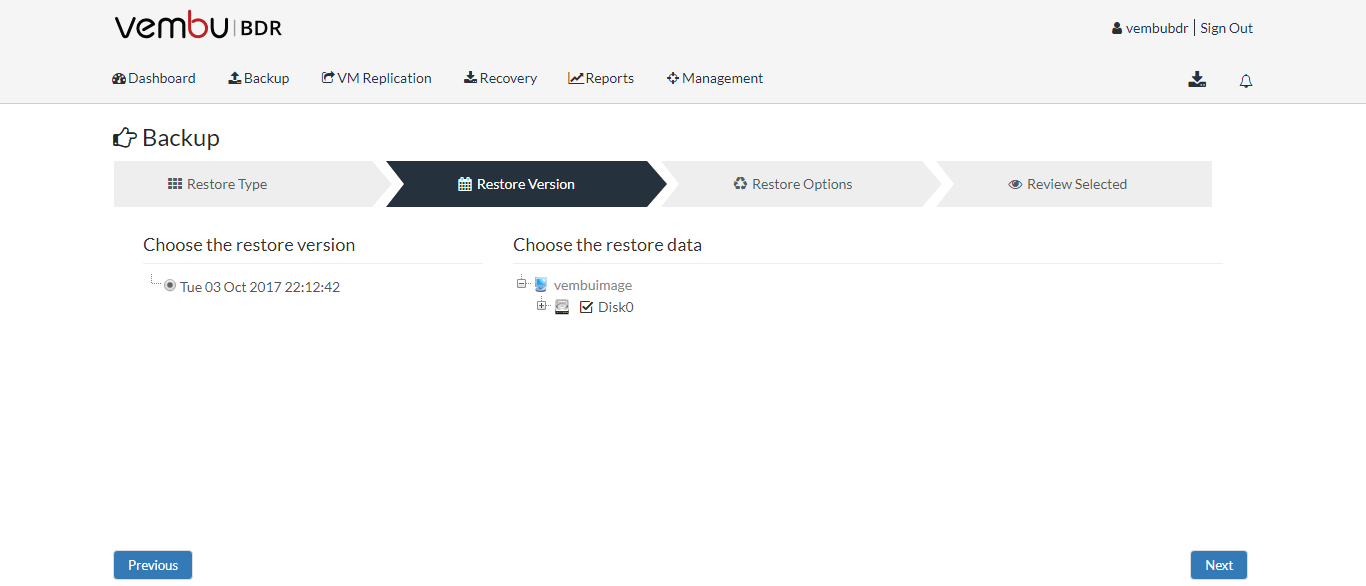
- Choose the restore version and click next
- Choose the restore location and Virtual Disk format and click next
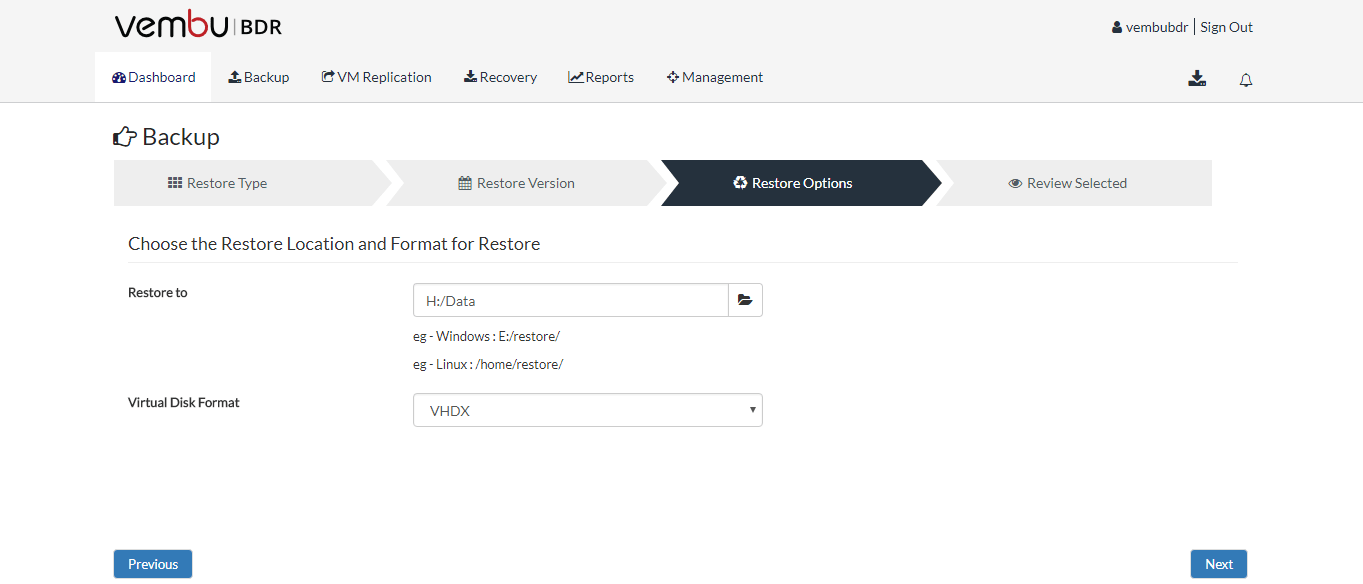
Here, we’ve to select the virtual disk format as VHDX. This VHDX file format stored in a specific path will create a new virtual machine in Hyper-V manager and mount your backup job in the existing hard disk.
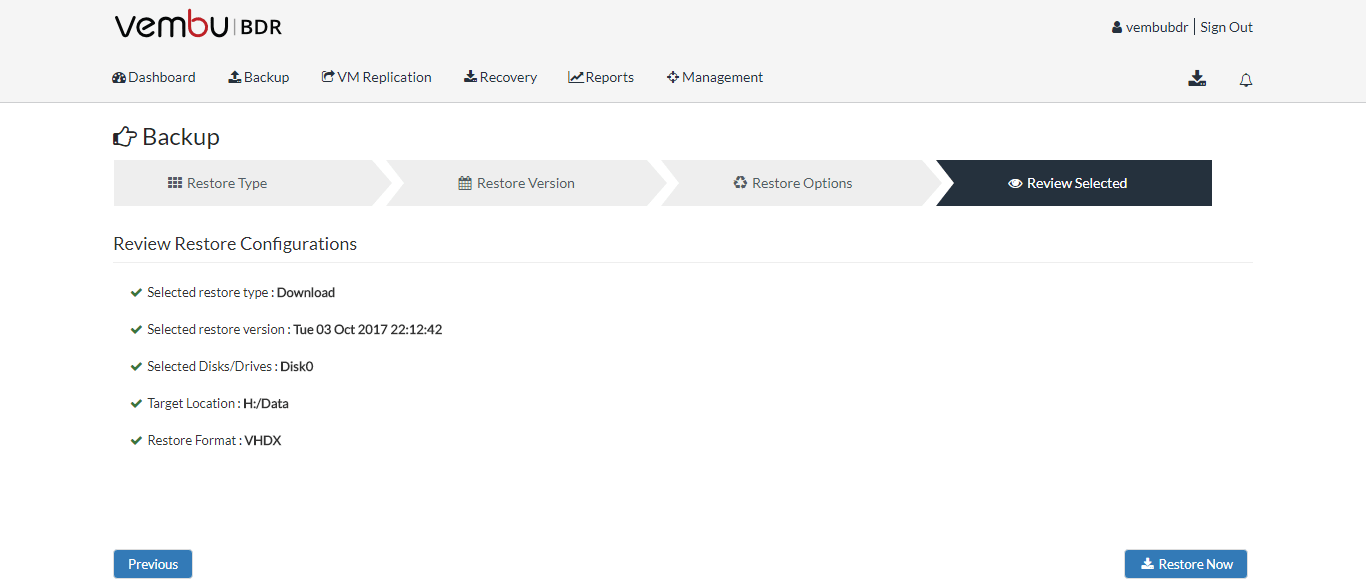
- Review your configuration settings once and click the Restore now option
- Restore is now successfully completed in the specific path

7. How to mount restored virtual machine?
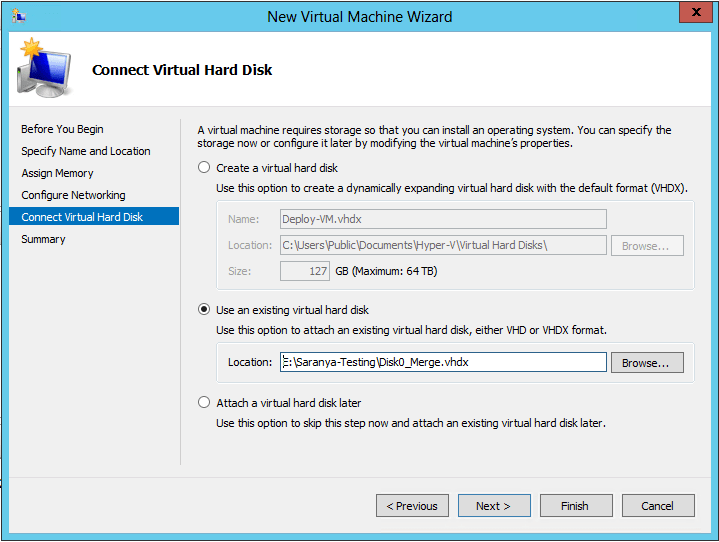
- Open Hyper-V Manager
- Create a new virtual machine
- Choose the option “Use an existing virtual hard disk” and browse restored hard disk from specific path and click next
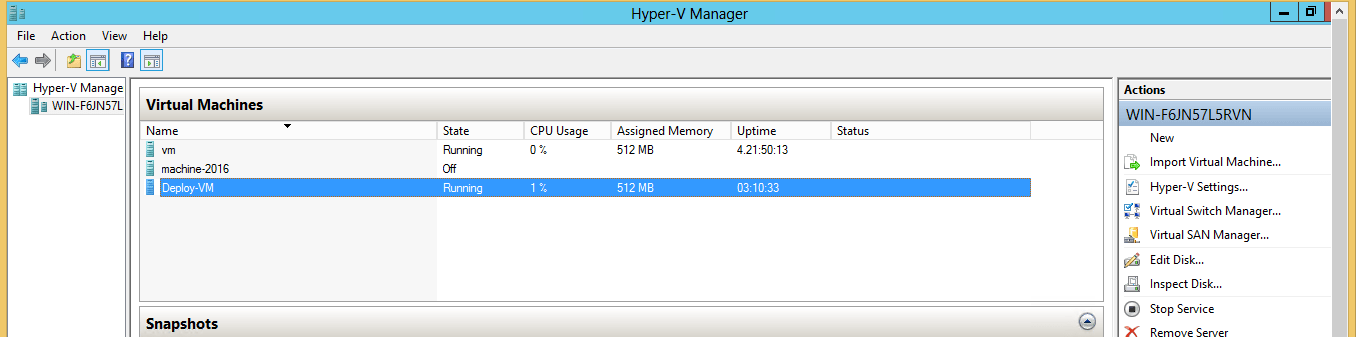
- Restored hard disk successfully is now mounted in new virtual machine
- Now virtual machine is ready to use
Conclusion
Thus configuring backups and restores for free ESXi is now easy with the Vembu ImageBackup client as it does not require any license key. It can backup the entire system or specific Disk/Drives to an on-site server or to the cloud. So user can configure backups for their data at anytime and anywhere. Moreover, you can configure restores on a entirely different hypervisor as well.
Got questions? Email us at: vembu-support@vembu.com for answers.
Follow our Twitter and Facebook feeds for new releases, updates, insightful posts and more.