
In the first part of the post – VMware NSX Deployment, we looked at What is VMware NSX, its components and working along with the use cases.
In this second part, we’ll look at the step-by-step process involved in deploying a VMware NSX-V:
- Installing NSX Manager
- Deploying NSX Controllers
- ESXi Host Preparation
- Deploying VXLAN
- Setting up transport zones
Table of Contents
- Installing the VMware NSX Manager
- Install NSX Controller
- NSX Host Preparation
- Configure NSX VXLAN
- Configuring an NSX Transport Zone
- Final Thoughts
Installing the VMware NSX Manager
The first component of VMware NSX that you will install in your environment is the NSX Manager. The NSX Manager with NSX-V integrates with the VMware vCenter Server in your environment to provide cohesive solution for virtualized networks in your vSphere environment.
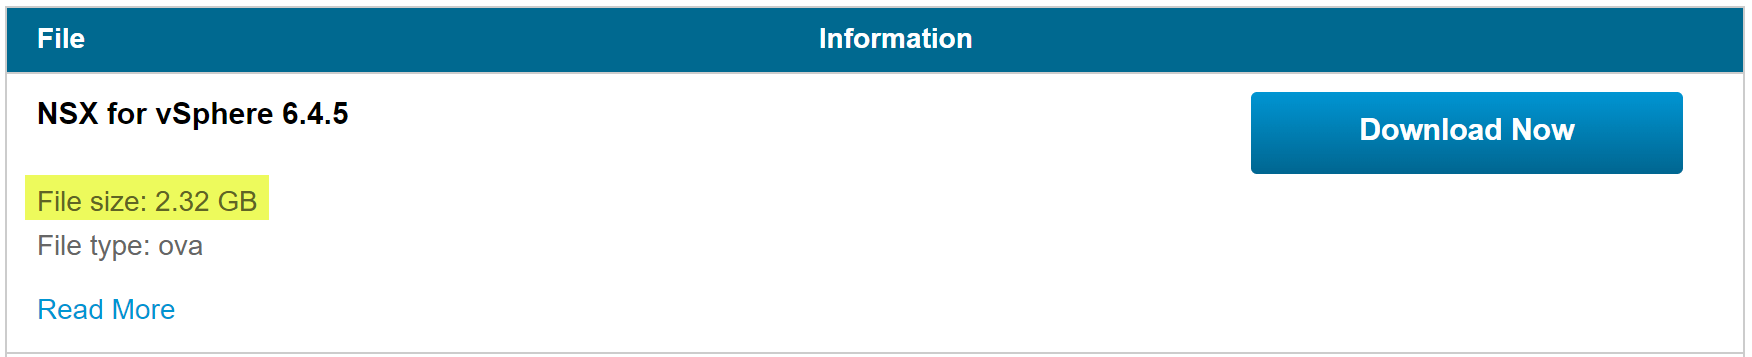
Download the VMware NSX Manager appliance from VMware. This will be an OVA file found in your “My VMware” portal site.

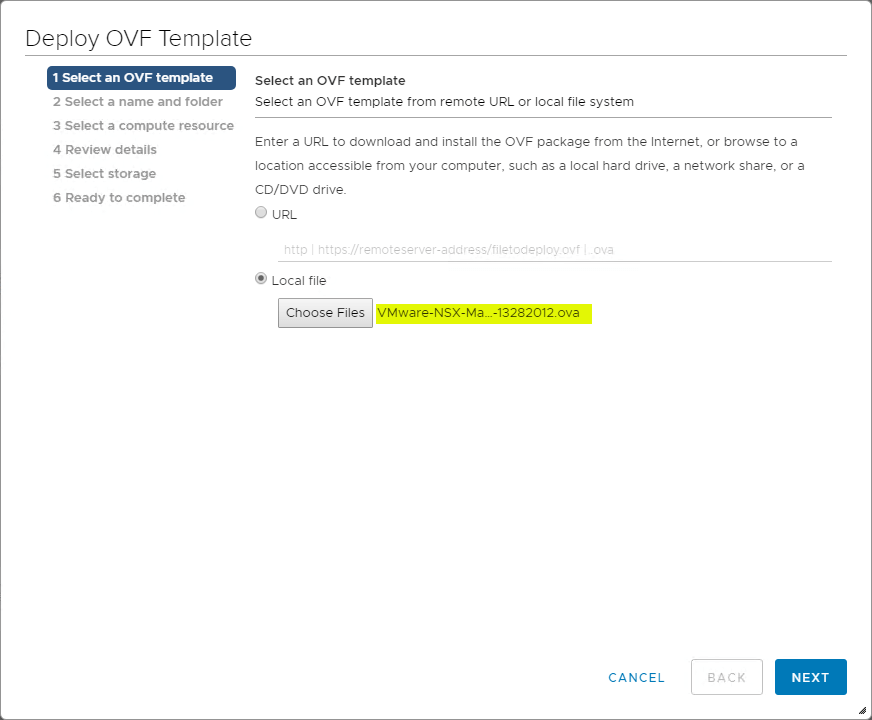
The OVA deployment process for the NSX Manager Appliance is straightforward and in line with a normal OVA deployment process. There is only a slight bit of configuration to do during the NSX Manager OVA deployment process.
In the first screen, choose your downloaded OVA appliance file.
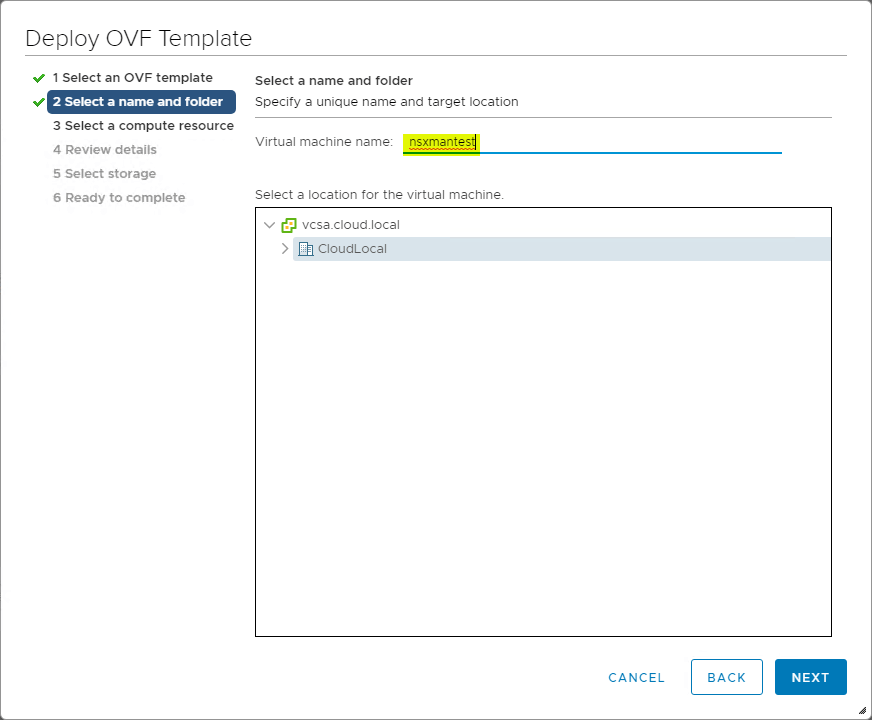
The next step is to select a name and folder for the deployed VMware NSX Manager.
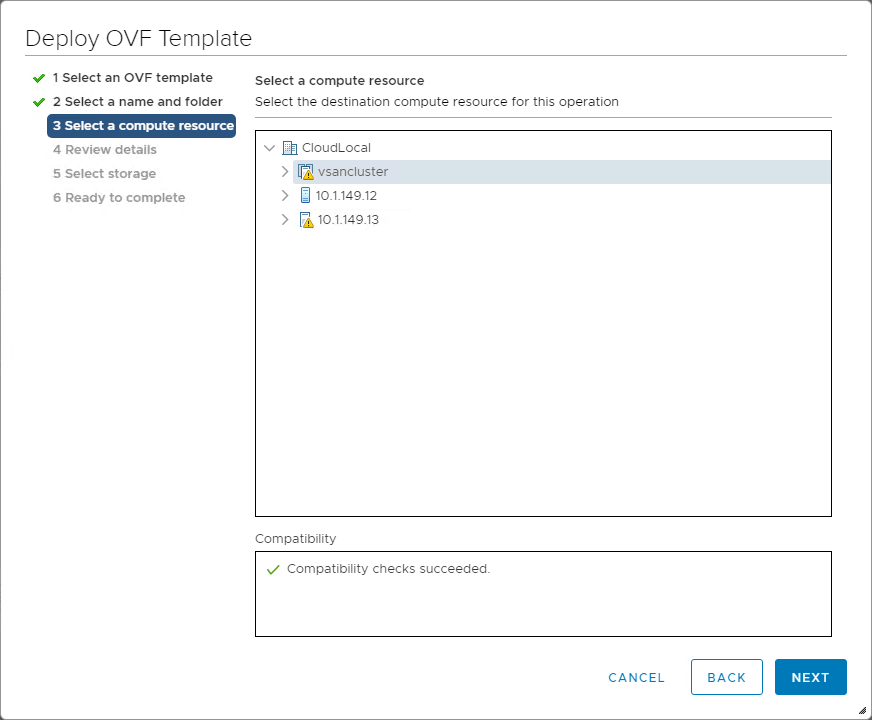
Select your compute resource for running the NSX Manager appliance.
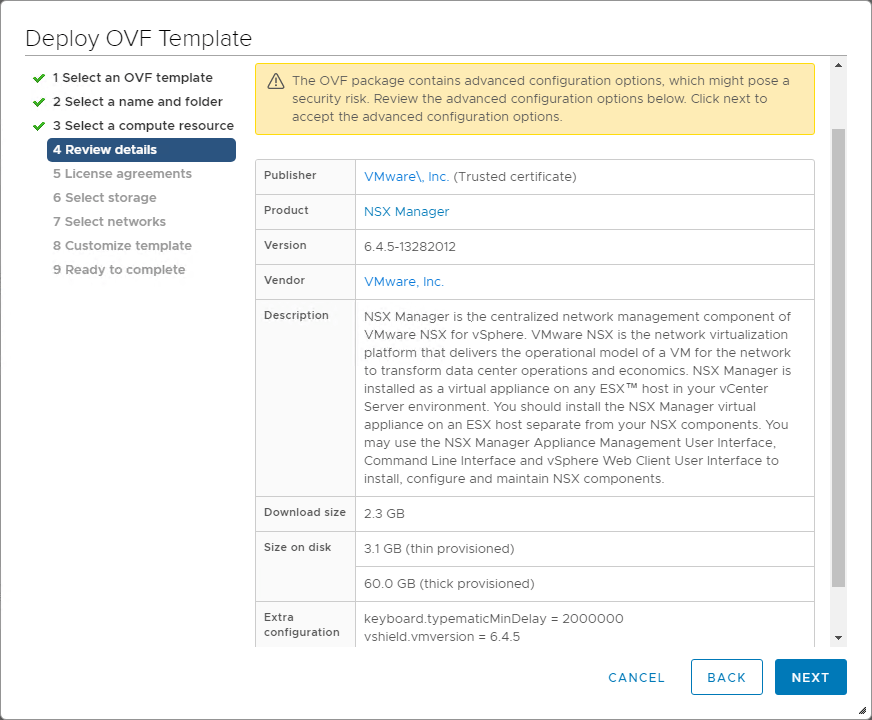
The next page is a Review details screen that has you review the details of the initial OVA appliance deployment.
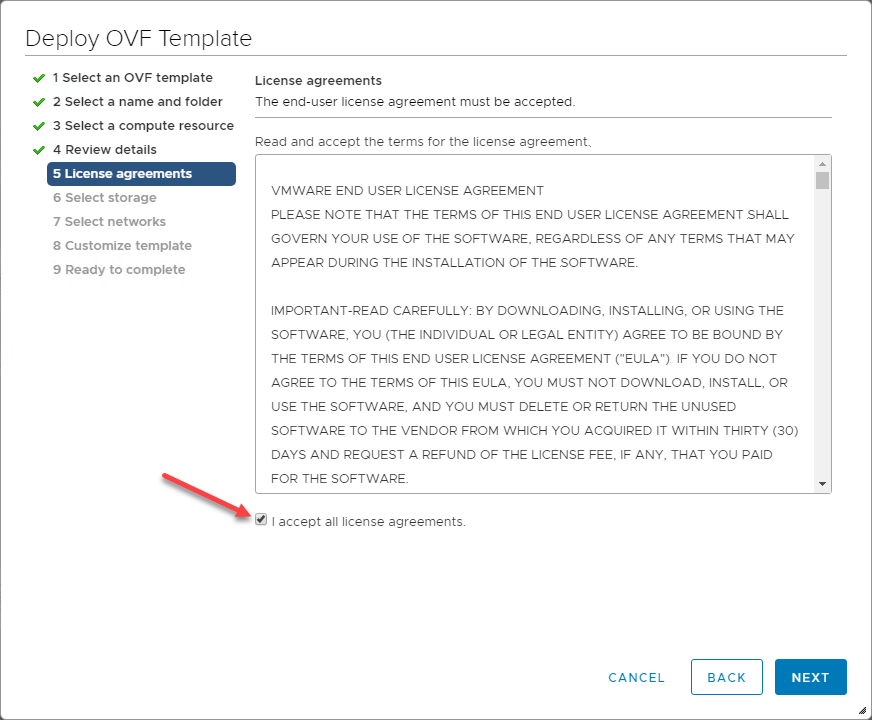
Review and agree to the License agreement by placing a checkbox in the I accept all license agreements.
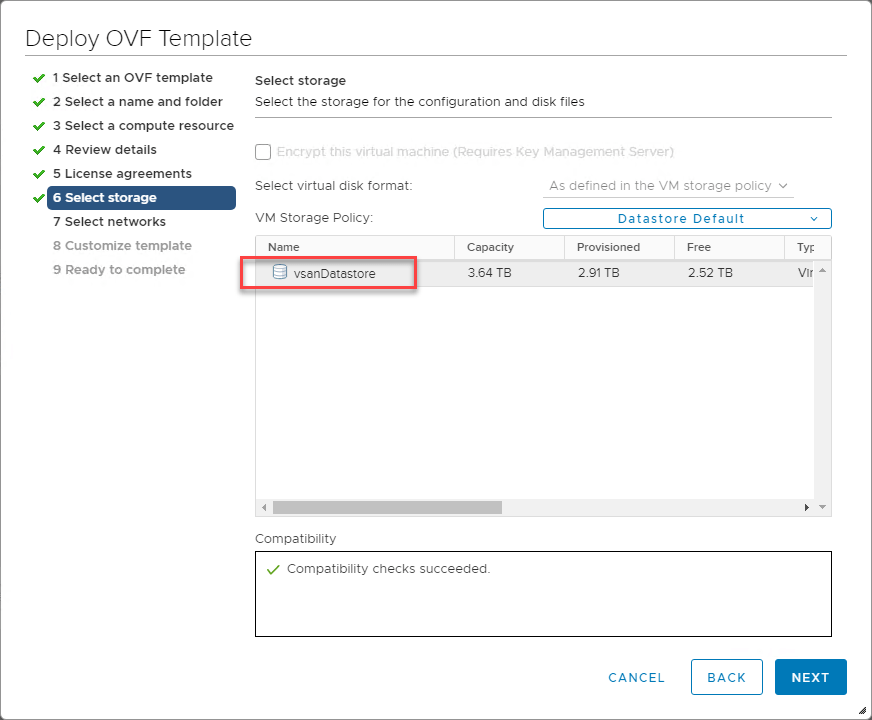
Select your storage for the NSX OVA appliance deployment.
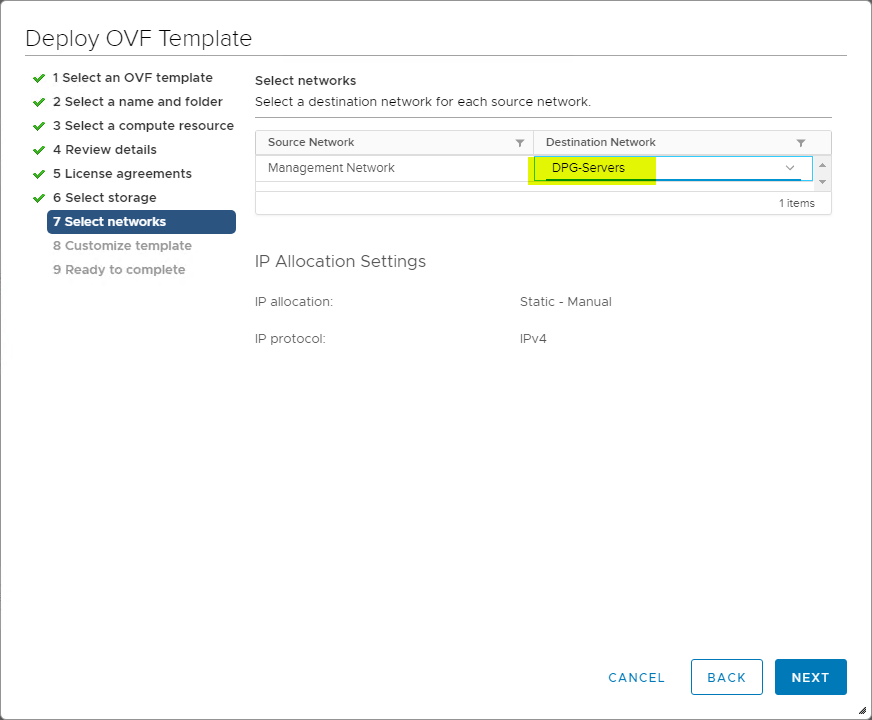
Next, select the network you want to connect your NSX Manager to for the management interface. This will provide the access you need to navigate to the management page of the NSX Manager to configure integration with vCenter Server.
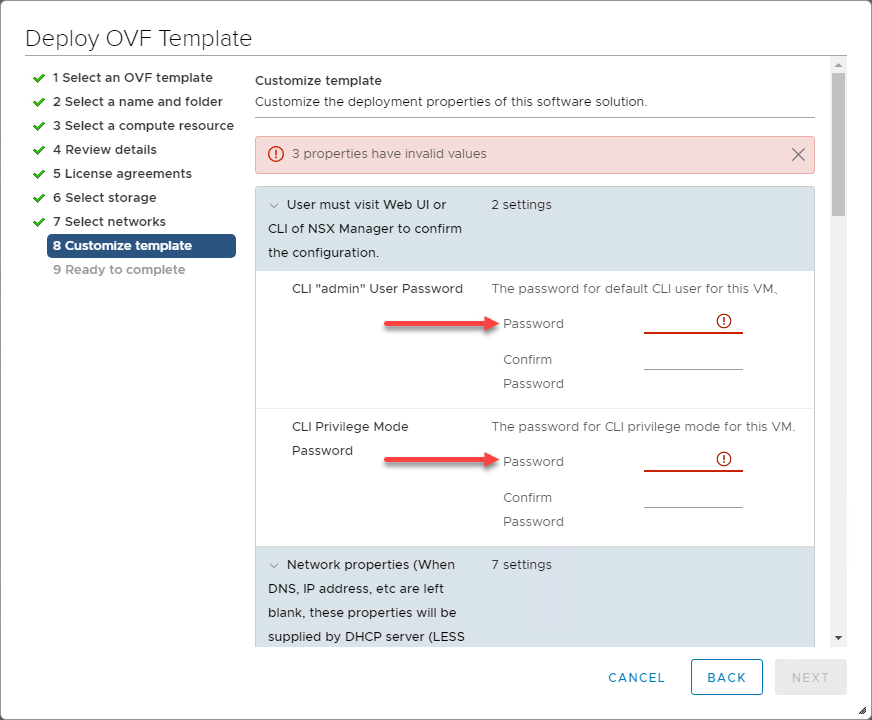
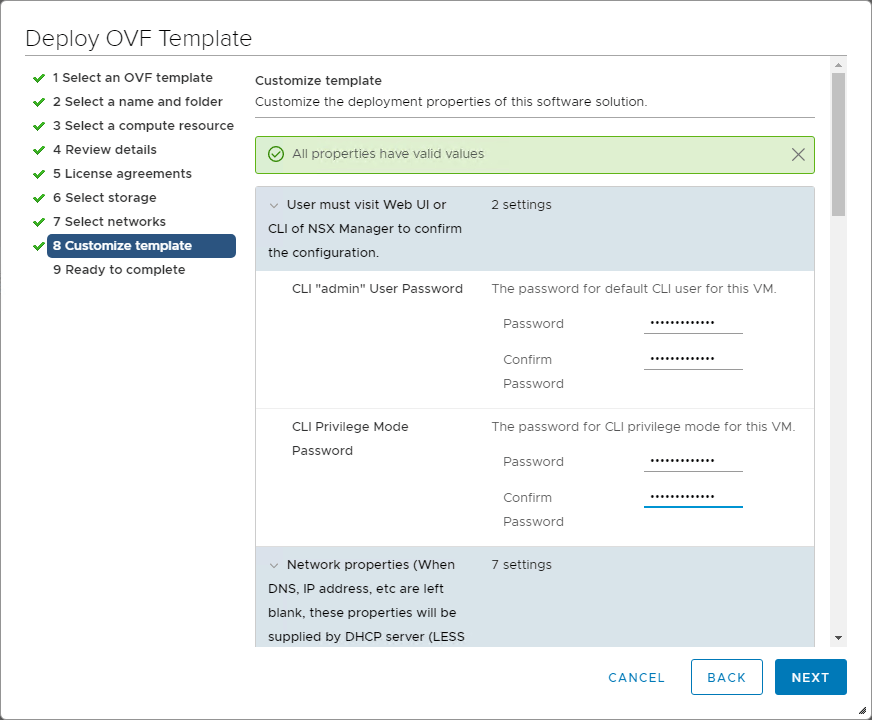
One the Customize Template screen, you need to fill in the following information:
- CLI Admin User Password
- CLI Privilege Mode Password
- Hostname
- Network 1 IPv4 Address
- Network 1 IPv6 (if using IPv6)
- Network 1 Netmask
- Default IPv4 Gateway
- DNS Server list
- Domain Search List
- NTP Server List
- Enable SSH
- Join the VMware CEIP
After finishing the configuration of the required variables you need to populate such as passwords, etc, you should see the message that All properties have valid values and click Next.
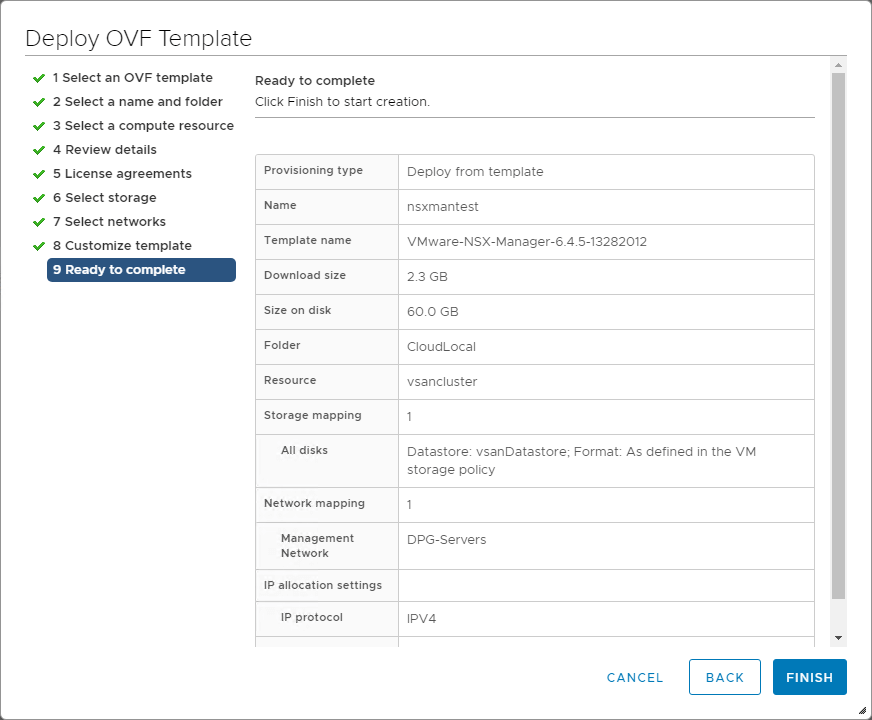
Finally, you are Ready to complete the OVA deployment wizard for the NSX Manager appliance.
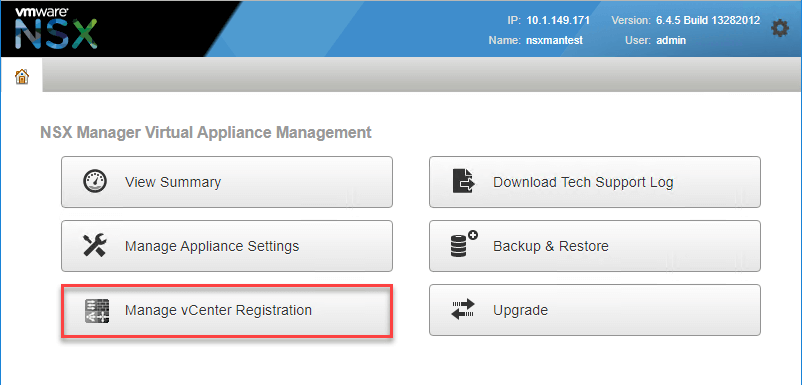
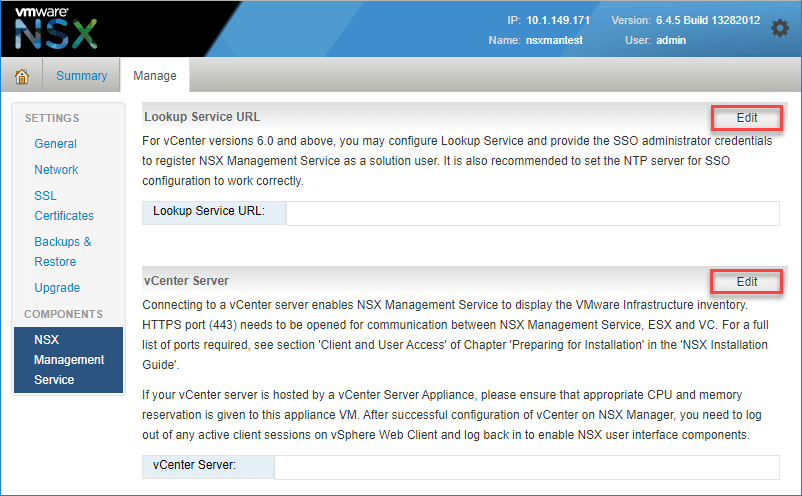
Once the NSX Manager appliance has finished deploying, power on the appliance and wait for the appliance to boot and services to start. After a few minutes, you should be able to browse to the web interface of the NSX Manager appliance. After logging in with the password configured during the appliance deployment, click the Manage vCenter Registration button.
There are two configuration settings you need to populate for connecting the NSX Manager appliance to the vCenter Server in your vSphere environment – Lookup Service URL and vCenter Server. For most environments, this will be your vCenter Server with the integrated Platform Services Controller.
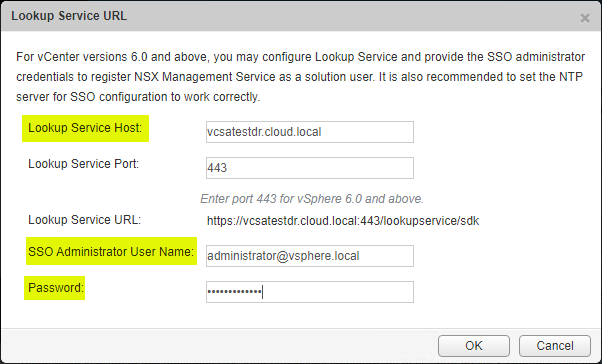
For the Lookup Service URL, populate the Lookup Service Host with your vCenter Server name and the SSO administrator credentials and password.
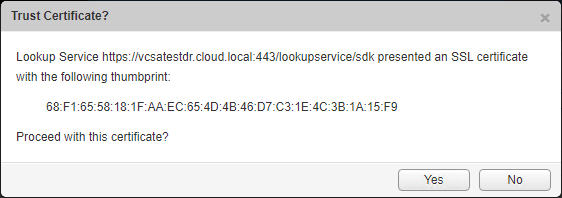
You will be prompted to accept and trust and accept the certificate presented by your vCenter Server.
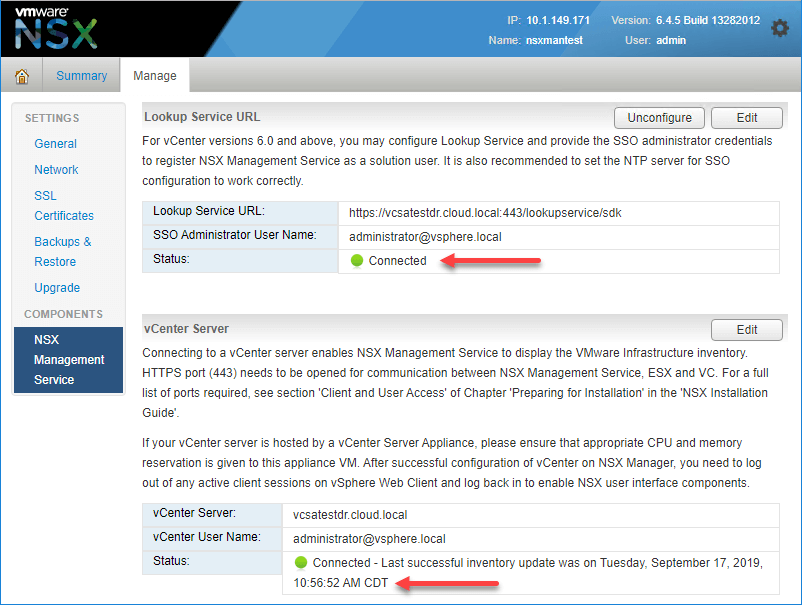
After populating both the Lookup Service URL and the vCenter Server with the vCenter Server host, you should see the status for both showing as Connected.
Now that the NSX Manager appliance is tied to your vCenter Server, the NSX components are integrated into your vSphere Client. You most likely will need to logout and log back into your vSphere Client to see the new Networking and Security menu. You may even see a ribbon at the top of the vSphere Client directing you to do so.
Now that we have access to the Networking and Security menu, we can continue with the NSX installation in the environment by deploying NSX Controllers into the environment.
Install NSX Controller
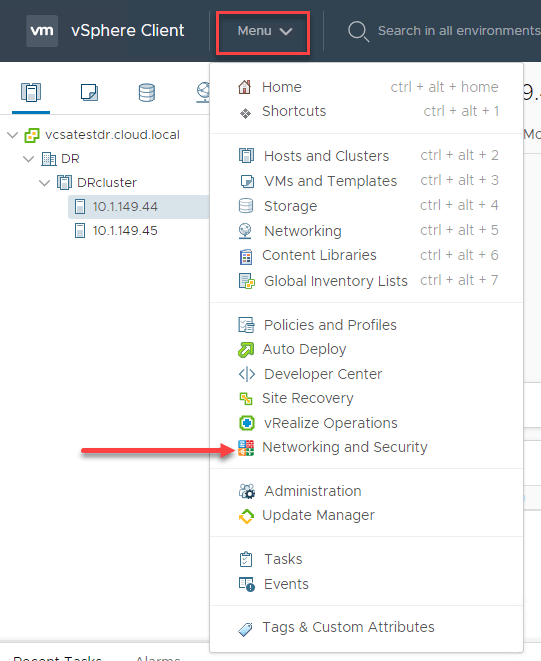
The next step after deploying the NSX Manager is installing NSX Controllers in the environment. First, navigate to the Networking and Security menu under the Menu.
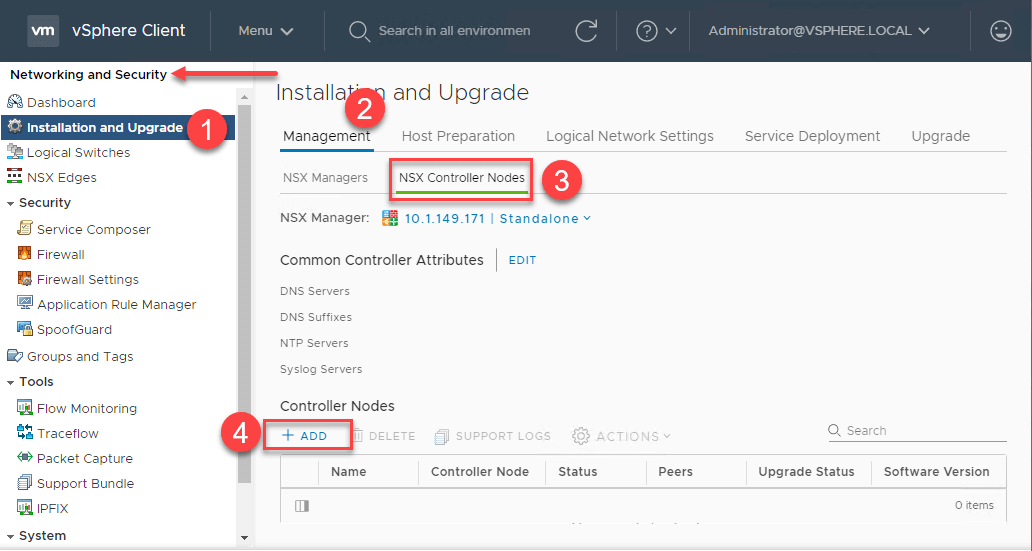
The NSX Controllers are deployed from the Installation and Upgrade menu. Click Installation and Upgrade > Management > NSX Controller Nodes > Add.
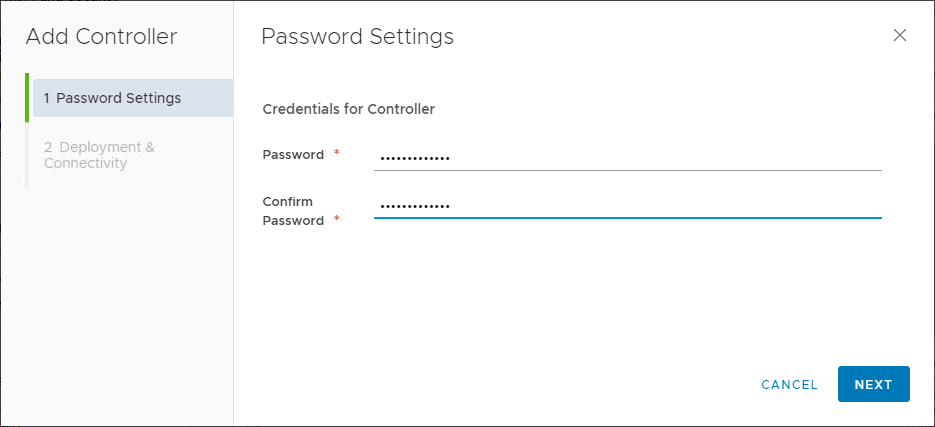
This launches the Add Controller wizard. In the first screen, set the credentials for the controller.
Step two of the Add Controller wizard is the Deployment & Connectivity configuration. Here you configure the compute, networking, and storage for the new NSX controller.
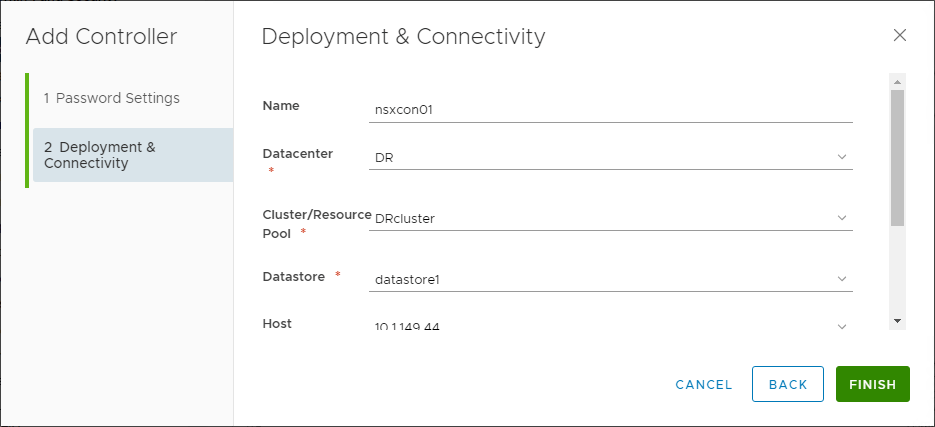
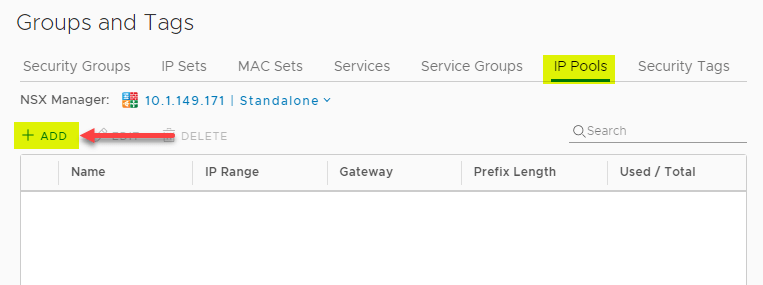
One of the configuration items under the Deployment and Connectivity wizard is how you want to configure IP addressing for the NSX Controller. This can be configured using IP Pools. Think of the IP Pool as a “static DHCP” configuration where you set aside IP addresses that are assigned to the NSX Controllers for provisioning.
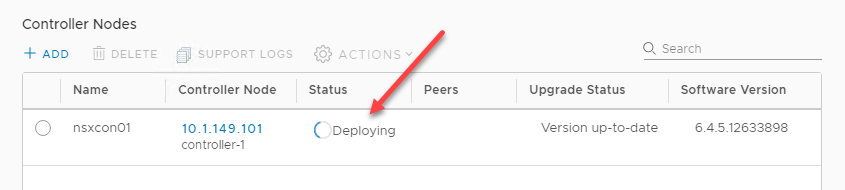
Once you complete the Add Controller wizard you will see the new controller start deploying. You can monitor the progress of the NSX Controller deployment right from the controller nodes dashboard.
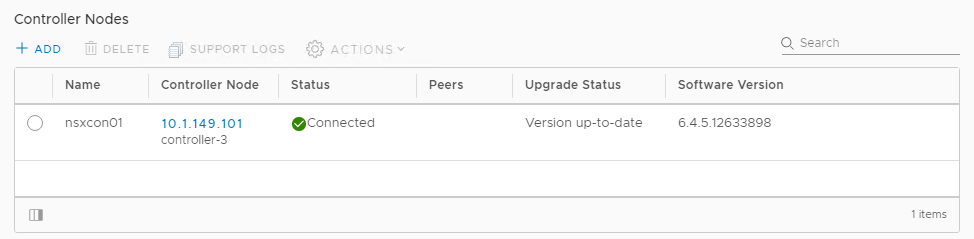
As mentioned earlier under the NSX Controller section, VMware only supports an NSX Controller cluster configuration of three NSX Controller nodes. Be sure to deploy the three NSX controllers for a supported configuration.
After deploying both the NSX Manager and the NSX Controller cluster, the next step is to prepare your ESXi hosts in the vSphere environment. Preparing your ESXi hosts involves installing the specific NSX VIB files on each host as well as configuring VXLAN which makes the overlay network possible.
NSX Host Preparation
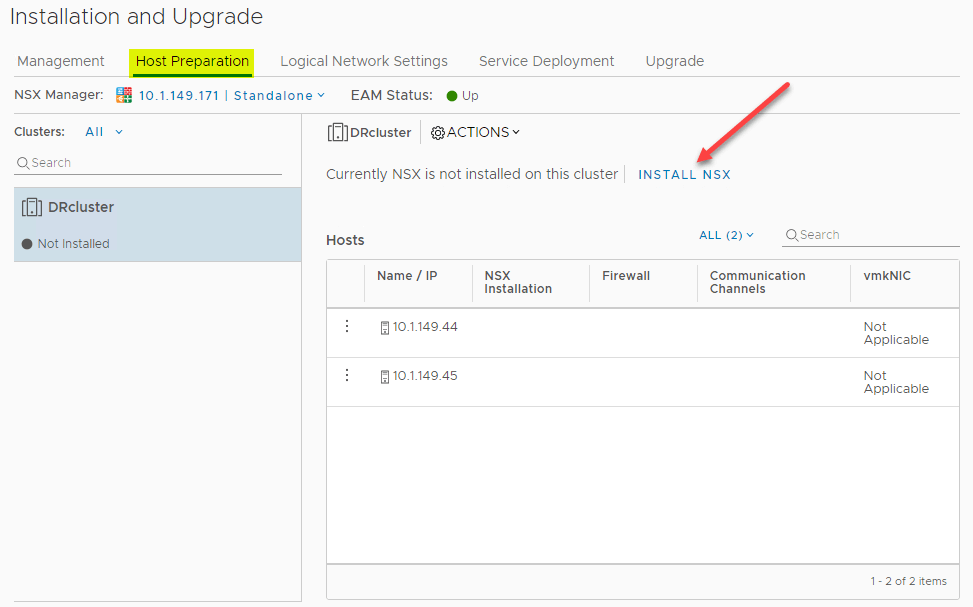
Under the Networking and Security > Installation and Upgrade > Host Preparation tab, click the Install NSX link to begin preparing your ESXi hosts for the NSX installation.
At this point as well, make sure you have installed a proper license for VMware NSX. If a license has not been installed, you will receive an error during the Host Preparation configuration.

After a few minutes of installation and synchronization time, you should eventually see the Firewall show as Enabled and the Communication Channels show as UP.
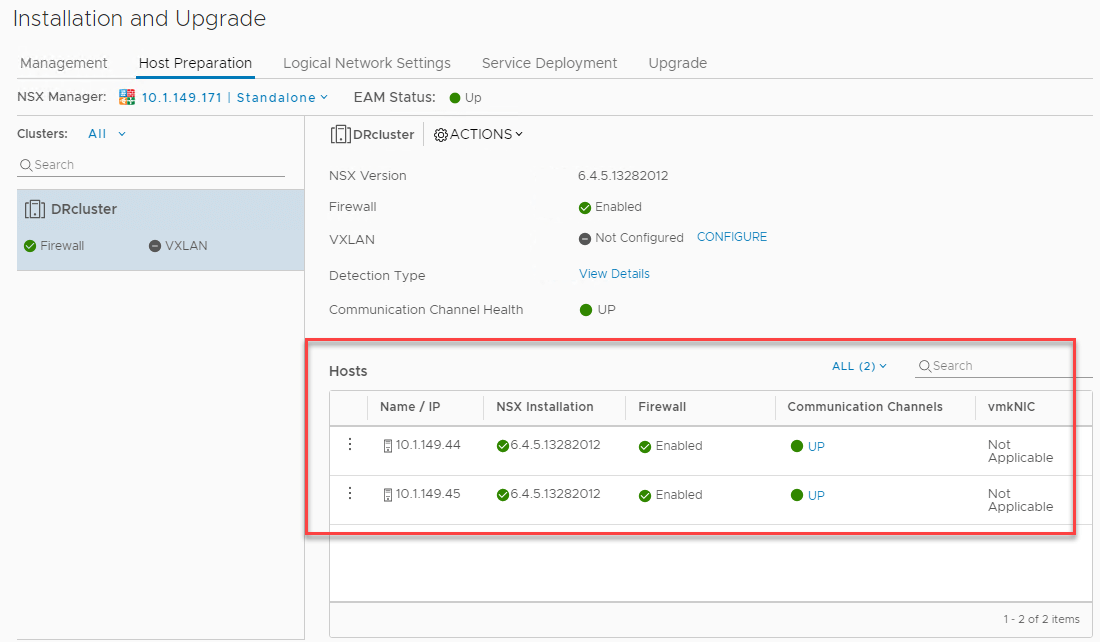
After installing the NSX VIBs on your ESXi hosts, you can now start using VMware NSX to create firewall rules. For the more advanced networking capabilities provided by VMware NSX, you will need to complete the configuration of VXLAN and Transport Zones in your environment, which we will cover next.
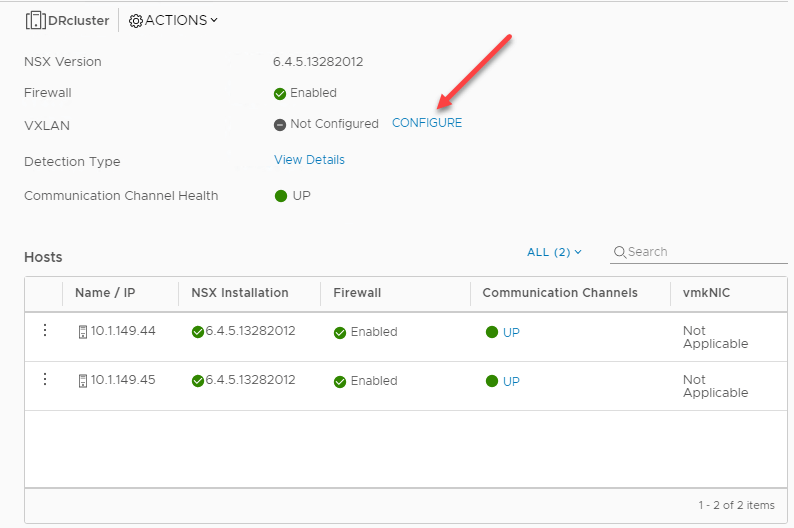
Configure NSX VXLAN
In addition to installing the NSX VIBs, the Install NSX process does not configure VXLAN. VXLAN is an extremely important part of the process as the VXLAN tunnels are what make the Overlay network possible with NSX-V. Still under the Host Preparation tab, next to VXLAN, click Configure.
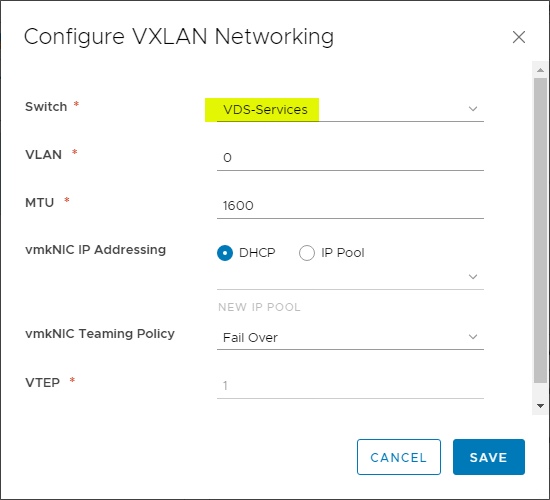
This launches the Configure VXLAN Networking wizard. Here you configure the:
- Switch
- VLAN
- MTU
- vmkNIC IP Addressing
- vmkNIC Teaming Policy
- VTEP
The switch needs to be a vSphere Distributed Switch that you have added to your ESXi hosts in the environment.
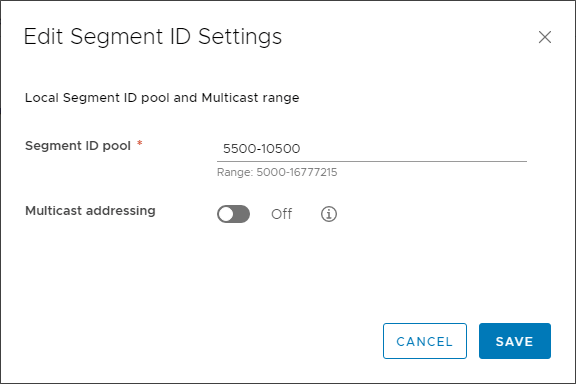
After configuring VXLAN for your ESXi hosts, under the VXLAN Settings tab, you also need to add Segment IDs. Click Edit.
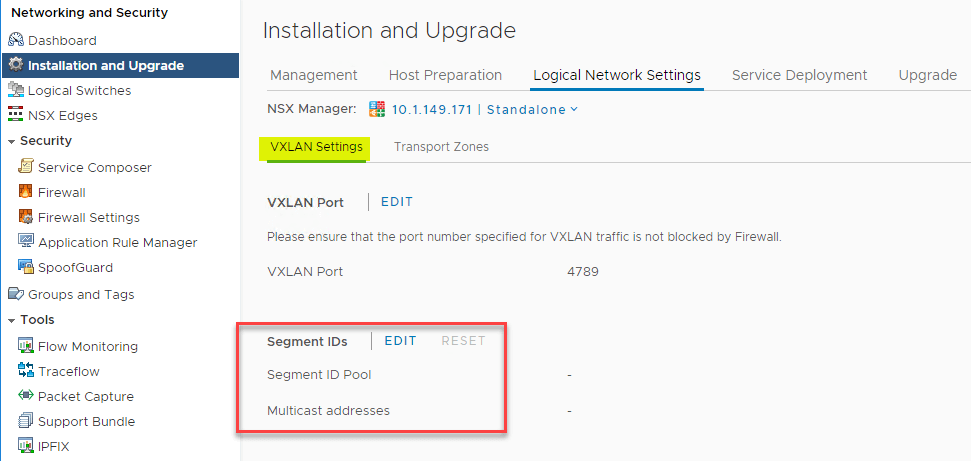
This launches the Edit Segment ID Settings. As you can see below the Segment ID pool range is 5000-16777215. VXLAN segments are built between VXLAN tunnel endpoints (VTEPs). Each VXLAN tunnel has a segment ID. You must specify a segment ID pool for the primary NSX Manager to isolate your network traffic.
When determining the size of each segment ID pool, consider that the segment ID range controls the number of logical switches that can be created. Choose a small subset of the 16 million potential VNIs. Do not configure more than 10,000 VNIs in a single vCenter because, vCenter limits the number of dvPortgroups to 10,000.
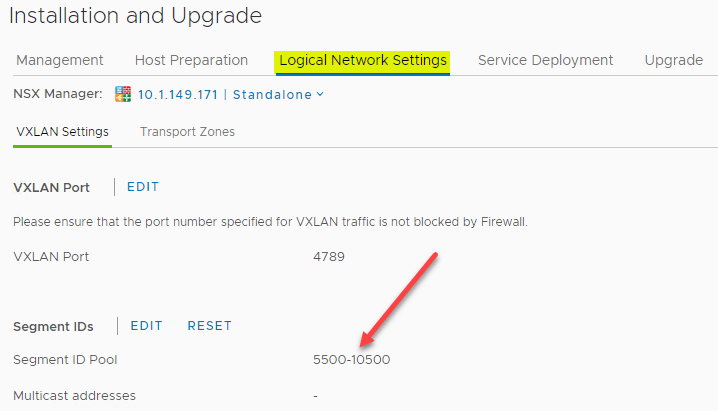
The Segment ID Pool settings are now populated.
Configuring an NSX Transport Zone
One of the final configurations that need to be made in the initial NSX deployment is configuring the Transport Zones.
What is the transport zone?
A transport zone controls which hosts a logical switch can reach and can span one or more vSphere clusters. Transport zones dictate which clusters and, therefore, which VMs can participate in the use of a particular network. Universal transport zones can span vSphere cluster across a cross-vCenter NSX environment.
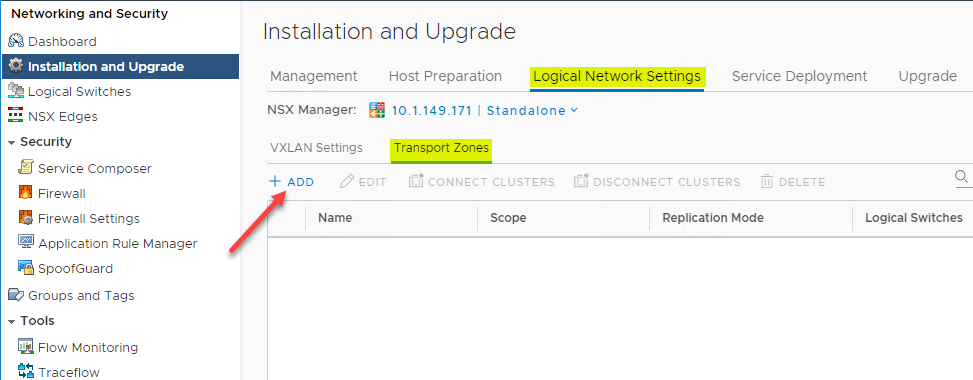
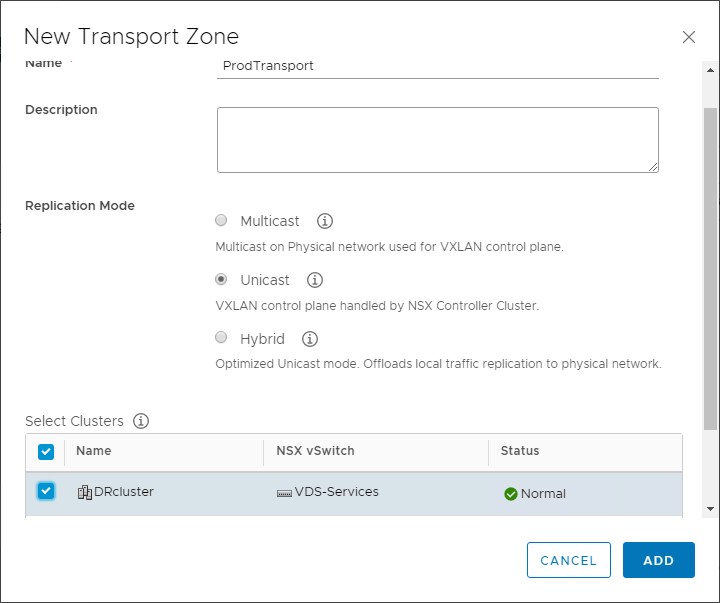
To configure a new Transport Zone, navigate to Installation and Upgrade > Logical Network Settings > Transport Zones > Add.
Populate the New Transport Zone configuration with:
- Name
- Description
- Replication Mode
- (Select Clusters that will participate)
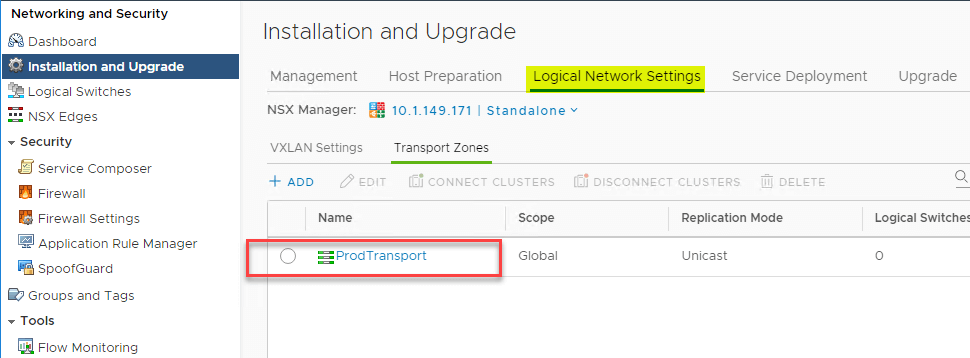
After creating the new Transport Zone it should be listed under the Transport Zones tab.
After configuring the Transport Zones, you should now have a basic VMware NSX deployment into your VMware vSphere environment. You can now begin to start creating virtualized network objects like Logical Switches (LS) and Distributed Logical Routers (DLRs).
Final Thoughts
VMware NSX is a powerful software-defined networking technology that will help your business to unlock networking capabilities that are simply not possible with traditional physical networking. You are most likely going to need to be able to move with agility and flexibility as your environment may span on-premises, public cloud, and multi-cloud environments. VMware NSX allows you to do this effectively.
Creating networks inside of software is the way to solve many of the network challenges encountered while running today’s workloads across various landscapes. Deploying VMware NSX is certainly a more advanced deployment process and should be approached with careful planning and testing before making changes in production environments.
However, as shown, VMware has greatly simplified the process with the easy provisioning of the required components for standing up the VMware NSX network virtualization environment. With VMware NSX running on top of your vSphere environment, you will have several features and capabilities unlocked for housing business-critical data and services where you need them. This allows ensuring network communication between the required application components, regardless of where they live.
While VMware NSX provides the ability to serve your data from any location, even spanning multiple environments, be sure you are properly protecting your data with a backup solution that can also span environments and can properly protect your business-critical applications.
Be sure to check out Vembu BDR Suite for a fully-featured trial version to effectively backup your VMware vSphere workloads.
Experience the strength of our VMware backup solution in BDRSuite, designed to boost your data security. It’s free to explore.
Download BDRSuite todayfor peace of mind and added strength to your VMware setup.
Follow our Twitter and Facebook feeds for new releases, updates, insightful posts and more.