
In part II of this series, we discussed the steps to convert VMware to Hyper-V using System Center 20160 – Virtual Machine Manager (VMM). In this third & final part, we will discuss, How to convert a VMware virtual machine to Hyper-V using Export/Importing options with OVF files and PowerShell commands.
Export/Importing is an option that is not suitable for all conversions, or all type of VMs, but for a simple conversion, we can use it.
We will export source Virtual Machine into an Open Virtualization Format (OVF) file.
OVF standard is independent of any particular hypervisor or vendor.
For our case, VMware OVF is a virtual machine distribution format that supports sharing virtual machines between products and organizations regardless of processor or architecture from the source.

Using OVF format, users will have one preconfigured virtual machine package that includes applications with the operating system they require into a virtual appliance.
First, we need to export our source Virtual Machine in VMware into an OVF.
Note: For vSphere 6.0 we use vSphere Client tool, for vSphere 6.5 we use vSphere Web Client to export to OVF.
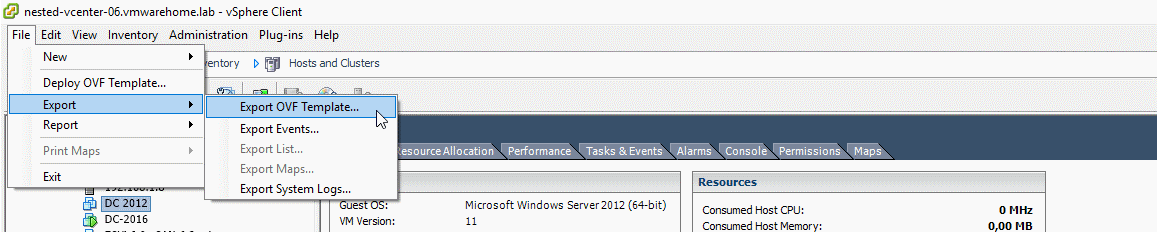
For vSphere 6.0 – using vSphere Client Tool
In vSphere Client tool select File / Export / Export OVF Template.
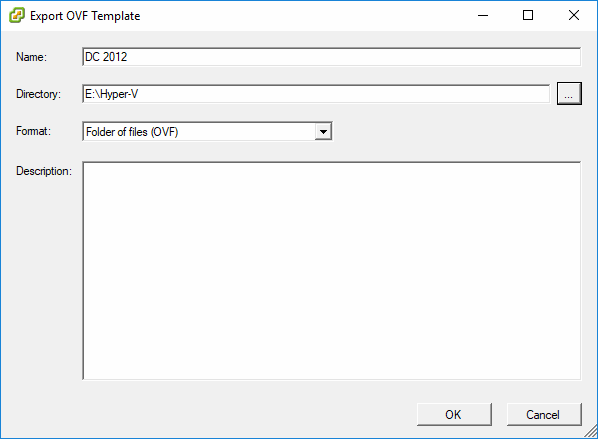
Fill in the details (name, directory to store file and format) and click OK to start the Export process.
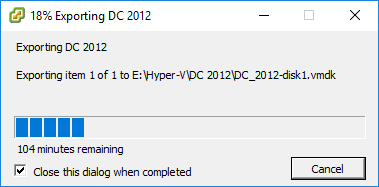
After the process is finished, you can double check status in the Tasks/Events.

For vSphere 6.5 – vSphere Web Client
In the Virtual Machine menu, select Template / Expert OVF Template.
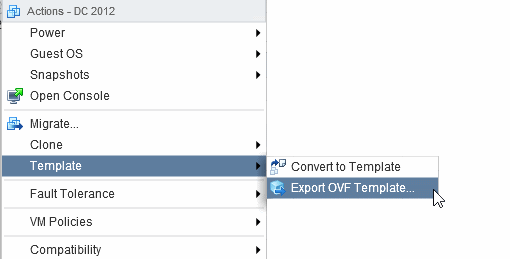
The rest of the process is similar to the vSphere Client tool example.
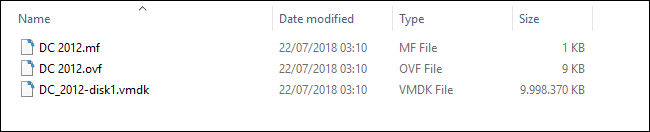
Exporting to OVF will create three types of files.
.mf – The manifest file is optional and are used for integrity and authenticity checks. The manifest file contains the SHA1 digest of all files in the package (except for the .mf and .cert files themselves).
.ovf – The OVF descriptor (.ovf) is the main document of an OVF package. It contains all metadata for the OVF package and has links to external files, such as virtual disks.
OVF file is an xml-file file with the Information about the machine settings (vCPUs, vMemory, vNIC, vHD, etc.). If needed, you can open or edit the file using browser/xml-parser or a Notepad editor (I use NotePad++).
.vmdk – The VMDK file is a disk image containing the Virtual Disk from the Virtual Machine exported.
You can read HERE more about OVF.
For this initial convert/import, we only need the vmdk file. Only if you use System Center VMM import or a third-party tool, you could use the .ovf with the metadata to create the Virtual Machine automatically in Hyper-V.
For this article, we are using official Microsoft tools and will only convert/import the VMDK file using these tools. In this case, Powershell using MVMC and System Center Powershell modules.
How to Import created OVF or Virtual Hard Disk.
Convert/Import VMDK using MVMC PowerShell module.
First option
To convert/import the VMDK file, we need to use the PowerShell module from MVMC (MvmcCmdlet.psd1).
To use MVMC Powershell module you need to have MVMC Tool installed (check first part of this article how to).
Import module from the folder you installed MVMC.
Import-Module ‘C:\Program Files\Microsoft Virtual Machine Converter\MvmcCmdlet.psd1
Then run the command to convert the virtual disk(vmdk).
ConvertTo-MvmcVirtualHardDisk -SourceLiteralPath e:\Hyper-V\DC_2012-disk1.vmdk -VhdType DynamicHardDisk -VhdFormat vhdx -destination e:\Hyper-V\DC_2012-disk1.vdhx
There is no need to add the .VHDX extension after the new file name, since we are using -VhdFormat parameter.
Note: If the conversion fails, you can check the MVMC log in Windows Temp files. In our case log file was in: “C:\Users\administrator.domain\AppData\Local\Temp\mvmc.log”.
After the file is converted to Hyper-V format, you have to move the converted file to your Hyper-V, create a new Virtual Machine and use this converted Virtual Disk.
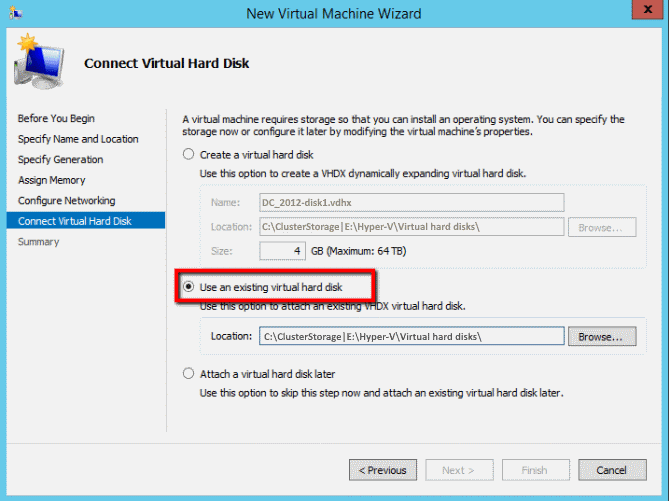
Now, we have converted and imported the vmdk file into a new Virtual Machine in Hyper-V.
Second option
Convert/Import VMDK directly to your System Center VMM using PowerShell module.
For this case the process is similar, but we will import a .ovf file, and the Virtual Machine will be created automatically by System Center VMM.
For System Center 2012/2016 VMM
You need to install in your VMM Server OVF Export / Import from HERE. Install file SC2012_VMM_OVFImport-Export.msi in your System Center 2012 VMM.
The package installs a Windows PowerShell snap-in that contains the following cmdlets:
- Export-SCVirtualMachine
- Import-SCVirtualMachine
To add the snap-in, run the cmdlet Add-PSSnapin OVFToolSnapIn
Note: Run Add-PSSnapin from a Windows PowerShell Console with “Run as Administrator.” Do not launch with System Center PowerShell.
First, convert the Virtual Disk so that we can import to VMM.
ConvertTo-MvmcVirtualHardDisk -SourceLiteralPath C:\App\DC_2012-disk1.vmdk -VhdType DynamicHardDisk -VhdFormat vhd -destination C:\App\DC_2012\
Note: Since importing to System Center VMM is only possible with vhd, we need to add the import parameter only to create a vhd disk and not vhdx. If want vhdx disk, you can rerun it after is imported and convert the disk to vhdx.
$SCVMM = get-scvmmserver -ComputerName “SystemCenter.mydomain” – Your System Center Server
$SCLS = Get-SCLibraryServer -ComputerName “SystemCenter.mydomain” – Your Library Server (can be a different server).
Import-SCVirtualMachine -ImportVMPath “C:\App\DC 2012.ovf” -LibraryServerObject $SCLS -VMMServerObject $SCVMM –LibrarySharePath “\\SystemCenter.vmwarehome.lab\MSSCVMMLibrary\Import\” –VHDSourcePath “C:\App\DC_2012\DC_2012-disk1.vhd” -VMName “VM Imported”
Note: Using Import-SCVirtualMachine to import a VM to Hyper-V can be tricky since you deal with some conversion issues(like Virtual Machine Hardware version, Video Resolution etc.) and those issues are not issue to track or fix. If you encounter many issues, then you should choose the first option.
Conclusion
Now that we have seen the process of converting VMware VM to Hyper-V through the procedures of Exporting OVF file in VMware and Importing it in Hyper-V using PowerShell. Exporting and importing a VMware Virtual Machine using OVF file and PowerShell is easy if everything works. If not, then it can be time-consuming troubleshooting the issues and the root cause.
Hope the different methods discussed in this and in my previous articles – Part 1, Part 2 to convert VMware VM to Hyper-V VM helps you perform the VM conversion/migration easily and quickly without any hassle.
Related Posts
Difference between VMware and Hyper-V: A Complete guide
Nested Hyper-V VMs on a VMware ESXi Server
Follow our Twitter and Facebook feeds for new releases, updates, insightful posts and more.