
Quick Bites:
RADIUS (Remote Authentication Dial-In User Service) authentication is a networking protocol that provides a centralized authentication, authorization, and accounting (AAA) system for managing user access to network resources. It is commonly used in enterprise environments, particularly for remote access scenarios such as virtual private networks (VPNs), wireless networks, and dial-up connections.
By using RADIUS authentication, organizations can centralize user authentication, enforce strong security measures, and simplify the management of user access to network resources. It offers a scalable and flexible solution for managing user authentication in complex network environments.
SonicWall is a company that specializes in network security solutions, and a SonicWall device refers to one of their hardware appliances used for network security and firewall protection. SonicWall devices are designed to provide robust security features, advanced threat protection, and network management capabilities.
In this blog, we are going to see how to Create User Groups and configure User Management for RADIUS Authentication in Windows Server 2016 AD
What is Radius:
Remote Authentication Dial-In User Service (RADIUS) is a client/server protocol and software that provides remote access servers to communicate with a central server to authenticate dial-in users and authorize their access to the requested system or service. RADIUS allows a company to maintain user profiles in a central database that all remote servers can share. It provides better security, allowing a company to set up a policy that can be applied at a single administered network point.

Using Radius Authentication method we are going to communicate with Sonicwall Device. Create a Radius Client in the NPS. After creating Radius client, create an NPS Policy to perform authorization.
We are going to configure Radius authentication in SonicOS 6.5, which was released in September 2017. This release includes significant user interface changes and many new features that are different from the SonicOS 6.2 and previous firmware.
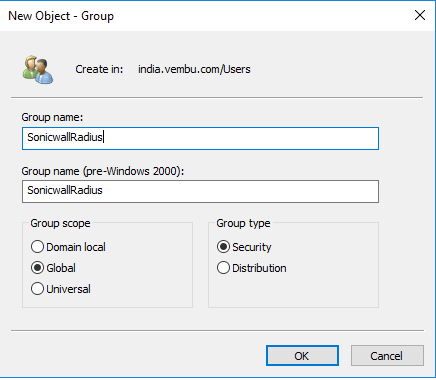
- Open AD Users and Computers and create a new group in the user folder
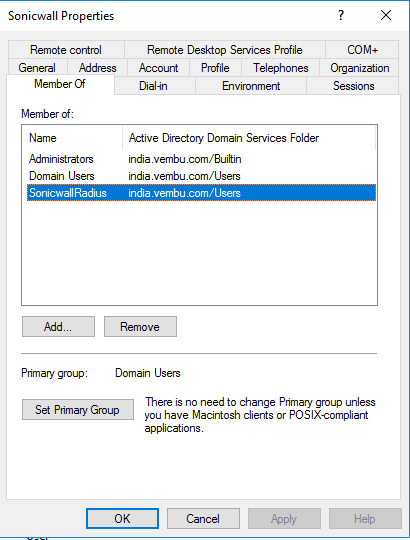
- Create a new user and add as a member for the new user group
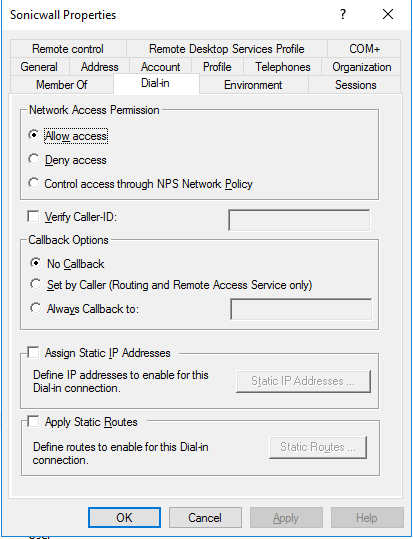
- Open the user properties and go to Dial-in users and select Allow access for Remote Access Permission (Dial-in or VPN)
Configuring the NPS to Support RADIUS Clients
- Open Network Policy Server from Administrative Tools
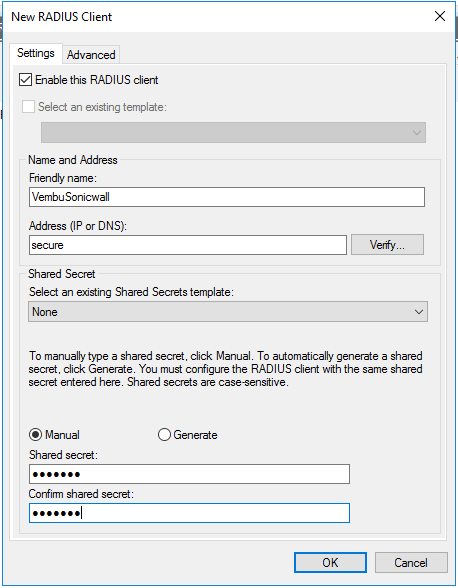
- Right click on the RADIUS Clients folder and click New
- Enter a friendly name for the client and give IP or FQDN
- Enter a Shared Secret. This shared secret is needed later, so note this for future reference
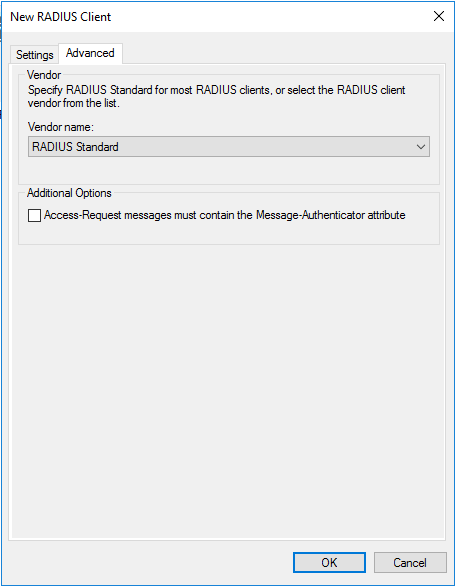
- Now click Advance tab on the top and select Radius Standard in the Vendor name drop down
- Click OK to create the Radius client
To set up the permission for users,
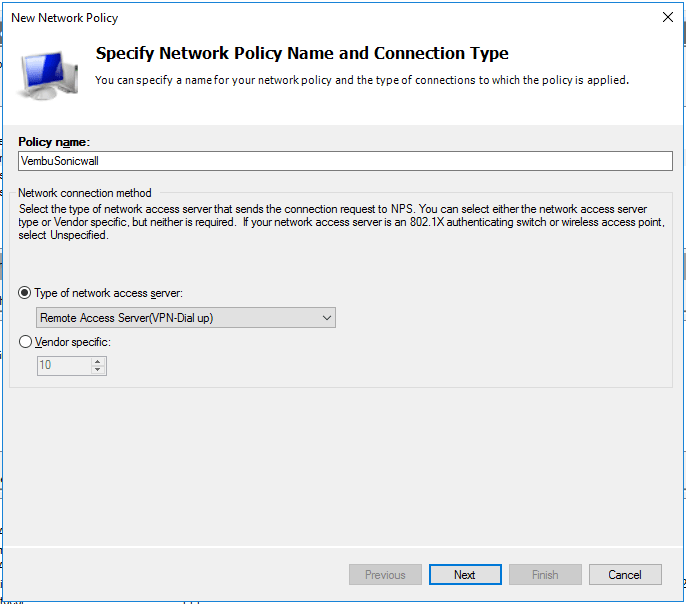
- Expand Policies and right click on the Network Policies and select New
- Specify a friendly Network Policy Name and select Connection Type “Remote Access Server(VPN-Dial ap)” and give Next
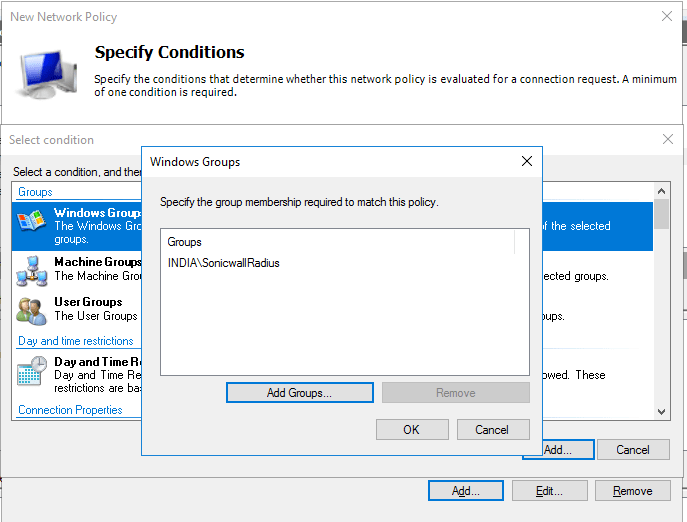
- In Specify Conditions page, click add and select “Windows Group” and click Add Group to add the group which we have created in the beginning
- Click Next to specify Access Permission
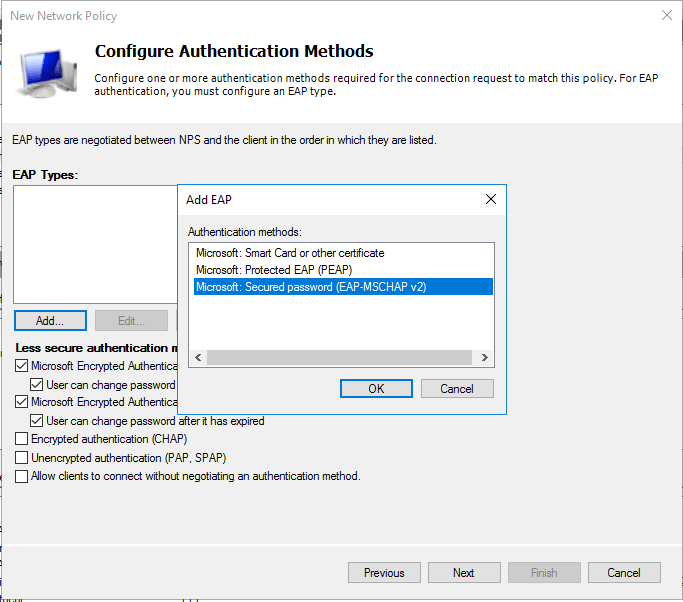
- Click Access Granted option and give Next to configure Authentication Methods
- Click Add and select Microsoft: Secured password (EAP-MSCHAP v2) and give Next
- Keep Default in the Configure Constraints page and move on to the next page
- Pass this Configure page and give Next and review the overall configurations and click Finish
Now we can check Radius Server settings from the Sonicwall Firewall
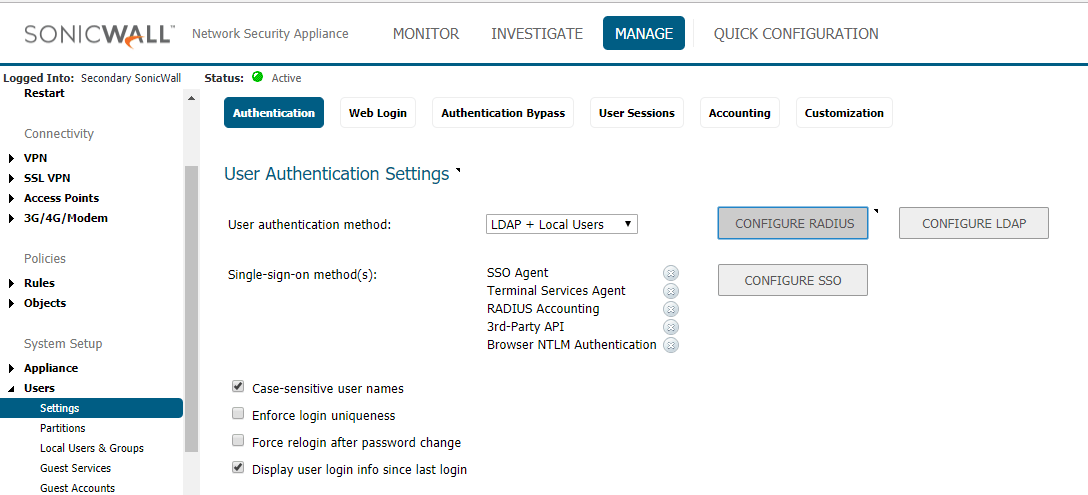
- Login to the Sonicwall in configuration mode and go to Manage tab
- Click Users on the left side pane and select Settings
- In Settings page, click Configure Radius option
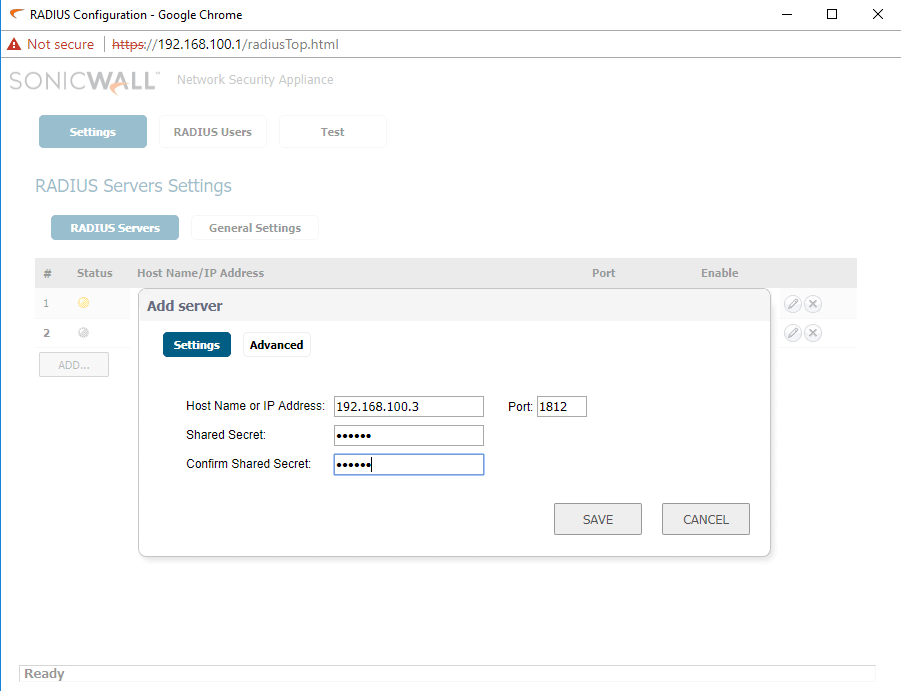
- Now click add and enter the radius server details and Shared secret key and save it
- After saving the settings move on to the Test tab to test the Radius Server connectivity
- Select the Radius Server in the drop list and select the authentication method to test
- Provide valid user account details of the Radius Server and check the connectivity
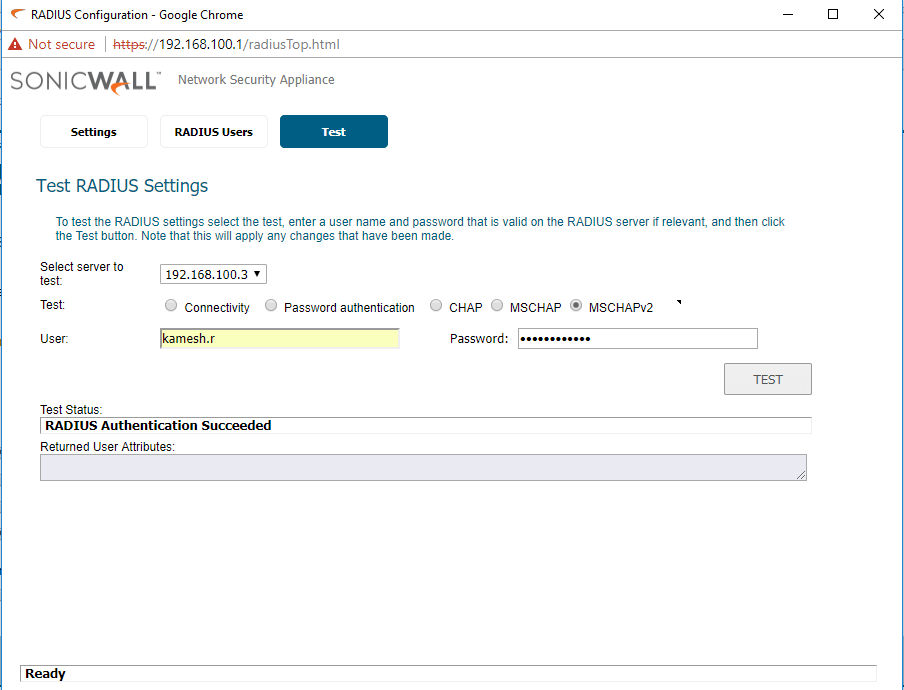
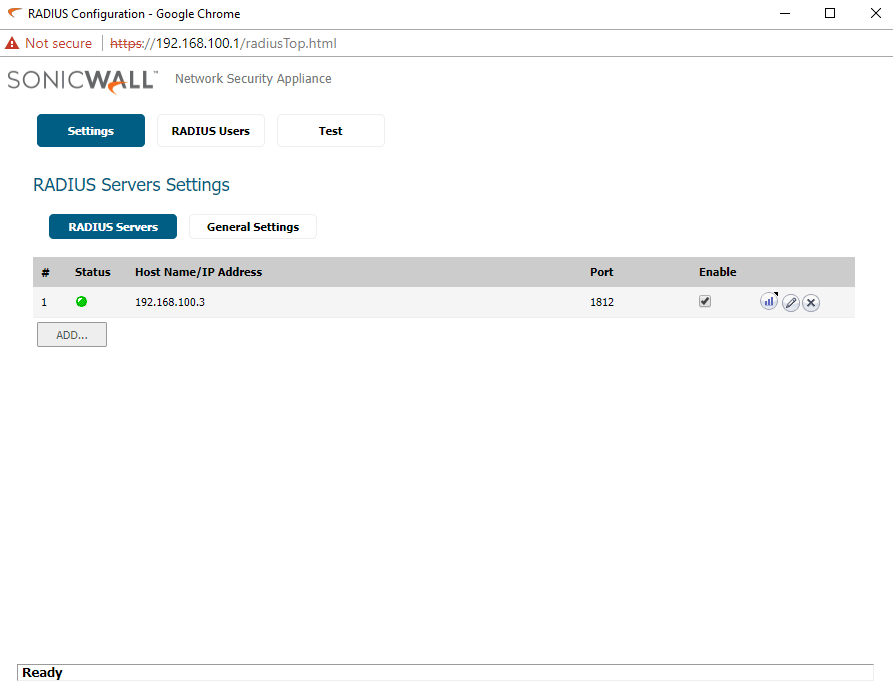
Here we have completed the NPS configuration, If all the configurations are correct, the test status will show the result, “Radius Authentication Succeeded”. You can also check the Settings tab to confirm the status of the Radius Server. If it is green, then the communication with the Radius Server is verified and connection is established.
Experience modern data protection with this latest BDRSuite v3.9.0 FREE edition. Try the 30 days free trial here: https://www.bdrsuite.com/vembu-bdr-suite-download/
Got questions? Email us at: vembu-support@vembu.com for answers.
Follow our Twitter and Facebook feeds for new releases, updates, insightful posts and more.