
About AZURE CLOUD Service:
Microsoft has created a cloud computing service which is termed as Microsoft Azure. It is used for building, deploying, testing, and managing the applications and also the services through Microsoft-managed data center which is a global network. It was renamed as “Microsoft Azure” on March 25, 2014, which was actually released on February 1, 2010, as “Windows Azure”. Microsoft Azure provides,
Software as a Service (SaaS),
Platform as a Service (PaaS) and
Infrastructure as a Service (IaaS)
And it also supports other different programming languages, tools, and frameworks, including both Microsoft-specific and third-party software and systems.
Troubleshoot Azure Linux VM:

In an ordinary scenario, our physical or virtual machines encounter boot issues or Hard disk error and the virtual machine which does not boot properly. The same issues appear on Azure cloud Linux Virtual Machines and VM will not boot and needs to troubleshoot on the virtual hard disk itself.
This blog describes how to connect and resolve the Azure Linux Virtual Hard disk booting issue and once the issue is resolved, the creation of a new Virtual machine template to the Virtual hard disk is described.
Troubleshooting Steps:
- Diagnose booting issue
- Delete the Problematic VM and keep the VM Virtual Hard disk
- Attach the Virtual Hard disk to another VM to check
- Fix the booting issue on problematic Virtual Hard disk
- Unmount virtual hard disk from VM
- Create new VM to connect the Virtual Hard disk
Diagnose Booting issue:
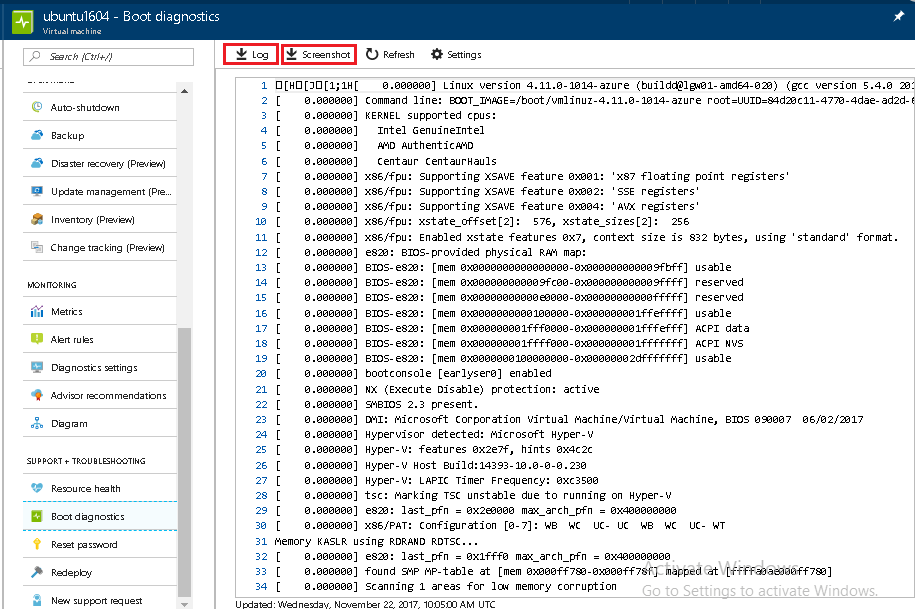
The Microsoft Azure debugging options(Serial Console Output and Screenshot support) help to identify the Virtual Machine Booting issues.
Select the Virtual Machine and go to Support + Troubleshooting and then click on Boot Diagnostic. It will now display the Virtual Machine log, where you can download the entire Machine log or you can take the screenshot of the current machine logs.
You can also download and review this debugging log which helps to identify and resolve the issue related to booting. Refer screenshot for reference.
Existing Virtual Hard disk Details:
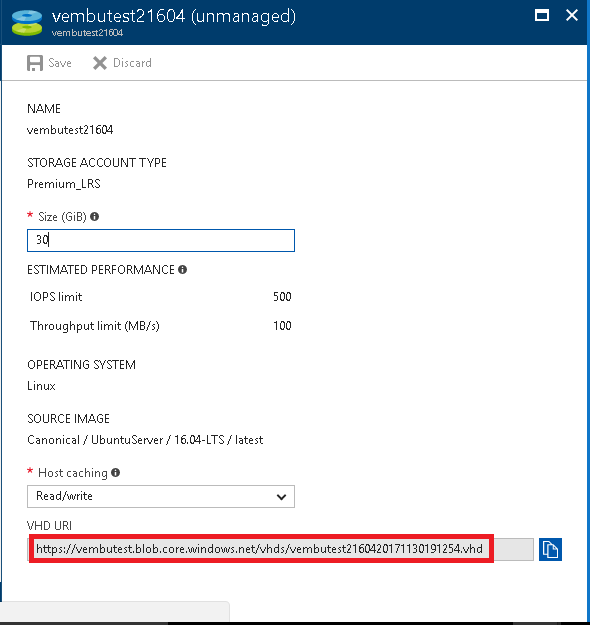
You can check the Debugging logs and if you still face the Virtual Machine Booting issue, then you can move the existing hard disk to another VM to resolve the issue or to take the data recovery. Before moving, the Virtual Hard disk from another VM, needs to Identify the Virtual hard disks name and location.
Goto Virtual Machine options and select the problematic virtual machine and then go to setting and click on Disk. after clicking the Disk in right side displays the Disk properties.
Refer screenshot.
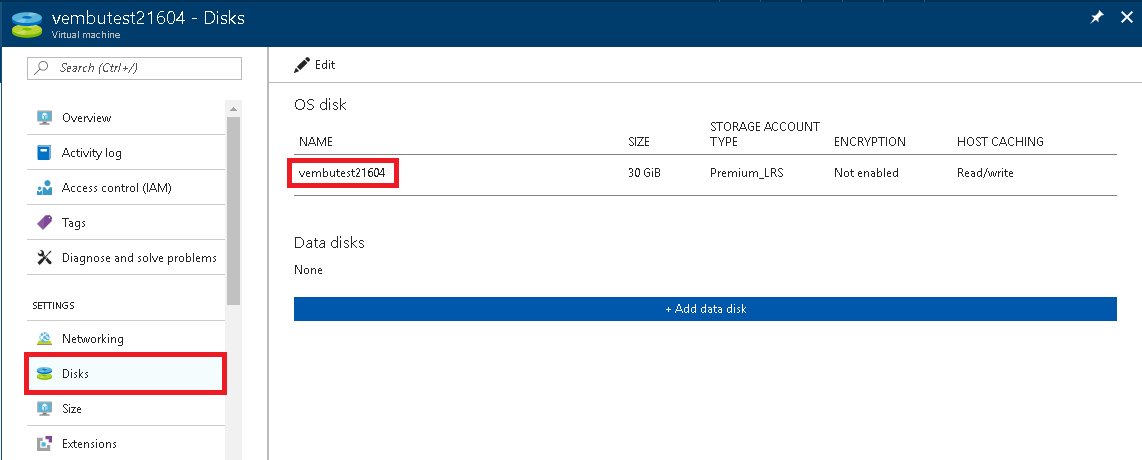
Now click on the OS Disk, where you can see the OS disk details like location and name. Refer screenshot.
Connect Virtual Hard disk to Another Virtual Machine:
Once you find out the Virtual Hard disk path, detach it from the VM and then attach the Virtual Hard disk to the working Virtual Machine. Go to working virtual machine setting, click on disks and on the right side option “add data disk” once you click on this option a window will open to attach unmanaged disk. Fill the required details, refer screenshots.
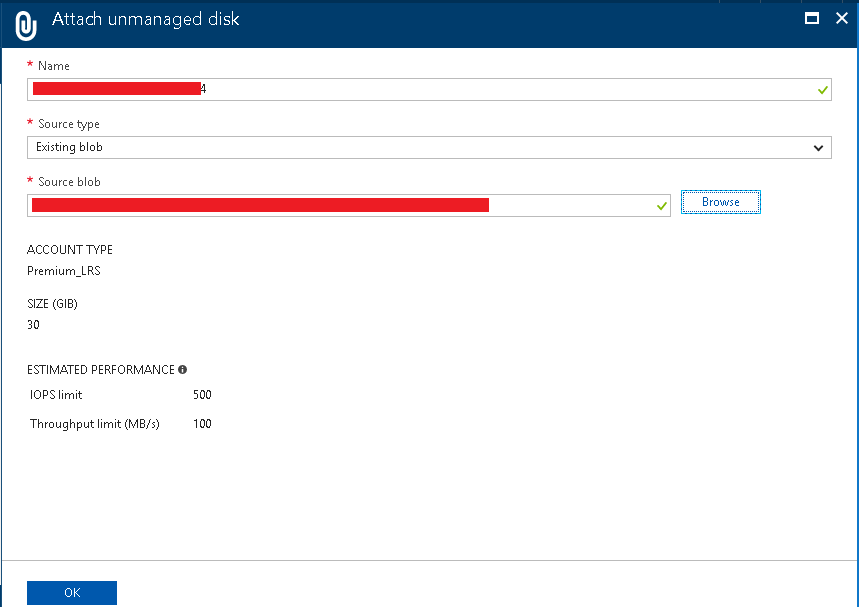
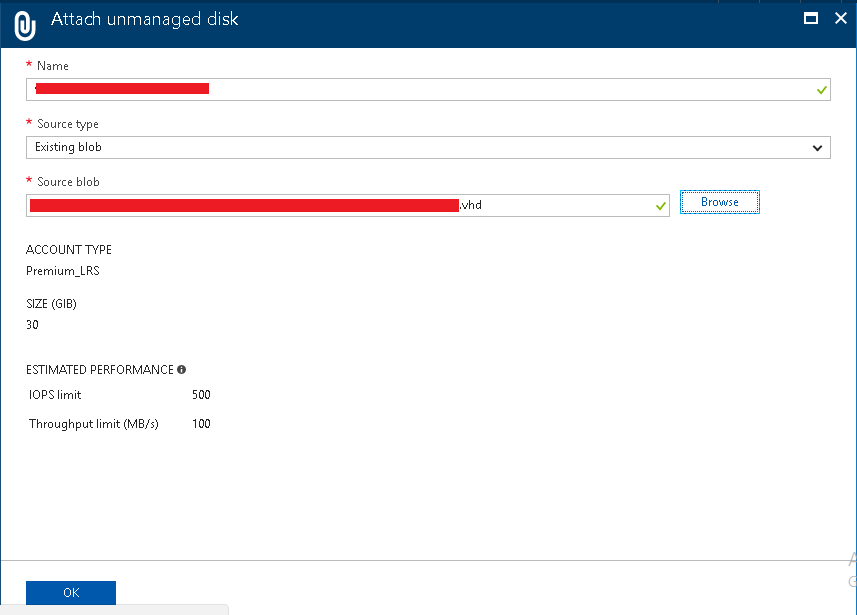
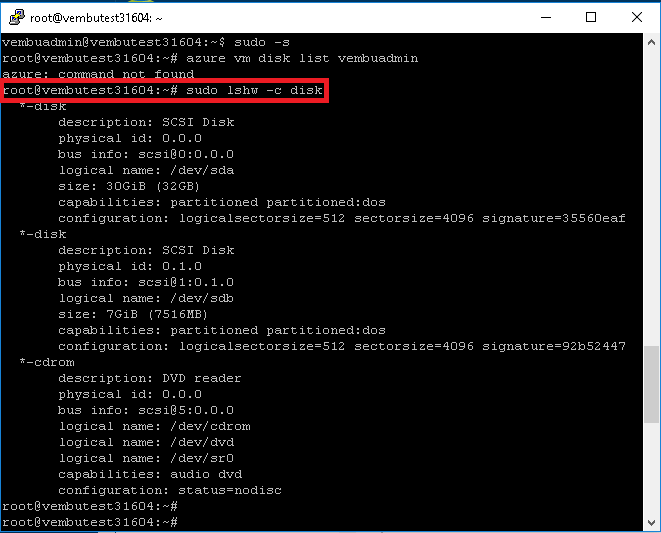
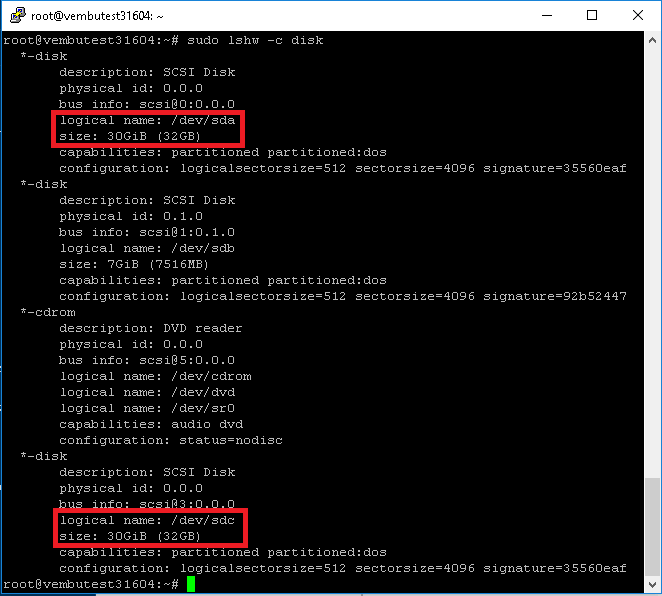
Once you add the virtual hard disk, you can mount the hard disk on working Linux machine and then troubleshoot to resolve the booting issue. Once the issue is resolved, detach it from the virtual machine and then create a separate VM to install the Virtual Hard Disk. Refer the screenshot posted, for before and after attachment of the working VM.
Before attach
After Attach
After detaching the recovery hard disk, we can deploy the new virtual machine by connecting it to the original virtual hard disk. Azure provides the Azure Resource Manager Template to deploy the new virtual machine for the virtual hard disk.
Click here to login Azure Resource Manager Template
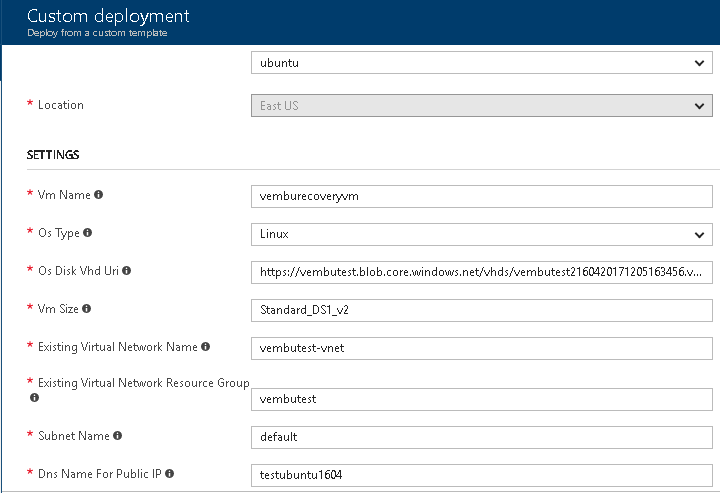
This is the routing to Azure portal. Now click on deploy to Azure option and enter the Azure login credential. Once provided login credentials, the azure deploying template will be displayed.
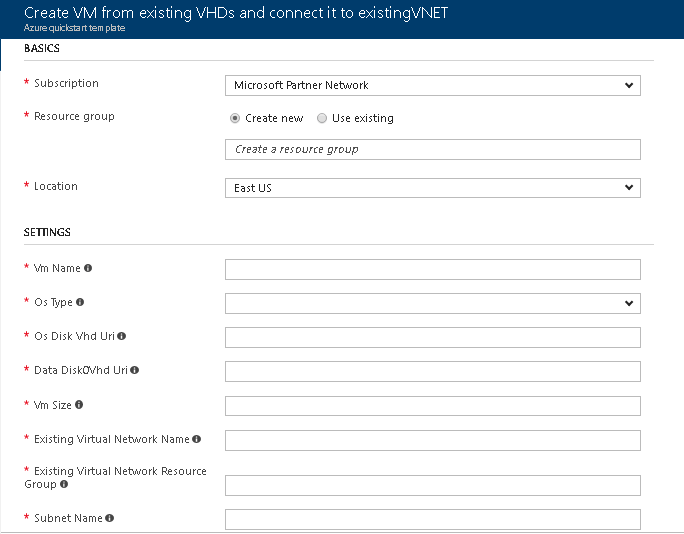
Now we can update the subscription, Resource group, OS disk URL, and Virtual Network details and Existing Virtual Network Resource Group details.
After updating the details, agree on terms and conditions and click on purchase.
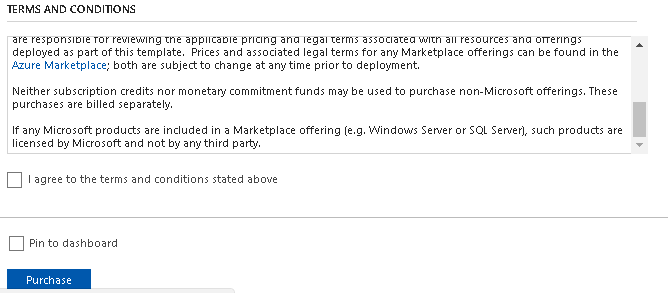
Refer below screenshot for reference:
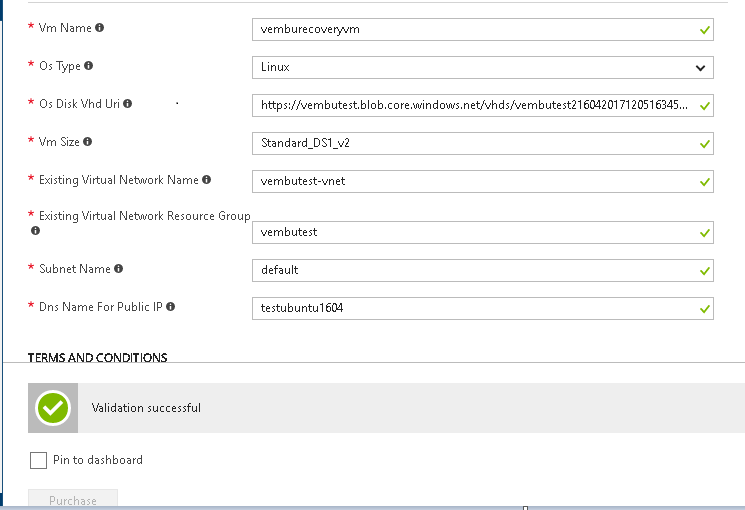
After updating the details click purchase, then validation will go on. once the validation is successful then the Virtual machine deployment will start.
Once deployment is successful, you can get notification alert from Azure portal.
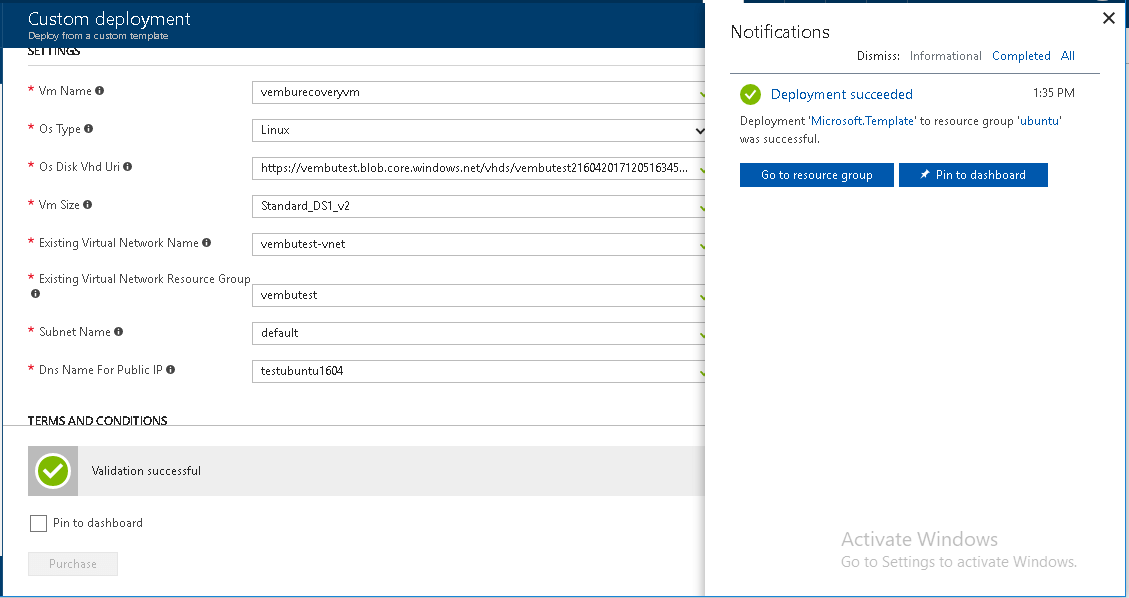
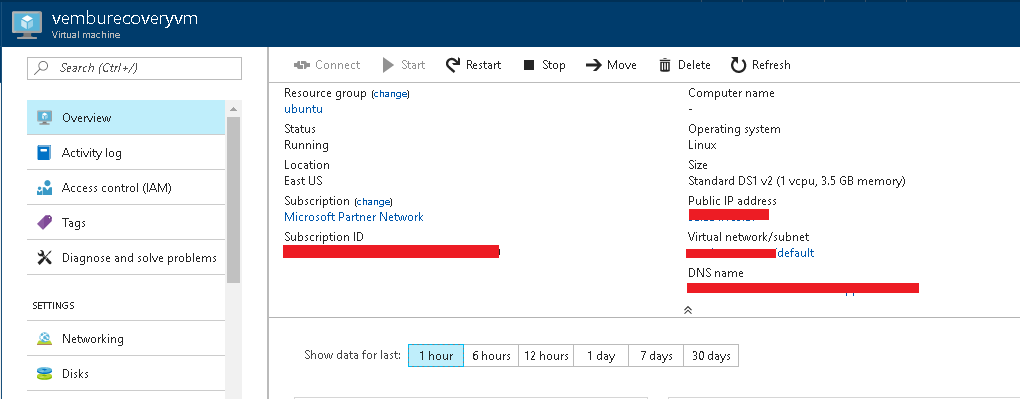
After that, you can verify from virtual machine list and you can see the details in the overview tab for virtual machine details.
Conclusion:
Azure provided easy options to recover virtual hard disk from not booting virtual machines. And this virtual hard disk recovery process very simple and easy to recover the virtual hard disk. Once issue addressed you can create new virtual machine template to connect the virtual hard disk.
Experience modern data protection with this latest Vembu BDR Suite v.3.8.0 FREE edition. Try the 30 days free trial here: https://www.bdrsuite.com/vembu-bdr-suite-download/
Got questions? Email us at: vembu-support@vembu.com for answers.
Follow our Twitter and Facebook feeds for new releases, updates, insightful posts and more.