
As a DevOps Engineer, you probably work with Containers, and you probably need to orchestrate and manage your clusters using Swarm or Kubernetes? If you choose to work with Kubernetes, it could be hard to start from scratch, so you should think about Azure to deploy your Cluster in the Cloud. Kubernetes can be easily deployed in Azure using a great new service called Azure Kubernetes Service (AKS).
What is Azure Kubernetes Service?
AKS is a new managed Kubernetes service. With AKS, you get the benefit of open source Kubernetes without complexity. I mean that Azure Kubernetes Service (AKS) will manage your hosted Kubernetes environment. Without expertise about container orchestration, you will be able to easily deploy and manage your application. Thanks to AKS, you can also auto scale your application depending the traffic.
What about the pricing?
Azure Kubernetes Service (AKS) is a free container service. It means that you do not need to pay for cluster management. You will only pay for what you will use (e.g Virtual Machines Instances).

More information here: https://azure.microsoft.com/en-us/pricing/calculator/?service=kubernetes-service
The cluster management can be performed using the Azure Portal or the Azure CLI in order to automate admin tasks.
Last June, Microsoft has released Azure Kubernetes Service in generally available to the public but, the biggest limitation is that AKS is currently available for Linux virtual machines only.
How does Azure Kubernetes Service work?
You will see the Virtual Machines that represent the nodes of the Kubernetes cluster, but you will not have to worry about Kubernetes Masters because they are completely hidden. Everything is automated, from the deployment to the need to add new nodes within the cluster. Even if you want to upgrade the Kubernetes Cluster version, do not worry because it is automated. These operations are performed using the command line but you can also perform some of these tasks using the Azure Portal.
Create Azure Kubernetes Cluster
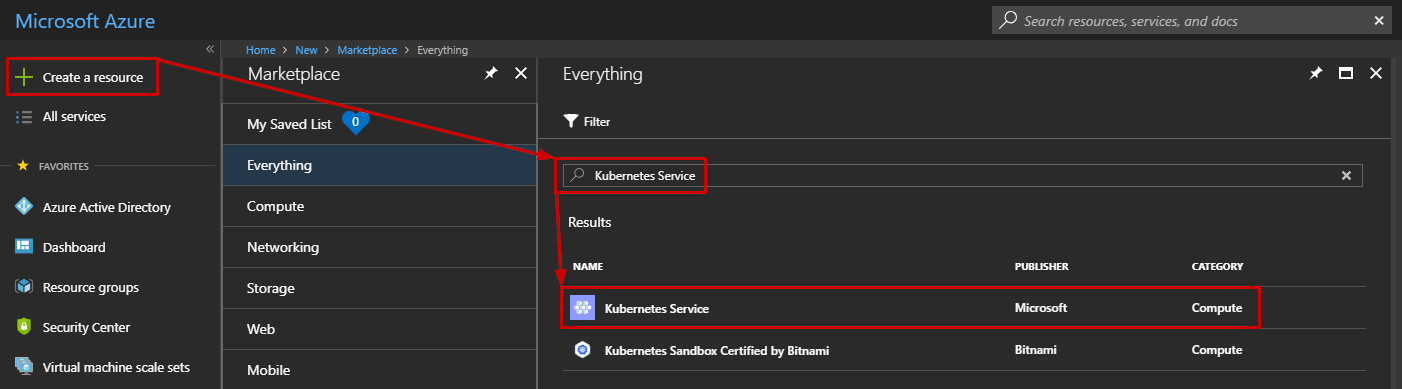
To create a new Kubernetes Cluster, log in to the Azure portal at http://portal.azure.com and click Create a resource, search for Kubernetes Service, then select Create:
A new blade appears and you walk through a cool wizard to help you deploy and configure your first Kubernetes Cluster.
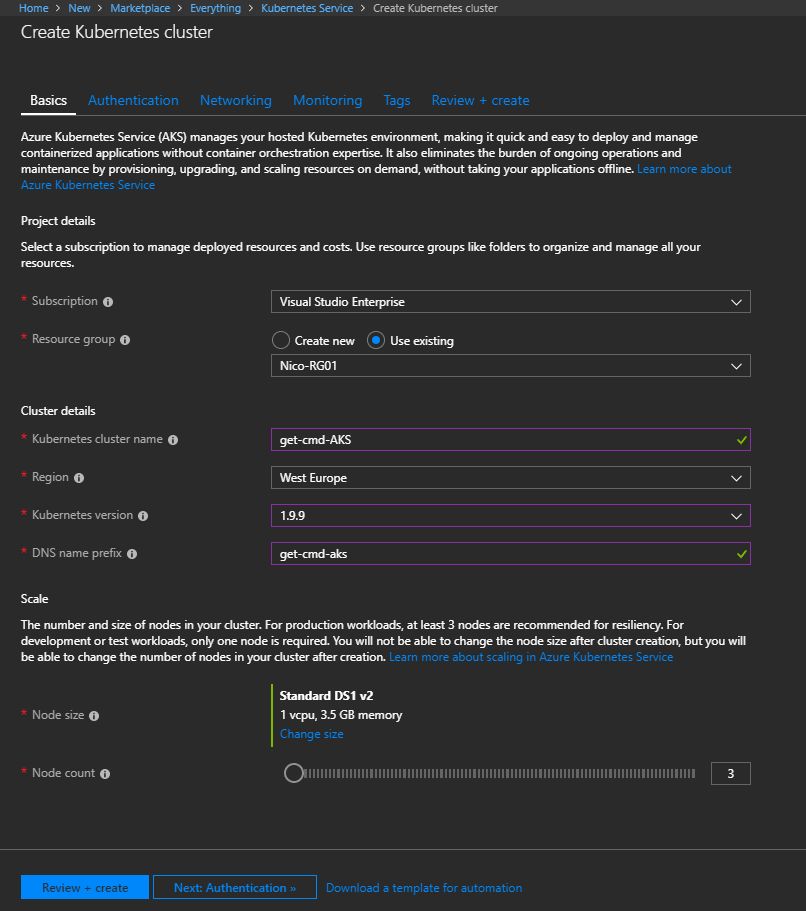
Enter the following information:
- Resource Group: Select an existing Resource Group or create a new one
- Kubernetes Cluster Name: It is the friendly name of the cluster
- Region: The location for the cluster
- Kubernetes version: The version for the cluster but keep cool, you can upgrade the version later
- DNS name prefix: it is used for the API server address
- Node size: Select the size for each node in your cluster
- Node count: Select the number of nodes in your cluster. You can increase or decrease this number later
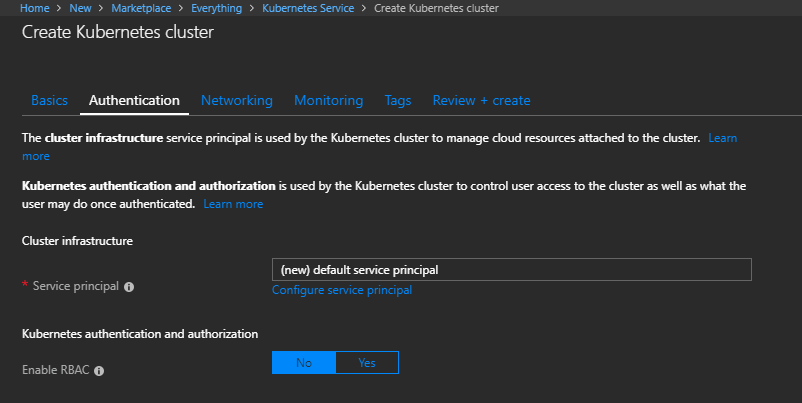
Click next to configure the Authentication. The cluster infrastructure service principal is used by the Kubernetes cluster to manage cloud resources attached to the cluster. If you do not have any service principal, then click Next to create a new one.
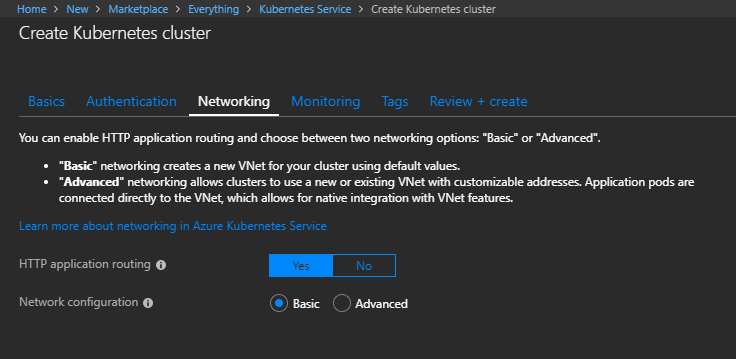
At this step, you can configure the network. By default, the network configuration is basic and is good to start with Kubernetes, but you can select “Advanced” to suit your needs.
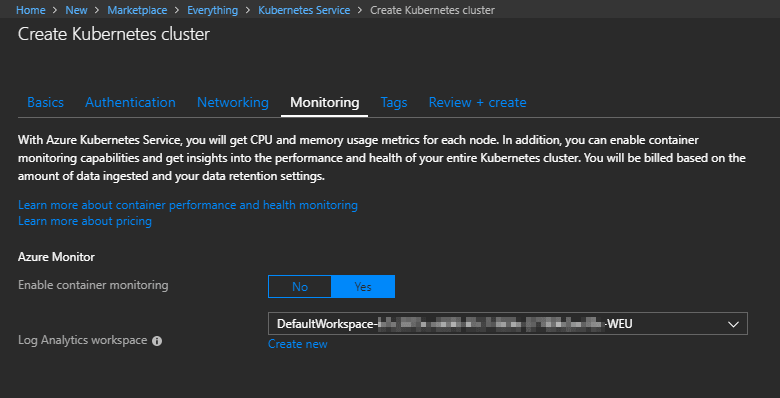
Click Next and configure the Monitoring. Some metrics will be monitored such as CPU and Memory. Container monitoring will be enable by default but you can disable it. If you enable Container Monitoring, then a new workspace will be created in Log Analytics.
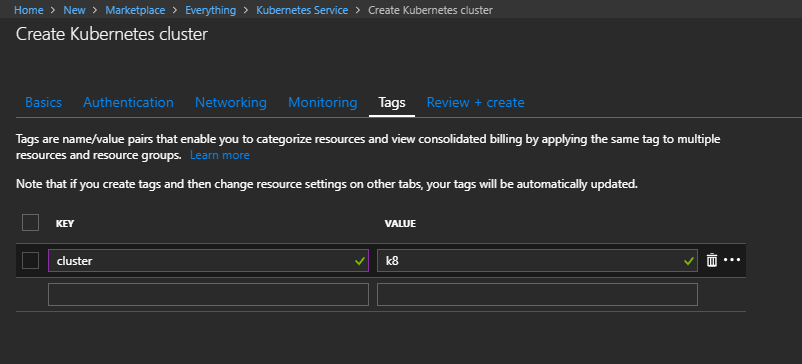
Finally, you can add some tags to easily manage billing information using a simple key=value pair.

Creating an AKS cluster typically takes a few minutes. Once completed, you can access and manage your cluster through “az aks” and “kubectl” command-line tools.
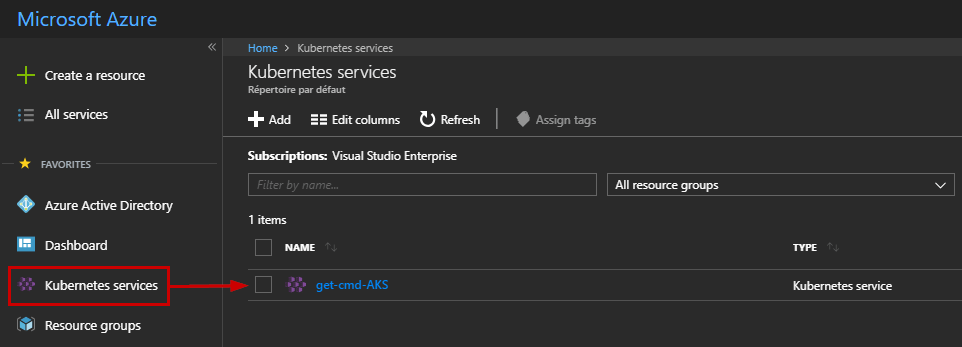
Confirm if the Kubernetes service is created using the Azure Portal or open the cloud shell, and connect to the cluster. Use the following command to retrieve your credentials:
az aks get-credentials –resource-group
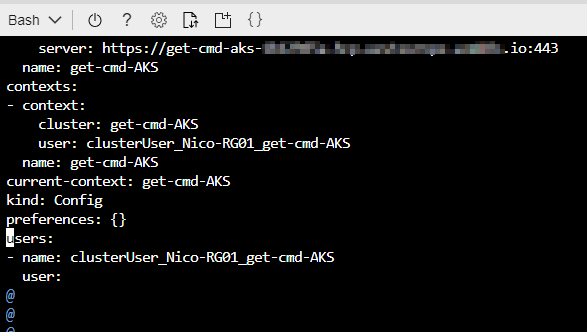
For those of you who want to learn more about credentials, you can edit the following file:
vim /home/n/.kube/config
Output is shown below:
and then check the connection to your cluster using the following:
kubectl get nodes
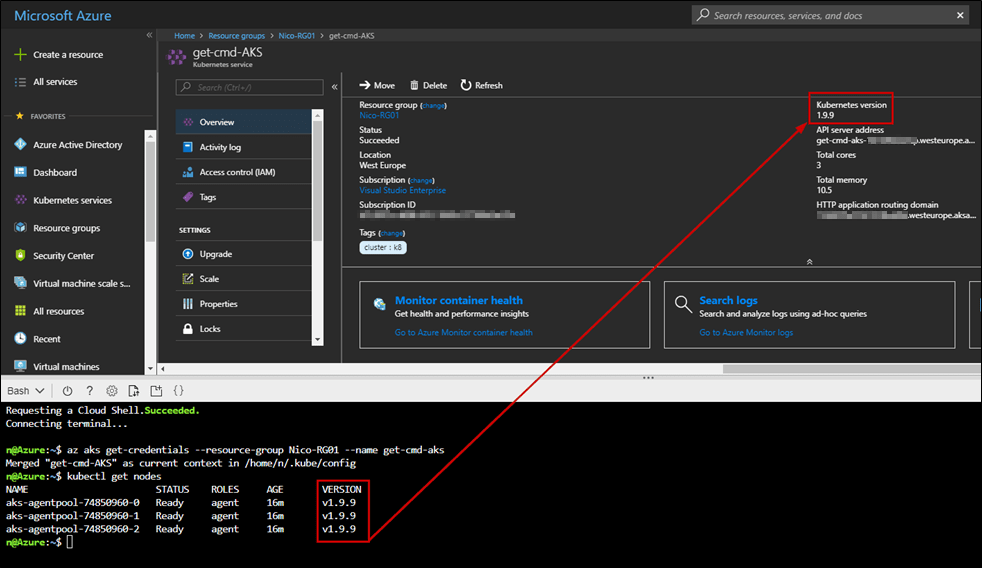
Check the version between the agents and the cluster. Here, the version is v1.9.9 and it is not the latest available version but I will explain how to upgrade the cluster version in the next section.
Upgrade Kubernetes Cluster
One of the biggest advantage of Azure Kubernetes Service is that you can very easily manage your cluster without expertise. For instance, you can upgrade a cluster to a newer version very easily using the Azure Portal by clicking “Upgrade”:
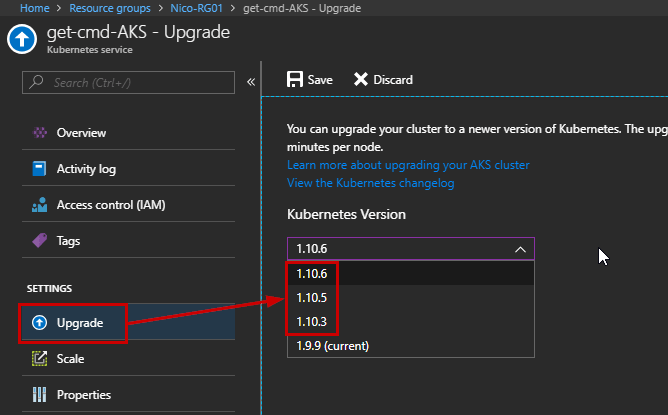
You just need to select which version you want to apply and wait 10 minutes per nodes. Please note that you cannot downgrade a cluster.
Auto Scale Kubernetes Cluster
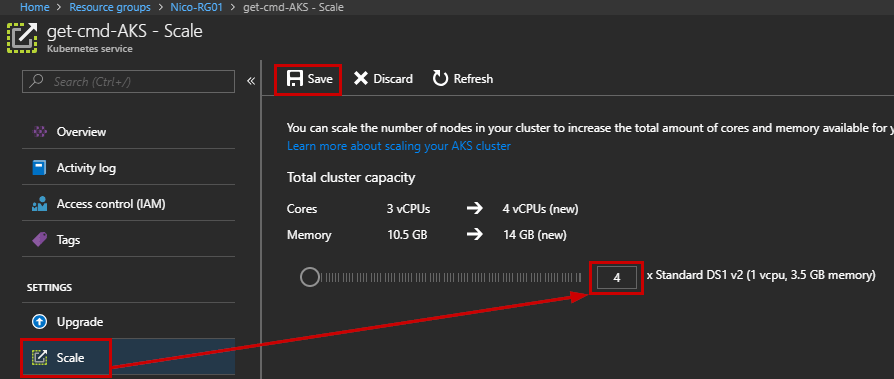
Another advantage of Azure AKS is the ability to auto scale your Kubernetes Cluster. Let’s imagine your application requires more hardware (e.g more nodes), then you can quickly add a new node within your cluster. To perform this task, simply click on “Scale” and then increase the following value:
Rerun the following command to confirm that a new node has been deployed:
kubectl get nodes
Deploy Application in Kubernetes Cluster
To finish this article, you can now deploy your application using your YAML file. Below is an example from docs.microsoft.com. The application is called Azure Vote:
kind: Deployment
metadata:
name: azure-vote-back
spec:
replicas: 1
template:
metadata:
labels:
app: azure-vote-back
spec:
containers:
– name: azure-vote-back
image: redis
ports:
– containerPort: 6379
name: redis
—
apiVersion: v1
kind: Service
metadata:
name: azure-vote-back
spec:
ports:
– port: 6379
selector:
app: azure-vote-back
—
apiVersion: apps/v1beta1
kind: Deployment
metadata:
name: azure-vote-front
spec:
replicas: 1
template:
metadata:
labels:
app: azure-vote-front
spec:
containers:
– name: azure-vote-front
image: microsoft/azure-vote-front:v1
ports:
– containerPort: 80
env:
– name: REDIS
value: “azure-vote-back”
—
apiVersion: v1
kind: Service
metadata:
name: azure-vote-front
spec:
type: LoadBalancer
ports:
– port: 80
selector:
app: azure-vote-front
Open the Cloud Shell, and use the following command to create your application from the YAML file. First, you must create a file in your home directory for example with the “Touch” command. Output is below:
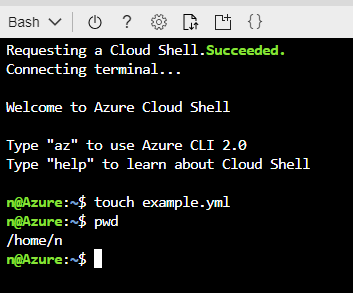
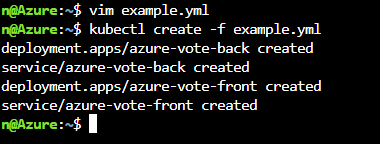
Once the file is created, copy and paste the YAML code to the file and save it. Then, use the following command followed by the YAML file to deploy the Azure Vote Web Application:
kubectl create -f example.yml
Output is below:
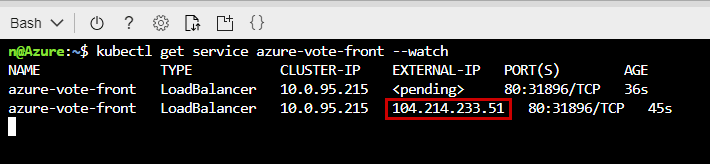
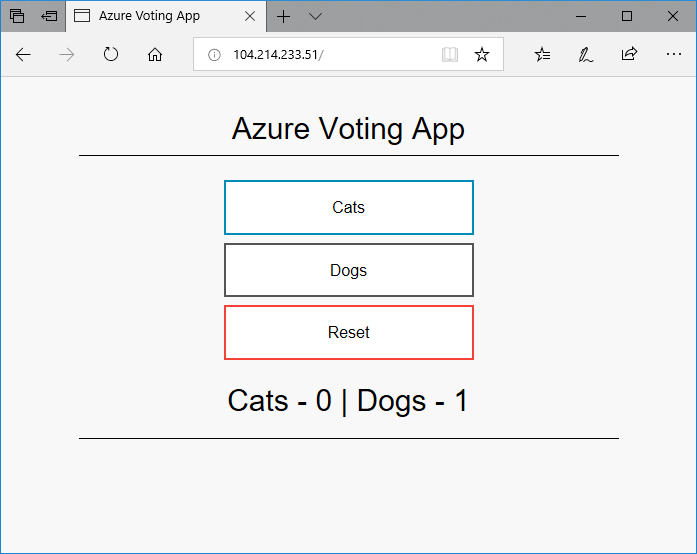
Finally, use the following command to retrieve the external IP in order to access to your web application:
kubectl get service azure-vote-front –watch
In this example, a basic web application has been deployed in a Kubernetes Cluster in less than 10 minutes!
Now, you can easily manage your cluster and keep your application up and running during the following actions:
- Increase number of nodes
- Decrease number of nodes
- Upgrade Cluster version
Conclusion
Azure Kubernetes Service (AKS), will help you save time to manage your Kubernetes Clusters in your Azure subscription and it will make it easier to define your Kubernetes infrastructure by providing greater efficiency.
AKS is a great service to deploy and manage your Kubernetes Cluster without the need to be an expert on containers orchestration.
Follow our Twitter and Facebook feeds for new releases, updates, insightful posts and more.