
What is Azure Database Migration Services?
Azure Database Migration Service is a tool that helps you simplify, guide, and automate your database migration from a database server or from multiple database servers from an on-premise location to Azure. Easily migrate your data, schema, and objects from multiple sources to the cloud at scale. Simplify your migration with a two-step process
Table of Contents
- Prerequisites for migrating SQL Server to Azure SQL Database
- Creating a migration project under the newly created migration service.
- Conclusion
First, use Azure to Migrate to discover your on-premises data estate, assess migration readiness, and choose the best destination for your databases. Then, use Database Migration Service to move your on-premises databases to Azure. Azure Database Migration Service is designed to support different migration scenarios (source/target pairs) for both offline (one-time) and online (continuous sync) migrations.
Prerequisites for migrating SQL Server to Azure SQL Database
- Create an instance of Azure SQL Database instance
- Download and install the Data Migration Assistant v3.3 or later after creating the migration project
- Open your Windows Firewall to allow the Azure Database Migration Service to access the source SQL Server, which by default is TCP port 1433.
- Create a server-level firewall rule for SQL Database to allow the Azure Database Migration Service access to the target databases. Provide the subnet range of the virtual network used for the Azure Database Migration Service.
- Ensure that the credentials used to connect to source SQL Server instance have CONTROL SERVER permissions.
- Ensure that the credentials used to connect to the target database have CONTROL DATABASE permission on the target database.
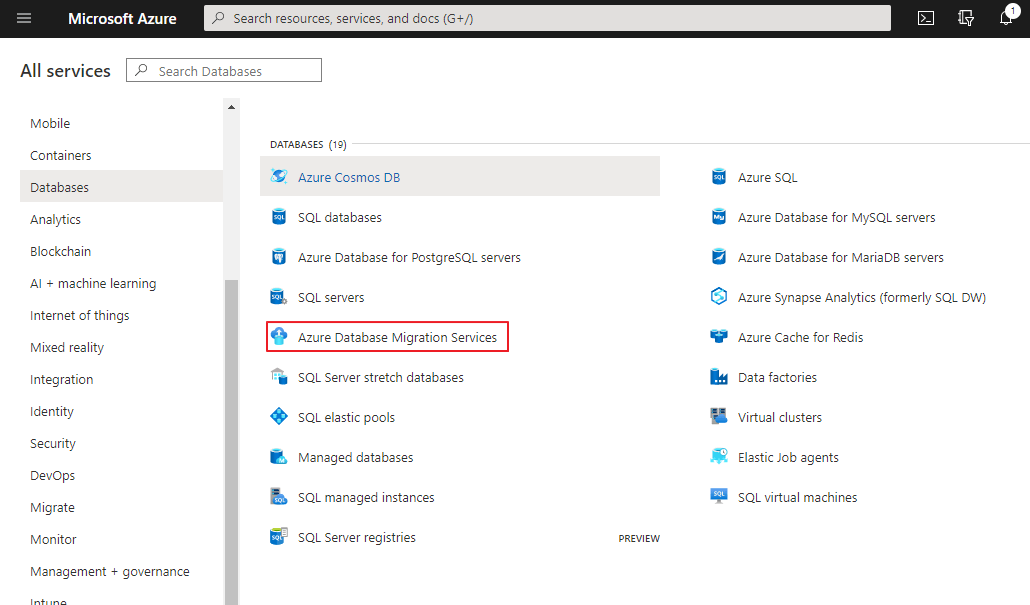
In this blog, we are providing an overview of these steps briefly on the Azure admin web console side. Database migration through automation at the On-premise end is the scope of the Database administrator. As a first step, you need to create a migration service and a migration project in Azure. Choose Azure Database Migration Service in Database Categories in Azure
Azure All Services → Databases → Azure Database Migration Services

So in this step, we are creating a migration service project in the desired region, where your Azure database resides after migration. In this step, you need to provide your subscription and Resource group details to use for this migration project. Provide a migration service name and choose the location where you want this instance of the service to run. Click Next to configure Networking

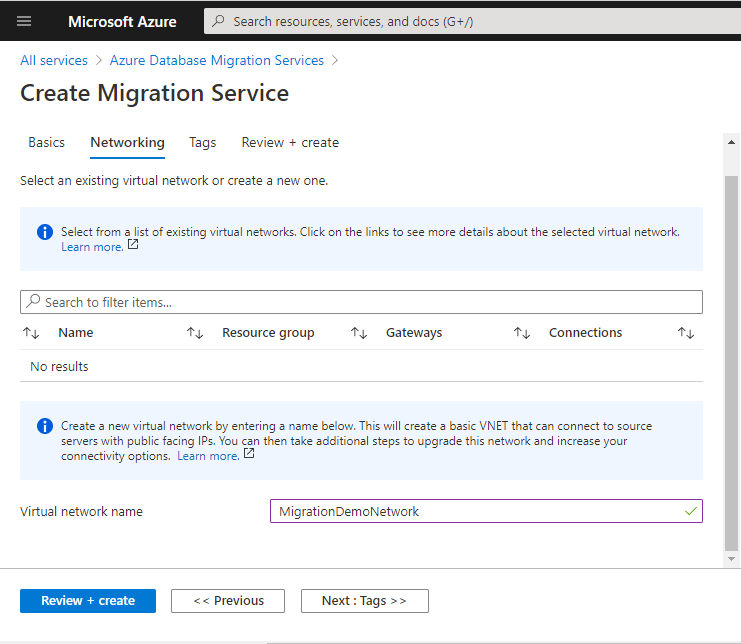
On Networking, Select an existing virtual network, or create a new one. Create a new virtual network by entering the name below. This will create a basic VNET that can connect to source servers with public-facing IPs. You can then take additional steps to upgrade this network and increase your connectivity options. Here we are going to create a new Virtual Network called “MigrationDemoNetwork”. Click Next to add “Tags”
Tags are name/value pairs that serve as metadata used to logically organize Azure resources into a taxonomy. After you apply tags, you can retrieve all resources in your subscription with a matching tag name and value. This approach is helpful when you need to organize resources for billing or management. Note that if you create tags and then change resource settings on other tabs, your tags will be automatically updated. Provide a Name and Value on the given respective boxes. Click Next to Create. After a while, two resources are created as shown below

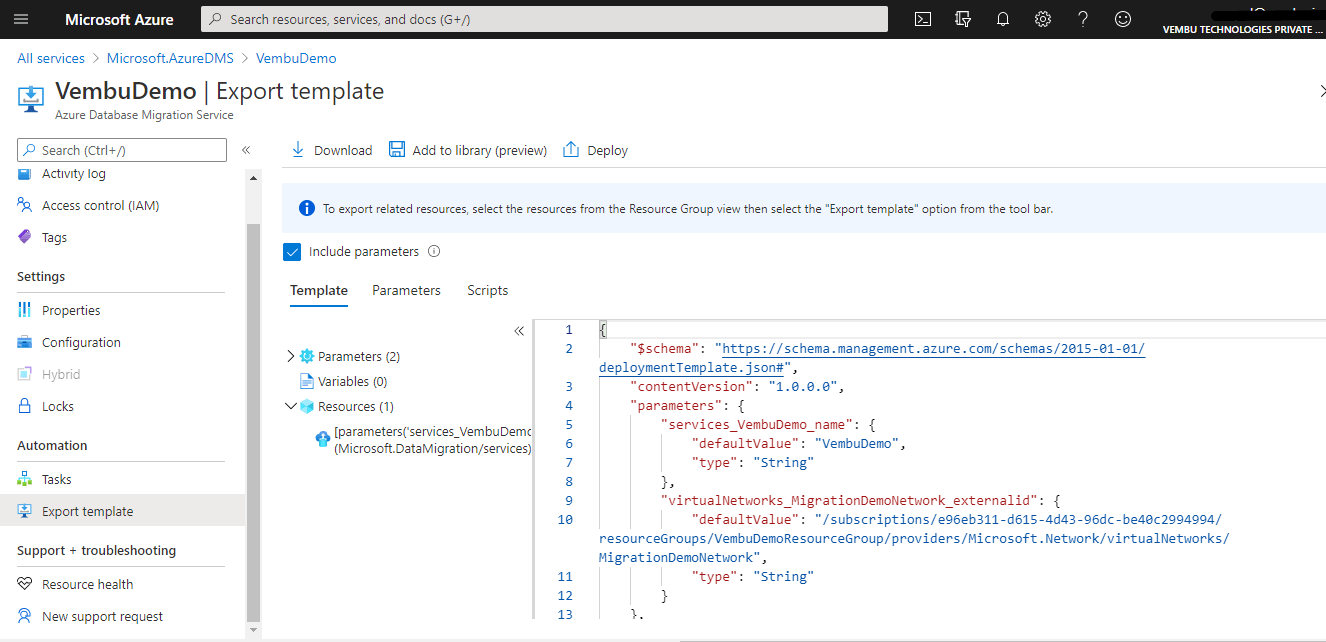
On clicking the project VembuDemo, you will get more information on the migration project including the automation template used to migrate your On-Premise database to Azure. Using the Export template wizard, you can download, deploy the template for migration purposes.
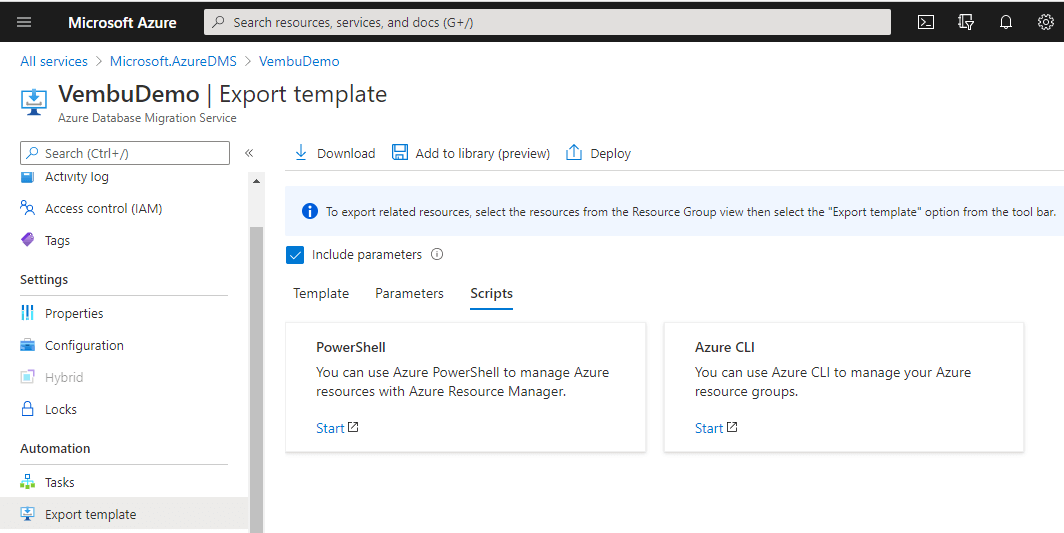
You could also use Powershell or Azure CLI scripts to automate the migration process.
Creating a migration project under the newly created migration service.
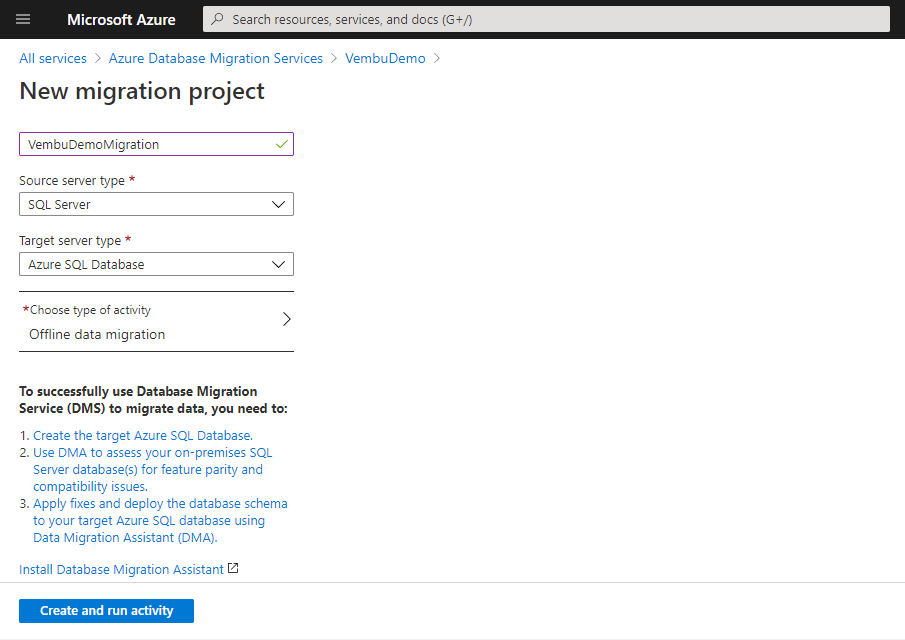
Select the migration service you created ( in our case the name of the migration service is VembuDemo ), and choose New migration project. Here are the details required for the migration analysis process.
Provide a name for the migration project
Choose source server type – Supported source databases are: SQL Server, MongoDB, MySQL, AWS RDS for MySQL, PostgreSQL, AWS RDS for PostgreSQL, Oracle and AWS RDS for SQL Server
Choose target Server type – Supported target Server are Azure SQL virtual machine, Azure SQL Database managed instance, Azure SQL Database
Choose the type of activity – Available options are: Offline data migration, Schema only migration, Online data migration, and create project only ( for later use ). Here we are choosing Offline migration.
Note: With Azure Database Migration Service, you can do an offline or an online migration. With offline migrations, application downtime begins at the same time that the migration starts. To limit downtime to the time required to cut over to the new environment when the migration completes, use an online migration. It’s recommended to test an offline migration to determine whether the downtime is acceptable; if not, do an online migration.
Click the “create and run activity” button to proceed further.
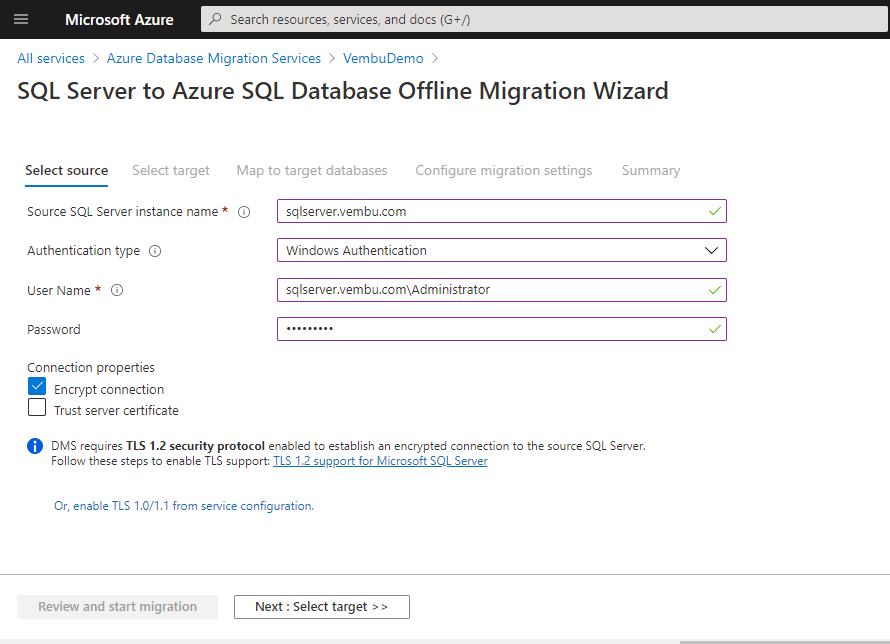
On the next screen, you will be asked to provide information about source database server details.
- Source SQL Server instance name – Use Fully Qualified Domain Name (FQDN) of SQL Server. You can also use the IP address directly where the DNS name resolution is not possible.
- Authentication Type – Select an authentication type from the combo-box, Windows authentication, or SQL authentication.
- Username & Password details for authentication.
Enable encrypt connection for the secured connectivity.
On the subsequent screens, you will be prompted to provide details for Target data source, Mapping source databases to target databases and configuring database migration settings, etc.
Conclusion
Since Azure Database Migration Service integrates some of the functionality of Microsoft’s existing tools and services, It provides customers with a comprehensive, highly available solution. Also, this service uses the Data Migration Assistant to generate assessment reports that provide recommendations to guide you through the changes required before performing a migration. It’s up to you to perform any remediation required during the migration to set up a seamless migration. The major advantage of using the Azure Database Migration Service is it makes it possible to start a migration project without waiting for excessive downtime to end. You can continue with regular operations during migration activities.
Related Posts:
Microsoft Azure for Beginners: Azure Migration Best Practices – Part 24
Migrating from VMware to Azure Using Azure Migrate – Part 1
Follow our Twitter and Facebook feeds for new releases, updates, insightful posts and more.