
Introduction
Multi-factor Authentication (MFA) is a security system that requires more than one method of authentication to verify the user’s identity for a login or other transaction.
The goal of MFA is to create a layered defense and make it more difficult for an unauthorized person to access a target. If one factor is compromised, the attacker still has at least one more barrier to breach before successfully accessing to the target.
One of the most popular MFA methods is OTP.
A one-time password token (OTP token) is a security hardware device or software program that is capable of producing a single-use password or PIN passcode. An OTP token will generate a PIN and this number will change every 30 or 60 seconds, depending on how the token is configured.
Today, OTP tokens are often software-based, and the passcode generated is displayed on the user’s smartphone screen.

Why using MFA with Azure AD?
Most organizations must secure the cloud identities with a second factor of authentication like Azure Multi-Factor Authentication (MFA). It is essential to ensure that safeguard access to data and applications.
With Azure MFA, users sign in to their Azure Active Directory account using their credentials and they are then required to also authenticate via a verification method such as:
- Phone call
- Text message
- or mobile app verification
Please note that Multi-factor authentication is an available feature in Azure AD Premium licenses.
Benefits of Azure MFA:
- Easy to Set Up
- Scalable
- Always Protected
- Reliable
- Intuitive User Experience
Getting Started
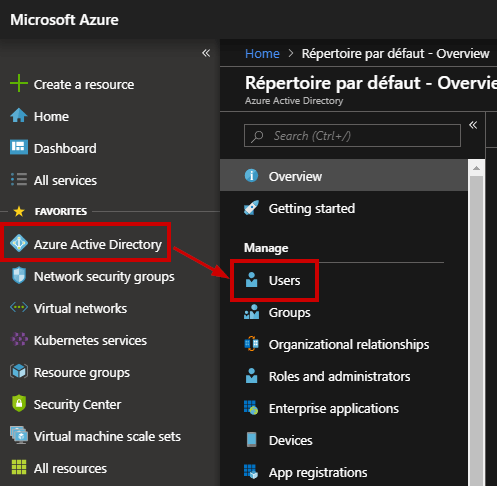
Open the Azure Portal and go to the Azure Active Directory blade and click “Users”.
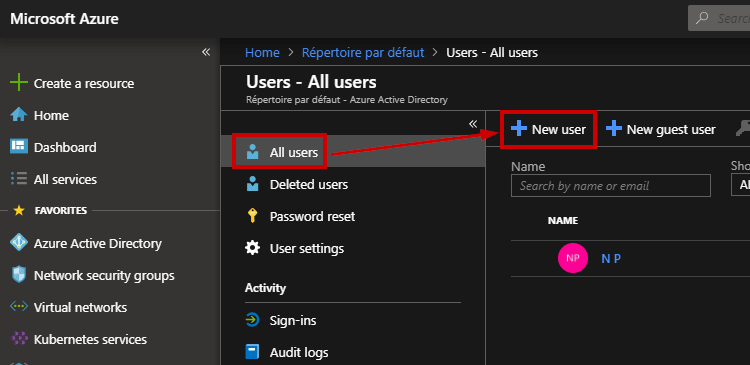
In this guide, I need to create a sample user to explain how to use Multi-Factor Authentication. Click “New User”
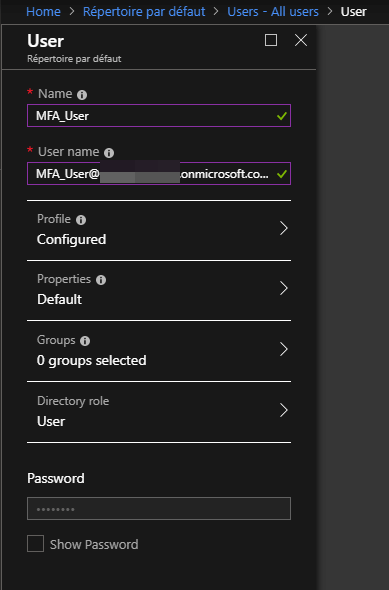
I called this user “MFA_User” with a default role.
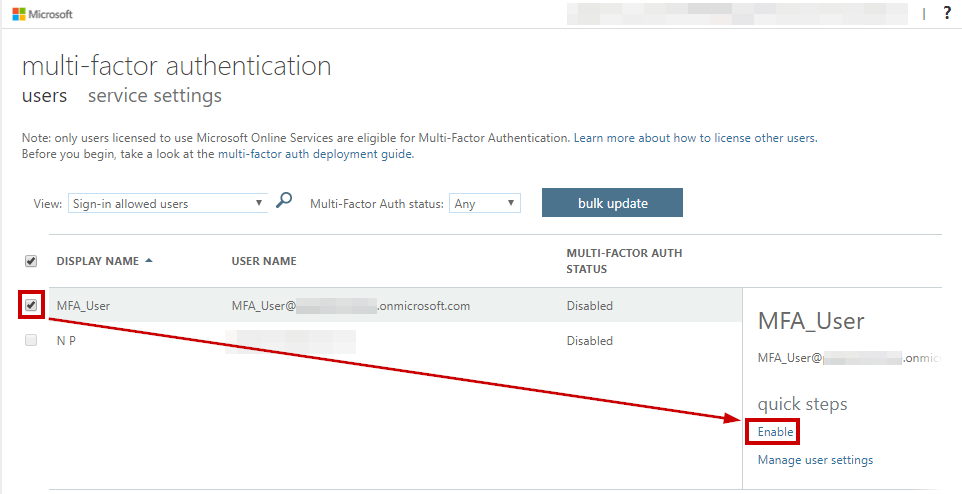
Once the account is created, I can enable MFA for this user by clicking “Multi-Factor Authentication”

A new Window appears, select this new user and then you can enable MFA from the right-hand panel.
It will open up a new pop-up, click on “Enable Multi-Factor Authentication”
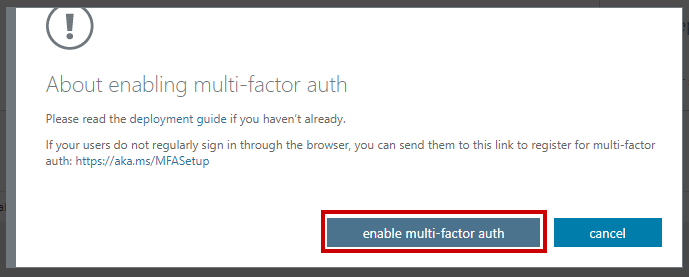
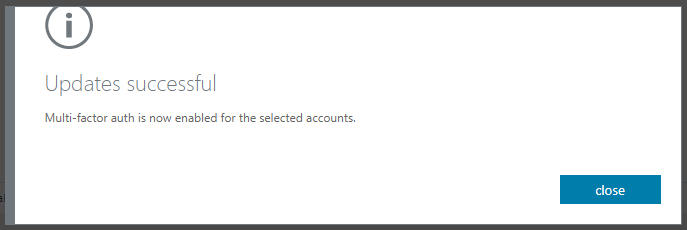
Wait for the confirmation
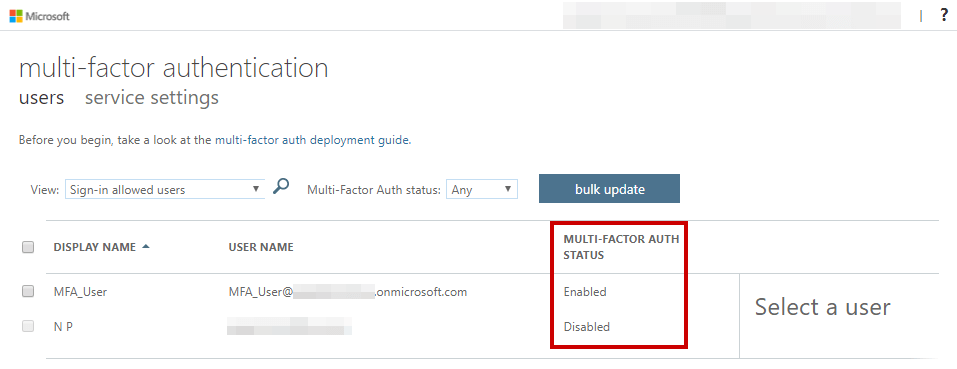
This user has MFA enabled. Let’s confirm in the web interface:
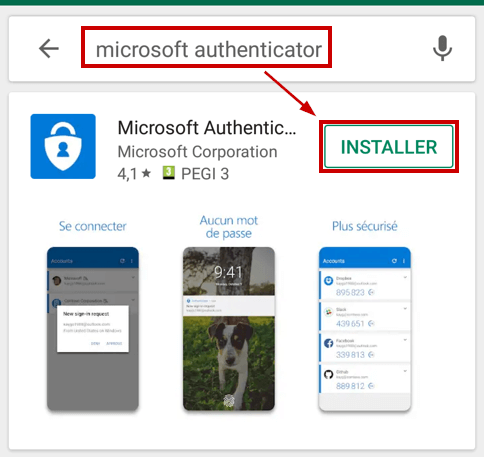
Next step is to setup the Microsoft authenticator App on your smartphone. Go to app store and search for “Microsoft Authenticator”.
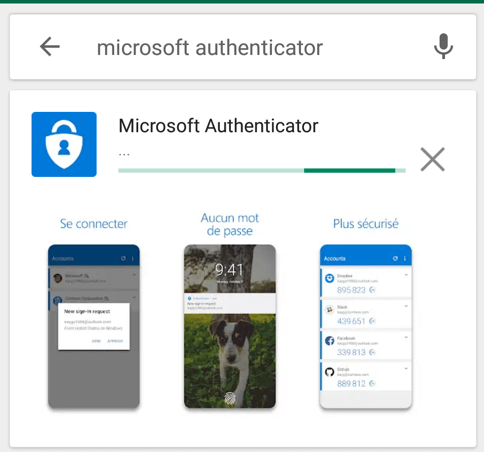
Wait for the confirmation
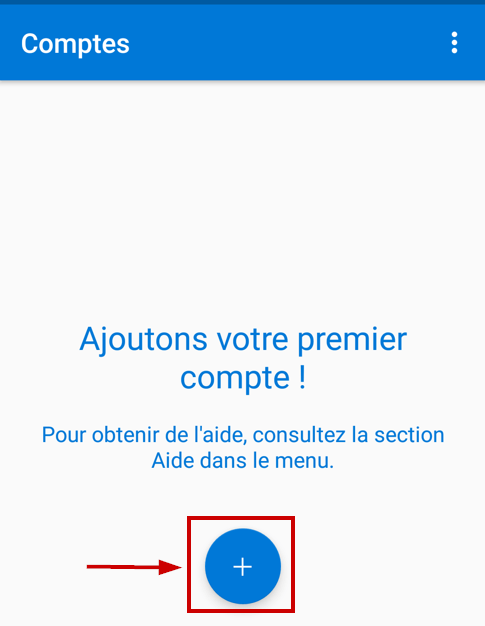
Once the installation is completed, click on open and click on “Add” to register your first account.
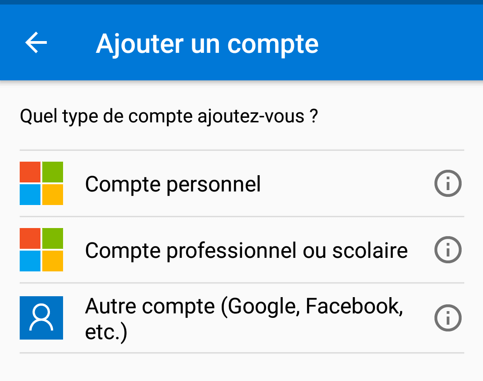
Click on “Work or school account”
Then go back to your PC and log in https://myapps.microsoft.com
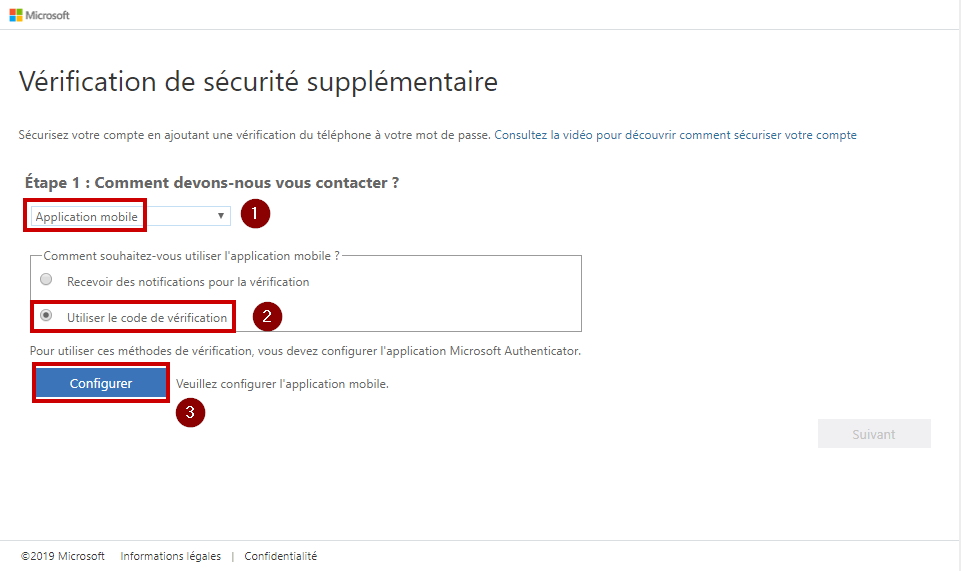
At this step, you must select “Mobile App” and select the second option.
Then it shows up the QR code.
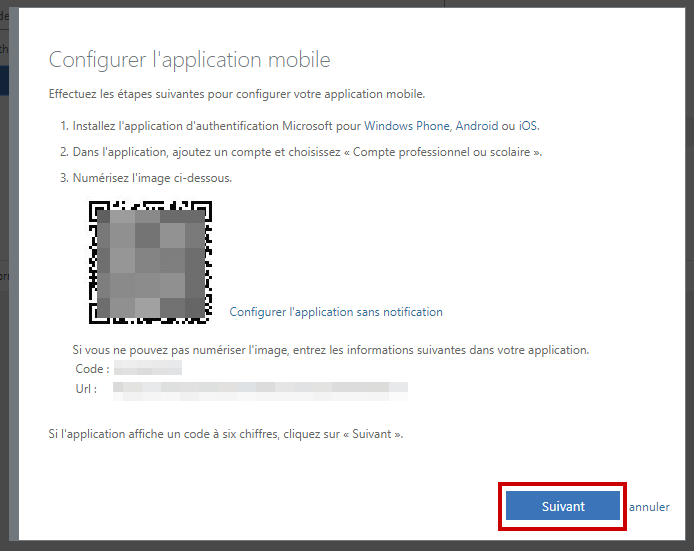
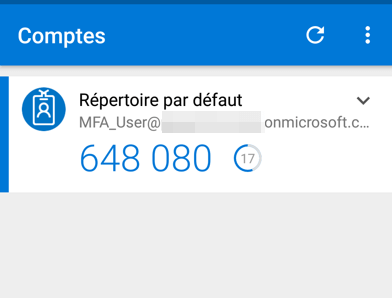
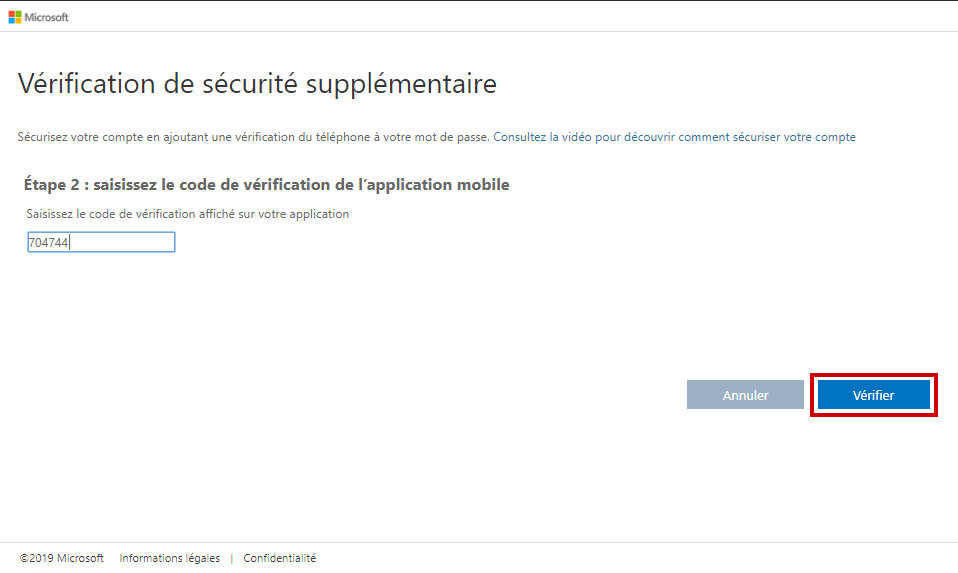
You just need to scan the QR code using your smartphone App. As you can notice, the code is renewed after 30 seconds.
Go back to your browser and complete the process by clicking on “save”.
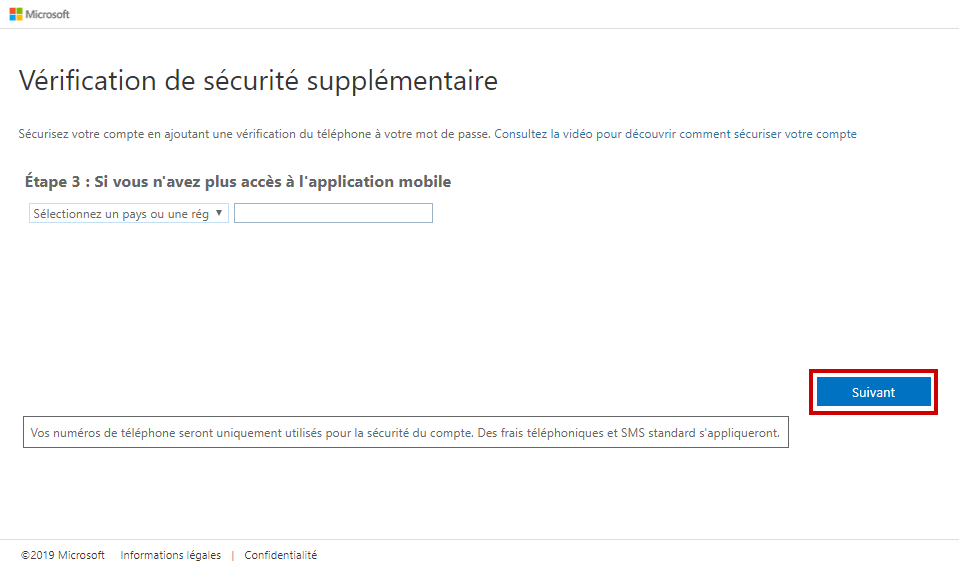
If you lost your smartphone or just uninstall the App, then you could still have access using your phone number. So, type your phone number at this step to verify it.
That’s all! Once the process complete, it will log you into the account.
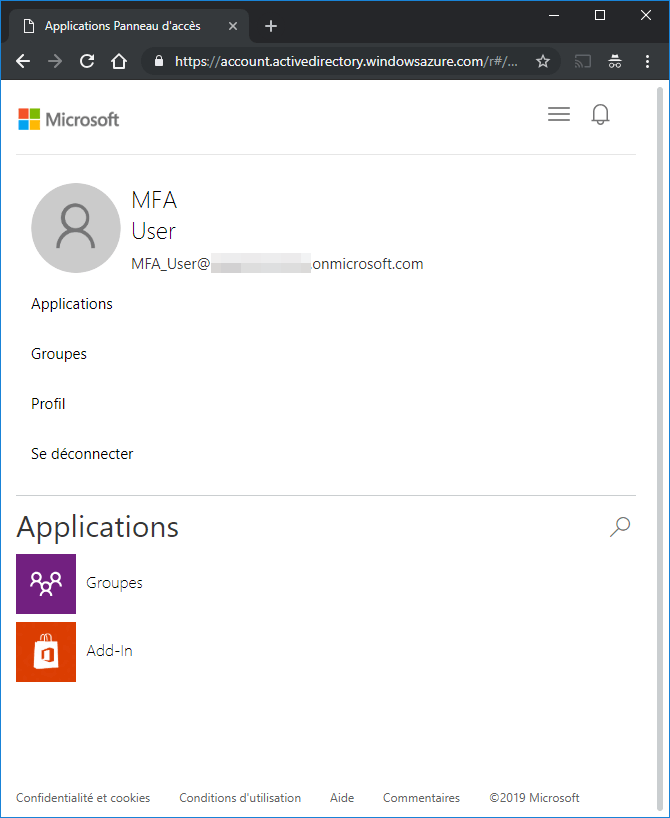
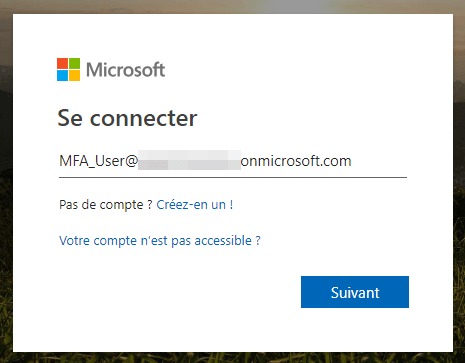
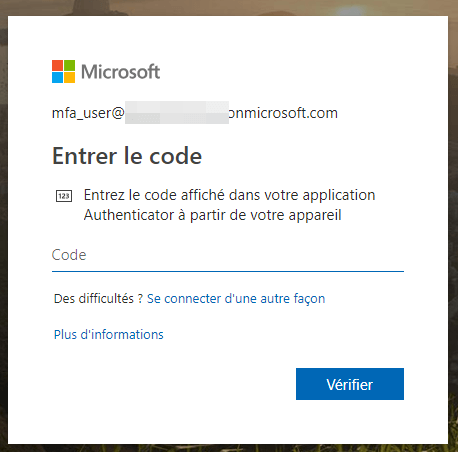
After checking your access, you can open a new browser and try to log in to https://myapps.microsoft.com with this user.
Now it will prompt you to enter your password, and a new window will appear in order to enter a PIN code.
This first part described how to enable Azure MFA for a single user, but you can also use a conditional access policy to automatically enable MFA for all users.
Policies determine the conditions under which Azure Multi-Factor Authentication is required:
- When a user is signing in with a personal device
- From outside the corporate network
- Not when they are signing in from an enterprise-owned device
- …
Sign in to the Azure portal using a global administrator account.
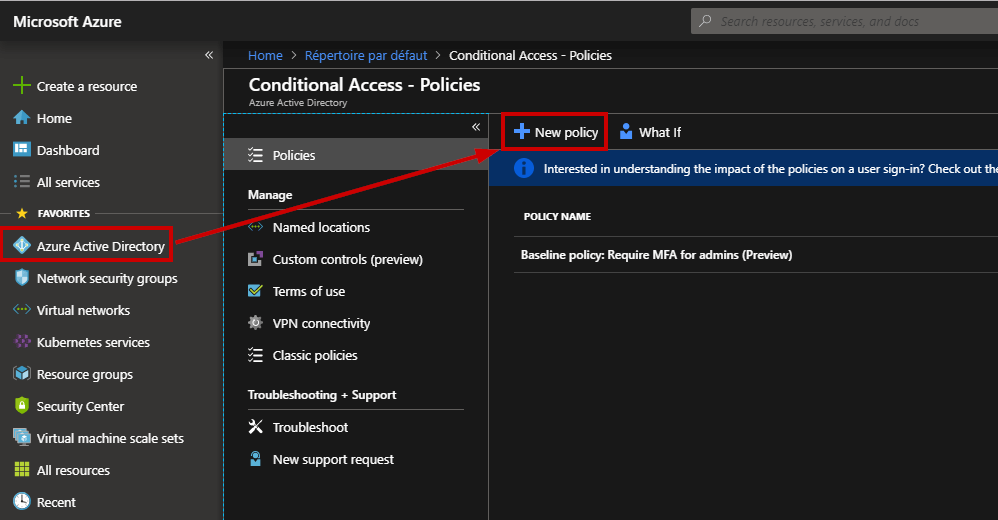
Browse to Azure Active Directory, Conditional access and select “New policy”. Here, I will create a policy based on multiple criteria.
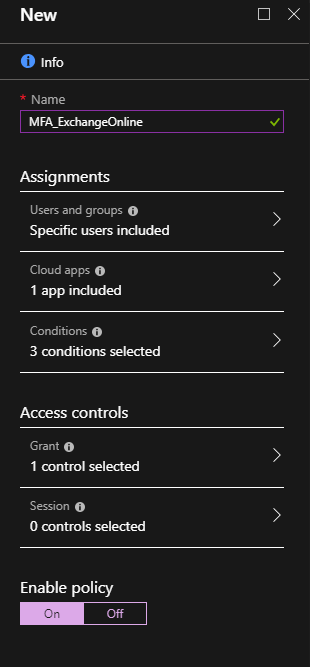
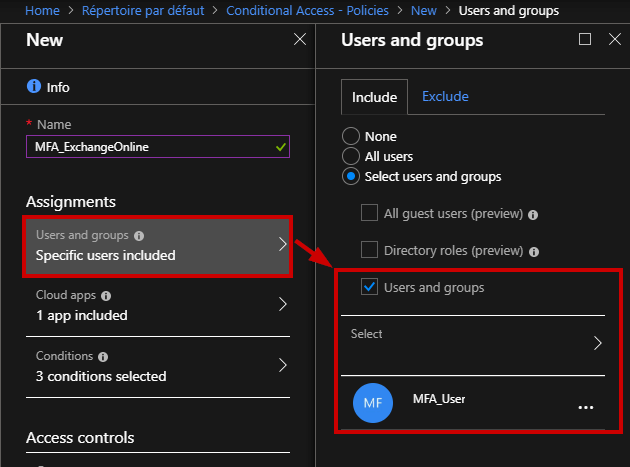
First, enter a friendly name for this policy. Then, select for which users the policy will apply. If you select “All users” be careful to not lock yourself! It is nice to apply a policy to a small set of users first to verify it behaves as expected.
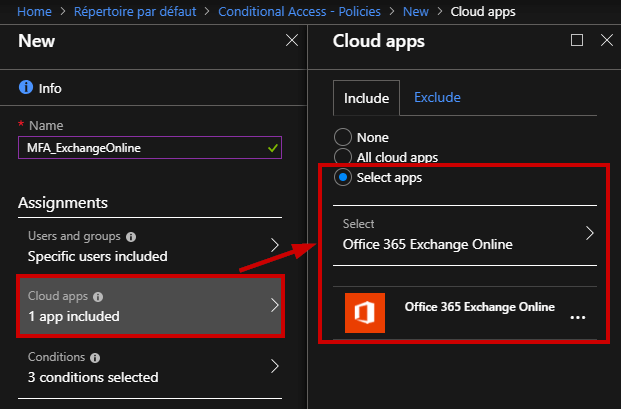
Here, you can select which Apps will match the policy.
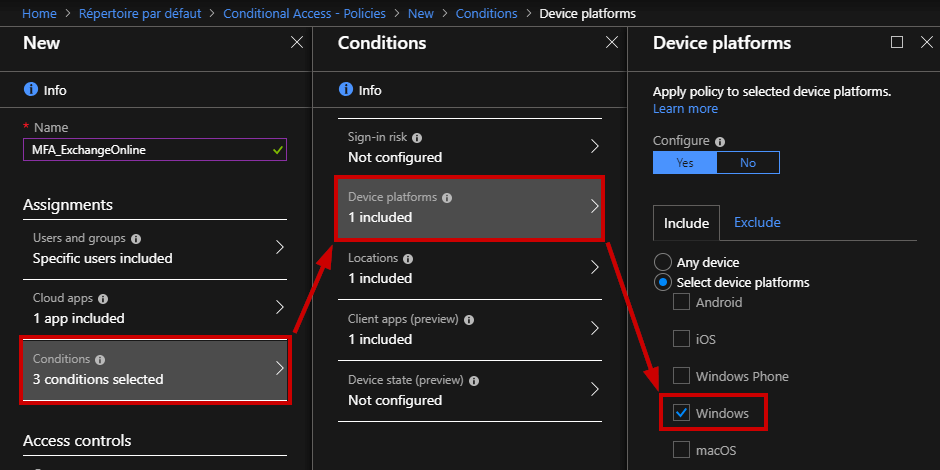
Now, you can adjust the conditions by allowing specific devices (e.g. Windows, iOS …), from a specific location, with a specific client app (e.g. web browser).
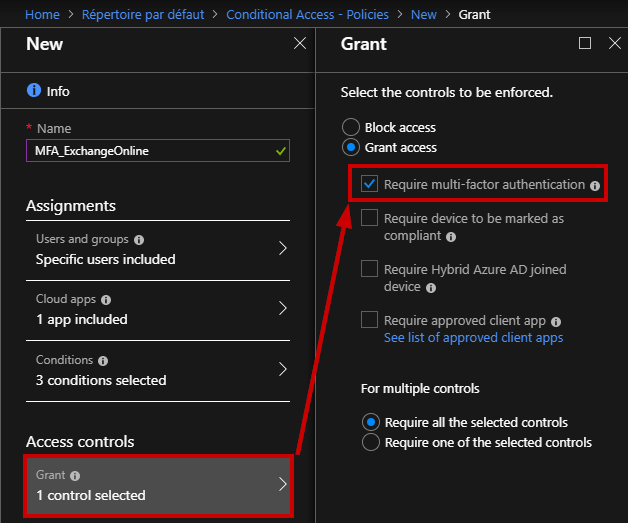
Next, you can require the MFA authentication
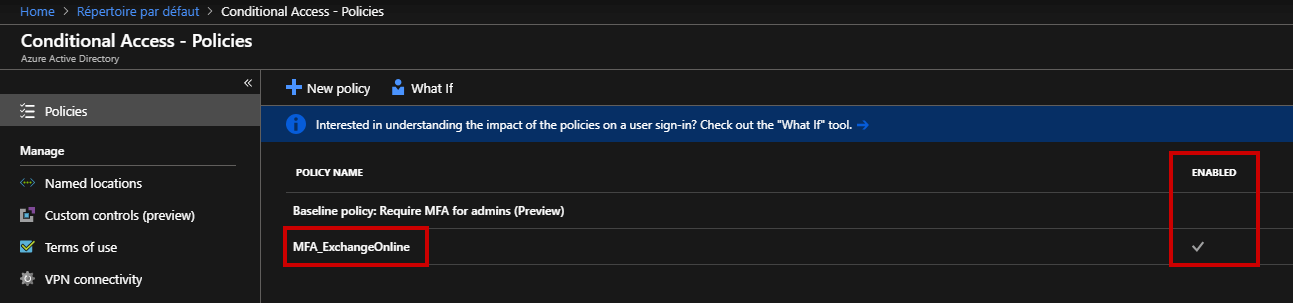
Let’s confirm if the policy is enabled.
Of course, you can automate these steps using Windows PowerShell.
Conclusion
Thanks to Azure Multi-Factor Authentication, you can secure access to data and applications. That’s the reason why Multi-Factor Authentication is everywhere. MFA is not the only answer, there are many solutions we can deploy but Azure MFA is very easy to use.
Thanks for reading!
Follow our Twitter and Facebook feeds for new releases, updates, insightful posts and more.