
Introduction
AWS Server Migration Service (SMS) is an agentless service which makes it easier and faster for you to migrate thousands of on-premises workloads to AWS. AWS SMS allows you to automate, schedule, and track incremental replications of live server volumes, making it easier for you to coordinate large-scale server migrations.
Table of Contents
- Introduction
- Stage1 : Setting up your AWS Account
- Stage2 : Setting up your vCenter Account
- Stage 3 : Connector OVA Deployment
- Stage 4 : Configuring Connector
- Conclusion
Stage1 : Setting up your AWS Account
- Download the Server Migration Connector OVA format that is ready for deployment in your vCenter
- Login into your AWS Management Console, Click here
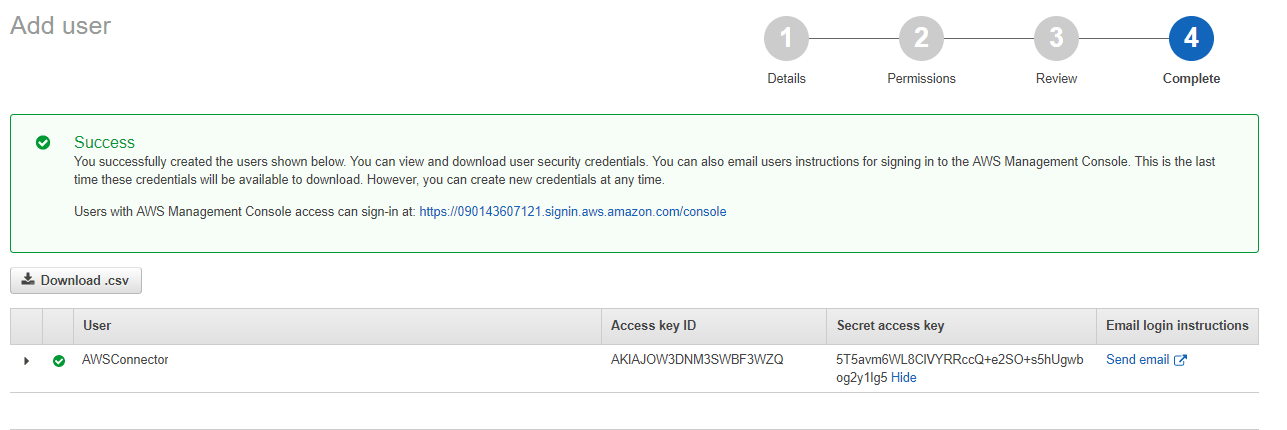
- Create a new IAM user which is used for the Connector to communicate with AWS
- Copy the Access key ID & Secret access key after the completion of the IAM User Creation
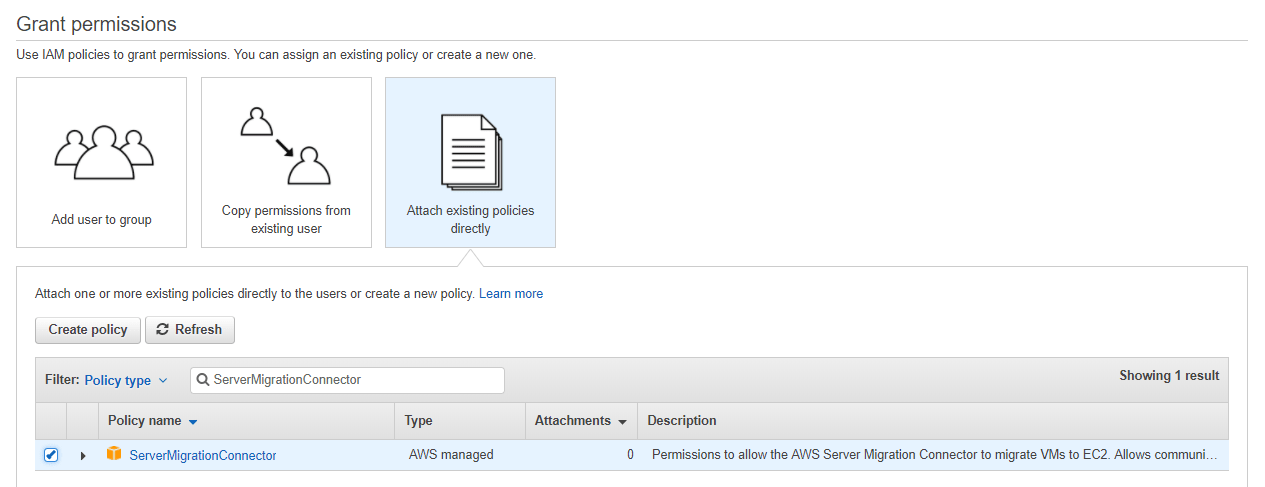
- Select created user, choose “Permission” tab and click “Add Permission” button
- Choose “Attach Existing Policy” and search for “ServerMigrationConnector” policy
- Proceed with onscreen instructions to complete it
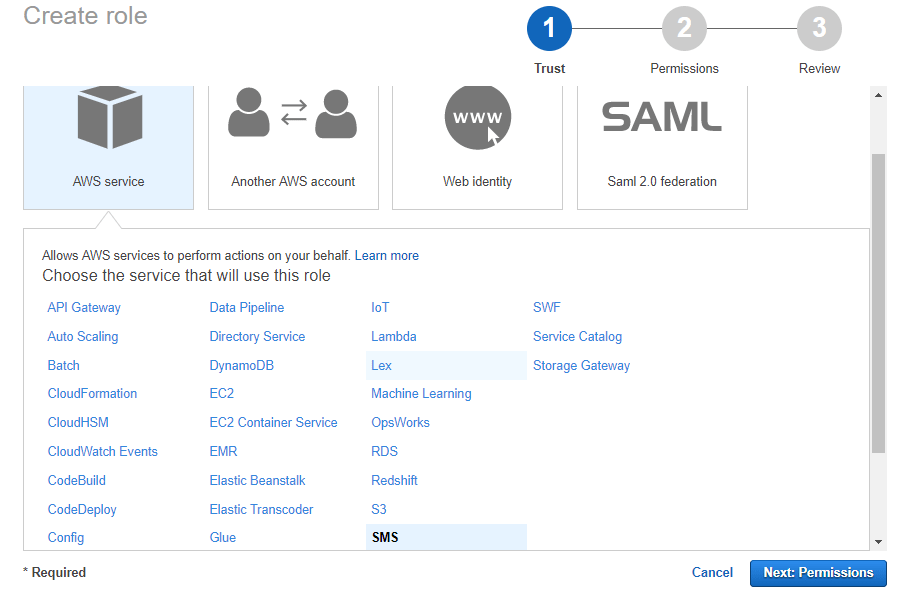
- Now create a new IAM role to grant privileges for the AWS Server Migration Service[SMS] to place the migrated VMs into your EC2 account
- In the navigation pane, choose Roles
- Choose “Create role” button
- “AWS service” remains selected as your trust entity
- Choose the service that will use this role as “SMS”
- Proceed with on screen instructions
- At the review screen it will ask for name, provide name “sms” (recommended)
- Type some short description of your own choice and proceed to complete
- Note : If the created IAM user at step 2 is not having full administrator privileges, then follow from step 17 to 20
- Go to “Users” section from the IAM management console
- Choose the user which you have created
- Select “Add inline policy” button
- Choose “Custom Policy” and select
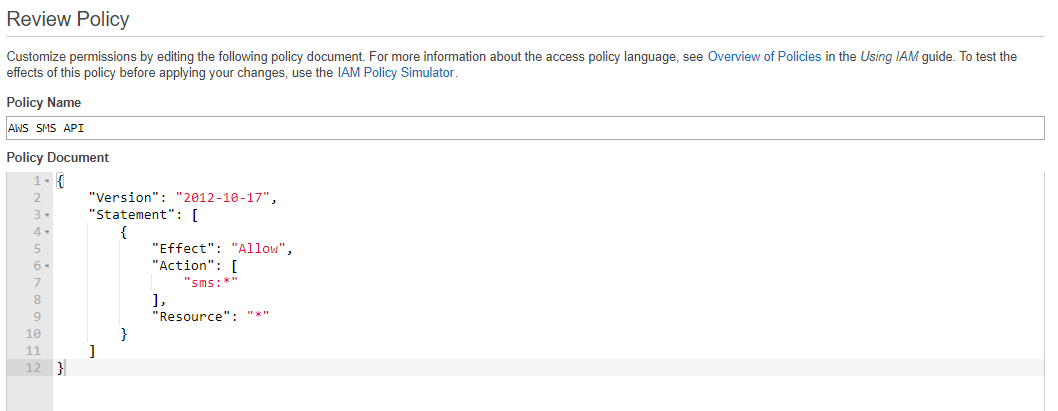
- Type in the below policy rule
- Provide a policy name “AWSSMSAPI”
- Proceed to complete creating the policy
Typical screenshot looks like below.

Typical screenshot looks like below.
Typical screenshot looks like below.
{
“Version”: “2012-10-17”,
“Statement”: [
{
“Effect”: “Allow”,
“Action”: [
“sms:*”
],
“Resource”: “*”
}
] }
Typical screen shot looks like below.
Stage2 : Setting up your vCenter Account
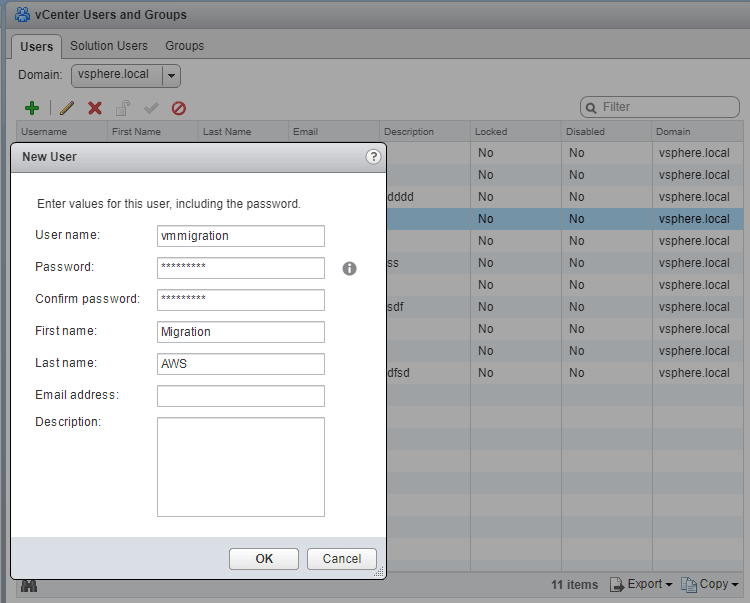
- Create a new user from vCenter Management Console
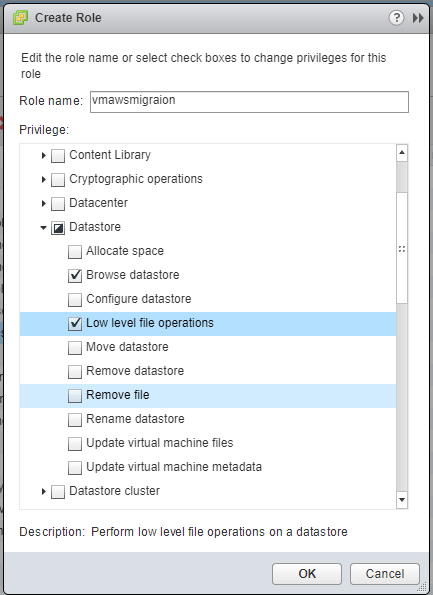
- Create a new role say : vmawsmigration and attach following roles to it.
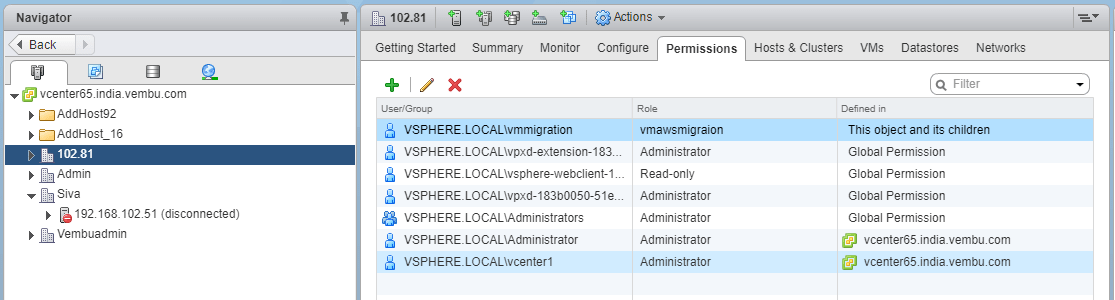
- Map the role to the created user, by selecting the required entity and going to the “Permission” tab
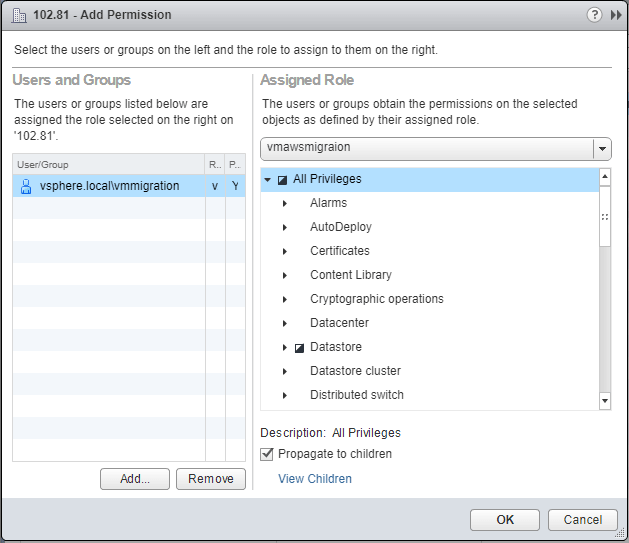
- Click “Add permission” button to add a permission to the selected entity
- At the User and Groups tab, select : Add button to add the created user in our case : vmmigration
- From the “Assign Role” dropdown, choose the role which we’ve created, in our case: vmawsmigration
Role 1 : Datastore > Browse datastore and Low level file operations
Refer screen shot attached :
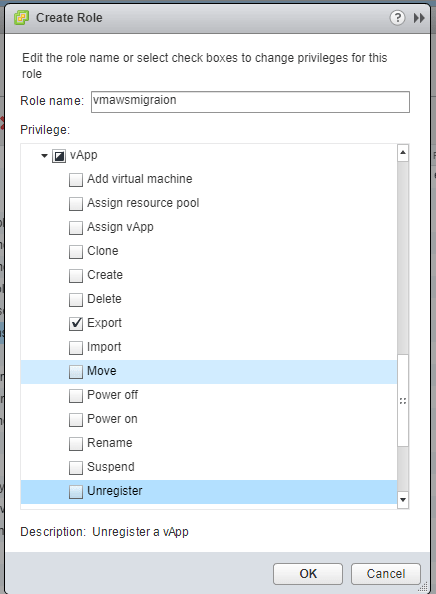
Role 2 : vApp > Export
Refer screen shot attached :
Role 3 : Virtual Machine > Snapshot management > Create snapshot and Remove Snapshot

Refer to screenshot attached below.
Stage 3 : Connector OVA Deployment
- Deploy the OVA downloaded in step 1 to your VMware environment using vSphere Client
- Power on the deployed VM created out of the OVA template
- Connect to the VM with its default username : ec2-user and password : ec2pass
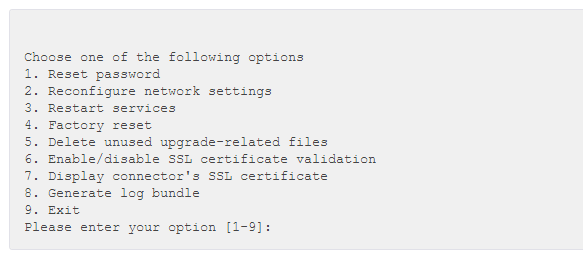
- Run the sudo setup.rb command
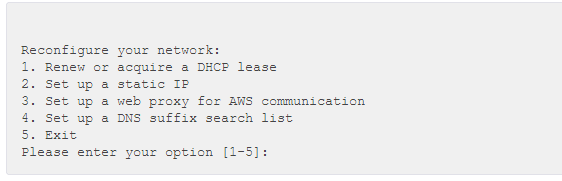
- Type 2, and then press Enter. The command displays the following menu:
- Proceed to setup your static ip
Stage 4 : Configuring Connector
- From your web browser, go to https://ip_address/, where ip_address is the static IP address of your connector appliance
- Click on “Get started now” button
- Review the license agreement and accept it to proceed further
- Create Connector Management Console password for the connector
- Skip “Network Info” section
- At the Log Uploads and Upgrade screen, proceed with default options
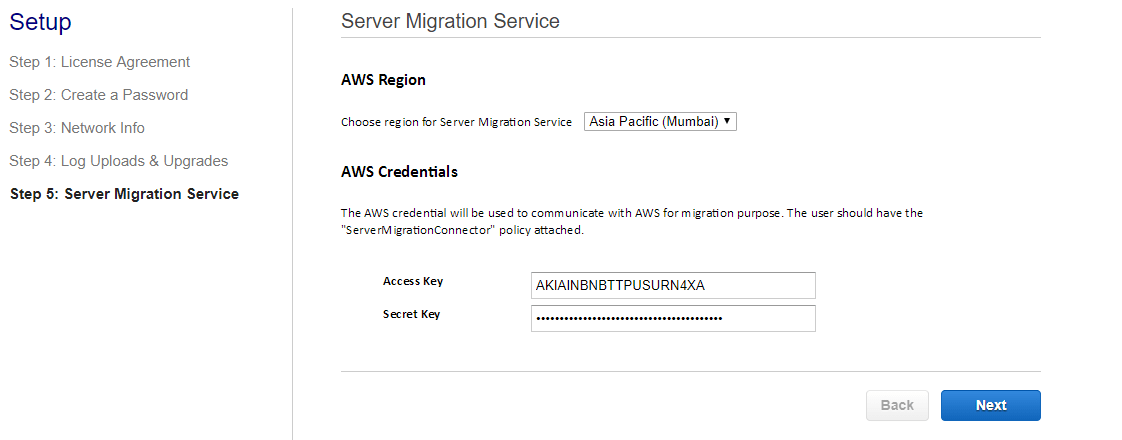
- At “Server Migration Service” screen, choose the required region to which you are migrating the VMs and provide the “Accesskey ID” and Secret Key” which you got it from Stage 1: Step 4
- Clicking on next will ask you to feed vCenter credential informations, provide the created vCenter user credentials to proceed further
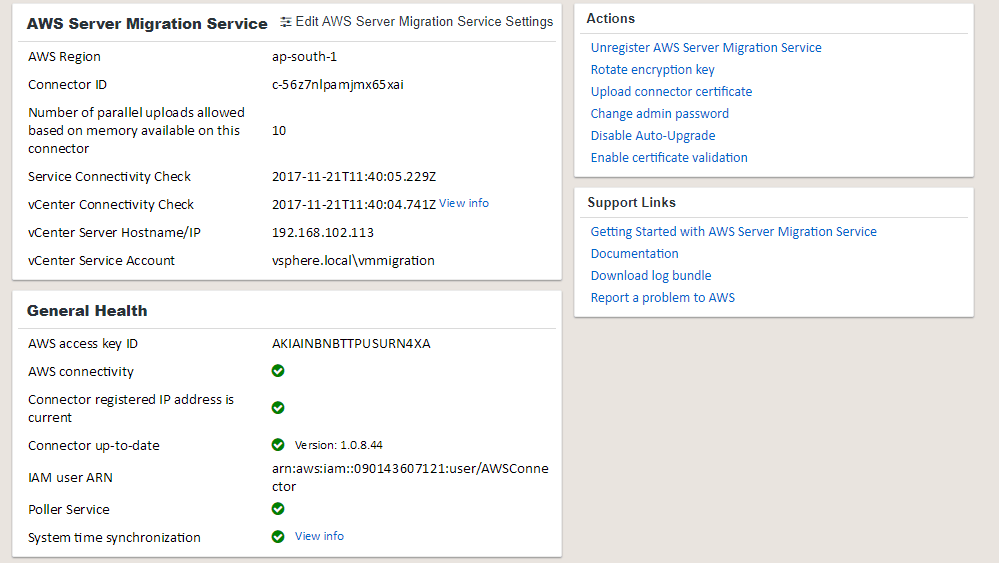
- On successful completion, you can see a screen like below
After following all the above stages, login to AWS Management portal, traversing to the “Server Migration Service” and navigate to menu “Servers”. If servers are not displayed, click “Import Server Catalog” button to load all the available VMs in the vCenter, choose the required VM and click on to create a replication job with the required scheduling option. Now you will be able to launch a VM migration to AWS environment. On successful migration, an AMI ID will be created – you can launch a VM out of that AMI.
Conclusion
AWS Server Migration Service will automatically replicate live server volumes to AWS and create Amazon Machine Images (AMI) as needed. Its very simple and faster for you to migrate thousands of on-premises workloads to AWS. In previous AWS Connector for vCenter allows you to migrate vCenter version till 6 but you can use AWS Server Migration Service in latest vCenter 6.5 also.
Got questions? Email us at: vembu-support@vembu.com for answers.
Follow our Twitter and Facebook feeds for new releases, updates, insightful posts and more.