
Azure Files offers fully managed file shares in the cloud that are accessible via the industry standard SMB protocol. Azure Files allows you to create file shares in the cloud without having to manage the overhead of a physical server or device/appliance. This means you can spend less time applying OS updates and managing hardware components such as: memory controllers, disks, …
Replacing on-premises file shares with Azure Files, also means you no longer have to wake up to deal with local power outages or network issues. It is a significant advantage. Azure Files currently only supports locally redundant storage (LRS) and geo-redundant storage (GRS) right now.
Azure File Shares use the Server Message Block 3.0 (SMB) Protocol which let you mount the Azure File Shares in different ways:
- On your local machine using SMB 3.0 protocol using your Windows Explorer
- On your local machine using Windows PowerShell with the New-PSDrive cmdlet
- On your local machine using Command Prompt with the Net Use command
Please note that you can also browse your Azure File Shares with Azure Storage Explorer in order to access files. Storage Explorer is available for Windows, Mac, and Linux. You can download it here: https://azure.microsoft.com/en-us/features/storage-explorer/
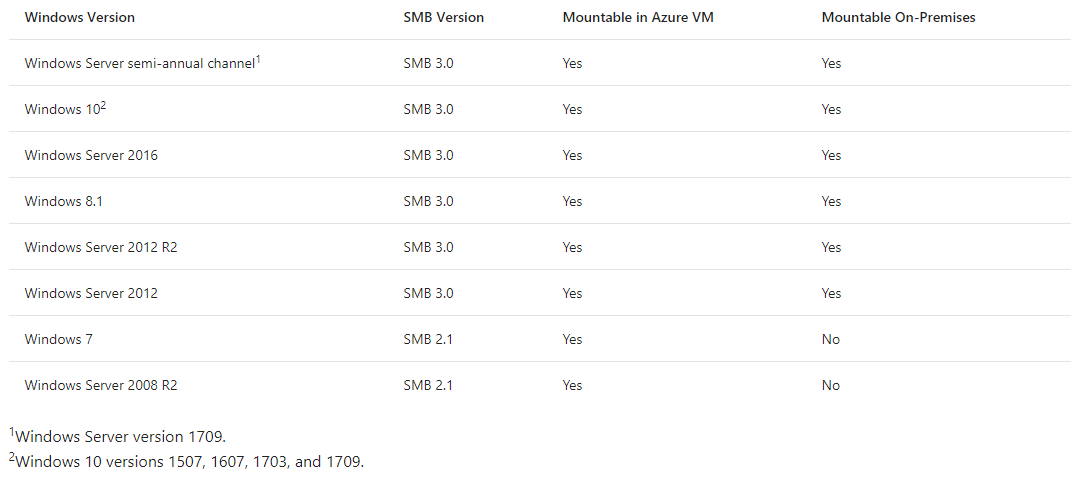
If you plan to test this feature before deploying in your production environment, you can mount Azure File Shares on a Windows installation that is running either in an Azure VM or on-premises. Below is a very interesting matrix from Microsoft which illustrates compatibility between OS version and SMB version:

I will describe in this article, how to create and configure an Azure File Share. Next, I will describe how to mount this Azure File Share on a Windows installation.
For those of you who are wondering the difference between Azure Blob Storage and Azure Files Shares, here is the answer: Unlike Azure Blob storage, Azure Files also offers SMB access to Azure File shares. This means you can directly mount an Azure File share on Windows, Linux, or macOS, on-premises or in cloud VMs.
Here is a very nice article from Microsoft to detect when you must use Azure Blob Storage, Azure Files, or Azure Disks: https://docs.microsoft.com/en-us/azure/storage/common/storage-decide-blobs-files-disks?toc=%2fazure%2fstorage%2ffiles%2ftoc.json
Create File Share through the Azure portal
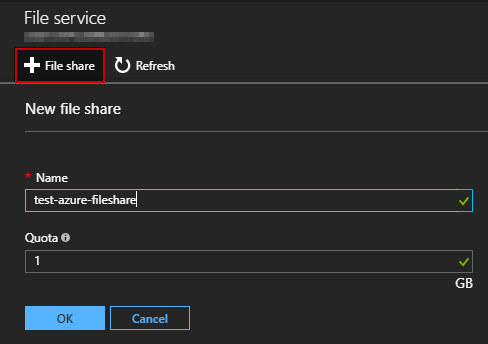
Azure Files is really easy to configure. You just have to create a File Share and mount it on your machine. Let’s start by creating the File Share from the Azure Portal. If you don’t already have a Storage Account, you must create it:
Go to Storage Account blade on Azure portal:
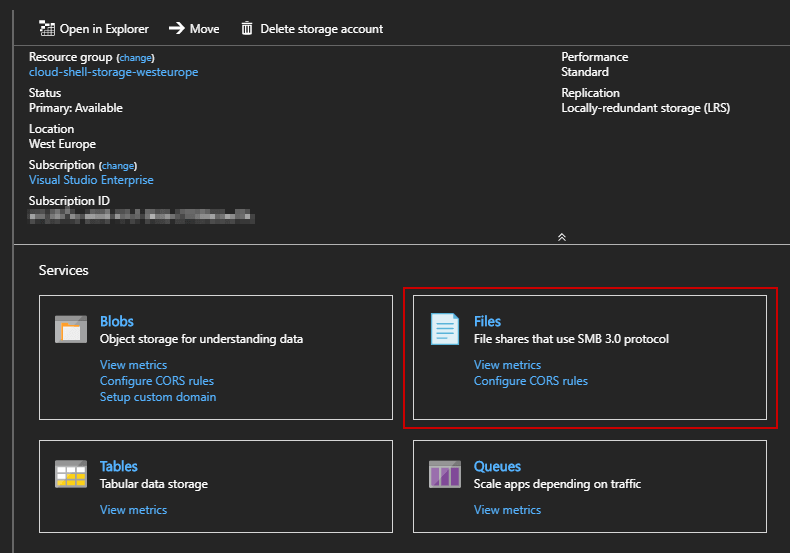
Click on “File Share” button:
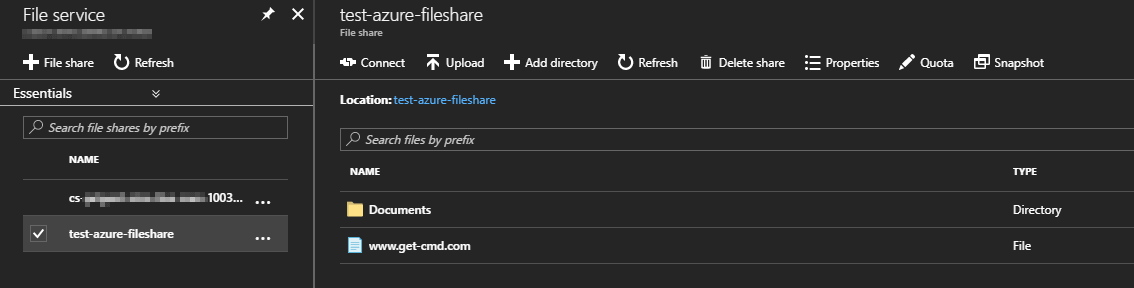
Once the creation is completed, you can access to your Azure File Share. From the Azure Portal, you can directly:
- Create a new directory,
- Upload files,
- Set quota,
- Create snapshot.
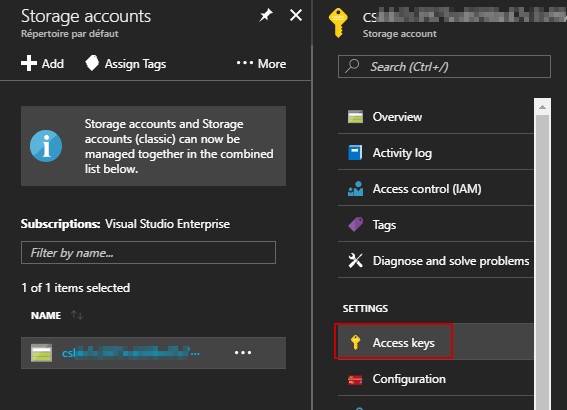
Now, you can easily mount your new Azure File Share on your machine. First, you must retrieve your Access Key linked to your storage account. Why? The password which will be used to mount your network drive is your Access Key. Not your Azure password!
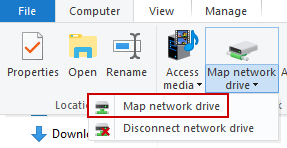
Open Windows Explorer, and click “Map Network Drive”:
Now, type your login which is your Storage Account Name and your password which is your Access Key:
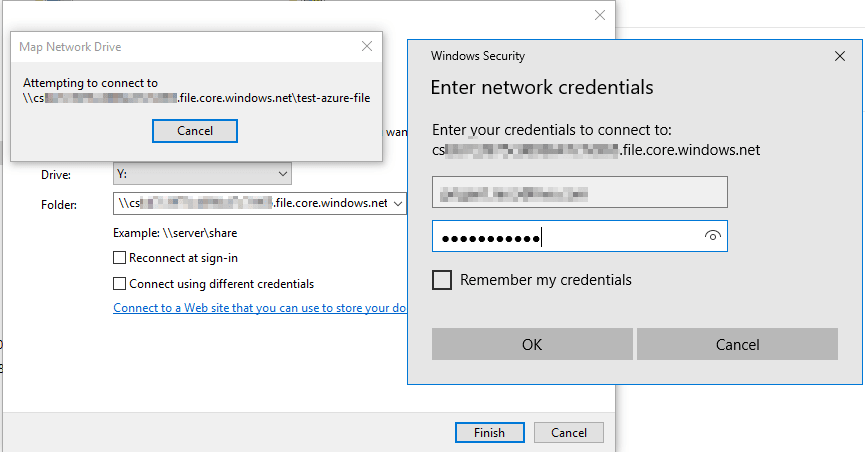
Click “OK” and your network drive will be created:

Notice that your Azure File Share is available as a Network Drive with a size limited to 1GB. When you increase the quota, it will be immediately updated on your machine:

You can automate this process using Windows PowerShell. Use the New-PSDrive cmdlet in order to mount a network drive:
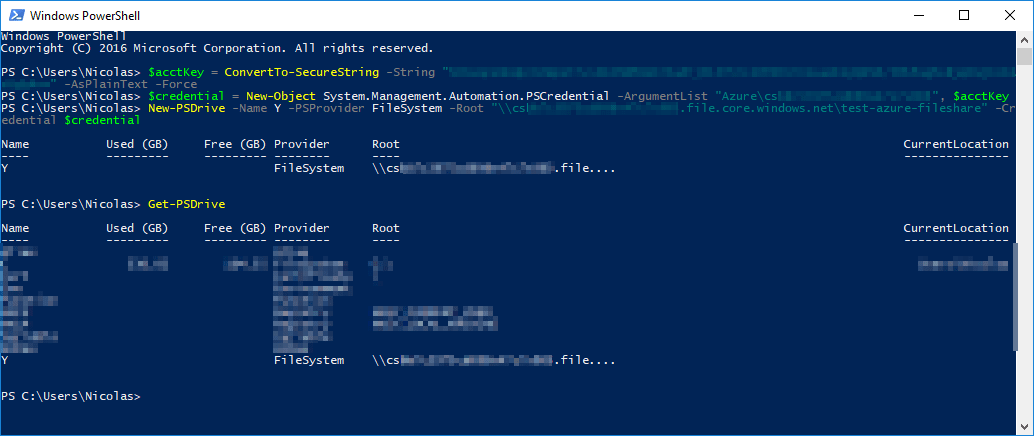
Below is the full command:
$acctKey = ConvertTo-SecureString -String “
” -AsPlainText -Force
$credential = New-Object System.Management.Automation.PSCredential -ArgumentList “Azure\“, $acctKey
New-PSDrive -Name-PSProvider FileSystem -Root “\\ .file.core.windows.net\ ” -Credential $credential
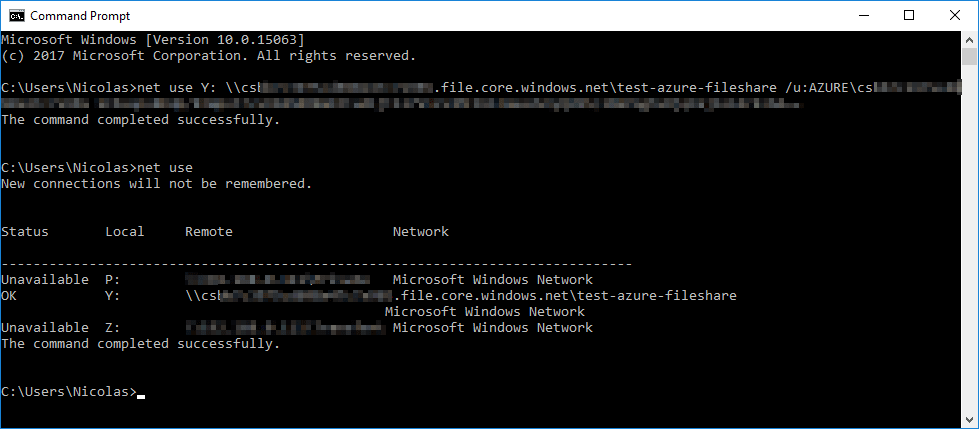
Another option is to use the “Net Use” command. To connect to the Azure File Share from a Windows computer using CLI, run this command:
Create File Share through Windows PowerShell
Thanks to Windows PowerShell, you can easily automate your tasks. Here I can create a new Azure File Share through PowerShell using the New-AzureStorageShare cmdlet.

$storageContext = New-AzureStorageContext
$share = New-AzureStorageShare logs -Context $storageContext
I can now confirm that my Azure File Share has been successfully created:

Azure Storage Explorer
Azure Storage Explorer is a standalone application that enables you to easily work with Azure Storage data on Windows, macOS, and Linux. Download it here https://azure.microsoft.com/en-us/features/storage-explorer/ and run the msi package.
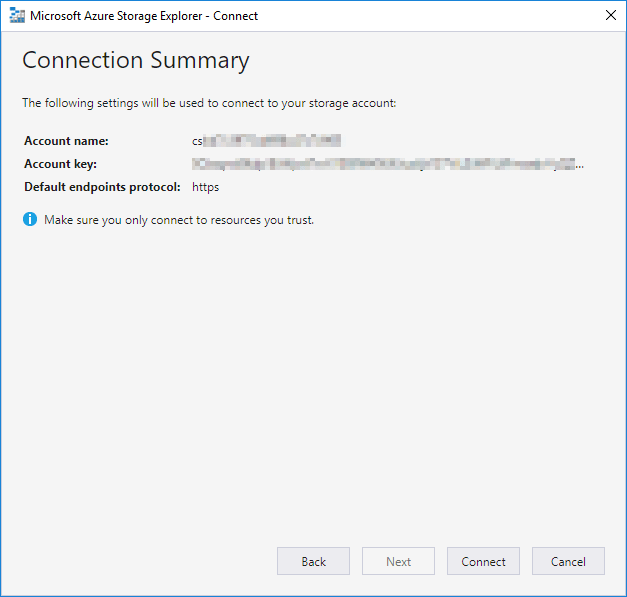
Open Azure Storage Explorer and add your Azure account:
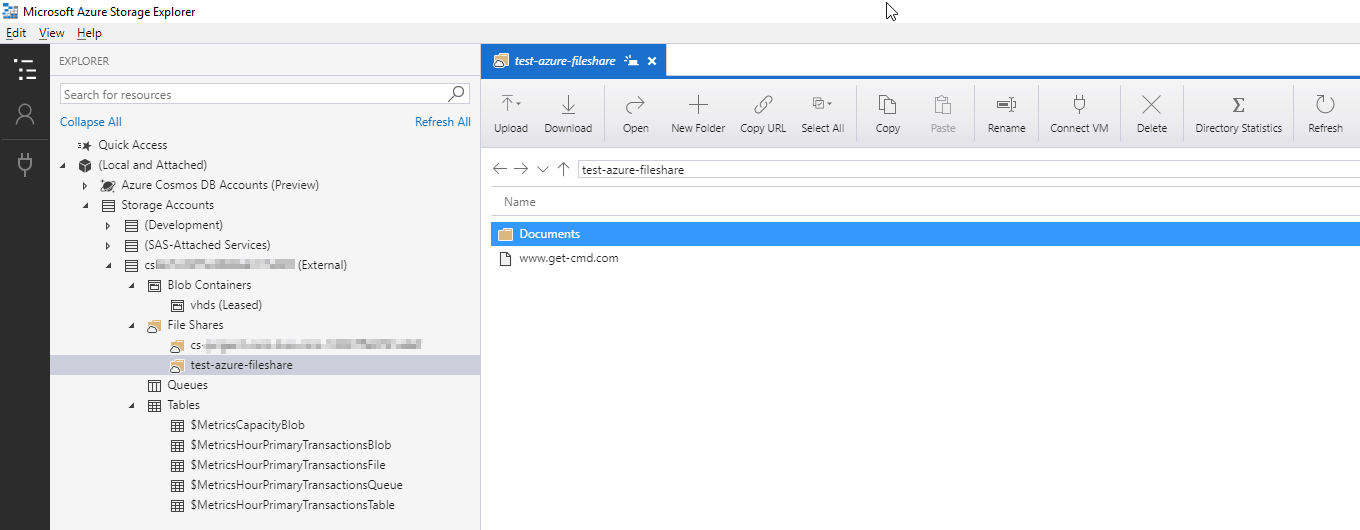
Thanks to Azure Storage Explorer, you can manage your files and folders. You also can manage your VHD files and others Azure File Shares. Azure Storage Explorer is really helpful if you don’t want to connect to the Azure Portal.
Conclusion
Azure File is a very useful feature offered by Microsoft. It will allow you to create File Shares as many as you need. Additionally, Azure File shares can be cached on Windows Servers with Azure File Sync (Preview) for fast access. I will describe this feature in my next article.
If you need more information, please read the announcement: https://azure.microsoft.com/en-us/blog/azure-file-storage-now-generally-available/
Experience modern data protection with this latest Vembu BDR Suite v.3.8.0 FREE edition. Try the 30 days free trial here: https://www.bdrsuite.com/vembu-bdr-suite-download/
Got questions? Email us at: vembu-support@vembu.com for answers.
Follow our Twitter and Facebook feeds for new releases, updates, insightful posts and more.